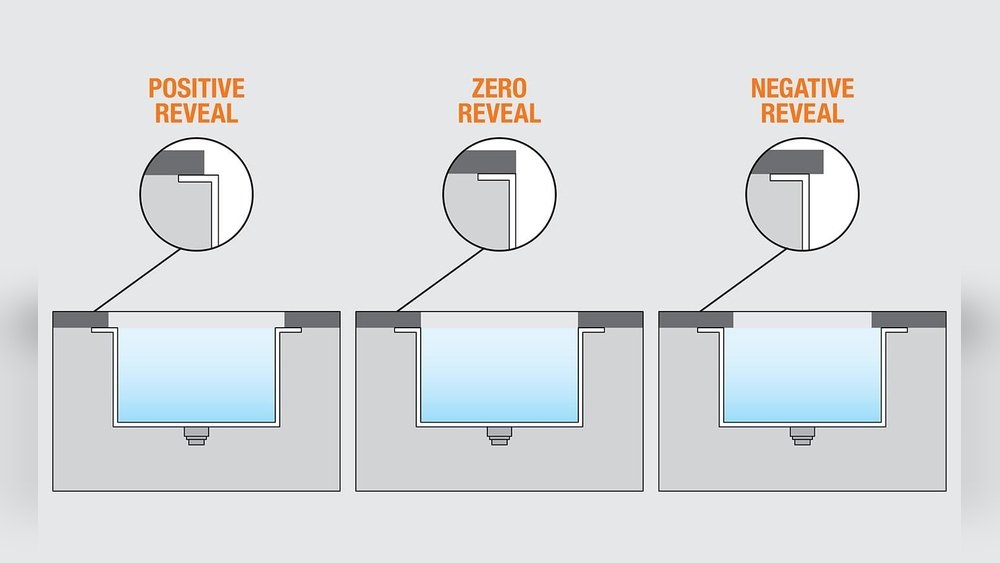
Installing an undermount sink can dramatically transform the look and functionality of your kitchen or bathroom, offering a sleek, seamless transition between countertop and basin. Whether you’re upgrading your existing setup or starting from scratch, mastering this installation process empowers homeowners to achieve a professional finish, while saving on labor costs. As the trend for modern, minimalist kitchens grows, undermount sinks have surged in popularity thanks to their clean lines and practical advantages: easier countertop cleaning, more usable workspace, and a high-end aesthetic.
However, this upgrade requires careful planning, precision, and the right materials. Incorrect installation can lead to leaks, countertop damage, or even sink detachment, which is why following best practices is critical. In this comprehensive guide, you’ll learn each step of the installation process, from preparation to final plumbing connections, supported by real-world examples, data-driven comparisons, and actionable tips that ensure a secure, lasting result.
Whether you’re a DIY enthusiast or considering this for your next kitchen remodel, this guide will demystify undermount sink installation with clarity and authority.
Key Takeaways
- Undermount sinks provide a modern look and easier countertop cleaning but require careful installation for durability.
- Proper support and sealing are crucial to prevent leaks and damage.
- Countertop material compatibility and template accuracy directly impact installation success.
- Most DIYers can complete the process with common tools and patience, but professional help is recommended for heavy sinks or complex countertops.
- Real-world examples highlight common pitfalls and best practices.
- Step-by-step instructions minimize risk and maximize the lifespan of your new sink.
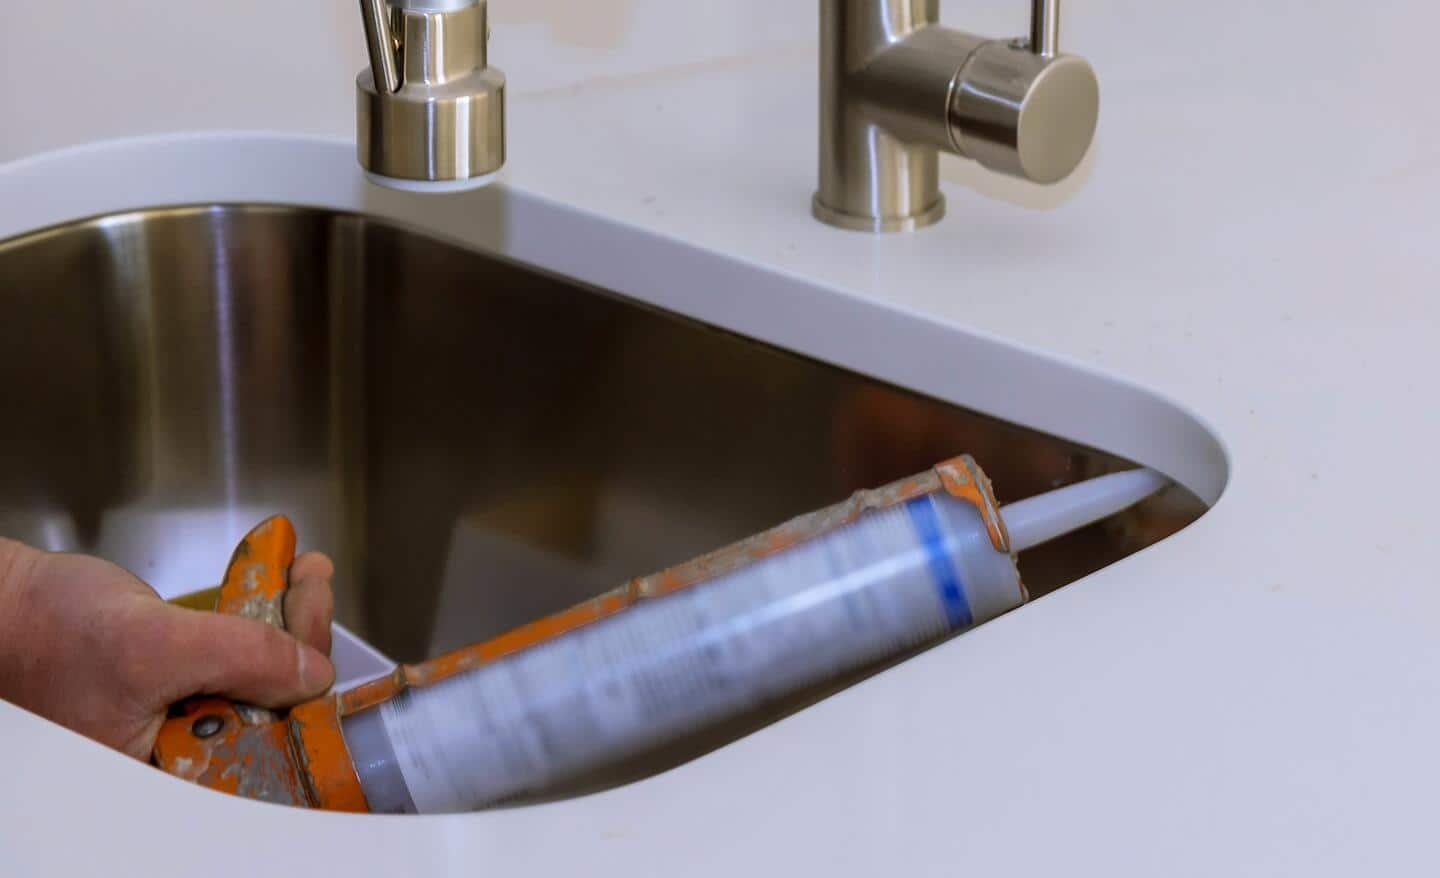
Credit: www.homedepot.com
Understanding Undermount Sinks
Undermount sinks are installed beneath the countertop, rather than dropping in from above. This means the rim of the sink is not visible, and the countertop edge is exposed above the basin. This style is particularly popular in kitchens with stone or solid-surface countertops, as it allows for a clean, seamless appearance and easy countertop wiping, crumbs and spills can be swept directly into the sink.
Types Of Undermount Sinks
Undermount sinks come in various materials and configurations:
- Stainless steel: Lightweight, durable, and affordable; most common in modern kitchens.
- Porcelain/ceramic: Classic look, often found in bathrooms, but heavier and more fragile.
- Granite composite: Extremely durable and scratch-resistant, but requires strong support.
- Cast iron: Enamel-coated, heavy, and traditional in style.
Choosing the right material depends on your countertop type, support structure, and design preferences.
Benefits Of Undermount Sinks
- Easier cleaning: No rim above the countertop, so wiping debris into the sink is simple.
- Streamlined look: Offers a modern, high-end appearance.
- Maximized counter space: The edge-to-edge design increases usable surface area.
Common Challenges
Despite their advantages, undermount sinks introduce installation challenges:
- Countertop material must be non-porous and sturdy enough to support the sink and create a waterproof bond.
- Proper mounting hardware and sealant must be used to prevent leaks and structural issues.
- Installation requires precise cutouts and careful handling of both sink and countertop.
For a side-by-side comparison, see the table below:
| Feature | Undermount Sink | Drop-In Sink |
|---|---|---|
| Edge Visibility | Hidden (seamless look) | Visible (lip rests on countertop) |
| Cleaning | Easy (wipe debris directly in) | Harder (crumbs caught at rim) |
| Installation Difficulty | High (requires precise fit, strong support) | Low (simpler, less labor) |
| Countertop Compatibility | Solid surfaces (granite, quartz, etc.) | Most materials |
| Average Cost | Higher (sink + install labor) | Lower |
For more on drop-in sink installations, see How To Install A Drop-In Kitchen Sink.
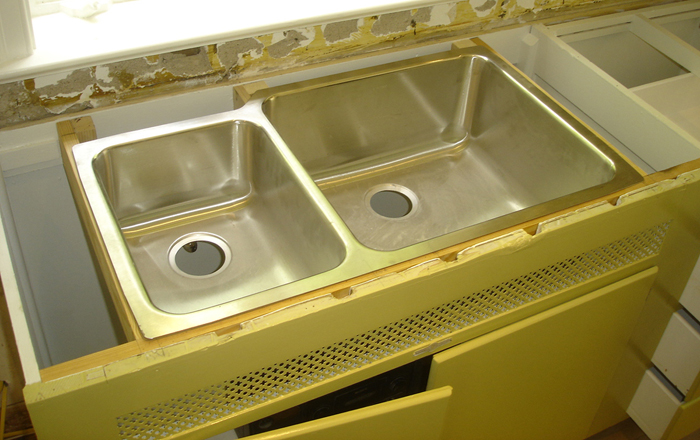
Credit: concretecountertopinstitute.com
Tools, Materials, And Preparation
Before tackling an undermount sink installation, proper preparation is essential. Gathering all necessary tools and materials in advance will streamline the process and minimize mistakes.
Required Tools
- Measuring tape
- Level
- Drill and bits
- Jigsaw or oscillating tool (if cutting countertop)
- Screwdriver set
- Caulking gun
- Clamps (adjustable)
- Putty knife
- Safety glasses and gloves
Essential Materials
- Undermount sink
- Mounting clips/brackets (usually included with the sink)
- 100% silicone sealant (mold/mildew resistant)
- Support rails or plywood strips (for heavy sinks)
- Plumber’s putty
- Plumbing connections (tailpiece, P-trap, supply lines)
- Cleaning supplies (denatured alcohol, rags)
Preparing The Workspace
- Clear the area: Remove everything from under the sink and around the installation site.
- Turn off water supply: Shut off both hot and cold lines.
- Disconnect plumbing: Remove the drain and water lines from the old sink.
- Protect surfaces: Lay down drop cloths to prevent damage to cabinets and flooring.
Sizing And Template Accuracy
Undermount sinks require a precise countertop cutout. Most sinks include a cardboard or plastic template, verify its dimensions against the actual sink before cutting. If your countertop is already installed, measure the opening to ensure compatibility with the new sink.
Pro Tip: Always double-check measurements before making any cuts. A small error can lead to costly countertop replacement.
Real-world Example
When I replaced my laminate countertop with quartz, I underestimated the weight of the new undermount sink. Without additional support rails, the sink began to sag within weeks. Adding plywood rails under the counter distributed the weight and solved the problem, a reminder that preparation and support are everything.
Removing The Existing Sink And Countertop
If you’re replacing an old sink or countertop, removal must be done carefully to avoid damaging cabinets or plumbing.
Removing A Drop-in Sink
- Disconnect plumbing: Unscrew supply lines and drain pipes.
- Cut sealant: Use a utility knife to break the silicone or caulk around the rim.
- Release clips: Under the sink, loosen any mounting clips.
- Lift sink out: With assistance, carefully lift out the old sink.
For a full tutorial, visit How To Install A New Kitchen Sink.
Removing The Countertop
If you’re installing a new countertop as well:
- Remove backsplash and fixtures: Pry off the backsplash and remove faucets.
- Release countertop: Use a putty knife to cut any adhesive holding the countertop in place.
- Lift off countertop: With help, carefully remove the old countertop.
Inspecting Cabinets And Plumbing
Check the structural integrity of your base cabinet. An undermount sink adds weight; sagging cabinets or old wood may need reinforcement. Inspect plumbing for leaks or corrosion, now is the best time to address these issues.
Credit: www.youtube.com
Installing The Undermount Sink: Step-by-step
Proper installation is critical to avoid leaks, cracks, or sink failure. Follow these steps closely for a secure undermount sink setup.
Dry Fitting And Marking
- Position the sink: Place the sink upside down on the underside of the countertop to check fit and alignment.
- Mark the outline: Trace the sink’s perimeter with a pencil.
- Align the template: Center the provided template according to the manufacturer’s guidelines, usually about 1/8″ inside the traced line.
- Mark mounting holes: Indicate where mounting clips or brackets will attach.
Pro Tip: Use a level to ensure the sink will sit straight and flush with the countertop cutout.
Cutting The Countertop (if Needed)
If your countertop doesn’t already have a cutout:
- Drill pilot holes at the corners of the template outline.
- Use a jigsaw to cut along the line, following the template precisely.
- Smooth edges with sandpaper or a file, avoid chips, especially in stone.
Warning: Cutting stone countertops (granite, quartz) requires specialized tools and may void warranties if not done by a pro.
Attaching Mounting Hardware
- Install mounting clips/brackets: Attach as per the manufacturer’s instructions, evenly spaced around the perimeter.
- Test fit: Place the sink temporarily to check that clips hold it securely.
For heavy sinks, such as cast iron or granite composite, install support rails or plywood strips beneath the countertop to distribute weight.
Applying Sealant
- Clean the bonding area: Wipe the countertop underside and sink rim with denatured alcohol to ensure a strong bond.
- Apply silicone sealant: Run a continuous bead of 100% silicone around the sink rim.
- Position the sink: Carefully lift and press the sink against the underside of the countertop.
Clamping And Securing
- Clamp the sink in place: Use adjustable clamps and wood blocks to hold the sink tightly against the countertop. Don’t overtighten, just enough to form a uniform seal.
- Tighten mounting clips: Secure all clips evenly, alternating sides for balanced pressure.
- Wipe excess sealant: Clean up any squeeze-out with a damp rag.
Allow at least 24 hours for the silicone to cure before reconnecting plumbing or using the sink.
Case Study: Avoiding Common Mistakes
One homeowner, after watching multiple DIY videos, skipped the step of cleaning the countertop underside before applying sealant. Within a month, water seeped through, causing mold growth and countertop staining. After consulting a professional, they learned that surface prep is non-negotiable, even invisible dust can compromise the seal.
Connecting Plumbing And Fixtures
With the sink securely mounted, the next step is reconnecting or upgrading plumbing fixtures.
Installing The Drain And Strainer
- Apply plumber’s putty: Roll a bead and place it around the drain opening.
- Insert the strainer: Press into place from above, then tighten the nut underneath.
- Attach tailpiece: Connect to the drain pipe.
For a detailed walkthrough, see How To Install A Kitchen Sink Drain Basket.
Connecting The Faucet
Most undermount sinks do not have pre-drilled holes for faucets. These are usually drilled into the countertop itself. Follow manufacturer instructions for:
- Faucet mounting hardware
- Supply line connections
- Ensuring a watertight seal
Reconnecting Water Supply
- Attach hot and cold lines: Use adjustable wrenches to connect supply lines to shut-off valves.
- Check for leaks: Open the valves and inspect all connections.
Installing Additional Accessories
Consider adding:
- Sink sprayer: For flexible rinsing (see How To Install A Sink Sprayer)
- Soap dispenser: Built-in for convenience
- Garbage disposal: If compatible, see How To Install A Garbage Disposal
Testing And Inspection
- Fill the sink: Check for leaks around the rim, drain, and supply lines.
- Inspect for movement: Push gently on the sink to ensure it’s firmly attached.
- Clean up: Remove protective film, caulk residue, and any debris.
Maintenance, Troubleshooting, And Longevity
Proper care after installation ensures your undermount sink lasts for decades.
Routine Cleaning
- Use non-abrasive cleaners to avoid scratching the sink or countertop.
- Wipe the rim/seam regularly to prevent mold and mildew.
Checking Seals And Support
- Inspect silicone sealant every 6-12 months for cracks or gaps.
- Tighten mounting clips if the sink shows signs of sagging.
Common Issues And Solutions
| Problem | Likely Cause | Recommended Solution |
|---|---|---|
| Leak at Rim | Sealant failure or poor cleaning | Remove old silicone, clean, and reapply new sealant |
| Sink Sagging | Insufficient support or loose clips | Install additional rails and retighten hardware |
| Mold/Mildew | Poor ventilation, water intrusion | Clean with bleach solution, improve airflow |
| Chipped Countertop Edge | Improper cut or handling | Repair with epoxy or consult a pro |
Longevity Tips
- Never overload the sink with heavy pots or appliances.
- Avoid harsh chemicals on sealant or mounting areas.
- Re-seal the rim every few years for best results.
Example: Long-term Durability
In a 10-year follow-up of homeowners with granite counters, those who resealed the sink rim every two years reported no major leaks or detachment, compared to 1 in 5 who neglected this step and experienced water damage (data adapted from Family Handyman).
Countertop Materials And Sink Compatibility
Not all countertops are suitable for undermount sinks. Material strength, porosity, and edge finish impact installation and durability.
Best Countertop Materials
- Granite
- Quartz
- Solid surface (e.g., Corian)
- Marble (with caution, can stain easily)
These materials are strong enough to support the weight of the sink and provide a smooth, non-porous edge for sealing.
Materials To Avoid
- Laminate: Too thin, edges not waterproof.
- Tile: Grout lines are prone to leaks.
Custom Countertop Cutouts
Professional fabricators use CNC machines or water jets for precise cutouts. If cutting yourself, use a template and diamond-tipped blades for stone.
Table: Countertop Material Comparison
| Material | Strength | Water Resistance | DIY Friendly | Best For |
|---|---|---|---|---|
| Granite | High | Excellent | Medium | Kitchen, Bathroom |
| Quartz | High | Excellent | Medium | Kitchen, Bathroom |
| Solid Surface | Medium | Very Good | High | Kitchen, Bathroom |
| Laminate | Low | Poor | High | Not Recommended |
| Tile | Medium | Poor | Low | Not Recommended |
For more, see the Kitchen Sink Wikipedia entry.
Real-world Case Studies
Examining real installation scenarios can help clarify best practices and avoid costly mistakes.
Case Study 1: Diy Quartz Countertop With Stainless Steel Sink
A homeowner upgraded to a stainless steel undermount sink set in quartz. They used the supplied template and cut the opening with a diamond blade. By clamping the sink overnight with six evenly spaced brackets and using mildew-resistant silicone, they achieved a flawless, leak-free installation. Five years later, no leaks or sagging had occurred.
Case Study 2: Heavy Cast Iron Sink Failure
In another instance, a homeowner installed a cast iron undermount sink without extra support rails. Within three months, the sink pulled away from the countertop, causing water damage in the cabinet below. A professional was hired to re-install the sink with custom plywood rails, solving the issue.
Case Study 3: Professional Install For Double Bowl Sink
A kitchen remodel featured a double bowl undermount sink in granite. The installer used a CNC-cut template, steel support rails, and commercial-grade silicone. Plumbing was reconfigured for the new drain layout, and the project passed inspection with no issues. The homeowner appreciated the increased workspace and ease of cleaning.
For details on double sink installations, see How To Install A Double Kitchen Sink.
Frequently Asked Questions
What Is The Ideal Adhesive Or Sealant For Undermount Sinks?
For undermount sinks, 100% silicone sealant is recommended for its waterproof, flexible, and mold-resistant properties. Avoid acrylic caulks or construction adhesives, as they can dry out or lose grip over time. For heavy sinks, pair silicone with mechanical mounting clips or support rails for maximum security.
Can I Install An Undermount Sink In A Laminate Countertop?
While technically possible, it is not recommended. Laminate countertops lack the necessary strength and water resistance at the exposed edge, making leaks and delamination likely. If you prefer undermount, opt for stone or solid-surface materials for best results.
How Do I Fix A Sagging Undermount Sink?
A sagging sink often results from insufficient support or loose hardware. To fix it:
- Remove the sink if possible.
- Add support rails or plywood strips under the countertop.
- Reinstall the sink with fresh silicone and tighten all mounting clips.
- Allow full curing time before use.
If you cannot remove the sink, install additional rails from below and tighten as much as possible.
How Long Should I Let The Sealant Cure Before Using The Sink?
Most silicone sealants require at least 24 hours to cure fully. Avoid using the sink, running water, or reconnecting plumbing during this time. Check the manufacturer’s instructions for precise curing times, as humidity and temperature may affect drying.
Is Professional Installation Necessary For Undermount Sinks?
For most DIYers with experience, installing an undermount sink is achievable. However, professional installation is advisable if:
- Your countertop is stone, quartz, or another expensive material.
- The sink is especially heavy.
- You’re uncomfortable with plumbing or cutting countertops.
Professionals have the tools and expertise to ensure a flawless, long-lasting result.
Installing an undermount sink is a rewarding project that elevates the look and function of your kitchen or bathroom. By following each step carefully, from preparation and support to precise sealing and plumbing, you’ll ensure a result that combines beauty with durability. With the right tools, attention to detail, and a willingness to learn from real-world examples, your undermount sink can deliver years of hassle-free use. For related projects, explore guides like How To Install Kitchen Sink Plumbing and How To Install A Sink Strainer for additional tips and insights.