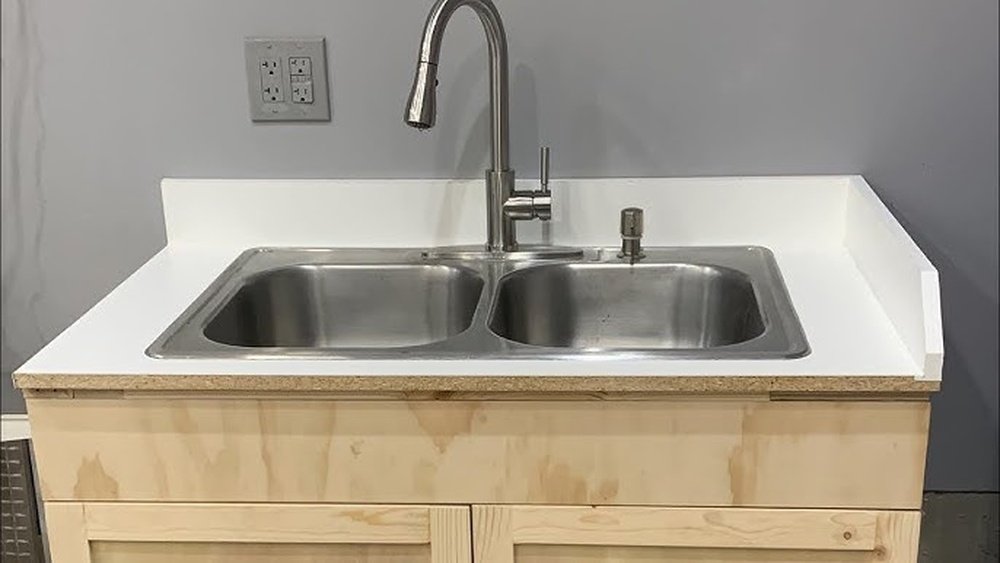
Building a kitchen sink countertop is one of the most rewarding DIY projects for homeowners seeking to combine practical function with personalized style. The countertop and sink form the heart of most kitchens, influencing workflow, hygiene, and aesthetics. Whether you’re renovating your entire kitchen or simply updating a single element, constructing the countertop around your sink is a high-impact improvement that can boost both property value and daily satisfaction.
From selecting the right materials to ensuring water-tight installation, every step in this process requires careful planning and attention to detail. While the undertaking may seem daunting, even for seasoned DIYers, demystifying each phase makes the project accessible. This article provides a comprehensive, step-by-step guide for building a kitchen sink countertop, including expert tips, real-world examples, and crucial design considerations.
By the end, you’ll be equipped to create a durable, beautiful countertop that integrates seamlessly with your sink and kitchen decor.
Key Takeaways
- Material choice is critical for durability, aesthetics, and maintenance.
- Accurate measurements and planning prevent costly mistakes.
- Proper waterproofing and sealing are essential for long-term performance.
- Integrating plumbing and sink installation with countertop construction saves time and effort.
- Real-world examples and data-driven comparisons help guide your decisions.
- Safety and adherence to best practices ensure both quality results and personal well-being.

Credit: www.youtube.com
Understanding Kitchen Sink Countertop Fundamentals
The foundation of any successful kitchen sink countertop project is a clear understanding of the key elements involved. Before picking up tools or purchasing materials, it’s essential to grasp the basic types, layout possibilities, and integration options for sinks and countertops.
Types Of Kitchen Sink Countertops
Kitchen countertops come in a range of materials, each with unique properties. Here’s a comparative overview:
| Material | Pros | Cons | Estimated Cost (per sq ft) |
|---|---|---|---|
| Laminate | Affordable, variety of colors, easy to install | Susceptible to scratches, not heat-resistant | $10, $40 |
| Granite | Durable, heat-resistant, luxury appearance | Heavy, requires sealing, costly | $40, $100 |
| Quartz | Stain-resistant, low maintenance, uniform look | Can discolor in sunlight, expensive | $50, $120 |
| Solid Surface | Seamless joints, repairable, custom shapes | Less heat-resistant, may scratch | $35, $85 |
| Butcher Block | Warm appearance, repairable, eco-friendly | Requires regular sealing, prone to water damage | $30, $70 |
Choosing the right material depends on your budget, usage habits, and design goals.
Sink Integration Methods
The way your sink is installed in the countertop impacts both functionality and aesthetics:
- Drop-In (Top-Mount): Sits above the countertop, rim is visible.
- Undermount: Installed below the surface, seamless look.
- Integrated: Formed from the same material as the countertop, no seams.
- Farmhouse (Apron Front): Large front face exposed, requires special cabinet support.
For a detailed guide on drop-in sinks, see How To Install A Drop-In Kitchen Sink.
Layout And Design Considerations
- Workflow: Place the sink near the dishwasher and main prep areas.
- Size & Depth: Standard sinks are 22” x 33”, but custom sizes may fit better.
- Cabinet Support: Ensure base cabinets can handle countertop and sink weight.
Real-world Example: Modern Quartz Countertop With Undermount Sink
A homeowner in Seattle opted for a quartz countertop with an undermount stainless steel sink. By aligning the sink center with the window and adding a single-hole faucet, they achieved both visual balance and ergonomic comfort. The seamless undermount installation made cleaning much easier.
Planning And Preparing For Construction
Meticulous planning is the difference between a smooth project and a frustrating, costly repair. This section covers site preparation, measuring, and gathering the right materials.
Measuring And Template Creation
Accurate measurements are crucial, especially for the sink cutout and faucet holes.
- Measure twice, cut once is essential.
- Use a physical template (often included with your sink) to mark the cutout.
- Account for countertop overhang, typically 1, 1.5 inches beyond cabinet edges.
Pro Tip: Use painter’s tape to outline the sink on the countertop; this provides a clear visual and prevents splintering during cutting.
Tools And Materials Checklist
Depending on your chosen countertop material, you may need:
- Circular saw (with carbide-tipped blade for laminate/wood)
- Jigsaw (for curved cuts)
- Drill and hole saw bits (for faucets and accessories)
- Clamps, straightedge, measuring tape, pencil
- Level and square
- Safety gear: Goggles, gloves, hearing protection
- Waterproof adhesive and sealant
- Sandpaper or file (for smoothing edges)
Preparing The Workspace
- Clear the area and protect floors/cabinets with drop cloths.
- Ensure the base cabinets are level and securely anchored.
- Disconnect plumbing and remove the old countertop if replacing.
Example: Diyer’s Laminate Countertop Build
When I tested my first laminate countertop project, I underestimated the importance of a perfectly level base. Shimming and re-checking with a long level at every stage prevented future warping and gaps around the sink.

Credit: farmhouse1820.com
Selecting And Cutting The Countertop Material
The cutting phase is where your preparation pays off. Mistakes here can be costly, especially with expensive materials like granite or quartz.
Marking And Cutting The Sink Opening
- Place the sink template on the countertop and tape in place.
- Mark the cut line with a pencil.
- Drill pilot holes at each corner for jigsaw blade entry.
- Use a circular saw for straight sections and a jigsaw for curves.
- Test-fit the sink before proceeding.
Warning: Always support the cutout piece to avoid splintering or dropping it when the cut completes.
Working With Different Materials
- Laminate/Wood: Go slow to avoid chipping. Seal raw edges with waterproof sealant.
- Stone/Quartz: Often requires specialized tools or professional fabrication. Cutting stone at home is not recommended unless you have the right equipment.
- Solid Surface: Can be cut with regular woodworking tools, but dust extraction is essential.
Creating Faucet And Accessory Holes
- Use a hole saw bit sized for your faucet shank.
- Consider future accessories like soap dispensers or filtered water taps.
- Refer to How To Install A Soap Dispenser In A Kitchen Sink for more details.
Smoothing And Sealing Edges
- Use sandpaper or a file to smooth all cut edges.
- Apply a waterproof sealant to prevent moisture ingress, especially for wood and laminate.
Case Study: Butcher Block Countertop In A Historic Home
A couple renovating a 1920s bungalow chose butcher block for its classic look. They carefully sealed every cut edge with mineral oil and polyurethane, preventing water damage around the sink, an essential step in older, high-humidity kitchens.
Credit: www.youtube.com
Installing The Sink And Countertop
With the countertop cut to size and the sink opening prepared, installation is the next critical phase.
Dry-fitting Components
- Position the countertop on the cabinets without adhesive to check fit.
- Place the sink in the opening to ensure a snug fit.
- Check alignment with walls, cabinets, and appliances.
Securing The Countertop
- For laminate and wood, apply construction adhesive to the cabinet tops.
- Use screws from below (through cabinet supports) to anchor the countertop. Avoid overtightening, which can crack some materials.
- For stone/quartz, countertop pieces are usually epoxied and may require professional installation due to weight.
Installing The Sink
- Drop-In Sinks: Apply a bead of silicone sealant under the rim, lower the sink into place, and use mounting clips to secure.
- Undermount Sinks: Attach from below using brackets and strong, waterproof adhesive. Clamping is often required while the adhesive cures.
For step-by-step guidance, see How To Install A New Kitchen Sink.
Connecting Plumbing And Accessories
- Connect water supply lines to the faucet.
- Attach the drain assembly and, if applicable, garbage disposal.
- Check for leaks before finalizing.
For advanced setups, refer to How To Install Kitchen Sink Plumbing.
Sealing And Finishing
- Run a thin bead of silicone caulk around the sink perimeter (for drop-in sinks) to prevent water infiltration.
- Wipe away excess caulk with a damp cloth.
Pro Tip: Wait at least 24 hours before using the sink to allow sealants to fully cure.
Waterproofing And Longevity Strategies
The kitchen sink area is particularly vulnerable to water damage. Proper waterproofing and maintenance can greatly extend your countertop’s life.
Choosing The Right Sealant
- 100% Silicone Caulk: Best for sink perimeters, remains flexible and waterproof.
- Polyurethane Sealers: Excellent for wood or butcher block, penetrates deep and protects from within.
- Epoxy Sealants: Used for stone or solid surface seams, highly durable.
Sealing Edges And Joints
- Pay special attention to all cut edges, especially those not factory-finished.
- For undermount sinks, seal both the sink-cabinet joint and the countertop cut edge.
Maintenance Best Practices
- Wipe up spills immediately, especially with wood or laminate.
- Re-seal wood countertops every 6, 12 months.
- Check and reapply caulk as needed, typically once a year.
Example: Quartz Countertop Maintenance Routine
A busy family in Austin found that quarterly cleaning with a mild detergent and annual inspection of caulking prevented stains and water seepage, maintaining their countertop’s appearance for years.
Customization And Design Enhancements
Building your own kitchen sink countertop allows for tailored features and personal touches. Consider these customization strategies:
Integrated Draining Boards
Some solid surface and stone countertops can be routed to include a sloped draining board next to the sink, improving functionality.
Backsplashes And Edging
- Add a matching or contrasting backsplash to protect walls.
- Choose from straight, beveled, or rounded edges for aesthetics and safety.
Accessory Integration
- Install soap dispensers, filtered water taps, or pull-out spray faucets.
- For guidance, see How To Install A Sink Sprayer.
Lighting And Power Outlets
- Under-cabinet lighting enhances workspace utility.
- Waterproof outlets near the sink area increase convenience.
Personalization Case Study: Eco-friendly Concrete Countertop
A DIY enthusiast built a concrete countertop with recycled glass accents and an integrated sink. They embedded LED strip lighting beneath the edge for a dramatic night-time effect, illustrating the creative freedom of custom builds.
Troubleshooting Common Issues
Even with careful planning, challenges can arise during construction or after installation. Here’s how to address some of the most frequent problems.
Sink Doesn’t Fit The Opening
- Double-check measurements; if the opening is too small, carefully enlarge with a jigsaw.
- If it’s too large, consider a wider rim sink or use a trim piece.
Water Leaks Around Sink
- Remove old caulk, dry surfaces thoroughly, and reapply fresh silicone.
- Check mounting clips for proper tension.
Countertop Not Level
- Use shims between cabinets and countertop.
- Loosen mounting screws, adjust, and re-tighten.
Damage To Surface
- Small chips in laminate can be repaired with color-matched filler.
- Scratches in solid surface or wood can often be sanded and refinished.
Plumbing Challenges
- For complicated setups (double sinks, garbage disposals), see How To Install A Double Sink With Garbage Disposal.
- If unsure, consult a licensed plumber.
Example: Repairing A Warped Countertop
A homeowner noticed warping near their sink after a minor leak went unchecked. They removed the sink, allowed the area to dry, then reinforced the underside with waterproof plywood before resealing, saving the countertop without a full replacement.
Cost, Time, And Value Comparison
Understanding the investment required for building a kitchen sink countertop helps set realistic expectations. Here’s a data-driven breakdown:
| Countertop Type | DIY Cost (Approx.) | Pro Installation Cost | Typical Project Time (DIY) | Resale Value Increase |
|---|---|---|---|---|
| Laminate | $300, $700 | $700, $1,500 | 1, 2 Days | Low, Moderate |
| Granite | $1,200, $2,500 | $2,500, $5,000 | 2, 3 Days | High |
| Quartz | $1,500, $3,000 | $3,000, $6,000 | 2, 3 Days | High |
| Butcher Block | $400, $1,000 | $1,000, $2,000 | 1, 2 Days | Moderate |
| Solid Surface | $1,000, $2,000 | $2,000, $4,000 | 2, 3 Days | Moderate, High |
Pro Tip: DIY savings are substantial, but factor in tool rentals and possible material waste from mistakes.
Value-boosting Enhancements
- Adding a modern sink and faucet can yield a return on investment of up to 80% during resale, according to the National Association of Realtors.
- High-quality countertops are a top priority for buyers, often making the difference in a competitive housing market.
For authoritative market trends, see National Association of Realtors.
Frequently Asked Questions
What’s The Best Countertop Material For Heavy Kitchen Use?
For high-traffic kitchens, quartz stands out due to its stain resistance, durability, and minimal maintenance. Unlike granite, it doesn’t require sealing, and it resists scratches and heat well. If budget allows, quartz offers an excellent blend of resilience and aesthetics, especially around the sink area where water exposure is constant.
How Do I Handle Plumbing When Replacing Both Sink And Countertop?
Disconnect all plumbing before removal, including water supply lines and the drain. If upgrading to a different sink configuration (e.g., single to double bowl), you may need to adjust the drain and vent pipes. Flexible supply hoses make reconnections easier. If you’re adding features like a garbage disposal, consult guides like How To Install A Disposal In A Single Sink for appliance-specific steps.
Can I Build A Countertop With A Pre-existing Sink Cabinet?
Yes, as long as the cabinet is structurally sound and properly sized for the new sink and countertop. Reinforce older cabinets if necessary, especially for heavy materials like granite or concrete. Ensure the cabinet opening matches your sink’s dimensions, or modify as needed for a secure fit.
How Do I Prevent Water Damage In The Future?
Regularly inspect caulked seams and reapply as needed. Use cutting boards and trivets to protect the surface from excess moisture and heat. For wood or butcher block countertops, re-seal at least twice a year. Promptly fix any leaks under the sink to avoid hidden water damage.
Are There Eco-friendly Options For Kitchen Sink Countertops?
Absolutely. Recycled glass countertops, bamboo butcher block, and concrete with recycled aggregates are increasingly popular sustainable choices. These materials often have lower environmental impact and can be customized for sink integration. Always check for certifications like GREENGUARD or FSC to ensure eco-credentials.
Building a kitchen sink countertop is a project that combines creativity, craftsmanship, and functional design. By following best practices, from precise measurements to careful sealing, you’ll create a kitchen centerpiece that serves reliably for years. Whether you choose budget-friendly laminate or luxurious quartz, the satisfaction of a job well done will be reflected every time you prepare a meal or gather around the sink with family and friends.