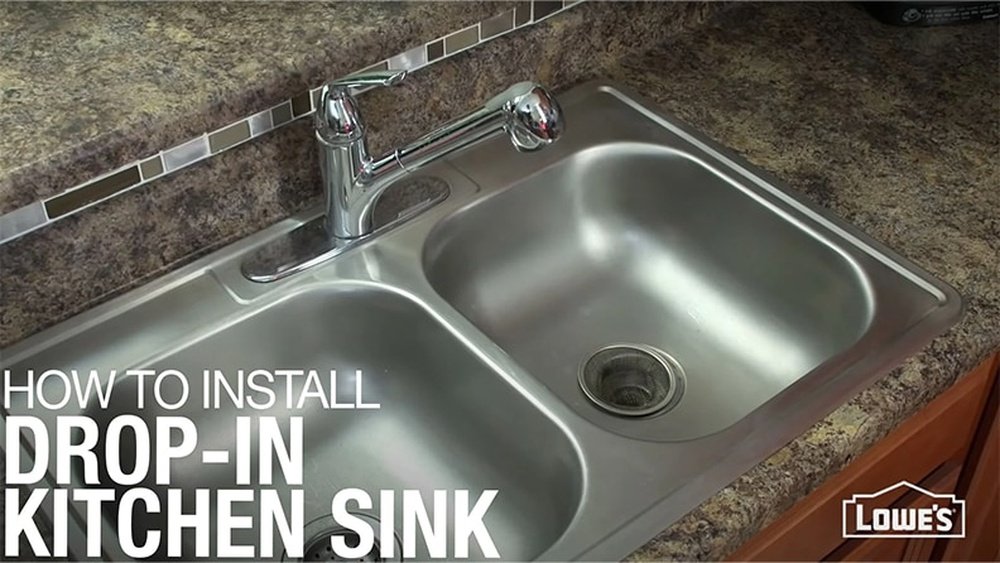
Replacing or installing a drop-in kitchen sink can transform the look and functionality of your kitchen. Whether you’re upgrading your countertop, switching to a modern sink, or simply tackling a much-needed repair, installing a drop-in sink is a manageable DIY project for most homeowners.
With careful preparation and the right tools, you can save on professional installation costs and achieve a seamless, watertight result.
Installing a drop-in kitchen sink involves more than just setting the basin in place; it requires precise measurements, careful cutting (if needed), and proper sealing to prevent leaks. This comprehensive guide walks you through every step, from choosing the right sink and gathering materials to finishing the installation and troubleshooting common pitfalls.
Along the way, you’ll find expert tips, real-world examples, and practical tables to ensure your project succeeds the first time.
Key Takeaways
- Drop-in kitchen sinks are designed for DIY-friendly installation, fitting into a pre-cut countertop hole.
- Proper measurement and template use are critical for a precise fit and leak prevention.
- The right sealant and fastening method ensure a watertight and secure installation.
- Removing the old sink and connecting plumbing should be done with care to avoid damage or leaks.
- Common installation mistakes can be avoided with attention to detail and by following proven steps.
:max_bytes(150000):strip_icc()/double-sink-plumbing-differences-and-how-to-install-5209390-02-4f80d5c8fb654eb08dd30a44b7835f01.jpg)
Credit: www.thespruce.com
Understanding Drop-in Kitchen Sinks
Choosing the right kitchen sink is the foundation of a successful installation. Not all sinks are created equal, and the features you select will impact both the installation process and your long-term satisfaction.
What Is A Drop-in Kitchen Sink?
A drop-in kitchen sink, sometimes called a self-rimming or top-mount sink, is designed to “drop” into a hole cut in the countertop. The rim of the sink sits on top of the counter, supporting the weight and creating a visible border around the basin. Drop-in sinks are among the most popular choices for residential kitchens due to their ease of installation and versatility with different countertop materials.
Drop-in Vs. Undermount: Key Differences
To understand why a drop-in sink is often preferable for DIYers, compare it to the undermount sink:
| Feature | Drop-In Sink | Undermount Sink |
|---|---|---|
| Installation Complexity | DIY-friendly | Professional recommended |
| Countertop Compatibility | Works with most materials | Requires solid surface (granite, quartz, etc.) |
| Maintenance | Easy to replace or upgrade | More difficult to access and reseal |
| Cost | Lower overall | Higher (sink + installation) |
| Appearance | Visible rim | Seamless look |
Sink Material Selection
Selecting the right material affects both the installation and long-term durability of your sink. Common options include:
- Stainless steel: Durable, easy to clean, and affordable.
- Porcelain: Classic look but can chip if heavy items are dropped.
- Composite granite: Scratch-resistant and modern, but heavier.
- Cast iron with enamel: Extremely tough but requires strong support.
Your choice will impact the tools you need and the support structure required in your countertop.
Real-world Example: Choosing A Sink For A Laminate Countertop
When installing a drop-in sink in a laminate countertop, it’s crucial to pick a sink that doesn’t require a heavy under-mount or extra reinforcement. In my experience, stainless steel sinks work best for these surfaces due to their lighter weight and forgiving rim design, which accommodates minor imperfections in the countertop cut.
Credit: helpcenter.elkay.com
Tools And Materials: Preparation For Success
The right preparation is half the battle in any DIY project. Gather all necessary tools and materials before starting to avoid mid-project runs to the hardware store.
Essential Tools
- Tape measure
- Adjustable wrench
- Screwdriver set
- Jigsaw or handsaw (for cutting the countertop, if needed)
- Plumber’s putty or silicone caulk
- Bucket (for catching water during disconnection)
- Utility knife
- Pipe wrench
- Plumber’s tape (Teflon tape)
- Level
- Protective gloves and safety glasses
Materials Checklist
- Drop-in sink (with template and mounting clips)
- Faucet (if replacing or installing new)
- Supply lines and drain assembly
- Sealant (100% silicone or plumber’s putty, depending on sink material)
- Cleaning supplies (rags, mild detergent)
Pro Tip:
Always review the manufacturer’s instructions and template included with your new sink. Some sinks require specific sealants or mounting hardware not included in universal kits.
Example: Saving Time With A Pre-assembled Faucet
Some modern sinks come with pre-drilled holes and even pre-assembled faucets. This can shave an hour or more off installation time and minimizes the risk of leaks at the faucet base.
Removing The Old Sink: Step-by-step
Before you can install a new drop-in sink, the old unit must be removed carefully to avoid damaging the countertop or plumbing.
Step 1: Disconnect Water Supply And Drain
- Turn off water supply valves under the sink.
- Open the faucet to relieve pressure and drain remaining water.
- Place a bucket under the P-trap to catch spills.
- Loosen nuts on supply lines with an adjustable wrench.
- Disconnect the drain trap and any dishwasher or garbage disposal connections.
If you encounter a clog during this process, consult the guide on how to clear a clogged kitchen sink drain.
Step 2: Remove Mounting Clips And Cut Sealant
- Locate and loosen the sink’s mounting clips from below using a screwdriver.
- Use a utility knife to slice through any old caulk or sealant around the sink rim.
Step 3: Lift Out The Old Sink
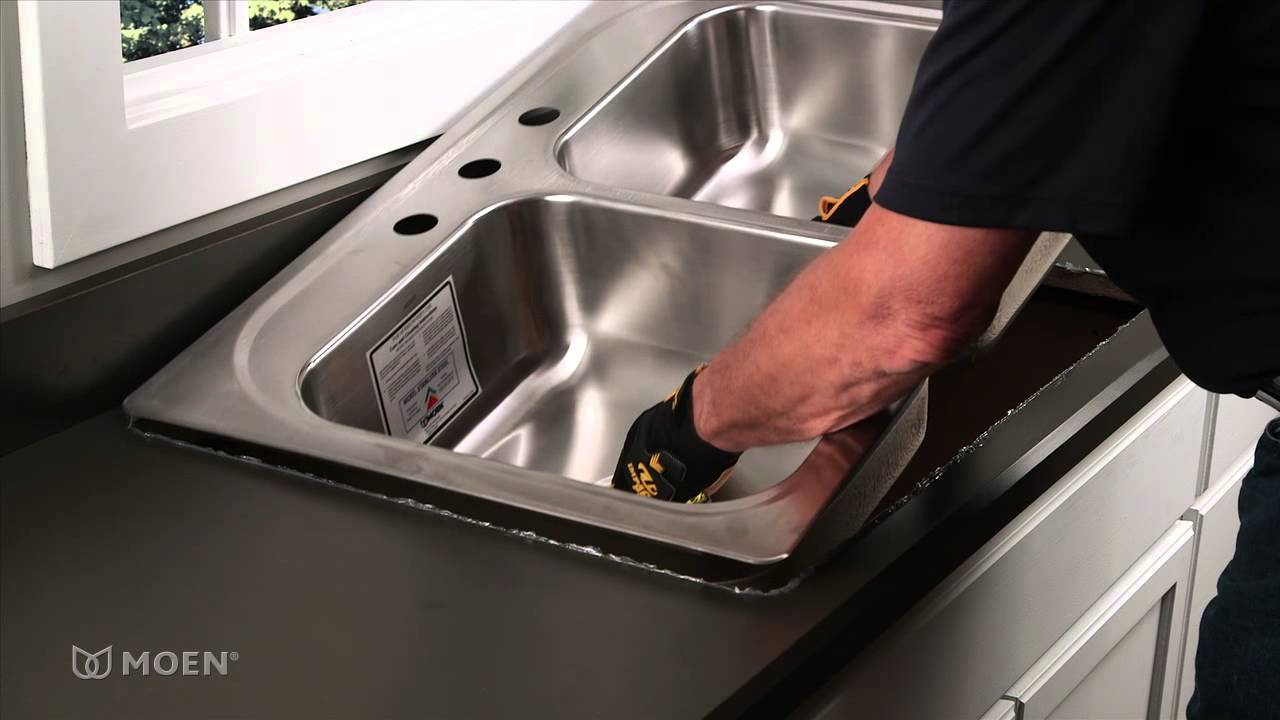
With all connections and sealant cut, carefully lift the sink straight up. If it’s stuck, gently pry with a putty knife, avoid excessive force to prevent countertop damage.
Step 4: Clean The Countertop Opening
Remove old putty or debris using a scraper and clean with mild detergent. Ensure the opening is dry and free from residue for a proper seal with the new sink.
Example: Dealing With A Stubborn Sink
If the old sink is heavily caulked or painted in place, gently apply a hair dryer to soften the sealant before prying. Never use sharp tools that could gouge the countertop.
Credit: www.youtube.com
Measuring, Marking, And Cutting The Countertop
Precision at this stage ensures a snug, professional-looking fit and prevents leaks or structural issues.
Step 1: Confirm Sink Opening Size
Check your new sink’s template against the existing cutout. If the opening is too small, mark the edges with a pencil where additional material needs to be trimmed.
Step 2: Using The Sink Template
Most drop-in sinks include a paper or cardboard template. Place the template on the countertop, centered over the cabinet below, and tape it securely.
- Trace the outline with a pencil.
- Mark faucet holes if not pre-drilled.
Step 3: Cutting The Countertop (if Needed)
- Drill a pilot hole inside one corner of the outline.
- Insert a jigsaw blade into the hole and carefully cut along the line.
- Support the cutout to prevent it from falling and chipping the countertop.
Warning: Wear safety glasses and use a mask to avoid inhaling dust, especially when cutting laminate or composite materials.
Step 4: Dry-fit The Sink
Place the sink in the opening to check for fit. The rim should rest evenly on all sides, with no rocking or gaps.
Pro Tip:
If the opening is slightly too large, use silicone caulk to fill minor gaps. For significant errors, a countertop repair kit may be needed.
Installing The Faucet And Accessories
Installing the faucet and accessories before placing the sink makes the process easier and reduces the risk of damaging plumbing or the sink itself.
Step 1: Attach The Faucet
Insert the faucet stems through the pre-drilled holes. Secure with mounting nuts and washers from below, tightening by hand and then with a wrench.
Step 2: Install Additional Accessories
- Soap dispensers
- Spray hoses
- Filtered water taps
Follow the manufacturer’s instructions for each accessory. Use plumber’s tape on threaded connections to prevent leaks.
Step 3: Connect Supply Lines
Attach flexible water supply lines to the faucet and tighten. Do not overtighten, as this can damage the fittings.
Example: Pre-installation Test
In my experience, hooking up the faucet and lines before installing the sink into the countertop makes it far easier to access tight spaces. Test all connections by briefly running water (over a bucket) to check for leaks before final installation.
Installing The Drop-in Sink: Final Placement
This is the most critical stage, where careful sealing and secure fastening ensure your sink remains watertight and stable for years.
Step 1: Apply Sealant
- For stainless steel sinks, use a bead of plumber’s putty around the underside of the rim.
- For composite or stone sinks, use 100% silicone caulk (as plumber’s putty can stain porous materials).
Do not apply sealant to the countertop itself; keep the bead on the sink rim for easier future removal.
Step 2: Set The Sink
- Carefully lower the sink into the opening.
- Press down evenly to seat the rim against the countertop.
- Wipe away any excess sealant that squeezes out with a damp cloth.
Step 3: Attach Mounting Clips
From below, secure the sink with the provided mounting clips. Tighten each clip incrementally, alternating sides to distribute pressure evenly.
Step 4: Install Drain Assembly
Insert the drain flange into the sink, using plumber’s putty or the recommended sealant. Tighten the locknut from below and connect the P-trap.
Step 5: Reconnect Water Supply And Test
Open the supply valves and run water to check for leaks. Test both hot and cold lines, as well as the drain.
Example: Avoiding Common Leaks
A common mistake is failing to clean the countertop thoroughly before installing the new sink. Even small debris can compromise the seal, leading to leaks. Always inspect the rim after seating the sink and reapply sealant to any suspicious gaps.
Troubleshooting And Fine-tuning Your Installation
Even with careful planning, issues can arise. Address them promptly to ensure the longevity and functionality of your new sink.
Common Problems And Solutions
| Problem | Likely Cause | Solution |
|---|---|---|
| Leaking rim | Insufficient or missing sealant | Remove sink, clean thoroughly, reapply sealant |
| Loose faucet | Improperly tightened mounting nuts | Tighten nuts under the sink |
| Drain leaks | Improper plumber’s putty or loose connections | Reseat drain assembly with fresh putty |
| Swaying sink | Loose or uneven mounting clips | Retighten or adjust clips evenly |
| Clogged drain | Debris from installation or old pipes | Flush lines, use a safe drain cleaner, or consult how to fix a clogged kitchen sink |
Pro Tip:
If you’re troubleshooting persistent drainage issues, explore guides such as how to fix kitchen sink not draining or how to open a clogged kitchen sink drain for step-by-step solutions.
Adjusting The Sink Position
If the sink shifts during installation, loosen the mounting clips, realign the sink, and retighten. The rim should be flush and even on all sides.
Cleaning And Maintenance Tips
- Wipe away excess sealant promptly to prevent hard-to-remove stains.
- Use mild, non-abrasive cleaners on all sink materials.
- Inspect under the sink periodically for signs of leaks or moisture.
Example: Real-world Installation Challenge
When replacing an old cast iron sink, I found the countertop opening slightly off-square. Rather than force the new sink, I used a jigsaw to gently expand the opening and a file to smooth rough edges. This adjustment made all the difference in achieving a perfect, leak-free fit.
Cost, Time, And Value: What To Expect
Understanding the investment of time and money helps set realistic expectations for your project.
Typical Costs
| Component | Low-End Cost | High-End Cost |
|---|---|---|
| Drop-in sink | $70 | $500+ |
| Faucet | $40 | $400+ |
| Plumbing supplies | $20 | $80 |
| Professional installation | $150 | $500 |
DIY installation saves on labor but requires investing in tools and supplies if not already on hand.
Time Investment
- Preparation and removal: 1, 2 hours
- Measuring and cutting: 1 hour
- Faucet and supply line installation: 30, 60 minutes
- Final sink installation: 1, 2 hours
Most homeowners can complete the project in half a day with basic skills.
Value Added
A new drop-in sink can dramatically improve the appearance and utility of your kitchen, often adding resale value. Modern sinks with deep basins and integrated accessories are especially attractive to buyers.
Example: Home Sale Impact
According to the National Association of Realtors, minor kitchen upgrades (including new sinks) recoup over 80% of their cost at resale. For more information, see their Remodeling Impact Report (NAR Remodeling Impact Report).
Real-world Case Studies: Successes And Lessons Learned
Learning from others’ experiences can help you avoid common pitfalls and achieve the best results.
Case Study 1: Upgrading A Rental Property
A landlord replaced outdated, shallow sinks in three rental units with deep, stainless steel drop-ins. By choosing sinks with included templates and pre-drilled faucet holes, the total installation time per unit was just under three hours. Tenants reported fewer problems with splashing and improved kitchen appearance, leading to higher renewal rates.
Case Study 2: Repairing A Leaking Rim
A homeowner noticed water damage under the sink and discovered the previous installer had used the wrong sealant. After removing the sink, cleaning thoroughly, and resealing with silicone caulk, the leak stopped completely. This repair avoided costly countertop replacement and reinforced the importance of following manufacturer recommendations.
Case Study 3: Diyer’s First Installation
When I installed my first drop-in sink, I underestimated the need for two people, one to guide the sink from above and another to secure mounting clips below. After struggling with misaligned clips, I recruited a helper, and the process went smoothly.
This taught me the value of teamwork and careful planning, especially in tight spaces.
Frequently Asked Questions
What Is The Best Sealant For A Drop-in Kitchen Sink?
The ideal sealant depends on your sink and countertop materials. For stainless steel sinks, plumber’s putty is widely recommended for its pliability and water resistance. For composite granite, stone, or porous materials, use 100% silicone caulk to prevent staining and ensure a flexible, watertight seal. Always check your sink manufacturer’s guidelines for compatibility.
Can I Install A Drop-in Sink On A Solid Surface Countertop Like Granite Or Quartz?
Yes, drop-in sinks are compatible with most countertop materials, including granite and quartz. However, solid surfaces require careful cutting with diamond-tipped blades and proper support to avoid cracks. If you’re uncomfortable with these steps, consult a professional installer or a certified fabricator recommended by your countertop supplier.
How Do I Prevent Mold And Mildew Under The Sink Rim?
To prevent mold and mildew, ensure the rim is thoroughly sealed with the appropriate caulk or putty. After installation, periodically check under the rim for moisture or dark spots. Promptly clean any spills and allow the area to dry completely. Using a mildew-resistant caulk can also reduce the risk of future growth.
What Should I Do If My New Sink Is Slightly Smaller Than The Old Opening?
If your sink is smaller than the countertop cutout, you have a few options:
- Use a trim piece or sink rim extender, available at hardware stores, to cover the gap.
- Apply a bead of silicone caulk to fill minor gaps.
- If the gap is significant, consider replacing the countertop or consulting a professional for custom fitting.
Do I Need To Replace The Faucet And Plumbing When Installing A New Sink?
Not necessarily. If your existing faucet and plumbing are in good condition and compatible with the new sink’s hole configuration, you can reuse them. However, upgrading to new fixtures during installation saves time and ensures all components are leak-free and up to code. Modern supply lines and drains are easier to install and maintain.
A well-installed drop-in kitchen sink instantly elevates both the appearance and functionality of your kitchen. With careful preparation, attention to detail, and the insights from this guide, you can tackle this project confidently, achieving professional results while saving money. Remember to consult reputable resources like the Family Handyman for additional troubleshooting and advanced tips. Happy renovating!