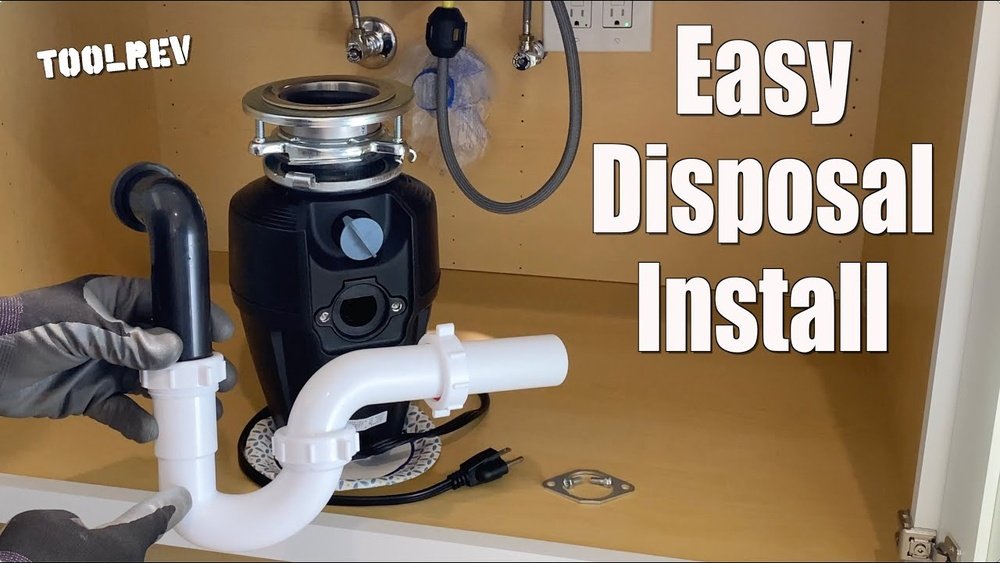
Upgrading your kitchen with a garbage disposal can transform daily clean-up, adding convenience and efficiency to your single sink setup. Whether you’re a passionate home cook or simply want to streamline waste management, installing a disposal is a practical DIY project that most homeowners can tackle confidently.
With the right tools, preparation, and guidance, you can dramatically reduce food waste and prevent clogs, making your kitchen more eco-friendly and easier to maintain.
However, while the process is straightforward, there are crucial steps and safety considerations that can make or break your installation. This article provides a comprehensive, step-by-step guide backed by expert advice and real-world examples. You’ll discover how to select the right disposal, prepare your workspace, execute the installation safely, and maintain your new appliance for years of trouble-free use.
We also include comparison tables, actionable tips, and answers to common questions, ensuring you’re equipped with everything needed to achieve a flawless result.
Key Takeaways
- Installing a garbage disposal in a single sink is a manageable DIY project for most homeowners.
- Choosing the right disposal unit depends on your sink setup, household needs, and budget.
- Proper preparation and adherence to safety guidelines are essential for a successful installation.
- Maintenance tips and troubleshooting steps help ensure long-term functionality and prevent clogs.
- Real-world examples illustrate key challenges and solutions in the installation process.

Credit: www.reddit.com
Understanding Garbage Disposals For Single Sinks
Garbage disposals are a staple in modern kitchens, making food waste disposal fast and hygienic. Before starting installation, it’s vital to understand the types of disposals, their benefits, and compatibility with a single sink setup.
Types Of Garbage Disposals
There are two primary types of garbage disposals:
- Continuous Feed: Operated by a wall switch, these units allow you to add waste while the disposal is running. They’re ideal for households with frequent food waste.
- Batch Feed: Activated by placing a stopper in the drain, these are safer for homes with children as they prevent operation unless covered.
Both types can be installed in a single sink, but continuous feed models are more common due to their ease of use.
Compatibility With Single Sinks
Single sinks often have limited space under the cabinet. When selecting a disposal, consider:
- Unit size: Compact models fit better in tight spaces.
- Horsepower: 1/2 HP to 1 HP is typically sufficient for most households.
- Mounting system: Quick-mount options simplify installation.
Some disposals are designed specifically for single sinks, featuring shorter bodies and easy-mount flanges.
Benefits Of Installing A Garbage Disposal
- Reduces food waste: Makes kitchen clean-up faster and more sustainable.
- Prevents clogs: Grinding waste prevents large particles from blocking drains.
- Improves hygiene: Eliminates lingering food scraps and odors.
Example: According to the EPA, food waste accounts for up to 22% of municipal solid waste in the U.S. Installing a garbage disposal helps divert this from landfills, contributing to environmental sustainability.
Selecting The Right Disposal
When choosing a unit, consider:
- Noise level: Newer models have sound insulation.
- Grinding stages: Multi-stage grinders break down tougher waste.
- Warranty: Look for units with at least a 2-year warranty.
| Feature | Continuous Feed | Batch Feed |
|---|---|---|
| Operation | Wall Switch | Drain Stopper |
| Safety | Moderate | High (Child-Proof) |
| Installation Complexity | Easy | Moderate |
| Common Usage | Frequent | Occasional |
Credit: www.homedepot.com
Preparing For Installation
Proper preparation is essential for a smooth and safe installation. This section covers everything from gathering tools to checking local regulations.
Tools And Materials Needed
Before you begin, assemble these tools:
- Screwdriver (flat and Phillips)
- Plumber’s putty
- Adjustable wrench
- Pliers
- Hammer
- Bucket and towels
- Electrical cord (if required)
- Garbage disposal unit
- Mounting hardware (included with unit)
- Pipe joint compound
Safety Precautions
- Turn off power at the circuit breaker before starting.
- Use gloves to protect your hands from sharp edges.
- Work in a well-lit area.
- Avoid water contact with electrical components.
Pro Tip: If your sink is already connected to a dishwasher, you may need to knock out a plug in the disposal’s inlet to ensure proper drainage.
Checking Local Codes And Regulations
Some municipalities require specific installation standards or permits. Always:
- Consult your local building department.
- Use an outlet with GFCI protection if needed.
- Ensure the disposal is compatible with your plumbing setup.
Removing The Existing Drain Assembly
If your sink has a standard drain or old disposal:
- Place a bucket under the sink to catch water.
- Loosen the slip nuts on the drainpipes and remove them.
- Unscrew the mounting assembly and clean the sink opening.
Example: In my experience, removing old plumber’s putty can be stubborn. Using a plastic scraper helps avoid scratching the sink surface.
Measuring Sink And Cabinet Space
Ensure the disposal fits comfortably:
- Measure the distance from sink drain to cabinet base.
- Check for clearance around pipes and other appliances.
If space is limited, opt for a compact disposal model.

Credit: www.youtube.com
Step-by-step Installation Guide
This section outlines the detailed process of installing a garbage disposal in a single sink, from mounting the unit to connecting electrical and plumbing.
Mounting The Disposal Flange
- Roll a bead of plumber’s putty and place it around the sink opening.
- Insert the flange and press firmly.
- Under the sink, attach the mounting ring and gasket, tightening screws evenly.
Pro Tip: Wipe away excess putty for a clean finish.
Attaching The Disposal Unit
- Align the disposal with the mounting ring.
- Turn the unit until it locks into place.
- Tighten screws to secure, but avoid over-tightening.
Connecting The Electrical Wiring
If your disposal comes with a cord:
- Plug it into a nearby outlet.
- Ensure the outlet is GFCI-protected.
If hardwiring:
- Remove the disposal’s access panel.
- Connect wires: Black to black, white to white, and ground to ground.
- Replace panel and secure connections.
Warning: If unsure about electrical work, consult a licensed electrician.
Connecting The Plumbing
- Attach the discharge tube to the disposal outlet.
- Connect the tube to the sink’s drain trap.
- If connected to a dishwasher, attach the dishwasher inlet hose.
| Step | Common Issue | Solution |
|---|---|---|
| Mounting Flange | Leakage | Reapply plumber’s putty, retighten screws |
| Electrical Wiring | Power failure | Check circuit breaker, wiring connections |
| Plumbing Hookup | Drain leaks | Use pipe joint compound, tighten slip nuts |
Testing The Installation
- Restore power at the circuit breaker.
- Run water and turn on the disposal.
- Check for leaks and listen for unusual noises.
Example: When I tested my own installation, running cold water while activating the disposal ensured smooth operation and prevented overheating.
Finalizing And Cleaning Up
- Tighten any loose connections.
- Remove debris from the cabinet area.
- Replace items stored under the sink.
Troubleshooting Common Issues
Even with careful installation, some issues may arise. This section covers typical problems and solutions for single sink garbage disposals.
Leak Detection And Repair
- Sink flange leaks: Caused by insufficient plumber’s putty. Reapply and tighten mounting screws.
- Drain pipe leaks: Ensure slip nuts are secure and use pipe joint compound.
For persistent leaks, check for cracks in the disposal body.
Electrical Problems
- No power: Verify the outlet and circuit breaker.
- Reset button tripped: Press the red reset button on the disposal base.
- Unusual noises: Check for foreign objects or loose mounting hardware.
If the disposal still won’t operate, consult the manufacturer’s troubleshooting guide.
Drainage Issues
- Slow draining: Indicates partial clog. Use a plunger or check the discharge tube.
- Dishwasher backup: Ensure the dishwasher inlet plug is removed.
For more complex blockages, refer to guides like How To Fix A Backed Up Kitchen Sink.
Disposal Jams
- Jammed blades: Turn off power, use a hex wrench in the disposal’s base to rotate and free the impellers.
- Foreign objects: Remove with pliers, never hands.
Example: A customer once reported a jam due to a spoon accidentally dropped. Removing it with pliers solved the issue without damaging the disposal.
When To Seek Professional Help
If you encounter:
- Persistent leaks
- Electrical faults
- Cracked sink or disposal body
Contact a licensed plumber or electrician. Improper repairs can lead to costly damage and safety hazards.
Maintaining Your Garbage Disposal
Proper care extends the life of your disposal and prevents odor and clogs. Follow these tips for optimal performance.
Routine Cleaning
- Run cold water for 30 seconds before and after use.
- Grind citrus peels to eliminate odors.
- Use a mild dish soap occasionally.
Avoid harsh chemicals, which can damage internal components.
Preventing Clogs
- Do not grind fibrous materials (e.g., celery, corn husks).
- Avoid large quantities of starchy foods.
- Run water during operation to flush particles.
For advanced tips, see How To Clear A Clogged Garbage Disposal.
Odor Control
- Grind ice cubes for cleaning blades.
- Use baking soda and vinegar monthly.
Example: In my experience, regular grinding of citrus peels keeps the disposal smelling fresh and prevents build-up.
Annual Inspection
- Check for leaks, loose connections, and worn parts.
- Tighten mounting screws as needed.
Pro Tip: Schedule inspection before holidays or large gatherings to prevent unexpected issues.
| Maintenance Task | Frequency | Benefit |
|---|---|---|
| Routine Cleaning | Weekly | Odor prevention |
| Clog Prevention | Every Use | Reduces blockages |
| Odor Control | Monthly | Freshens disposal |
| Inspection | Annually | Detects wear and leaks |
Real-world Examples And Case Studies
Examining real-life installation scenarios reveals common pitfalls and best practices. Here are three examples:
Example 1: Compact Disposal In Small Cabinet
A homeowner with limited cabinet space selected a compact 1/2 HP disposal. After measuring, they found only 13 inches of clearance. By choosing a unit with a short body and quick-mount system, installation was completed without rerouting plumbing.
Example 2: Upgrading An Older Sink
An older cast iron sink required extra effort to remove the original drain assembly. Using a plastic scraper and patience prevented damage. The new disposal’s stainless steel flange provided a secure, leak-free fit.
Example 3: Dishwasher Hookup Challenges
A household installing a disposal with a dishwasher had to knock out the inlet plug inside the disposal. Forgetting this step caused dishwasher water to back up. After consulting the manual and removing the plug, the system operated smoothly.
These cases highlight the importance of careful measurement, proper tool selection, and reading manufacturer instructions.
Comparing Popular Garbage Disposal Models
Choosing the right disposal involves balancing features, price, and reliability. The table below compares three popular models suitable for single sinks:
| Model | Horsepower | Size (Height) | Noise Level | Warranty | Price Range |
|---|---|---|---|---|---|
| InSinkErator Badger 5 | 1/2 HP | 11.5″ | Standard | 2 years | $90-$120 |
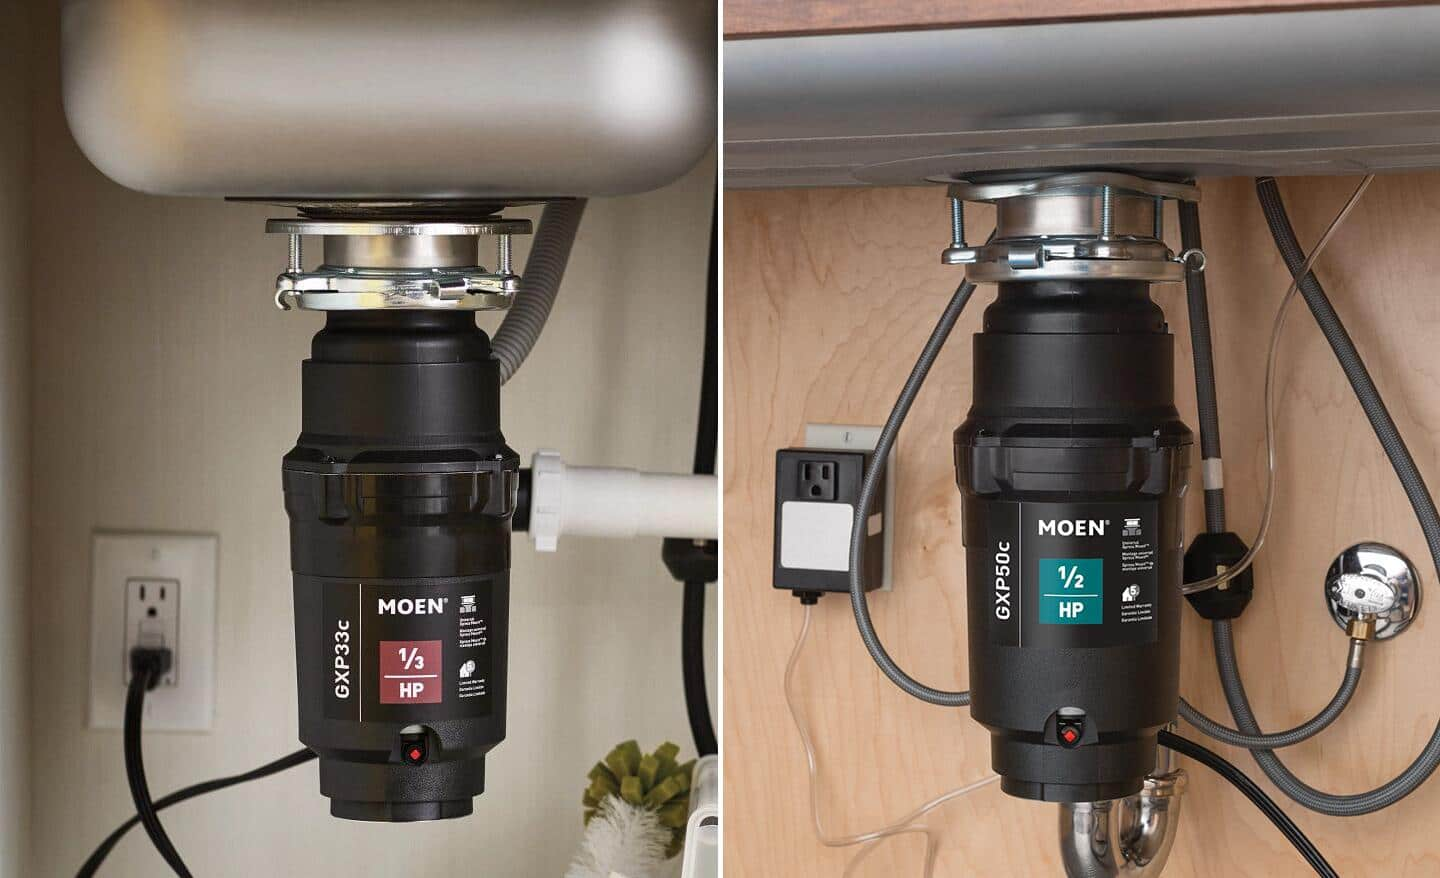
| Moen GX50C | 1/2 HP | 13″ | Low | 5 years | $100-$140 |
| Waste King L-1001 | 1/2 HP | 12.75″ | Low | 2 years | $70-$100 |
Each model offers reliable performance, but the Moen GX50C stands out for its quiet operation and extended warranty.
Frequently Asked Questions
What Type Of Garbage Disposal Is Best For A Single Sink?
For single sinks, a compact continuous feed disposal is typically preferred due to ease of use and space-saving design. Models with 1/2 HP are sufficient for most households. If safety is a concern, especially with small children, batch feed models offer added protection.
Can I Install A Garbage Disposal If My Sink Is Made Of Stainless Steel?
Yes, most modern disposals are compatible with stainless steel sinks. However, ensure the mounting flange is properly secured to prevent vibration and leaks. Stainless steel sinks may require additional support if they are thin or flexible.
Is Professional Installation Required, Or Can I Do It Myself?
DIY installation is feasible for most homeowners with basic tools and electrical knowledge. However, if your plumbing or electrical setup is complex, or if local regulations require, hiring a professional plumber or electrician is advised. Always consult local codes and manufacturer guidelines.
How Do I Prevent My Garbage Disposal From Clogging?
Prevent clogs by avoiding fibrous foods (such as celery), grinding small batches, and running cold water during use. Regular cleaning and maintenance also reduce the risk of blockages. For detailed guidance, see How To Clear A Clogged Kitchen Sink Drain.
Are There Any Eco-friendly Garbage Disposal Options?
Yes, some disposals are designed to be energy-efficient and compatible with septic systems. Look for units with multi-stage grinding and low water usage. For more information, visit Wikipedia’s Garbage Disposal Unit page.
Adding a garbage disposal to your single sink not only boosts kitchen convenience but also enhances sustainability and hygiene. With proper preparation, careful installation, and ongoing maintenance, you’ll enjoy reliable performance for years to come. For troubleshooting, repair, and maintenance tips, explore related guides such as How To Fix A Clogged Kitchen Sink and How To Fix Kitchen Sink Not Draining. Remember, safety and adherence to local regulations are paramount, consult professionals when in doubt, and enjoy your upgraded kitchen workspace.