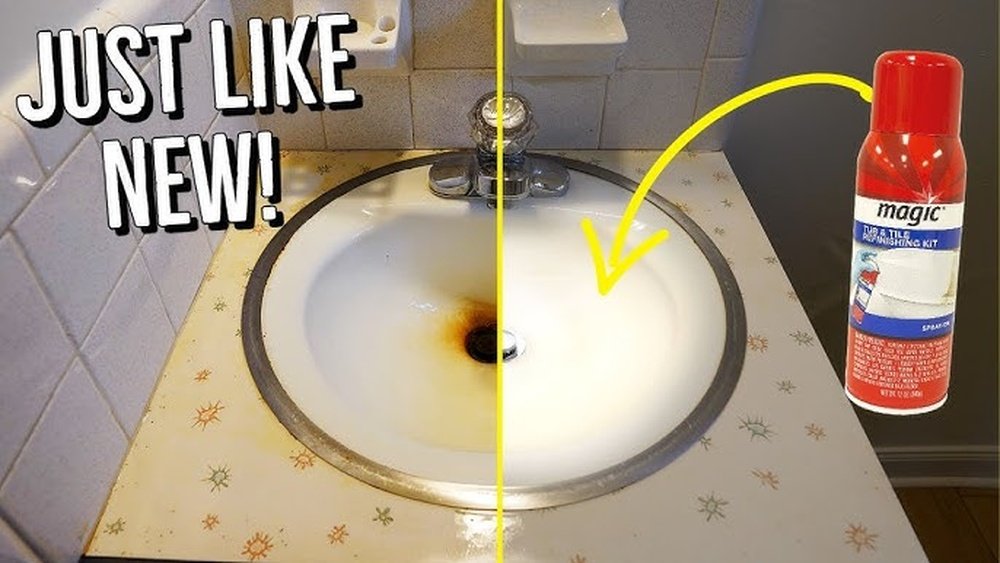
Restoring the shine and elegance of a worn or stained sink doesn’t always require a costly replacement. Re-enameling is a highly effective DIY or professional solution that can give new life to porcelain, cast iron, and steel sinks, transforming them from dull and damaged to glossy and fresh.
Many homeowners are surprised at how accessible and rewarding re-enameling can be, both in terms of cost and impact on the kitchen or bathroom’s overall appearance.
As sinks endure years of daily use, their enamel surfaces often develop chips, scratches, discoloration, or a rough texture that makes cleaning difficult. Rather than living with an unsightly fixture or investing in a full replacement, re-enameling provides a sustainable, budget-friendly alternative.
This comprehensive guide will walk you through every aspect of how to re-enamel a sink, from understanding the process and choosing the right materials, to step-by-step instructions, real-world examples, and tips for long-term care.
Key Takeaways
- Re-enameling can dramatically extend the lifespan of sinks, restoring appearance and functionality at a fraction of replacement cost.
- The process involves thorough cleaning, surface preparation, application of enamel coating, and careful curing for durable results.
- DIY kits are widely available, but professional services are recommended for severe damage or long-lasting finishes.
- Regular maintenance and proper care are essential to maximize the lifespan of a re-enameled sink.
- Understanding different enamel types and application methods helps ensure a successful outcome tailored to your needs.
Understanding Sink Enameling
What Is Enamel And Why Does It Matter?
Enamel is a glassy, protective coating fused onto metal (or sometimes ceramic) surfaces at high temperatures. Commonly found on cast iron and steel sinks, this layer is prized for its:
- Glossy finish
- Resistance to stains and scratches
- Ease of cleaning
- Hygienic properties
Over time, enamel can become chipped, etched, or discolored due to cleaning chemicals, dropped utensils, or age. Restoring the enamel renews the sink’s appearance and protective qualities.
Types Of Sinks Suitable For Re-enameling
Not all sinks are equally good candidates for re-enameling. The most common types include:
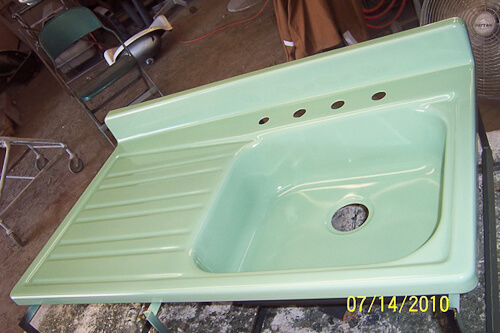
- Cast iron sinks: Heavy, durable, often found in vintage homes.
- Steel sinks: Lighter, common in mid-century and modern homes.
- Porcelain sinks: True porcelain (ceramic) sinks require a different approach but can often be refinished similarly.
Acrylic or composite sinks are generally not suitable for re-enameling, as the process relies on a strong bond with a metal base.
Common Causes Of Enamel Damage
Understanding what damages enamel helps you prevent future issues after refinishing. The main culprits include:
- Abrasive cleaners that scratch the surface
- Harsh chemicals (bleach, ammonia)
- Heavy impacts from dropped objects
- Prolonged standing water leading to mineral buildup
When To Re-enamel Vs. Replace
While re-enameling is effective for most surface-level damage, sinks with severe structural issues (large cracks, rust-through, or major warping) may need replacement. Compare the costs and benefits in the table below:
| Situation | Re-Enamel | Replace |
|---|---|---|
| Minor chips & scratches | ✔️ Recommended | Not necessary |
| Heavy staining/discoloration | ✔️ Effective | Optional |
| Rust/pitting (surface only) | ✔️ Possible | Consider if severe |
| Major cracks/structural damage | Not suitable | ✔️ Required |
| Desire to change color/style | Possible | ✔️ More options |

Credit: www.youtube.com
Preparing To Re-enamel Your Sink
Assessing Your Sink’s Condition
Start by inspecting the entire sink for:
- Chips, cracks, or worn areas
- Rust spots or pitting
- Stubborn stains
- Areas of rough or dull finish
Take photos or notes of problem areas for reference. If damage is deep or structural, replacement may be more cost-effective.
Gathering The Right Tools And Materials
For a standard DIY re-enameling project, you’ll need:
- Protective gear: Gloves, goggles, mask/respirator
- Cleaning supplies: Degreaser, non-abrasive scrubbing pads
- Sandpaper: 220 to 400 grit (wet/dry)
- Epoxy filler (for chips or cracks)
- Masking tape and plastic sheeting
- Enamel refinishing kit: Includes bonding agent and enamel coating
- Paintbrush or spray gun (depending on kit)
- Ventilation fan (for indoor work)
Pro Tip: Choose a high-quality refinishing kit designed specifically for sinks and bathtubs. Brands like Rust-Oleum and Ekopel are widely used and reviewed.
Safety Considerations
Enamel coatings and solvents often contain strong chemicals. Always:
- Work in a well-ventilated area
- Use a respirator if spraying
- Protect skin and eyes
- Keep pets and children away during application and curing
Removing And Prepping The Sink (optional)
For the best results, especially with drop-in or undermount sinks, remove the sink from the countertop. This allows full access and minimizes mess. If removal isn’t practical, use masking tape and plastic sheeting to protect surrounding surfaces.
For guidance on removing and reinstalling sinks, see How To Install A Drop-In Kitchen Sink.
Comparing Diy Vs. Professional Re-enameling
Deciding between doing it yourself and hiring a pro depends on:
| Factor | DIY | Professional |
|---|---|---|
| Cost | $50, $150 (kit and supplies) | $300, $700 (average) |
| Time | 6, 8 hours + curing | 2, 4 hours + curing |
| Durability | 3, 5 years (typical) | 5, 10 years (typical) |
| Skill required | Moderate (prep is key!) | Minimal (let the pros handle it) |
| Finish quality | Good (with care) | Excellent (spray equipment) |
If you value a perfect, factory-like finish, professional services are recommended, especially for high-value or heavily used sinks.
Credit: retrorenovation.com
Step-by-step Guide To Re-enameling A Sink
Step 1: Deep Cleaning And Degreasing
A spotless surface is essential for proper enamel adhesion. Clean the sink thoroughly with:
- Degreaser (e.g., trisodium phosphate)
- Non-abrasive scrub pads
- Rinse thoroughly and dry completely
Remove all soap scum, mineral deposits, and residue. Any oils or contaminants will prevent the new coating from bonding.
Step 2: Repairing Chips, Cracks, And Rust
- Use epoxy filler to patch chips or small cracks
- Apply according to manufacturer instructions
- Sand smooth with fine-grit sandpaper once cured
- For light rust, sand to bare metal and treat with a rust converter if needed
This step ensures a smooth, level base for the new enamel.
Step 3: Sanding And Surface Preparation
- Sand the entire sink with 220, 400 grit sandpaper
- Focus on roughing up the old enamel to provide “tooth” for the new coating
- Clean thoroughly to remove all dust
Pro Tip: In my experience, wet sanding produces a smoother result and keeps dust to a minimum.
Step 4: Masking Off Surrounding Areas
- Use painter’s tape to mask drain openings, faucets, and any areas not being refinished
- Cover countertops and cabinets with plastic sheeting
Proper masking prevents accidental overspray and keeps your workspace tidy.
Step 5: Applying The Bonding Agent
- Most kits include a bonding primer, apply this first to help the enamel adhere to the surface
- Allow to dry according to the kit instructions (typically 30, 60 minutes)
Step 6: Applying The Enamel Coating
- Stir or shake the enamel thoroughly
- Apply using a high-quality brush, roller, or spray gun (spraying yields the smoothest finish)
- Use long, even strokes to avoid brush marks
- Apply 2, 3 thin coats, allowing drying time between each
Pro Tip: If brushing, use a foam brush for minimal streaks. For best results, consider a spray kit.
Step 7: Curing And Reassembly
- Allow the enamel to cure for at least 24, 48 hours (see kit instructions)
- Avoid heavy use or placing objects in the sink during this time
- Reinstall the sink and reconnect plumbing if it was removed
For installation tips, see How To Install Kitchen Sink Plumbing.
Step 8: Final Inspection And Clean-up
- Remove masking tape and plastic sheeting carefully
- Inspect for missed spots or drips, minor imperfections can sometimes be sanded and touched up
- Clean up all materials and dispose of chemical waste safely
Credit: www.reddit.com
Choosing The Right Enamel Products
Types Of Enamel Kits
There are two main types of enamel refinishing products:
- Epoxy-based kits: Easy for DIYers, widely available, durable for 3, 5 years
- Acrylic urethane sprays: Used by professionals, extremely hard and glossy, last 5, 10 years
Comparing Top Brands
When selecting a kit, compare durability, ease of use, and finish quality:
| Brand | Type | Finish Quality | DIY-Friendly | Average Lifespan |
|---|---|---|---|---|
| Rust-Oleum Tub & Tile | Epoxy | Good | ✔️ | 3, 5 years |
| Ekopel 2K | Epoxy | Excellent | ✔️ | 5, 8 years |
| Homax Tough As Tile | Epoxy | Good | ✔️ | 3, 5 years |
| Custom (Pro only) | Acrylic Urethane | Outstanding | ❌ | 7, 10 years |
Color And Finish Options
While classic white is the most popular, many kits offer off-white, almond, and pastel options. Professional refinishing services may offer custom colors and high-gloss or satin finishes.
Where To Buy
DIY kits are available at major hardware stores and online retailers. For professional services, search for “sink refinishing” or “bathtub refinishing” specialists in your area. Always check reviews and request before/after photos.
Real-world Examples And Case Studies
Example 1: Vintage Cast Iron Sink Restoration
A homeowner with a 1930s cast iron sink faced extensive enamel wear, rust spots, and deep staining. After researching options, they chose a professional re-enameling service for about $450. The result was a mirror-like finish that restored the sink’s historical charm, demonstrating that even heavily damaged sinks can be saved with the right expertise.
Example 2: Diy Epoxy Re-enameling On A Budget
A renter wanted to refresh a yellowed steel bathroom sink without replacing it. Using a $75 Rust-Oleum kit, they followed the manufacturer’s instructions, emphasizing careful surface prep and multiple thin coats. The process took a weekend, and the result was a clean, modern look that held up well for over three years with gentle cleaning.
Example 3: Commercial Application In A Rental Property
A property manager needed to update several sinks in a rental unit quickly and affordably. They hired a professional refinisher for all sinks, achieving a uniform, durable finish in one day. The improved appearance helped attract tenants while keeping renovation costs low.
Example 4: Addressing Minor Chipping With Spot Repair
A homeowner with a small chip near the drain used a porcelain repair kit with color-matched epoxy. The spot repair blended seamlessly, preventing rust and extending the sink’s life by several years.
Caring For Your Re-enameled Sink
Proper Cleaning Techniques
To maximize the lifespan of your newly coated sink:
- Use mild, non-abrasive cleaners
- Avoid steel wool, scouring pads, or gritty powders
- Rinse after each use to prevent mineral buildup
- Dry with a soft cloth to maintain shine
Preventing Future Damage
- Don’t drop heavy objects into the sink
- Use a rubber mat or dish rack to cushion impacts
- Avoid leaving acidic foods or harsh chemicals in contact with the enamel
Handling Minor Scratches And Touch-ups
Small scratches or chips can be repaired with touch-up kits available at hardware stores. Follow the product instructions, and always clean and dry the area thoroughly before applying the repair compound.
When To Reapply Or Refresh Enamel
Most DIY coatings last 3, 5 years with proper care; professional finishes can last up to a decade. If you notice dullness, staining, or chips returning, it may be time to repeat the process or consult a professional.
Common Mistakes To Avoid
Inadequate Surface Preparation
The number one cause of failed re-enameling is insufficient cleaning or sanding. Any grease, soap, or dust will prevent proper adhesion, leading to peeling or bubbling.
Rushing Drying And Curing
Impatience can ruin your hard work. Always allow full drying and curing between coats and before using the sink. Cutting corners leads to soft finishes and premature wear.
Ignoring Safety Guidelines
Many enamel products contain strong solvents. Failing to use proper ventilation and protection can cause health issues or fire hazards.
Using The Wrong Products
Regular paint or non-specialized coatings won’t bond to enamel and will quickly chip or peel. Always use kits designed for sinks or tubs.
Skipping Repairs For Chips Or Cracks
Applying enamel directly over unrepaired chips or rust traps moisture and leads to bubbling or future rusting. Always repair the surface first.
Comparing Re-enameling With Other Restoration Methods
When deciding how to update a worn sink, consider the pros and cons of re-enameling versus other options:
| Method | Cost | Durability | Appearance | DIY-Friendly | Time Required |
|---|---|---|---|---|---|
| Re-enameling | Low, Medium | 3, 10 years | Excellent (if done well) | ✔️ | 1, 2 days |
| Replacement | High | 10+ years | Like new | ❌ (usually) | 1, 2 days + plumbing |
| Spot repair | Very low | 1, 2 years | Good for small areas | ✔️ | 1, 2 hours |
| Cover/Insert | Medium | 5, 8 years | Varies | ✔️ | 1 day |
For more on sink replacement and installation, see How To Install A New Kitchen Sink.
Frequently Asked Questions
How Long Does Re-enameled Sink Coating Last Compared To A New Sink?
A properly applied DIY re-enamel can last 3, 5 years, while professional applications may extend up to 10 years. In comparison, a brand new sink can last 15, 30 years. The longevity of a re-enameled surface depends heavily on surface preparation, quality of materials, and ongoing care.
Can I Use My Kitchen Sink Immediately After Re-enameling?
No. The curing process is critical for durability. Most kits recommend waiting at least 24, 48 hours before using the sink for water, and up to 7 days before placing heavy objects or using abrasive cleaners. Early use can cause dents or marks in the not-yet-hardened finish.
Is Re-enameling Safe For Sinks That Handle Food Preparation?
Yes, once fully cured, most sink enamel coatings are non-toxic and food-safe. However, always check the product’s safety data sheet. Avoid direct food contact until the surface is fully cured and odor-free, and never use a damaged or flaking surface for food prep.
Can I Change The Color Of My Sink When Re-enameling?
Absolutely. Most re-enameling kits and professional services offer a range of colors beyond classic white, including almond, bisque, and custom shades. Note that some colors may require additional coats for full coverage or a professional-grade finish.
What Should I Do If My Sink Starts Peeling Or Bubbling After Re-enameling?
Peeling or bubbling usually indicates poor surface prep or moisture during application. For localized issues, sand the area, clean thoroughly, and reapply enamel following the instructions. For widespread problems, it may be best to strip the surface and start over, or consult a professional for advice.
Re-enameling a sink is a cost-effective, eco-friendly way to restore beauty and function to your kitchen or bathroom. Whether you tackle the project yourself or hire a professional, attention to detail in preparation and curing is the key to lasting results. By understanding the process, choosing the right products, and caring for your new finish, you can enjoy a gleaming sink for years to come, without the expense and hassle of full replacement. For more on related projects, explore guides like How To Install A Sink Sprayer or Enamel Paint, Wikipedia for further reading.