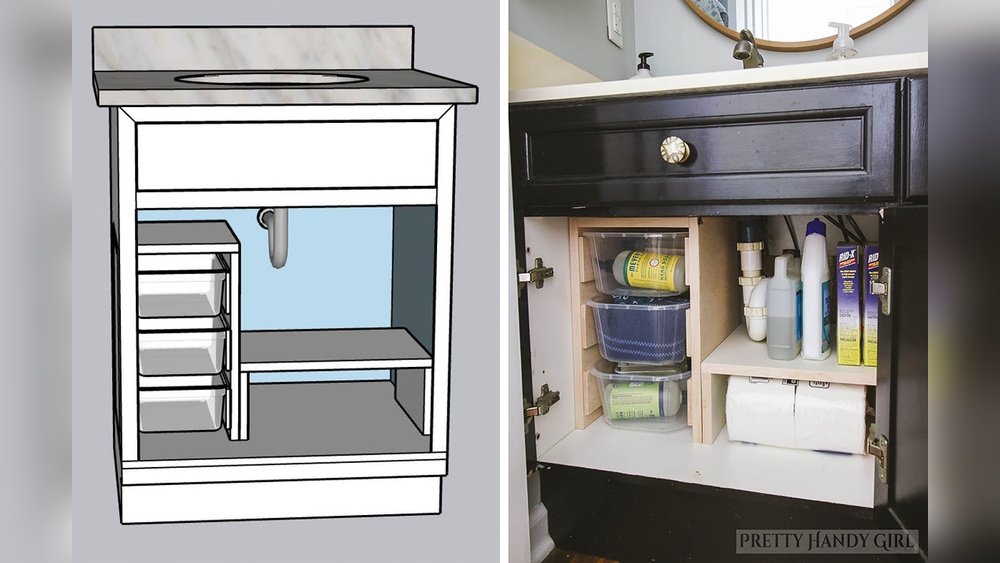
Building an under-sink cabinet is one of the most rewarding DIY projects you can tackle in your kitchen or bathroom. Whether your goal is to maximize storage, hide plumbing, or create a cleaner look, a custom-built under-sink cabinet adds both function and style to your space.
Unlike pre-fabricated options, a tailored cabinet ensures you make the most of every inch, accommodating pipes, waste disposals, and cleaning supplies with ease.
This guide will walk you through every step of the process, from planning and measuring to selecting materials, constructing, and finishing your cabinet. You’ll learn the most efficient techniques, common pitfalls to avoid, and how to ensure your finished cabinet stands the test of time.
Drawing on firsthand experience and real-world examples, the article also highlights relevant resources and expert tips to help both novice and experienced DIYers achieve professional results.
Key Takeaways
- Planning and accurate measurements are critical for a successful under-sink cabinet build.
- Material selection directly impacts durability, moisture resistance, and overall appearance.
- Custom cabinet design allows you to accommodate plumbing, disposals, and maximize storage.
- Step-by-step construction ensures structural integrity and a seamless fit.
- Finishing techniques such as sealing and hardware installation improve longevity and style.
- Real-world examples and expert insights provide actionable guidance for DIYers.
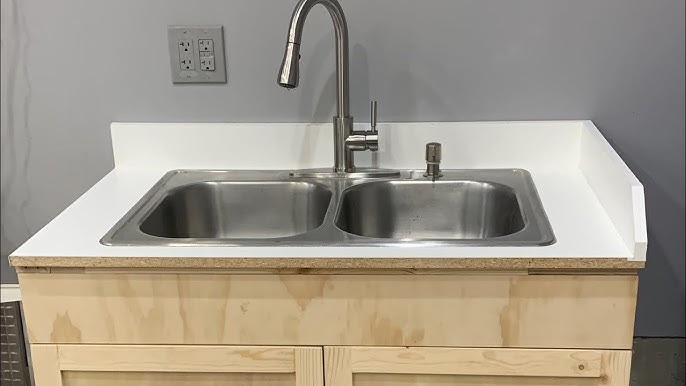
Credit: www.youtube.com
Understanding The Purpose And Benefits Of An Under-sink Cabinet
An under-sink cabinet is more than just a storage solution; it is a functional asset that enhances your kitchen or bathroom’s organization and aesthetics. Properly constructed, it keeps cleaning supplies, waste bins, and plumbing out of sight, making your space feel less cluttered and more hygienic.
Why Build Instead Of Buy?
While pre-made options are widely available, they rarely fit non-standard or older homes where plumbing configurations vary. Custom-built cabinets allow for precise cutouts around pipes, the addition of shelves or pull-out bins, and selection of materials that match existing décor. This flexibility ensures you maximize storage and functionality.
Key Features Of A High-quality Under-sink Cabinet
- Moisture resistance: Essential for longevity, especially in kitchens and bathrooms.
- Custom fit: Designed to work around plumbing obstacles.
- Adjustable storage: Shelves or organizers tailored to your needs.
- Easy access: Doors or drawers that open fully, even in tight spaces.
Real-world Example
When renovating a historic home, I found that off-the-shelf cabinets left large gaps around the pipes and wasted valuable space. Building a custom cabinet allowed me to design a snug fit, incorporate a pull-out trash bin, and select a water-resistant finish that has held up for years.
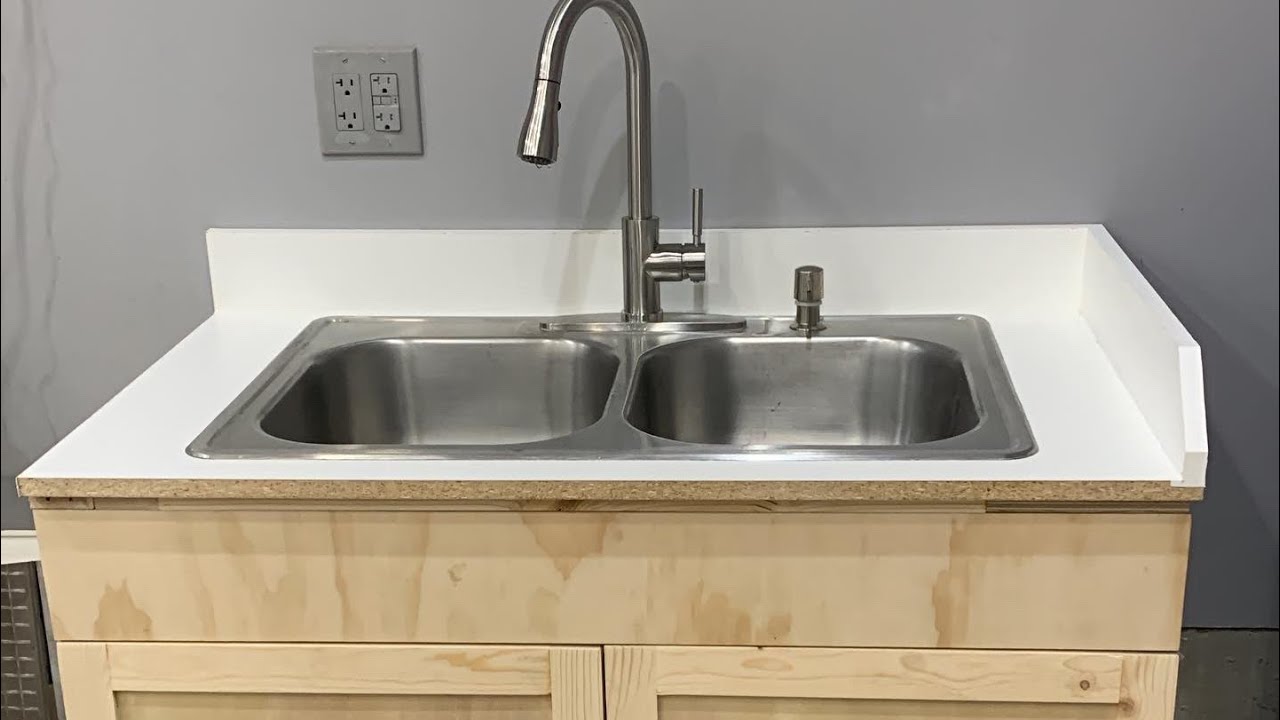
Credit: www.youtube.com
Planning And Designing Your Under-sink Cabinet
A successful cabinet project starts with careful planning and detailed measurements. This section covers how to assess your space, design a functional layout, and prepare for construction.
Measuring Your Space
Accurate measurements are the foundation of a well-fitting cabinet. Use a tape measure to record:
- Width and depth of the available space beneath your sink
- Height from floor to underside of sink or countertop
- Plumbing locations: Mark the position and size of drain pipes, water lines, and disposals
Pro Tip: Measure twice, cut once. Even a small error can lead to poor fit and wasted materials.
Designing For Functionality
Think about how you’ll use the cabinet:
- Do you need a pull-out drawer for trash or recycling?
- Will you store cleaning supplies, pots, or pans?
- Should the cabinet include adjustable shelves or a fixed divider?
Sketch your design or use free online tools to visualize the layout. For inspiration, explore resources like Family Handyman.
Planning For Plumbing Obstacles
Under-sink plumbing often requires creative solutions. Plan for:
- Cut-outs in the back or bottom panel to fit around pipes
- Removable panels for easy access to plumbing repairs
- Waterproof lining beneath the sink bowl to protect wood from leaks
Example: Adapting To A Garbage Disposal
In one kitchen remodel, I had to design the cabinet around a bulky garbage disposal and two water lines. By adding a removable back panel and shifting shelving to one side, I maintained ample storage without sacrificing accessibility.

Credit: www.youtube.com
Selecting Materials And Tools For Durability
Material selection is crucial for an under-sink environment, which is prone to moisture and potential leaks. This section compares material options, outlines essential tools, and explains hardware choices for a long-lasting build.
Comparing Cabinet Materials
| Material | Pros | Cons | Best For |
|---|---|---|---|
| Plywood | Strong, moisture-resistant, easy to cut | More expensive than MDF | Most under-sink cabinets |
| MDF (Medium Density Fiberboard) | Affordable, smooth finish | Susceptible to water damage | Low-moisture areas |
| Particleboard | Low cost | Weak, swells with moisture | Temporary solutions |
| Solid Wood | High-end appearance, durable | Costly, may warp if not sealed | Premium kitchens |
Pro Tip: For most projects, ¾-inch plywood offers the best balance of strength, stability, and moisture resistance.
Essential Tools For The Job
- Circular saw or table saw: For cutting panels to size
- Drill/driver: For assembling frames and attaching hardware
- Jigsaw: For making cutouts around pipes
- Tape measure and square: For accurate measurements and layout
- Clamps: To hold pieces steady during assembly
- Sander: For smoothing edges and surfaces
Choosing Hardware
Select hardware that matches your room’s style and stands up to frequent use:
- Cabinet hinges: Soft-close options reduce noise and wear
- Handles or knobs: Stainless steel or brass for durability
- Adjustable shelf supports: Provide flexible storage
Moisture Protection
Use a waterproof sealant or paint on all interior surfaces, focusing on the cabinet floor and any areas near plumbing. Consider lining the bottom with a water-resistant mat for extra protection.
Step-by-step Construction Process
Building your under-sink cabinet can be broken down into manageable steps: cutting materials, assembling the frame, creating cutouts for plumbing, and installing shelves and doors. Each step requires attention to detail for a professional finish.
Cutting And Preparing The Panels
- Transfer measurements: Mark all panel dimensions on your plywood.
- Cut panels: Use a circular or table saw for straight edges.
- Sand edges: Smooth all cut edges to prevent splinters and ensure tight joints.
- Mark plumbing cutouts: Draw outlines for pipe access on the back or bottom panels.
Example: When I built a cabinet for a double kitchen sink, I had to carefully coordinate the cutouts for two drains and a water supply line. Using a jigsaw with a fine blade ensured clean, accurate openings.
Assembling The Cabinet Frame
- Dry fit: Arrange all panels to check for proper fit.
- Assemble base and sides: Use wood glue and screws for strong joints.
- Attach back panel: Secure with screws, leaving space for plumbing cutouts.
- Install bottom panel: Set slightly above floor level for easier cleaning.
Pro Tip: Use corner clamps to keep panels square during assembly.
Creating Plumbing Cutouts
- Drill starter holes at the corners of your cutout area.
- Use a jigsaw to follow your cut lines.
- Test fit: Slide the cabinet into place and check alignment with pipes.
If needed, trim the cutouts for a perfect fit. For more on integrating sink plumbing, see how to install kitchen sink plumbing.
Installing Shelves And Dividers
- Measure clearances: Avoid interfering with pipes or disposals.
- Attach supports: Use shelf pins or cleats for adjustable shelves.
- Install shelves: Cut notches or holes as needed for pipe clearance.
Mounting Doors And Hardware
- Install hinges: Mark and pre-drill holes for accurate alignment.
- Hang doors: Adjust for even gaps and smooth operation.
- Attach handles: Center for a balanced look.
For sink cutouts, refer to the guide on how to install a drop-in kitchen sink.
Customizing Features And Advanced Options
Once the basic cabinet is built, you can add advanced features to boost functionality and style. This section explores popular customization options and their installation techniques.
Adding Pull-out Drawers Or Trash Bins
Pull-out systems maximize accessibility, especially in deep cabinets. You can purchase ready-made pull-out trash bins or build custom drawers.
- Install drawer slides: Attach to the cabinet sides and drawer box.
- Fit the bin or drawer: Ensure smooth operation and clearance around pipes.
- Secure front panel: Align with cabinet doors for a seamless look.
Integrating Adjustable Shelving
Adjustable shelves accommodate tall bottles or cleaning supplies. Use shelf pin holes spaced 1 inch apart for maximum flexibility.
Example: In my own kitchen, adjustable shelves allowed me to reconfigure storage as my needs changed, fitting everything from dish soap to a small fire extinguisher.
Incorporating Removable Panels
Removable back or side panels make it easier to access plumbing for repairs or upgrades.
- Use screws instead of glue for easy removal.
- Label panels for quick reinstallation.
Waterproofing And Lining
Apply a high-quality polyurethane or marine-grade varnish to all interior surfaces. For additional moisture control, add a vinyl or silicone liner to the cabinet floor.
Warning: Skipping waterproofing can lead to swelling, warping, and mold growth.
Table: Common Cabinet Upgrades And Benefits
| Upgrade | Benefit | Estimated Cost |
|---|---|---|
| Pull-out trash bin | Easy waste access, hides odors | $50, $120 |
| Adjustable shelves | Custom storage for various items | $15, $40 |
| Waterproof lining | Protects cabinet from leaks | $10, $30 |
| Soft-close hinges | Quieter, longer-lasting doors | $20, $40 |
Finishing, Painting, And Installing The Cabinet
The finishing stage determines the cabinet’s appearance and durability. Careful sanding, painting, and sealing, followed by precise installation, ensure a professional result.
Sanding And Surface Prep
- Sand all surfaces with 120, 220 grit paper for a smooth finish.
- Fill any gaps or holes with wood filler; sand flush after drying.
- Wipe clean with a tack cloth to remove dust.
Painting Or Staining
Choose a finish that matches your room’s style and protects against moisture:
- Primer: Apply a stain-blocking primer to raw wood or MDF.
- Paint: Use high-quality, water-resistant enamel for kitchens and baths.
- Stain: For natural wood, use oil-based stains followed by clear polyurethane.
Pro Tip: Paint or stain panels before final assembly for easier, more even coverage.
Sealing And Moisture Protection
- Apply two to three coats of polyurethane or a marine-grade sealant.
- Focus on edges and cutouts where water is most likely to seep in.
Installing The Cabinet
- Test fit: Slide the cabinet into place under the sink.
- Secure to wall studs: Use long screws through the cabinet back or mounting rails.
- Check for level: Adjust with shims if necessary.
- Reconnect plumbing: Ensure all connections are tight and leak-free.
For a comprehensive look at sink installations, see how to install a new kitchen sink.
Attaching Doors And Hardware
- Reinstall doors: Adjust hinges for even gaps.
- Attach hardware: Handles or knobs should be securely fastened and aligned.
Example: When building cabinets for a rental property, I opted for white enamel paint and brushed nickel hardware for a clean, modern look that’s easy for tenants to maintain.
Real-world Case Studies: Successes And Lessons Learned
Learning from others’ experiences can help you avoid common pitfalls and achieve better results. Here are two real-world case studies that highlight different challenges and solutions.
Case Study 1: Fitting A Cabinet Around Complex Plumbing
Janet, a homeowner in Seattle, wanted to replace an outdated under-sink cabinet but faced a maze of pipes and a water filter system. By carefully measuring each obstacle and creating detailed templates for cutouts, she built a cabinet with a removable back panel and a waterproof mat.
The project took a weekend and cost under $200, saving her hundreds compared to a custom cabinet shop.
Case Study 2: Maximizing Storage In A Small Bathroom
Eric, a DIY enthusiast, tackled a cramped bathroom with minimal storage. He designed a narrow under-sink cabinet with dual pull-out trays and a tip-out tray for sponges. Using birch plywood and water-based polyurethane, he created a durable, stylish solution. His favorite feature: a magnetic latch that keeps cleaning supplies secure, even with kids in the house.
Data Table: Diy Vs. Professional Cabinet Installation
| Aspect | DIY Build | Professional Install |
|---|---|---|
| Cost | $150, $350 (materials only) | $500, $1200 (materials & labor) |
| Customization | Fully customizable | Limited by stock options |
| Time Required | 1, 3 days | 4, 8 hours |
| Skill Level | Intermediate DIY | Professional carpenter |
| Warranty | None (unless using kits) | Often included |
Maintenance And Long-term Care
Even the best-built under-sink cabinets require periodic maintenance to stay in top condition. Preventing moisture damage and addressing minor issues early can dramatically extend the life of your cabinet.
Regular Inspection
- Check for leaks: Inspect plumbing connections monthly.
- Look for swelling or discoloration: Signs of water damage should be addressed immediately.
- Tighten hardware: Hinges and handles can loosen with use.
Cleaning Best Practices
- Use mild cleaners: Avoid harsh chemicals that can damage finishes.
- Wipe spills promptly: Especially on the cabinet floor and near plumbing cutouts.
- Ventilate: Leave doors open after a leak to speed drying and prevent mold.
Repairing Minor Damage
- Touch up paint or sealant if scratches or chips appear.
- Replace liners if they become stained or torn.
- Re-level shelves if they sag or shift.
When To Replace
If you notice persistent mold, severe swelling, or structural failure, it’s time to consider a replacement. The good news is that your custom cabinet design can be reused or adapted for a new installation.
Frequently Asked Questions
What Type Of Wood Is Best For An Under-sink Cabinet?
Plywood is generally the best choice due to its strength, stability, and moisture resistance. Unlike particleboard or MDF, plywood resists swelling and warping when exposed to humidity. For premium projects, marine-grade plywood offers even greater water resistance, though at a higher cost.
How Do I Protect My Cabinet From Water Damage?
Applying a waterproof sealant such as polyurethane or marine varnish is essential. Adding a vinyl liner to the cabinet floor and ensuring all plumbing is leak-free further protects your investment. Consider installing a leak detector under the sink for early warning of potential problems.
Can I Retrofit A Pull-out Trash Bin Into An Existing Cabinet?
Yes, many pull-out trash bin kits are designed for retrofitting into standard cabinets. Measure your available space carefully, select a model that fits around plumbing, and follow the manufacturer’s instructions for installation. Some kits may require minor modifications to the cabinet floor or sides.
What’s The Difference Between Face-frame And Frameless Cabinet Construction?
Face-frame cabinets have a solid wood frame attached to the front, making them sturdier and easier to align doors. Frameless cabinets (European style) offer more interior space and a sleeker look but may require thicker panels for stability. The choice depends on your preference and skill level.
How Do I Ensure Proper Ventilation Inside My Under-sink Cabinet?
Good ventilation prevents moisture buildup and mold. Drill ventilation holes in the cabinet sides or back, or install a small vent grille. Regularly leave doors open after cleaning or if a leak occurs, and avoid overcrowding the cabinet so air can circulate freely.
Building an under-sink cabinet is a smart way to upgrade your home’s function and style. With careful planning, quality materials, and attention to detail, you can create a custom solution that fits your space perfectly and stands up to daily use. Whether you’re a seasoned DIYer or a first-timer, following these steps will help you achieve a professional result. For related projects, check out resources on installing a double kitchen sink and how to install a garbage disposal. For further reading, explore expert advice at This Old House.
With your new under-sink cabinet in place, you’ll enjoy a tidier, more efficient space for years to come.