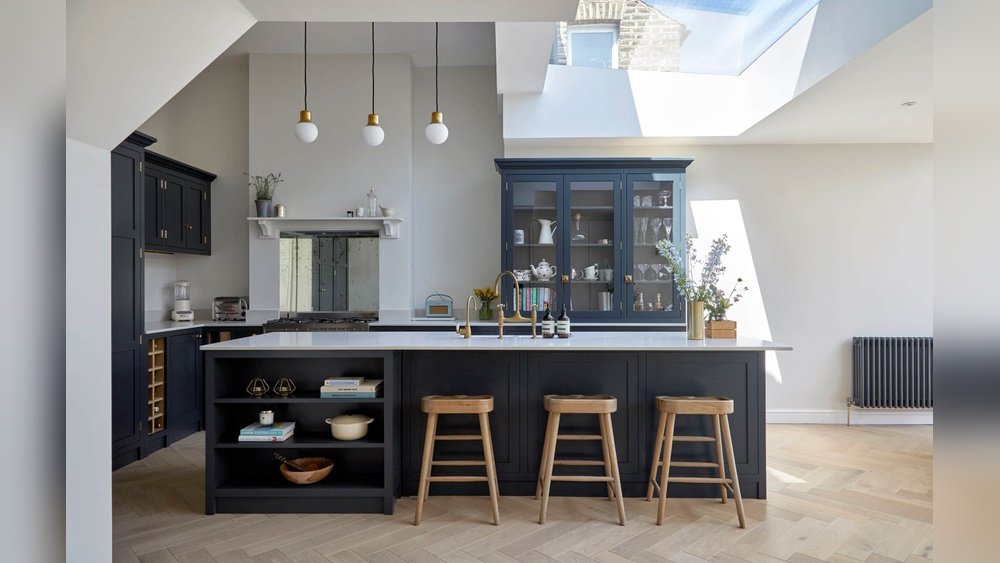
A well-designed kitchen island with a sink can dramatically enhance both the functionality and aesthetics of your kitchen. Whether you’re seeking more prep space, convenient clean-up, or a central hub for family gatherings, integrating a sink into your island transforms it from simple storage to a multi-purpose powerhouse.
With the trend toward open-plan living, homeowners increasingly prioritize islands with sinks as a practical solution for seamless workflow and social interaction.
But building a kitchen island with a sink involves more than just cabinetry and plumbing. You need to consider structural support, water supply, drainage, electrical connections, ventilation, and compliance with building codes. This comprehensive guide equips you with step-by-step strategies, expert tips, real-world examples, and actionable data to help you create a kitchen island that elevates your home and lifestyle.
Key Takeaways
- Kitchen islands with sinks improve workflow, add value, and boost kitchen versatility.
- Careful planning and design are crucial for durability, function, and code compliance.
- Installation requires plumbing, electrical, and structural expertise, professional help may be needed.
- Materials, sink type, and layout directly impact cost and performance.
- Real-world case studies illustrate common challenges and solutions.
- Proper maintenance ensures longevity and maximizes investment.

Credit: www.youtube.com
Planning Your Kitchen Island With Sink
Assessing Your Kitchen Layout
Before building, evaluate your kitchen’s size, shape, and traffic patterns. Islands with sinks require ample space for plumbing and comfortable movement. The National Kitchen & Bath Association (NKBA) recommends at least 42 inches of clearance between the island and surrounding countertops for optimal flow.
- Measure your available space.
- Sketch your current layout and mark potential island locations.
- Consider proximity to appliances, especially the dishwasher, refrigerator, and stove.
Example: In a 12×14-foot kitchen, placing the island centrally allows efficient access to all key zones.
Determining Island Size And Shape
The dimensions of your island should balance function and aesthetics. Common sizes range from 4×2 feet (for small kitchens) to 8×4 feet (for larger spaces). Shapes include rectangular, square, L-shaped, or custom designs.
| Island Size | Recommended Kitchen Size | Sink Compatibility |
|---|---|---|
| 4×2 ft | 10×10 ft | Single bowl |
| 6×3 ft | 12×12 ft | Double bowl |
| 8×4 ft | 14×16 ft | Farmhouse/large sink |
Choosing The Right Sink
Island sinks come in various types:
- Single-bowl: Ideal for prepping or bar sinks.
- Double-bowl: Perfect for multitasking and larger families.
- Farmhouse: Adds style, requires more space.
Consider the sink’s material, depth, and compatibility with accessories like sprayers, soap dispensers, and garbage disposals. For installation guides, see How To Install A Drop-In Kitchen Sink and How To Install A Double Kitchen Sink.
Budgeting And Cost Considerations
Building a kitchen island with a sink is an investment. Costs depend on materials, plumbing complexity, electrical work, and labor. According to Houzz, average costs range from $3,000 to $10,000+ depending on customization.
- Cabinetry: $1,500, $4,500
- Sink and faucet: $200, $1,200
- Plumbing: $800, $2,500
- Countertop: $600, $3,000
- Electrical: $300, $1,000
Pro Tip: Always allocate 10, 20% contingency for unexpected expenses.

Credit: www.talgomath.com
Designing Your Kitchen Island For Functionality And Style
Integrating Appliances And Storage
A well-designed island seamlessly incorporates appliances, storage, and seating.
- Add dishwashers, microwaves, or beverage fridges.
- Include deep drawers, pull-out trays, and custom cabinetry.
- Allocate space for recycling and trash bins.
Example: In my experience, integrating a dishwasher next to the sink reduces mess and speeds up clean-up.
Selecting Countertop Materials
Countertops must withstand water, heat, and daily wear. Popular options include:
- Quartz: Durable, low maintenance, available in many colors.
- Granite: Natural, elegant, requires sealing.
- Solid Surface: Seamless integration, easy to repair.
- Butcher Block: Warm, ideal for prep, needs regular oiling.
| Material | Durability | Maintenance | Cost (per sq ft) |
|---|---|---|---|
| Quartz | High | Low | $60, $120 |
| Granite | High | Medium | $50, $100 |
| Solid Surface | Medium | Low | $35, $85 |
| Butcher Block | Medium | High | $40, $100 |
Lighting And Ventilation
Adequate lighting is essential for safety and ambiance. Pendant lights, recessed fixtures, and under-cabinet LEDs are popular choices. For islands with cooktops, ensure proper ventilation via range hoods or downdraft systems.
- Use dimmers for flexible lighting.
- Position fixtures to minimize shadows.
Style And Finish Options
Your island should complement your kitchen’s design. Choose finishes, colors, and hardware that match or contrast your existing decor.
- Painted or stained cabinetry
- Brushed nickel or matte black hardware
- Water-resistant finishes
Example: A navy island with brass hardware creates a stunning focal point in a white kitchen.
Preparing For Construction: Permits, Codes, And Utilities
Navigating Permits And Regulations
Building a kitchen island with a sink requires compliance with local building codes. Permits typically cover plumbing, electrical, and structural changes.
- Contact your local building department for requirements.
- Submit detailed plans for review.
- Arrange inspections for plumbing and electrical rough-ins.
Warning: Unauthorized work can result in fines or forced removal.
Plumbing And Electrical Planning
Proper planning prevents costly mistakes. Sinks need hot and cold water supply lines, drains, and vents. Outlets should be GFCI-protected for safety.
- Map plumbing routes from the nearest supply.
- Plan for drain slope (1/4 inch per foot is standard).
- Allocate space for electrical outlets and switches.
For guidance, see How To Install Kitchen Sink Plumbing.
Structural Reinforcement
Islands must support heavy countertops, sinks, and appliances. Reinforce floors if needed, especially for stone surfaces.
- Use 2×4 or 2×6 framing for cabinetry.
- Secure cabinets to floor joists.
Example: In a recent remodel, extra blocking was added beneath the subfloor to safely support a 400-pound granite countertop.
Utility Relocation Challenges
Running water and drains to the island may require trenching through concrete or rerouting lines. Electrical wires must be concealed and protected.
- Consult licensed professionals for complex tasks.
- Plan for minimal disruption to existing flooring.

Credit: www.youtube.com
Building The Kitchen Island: Step-by-step Process
Framing And Cabinet Installation
- Mark the island footprint and confirm level.
- Assemble base cabinets and custom framing.
- Secure cabinets to the floor and each other.
- Install plywood support for countertops.
Pro Tip: Use shims for precise leveling to prevent countertop cracks.
Plumbing Installation
- Run supply lines (PEX or copper) from the nearest junction.
- Install drain pipes and venting according to code.
- Test for leaks before closing up cabinetry.
For sink installation details, see How To Install A New Kitchen Sink and How To Install A Kitchen Sink Faucet.
Electrical Wiring
- Install GFCI outlets as required.
- Run circuits for appliances and lighting.
- Connect switches for pendant or under-cabinet lights.
Example: Many islands require at least two outlets to meet code.
Sink And Fixture Placement
- Cut countertop openings for the sink and faucet.
- Mount sink using clips or undermount brackets.
- Install faucet, sprayer, soap dispenser, and garbage disposal.
For accessory guides, see How To Install A Sink Sprayer and How To Install A Soap Dispenser In A Kitchen Sink.
Countertop Installation
- Dry fit countertops for accuracy.
- Secure with adhesive and fasteners.
- Seal seams and edges to prevent moisture intrusion.
Pro Tip: Order countertops after cabinetry is installed for precise measurement.
Final Touches And Inspection
- Connect supply and drain lines, test all fixtures.
- Install lighting and appliances.
- Schedule final inspection for code compliance.
Real-world Examples And Case Studies
Case Study 1: Small Kitchen Upgrade
Homeowner Sarah transformed her 10×10-foot kitchen with a compact 4×2-foot island featuring a single-bowl sink. She chose quartz countertops and integrated a pull-out trash bin. The result: improved prep space and easier clean-up without sacrificing walkways.
- Budget: $4,500
- Key challenge: Routing plumbing through a crawl space
- Solution: Used flexible PEX lines and a compact drain setup
Case Study 2: Large Family Island
The Johnsons built an 8×4-foot island with a farmhouse sink and seating for six in their open-plan kitchen. Double dishwashers and abundant storage allowed for effortless entertaining and streamlined meal prep.
- Budget: $12,000
- Key challenge: Supporting heavy granite
- Solution: Reinforced subfloor and used 2×6 framing
Case Study 3: Modern Condo Retrofit
In a high-rise condo, Alex installed a 6×3-foot island with a double-bowl sink and waterfall countertop. Plumbing was run above the floor with decorative panels for concealment.
- Budget: $7,800
- Key challenge: Lack of access beneath slab
- Solution: Used a macerator pump for drainage and custom cabinetry for cover
Lessons Learned
- Professional help is vital for complex plumbing and electrical.
- Careful measurement prevents costly errors.
- Flexible plumbing solutions (e.g., PEX, macerators) adapt to unique layouts.
Maintaining And Troubleshooting Your Island Sink
Routine Maintenance
Proper care prolongs your investment:
- Clean sink and faucet regularly with non-abrasive cleaners.
- Seal stone countertops annually.
- Inspect plumbing for leaks monthly.
Example: Regular maintenance prevented a minor leak from turning into major water damage in my own kitchen.
Common Issues And Solutions
- Slow drainage: Clean traps and use enzyme-based cleaners.
- Leaks: Tighten connections and replace worn washers.
- Stained surfaces: Use recommended cleaners for each material.
For troubleshooting, see How To Fix A Backed Up Kitchen Sink.
Upgrading Fixtures
Modernize your island with:
- Touchless faucets
- Deep-bowl sinks
- Integrated filtration systems
For installation tips, visit How To Install A Disposal In A Single Sink and How To Install A Garbage Disposal.
Comparing Island Sink Types And Features
Choosing the right sink impacts both aesthetics and performance. Below is a comparison of popular options:
| Sink Type | Best For | Pros | Cons |
|---|---|---|---|
| Single Bowl | Small kitchens | Space-saving, easy to clean | Less multitasking |
| Double Bowl | Family use | Wash and rinse simultaneously | Takes more space |
| Farmhouse | Style and large pots | Deep, visually appealing | Requires custom cabinetry |
| Bar/Prep | Entertaining | Compact, ideal for drinks | Limited for heavy use |
Pro Tip: Choose a sink that matches your cooking habits and family size.
Maximizing Island Functionality: Accessories And Upgrades
Essential Accessories
Boost convenience and hygiene with:
- Pull-out sprayers
- Soap dispensers
- Built-in cutting boards
- Drain baskets and strainers
For installation help, see How To Install A Kitchen Sink Drain Basket and How To Install A Sink Strainer.
Advanced Upgrades
Consider high-end features for luxury and efficiency:
- Water filtration systems
- Built-in compost bins
- Integrated LED lighting
- Smart faucets (voice or touch control)
Example: Adding a water filter to my island sink made prepping produce safer and more convenient.
Seating And Multi-use Designs
Islands can double as dining tables, homework stations, or workspace. Adjustable stools, power outlets, and USB charging ports add versatility.
- Ensure seating height matches countertop level.
- Leave at least 24 inches per seat for comfort.
Storage Enhancements
Maximize island storage with:
- Deep drawers for pots and pans
- Vertical dividers for baking trays
- Pull-out spice racks
Pro Tip: Custom cabinetry can be tailored for unique needs, such as pet feeding stations or wine storage.
Frequently Asked Questions
What Is The Minimum Size For A Kitchen Island With A Sink?
The minimum recommended size is 4×2 feet, allowing for a small sink and limited storage. However, ensure at least 36, 42 inches of clearance around the island for safe movement.
Is It Possible To Add A Sink To An Existing Kitchen Island?
Yes, but it depends on plumbing access. If the island is near existing water and drain lines, retrofitting is easier. Otherwise, it may require extensive floor modifications or the use of a macerator pump for drainage.
Do I Need A Vent For The Island Sink Drain?
Most building codes require a vent for proper drainage and to prevent sewer gases. An air admittance valve (AAV) can sometimes be used in islands where traditional venting is difficult.
How Do I Protect My Kitchen Island From Water Damage?
Use water-resistant materials for cabinetry and countertops, regularly seal stone surfaces, and promptly repair leaks. Installing a drip tray under the sink can catch minor leaks before they cause major harm.
Are There Eco-friendly Options For Island Sinks And Fixtures?
Yes, many manufacturers offer low-flow faucets, recycled composite sinks, and sustainably sourced cabinetry. Choosing these options can reduce water usage and environmental impact.
A kitchen island with a sink is a practical and stylish addition that enhances workflow, storage, and the overall value of your home. By carefully planning layout, materials, and utilities, and following best practices for construction and maintenance, you can create a space that suits your lifestyle and stands the test of time. For specific installation guides, explore related articles like How To Install A Bigger Kitchen Sink and How To Install A Double Sink With Garbage Disposal. With the right approach, your kitchen island will become the centerpiece of your home, a place for cooking, gathering, and making memories.