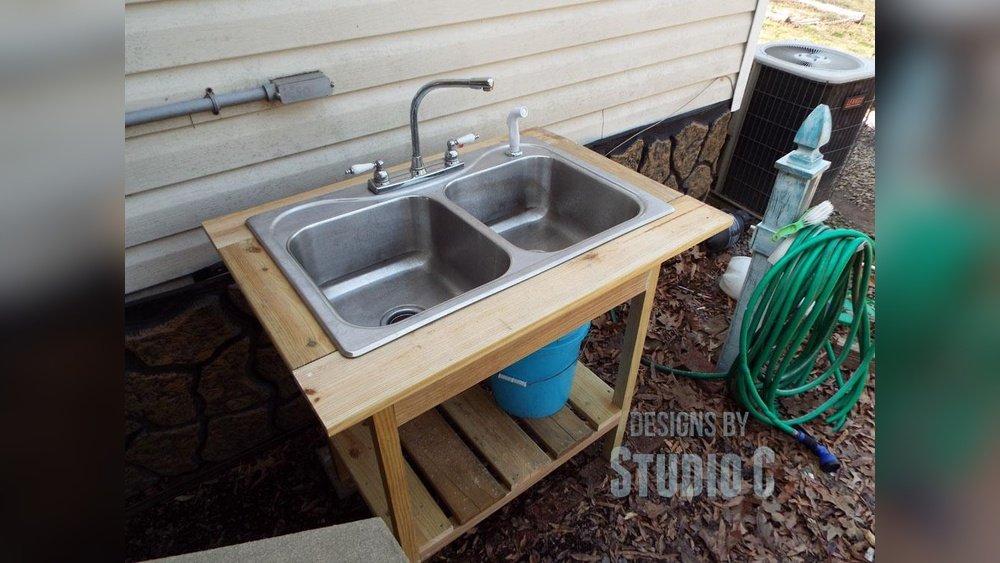
Building an outdoor sink is more than just a weekend DIY project, it’s a transformative upgrade that brings convenience, cleanliness, and added value to your backyard, patio, or outdoor kitchen. Whether you’re an avid gardener, a grill master, or simply enjoy spending time outside, having a dedicated space to wash up, prep food, or clean tools makes outdoor living exponentially easier.
The process might seem daunting at first, with water lines, drainage, and weatherproofing to consider, but with careful planning and the right materials, it’s a project well within reach for most homeowners.
In my experience, nothing elevates an outdoor entertainment area quite like a functional sink. The ability to rinse fresh-picked vegetables or wash hands without trudging inside saves time and keeps your indoor kitchen cleaner. Plus, installing an outdoor sink doesn’t just serve practical needs, it can also become a stylish focal point, blending seamlessly with your landscape and boosting your home’s curb appeal.
This guide will walk you step-by-step through the entire process, from planning and material selection to installation and maintenance, with detailed comparisons, real-life examples, and actionable advice based on industry best practices.
Key Takeaways
- Outdoor sinks significantly enhance backyard functionality and home value.
- Proper planning, including location, water source, and drainage, is crucial for a successful installation.
- Material selection impacts durability, cost, and maintenance requirements.
- Step-by-step assembly can be managed by most DIY enthusiasts with basic plumbing skills.
- Weatherproofing and regular care extend the lifespan of your outdoor sink.
- Real-world examples illustrate diverse design options and practical solutions.
Planning Your Outdoor Sink Project
Assessing Your Needs And Location
The first step to building an outdoor sink is understanding how you’ll use it. Will it be primarily for gardening, barbecuing, or cleaning up after kids and pets? Each use case may suggest a different location and design. For instance, a garden sink should be close to planting beds, while a kitchen prep sink is best positioned near your grill or outdoor kitchen.
Consider these factors:
- Proximity to water supply and drainage
- Accessibility from key outdoor areas
- Shelter from the elements, or exposure to maximize convenience
- Space for prep, storage, or additional features
Understanding Local Codes And Permits
Before breaking ground, research your local building codes. Many municipalities require permits for plumbing work, especially if connecting to the main supply or sewage line. Failure to comply can result in fines or forced removal.
- Contact your local building department for requirements.
- If using potable water, backflow prevention devices are often mandated.
- For gray water drainage (i.e., not connected to the sewer), specific regulations may apply.
Choosing A Water Source
There are three primary options for supplying water to an outdoor sink:
- Garden Hose Connection: Easiest to install, but not suitable for all-year use in cold climates.
- Tapping Into Indoor Plumbing: More complex, but offers permanent, reliable water flow.
- Rainwater Collection System: Environmentally friendly for non-potable uses like gardening.
Compare these in the table below:
| Water Source | Installation Complexity | Cost | Seasonal Use | Potable |
|---|---|---|---|---|
| Garden Hose | Low | Low | Spring-Fall | Yes (if potable hose) |
| Indoor Plumbing Tap | High | Medium-High | Year-Round (with frost protection) | Yes |
| Rainwater Collection | Medium | Medium | Spring-Fall | No |
Drainage Solutions
Drainage is often the most challenging aspect, especially if connecting to a municipal sewer isn’t feasible. Options include:
- French drain or dry well for gray water
- Direct connection to home’s existing drain system
- Portable gray water tank for off-grid solutions
Pro Tip: Always consult local codes on gray water disposal to avoid environmental issues and fines.

Credit: www.youtube.com
Selecting Materials And Components
Sink Types And Materials
Choosing the right sink material is essential for durability and ease of maintenance. The most popular options for outdoor sinks include:
- Stainless Steel: Rust-resistant, easy to clean, and affordable.
- Granite Composite: Stylish and durable, but pricier.
- Ceramic: Attractive but can crack in freezing weather.
- Plastic/Resin: Lightweight and inexpensive, though less durable.
Here’s a quick comparison:
| Material | Durability | Weather Resistance | Maintenance | Cost |
|---|---|---|---|---|
| Stainless Steel | High | Excellent | Easy | Low-Medium |
| Granite Composite | High | Good | Moderate | High |
| Ceramic | Medium | Fair | Easy | Medium |
| Plastic/Resin | Low-Medium | Good | Easy | Low |
Faucet And Fixture Considerations
Outdoor faucets must withstand temperature fluctuations, moisture, and sun exposure. Opt for:
- Frost-proof faucets in cold climates
- Brass or stainless steel for rust resistance
- Single-handle designs for ease of use
- Hose bibb attachment for added versatility
For step-by-step faucet installation, see How To Install A Kitchen Sink Faucet.
Countertops And Cabinets
Your outdoor sink will need a sturdy base. Popular choices include:
- Pressure-treated lumber
- Concrete
- Weather-resistant composite materials
- Stone or brick masonry
Each offers unique benefits in aesthetics, durability, and price. For example, concrete countertops deliver a modern look and exceptional longevity, while wood offers warmth but requires sealing.
Plumbing Supplies And Tools
Prepare a comprehensive list before beginning:
- Sink and faucet
- Supply lines (PEX or copper)
- Drain assembly and piping (PVC recommended)
- Hose bibb (if using a garden hose)
- Silicone caulk and plumber’s tape
- Pipe wrenches and channel locks
- Drill and hole saw (for mounting)
Having all materials on hand prevents mid-project delays.
Building The Foundation And Base
Site Preparation
Start by clearing and leveling the chosen area. If you’re installing a permanent structure (like a masonry base), dig down and add a gravel layer for drainage and stability. Use a level and measuring tape to ensure accuracy.
- Mark the footprint with stakes and string
- Remove grass and debris
- Excavate and add a 2-4 inch gravel base for drainage
Constructing The Base
Depending on your material choice, construction methods will vary:
- Wood Frame: Build a sturdy, level frame using pressure-treated lumber. Anchor posts in concrete for long-term stability.
- Concrete Pad: Pour a slab that’s at least 4 inches thick, reinforced with rebar or mesh.
- Masonry: Lay bricks or blocks with mortar, checking level and alignment frequently.
Ensure the base is tall enough to provide a comfortable working height (standard is 36 inches for counters).
Installing Countertops
Mount countertops securely to the base, using weather-resistant fasteners. For wood, use stainless steel screws; for masonry, construction adhesive or embedded anchors. Countertops should overhang slightly to prevent water from dripping onto the base.
Example: In one backyard project, a homeowner used recycled granite slabs atop a cinder block base, combining eco-friendliness with lasting strength.
Securing The Sink
Cut the sink opening according to the manufacturer’s template. Dry-fit the sink before final installation to check alignment. Apply a bead of silicone caulk around the opening, then lower the sink into place. Secure according to the manufacturer’s instructions.
For detailed guidance on drop-in sinks, refer to How To Install A Drop-In Kitchen Sink.
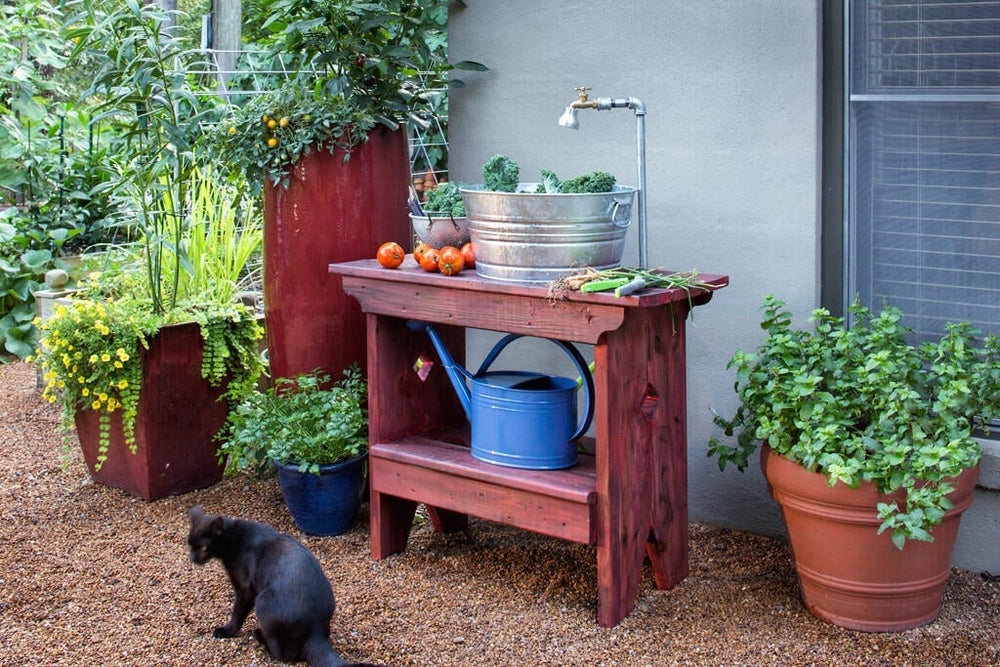
Credit: bonnieplants.com
Plumbing And Drainage Installation
Connecting The Water Supply
Garden Hose Connection
- Attach a hose bibb to the back of the sink cabinet.
- Use a Y-connector for simultaneous hose and sink use.
- Connect supply tubing from the hose bibb to the faucet inlet.
Indoor Plumbing Tap
- Run PEX or copper piping from the nearest indoor supply line.
- Use proper fittings, shutoff valves, and, if needed, a backflow preventer.
- Bury pipes below the frost line if you live in a cold climate.
Warning: If unsure about plumbing codes or techniques, consult a licensed plumber.
Faucet Installation
Install the faucet according to the manufacturer’s directions, using plumber’s tape on all threaded connections. Secure the faucet firmly to prevent leaks.
Drainage Options
French Drain Or Dry Well
- Dig a trench sloping away from the sink area.
- Fill with gravel and perforated pipe to disperse gray water safely.
Direct Sewer Connection
- Requires code-compliant traps, vents, and permits.
- Connect to the home’s main drain line using PVC piping.
Gray Water Holding Tank
- Place a portable tank under the sink to collect wastewater.
- Empty regularly in accordance with local regulations.
For more on sink drain installation, see How To Install A Sink Drain.
Leak Testing And Insulation
Turn on the water supply and check every joint for leaks. Tighten connections as needed. In cold climates, insulate exposed pipes with foam sleeves and install frost-proof faucets.
Pro Tip: Use quick-connect fittings for PEX lines to speed up installation and minimize leaks.
Weatherproofing And Outdoor Durability
Protecting Against The Elements
Weatherproofing is essential for longevity:
- Seal all wood surfaces with waterproof stain or paint.
- Use outdoor-rated caulk around sink edges and faucet bases.
- Apply UV-resistant sealant to stone, brick, or concrete surfaces.
Winterization
If you live in a freeze-prone region:
- Shut off and drain water supply lines before the first frost.
- Remove and store hoses and portable supply lines indoors.
- Use blow-out plugs to clear standing water from pipes.
Pest And Debris Management
Install mesh screens in drain openings to prevent clogs from leaves and insects. Keep the area clean to discourage rodents and pests.
Maintenance Schedule
- Inspect caulking and seals annually.
- Clean stainless steel sinks with mild detergent to prevent staining.
- Check for leaks or cracks in plumbing and base materials.
Example: A homeowner in Minnesota reported their outdoor sink survived five winters without damage due to careful winterization and regular inspection.
Real-world Examples And Case Studies
Backyard Garden Sink
A family in Oregon built a simple outdoor sink for their vegetable garden using a salvaged stainless steel sink, a cedar wood base, and a gravity-fed rain barrel. The gray water drained into a French drain lined with river rocks.
Their project cost less than $200 and was completed in a single weekend. The sink is used daily during harvest season and has held up well for over three years.
Outdoor Kitchen Sink
A Texas couple integrated a granite composite sink into their outdoor kitchen island, supplied by a permanent PEX water line from their home’s utility room. The drainage was connected to the main sewer line, requiring a permit and professional plumber for the final hookup.
The result is a fully functional food prep and cleanup station that handles large family gatherings with ease.
Mobile Potting Bench Sink
An avid gardener in California repurposed a rolling potting bench with a plastic basin and hose connection. The sink drains into a portable gray water tank, allowing the bench to be moved around the yard. This setup provides flexibility and avoids the need for permanent plumbing.
Enhancing Your Outdoor Sink
Adding Storage And Accessories
Maximize utility by incorporating:
- Shelving for cleaning supplies or garden tools
- Hooks for towels, gloves, or utensils
- Pull-out trash bins under the sink
- Integrated cutting boards or prep surfaces
Upgrading With Advanced Features
- Soap dispensers: For hygiene and convenience. Detailed install guide at How To Install A Soap Dispenser In A Kitchen Sink.
- Sink sprayers: For rinsing produce or cleaning large items. See How To Install A Sink Sprayer.
- Garbage disposal units: For heavy-duty outdoor kitchens. For step-by-step instructions, refer to How To Install A Garbage Disposal.
Style And Design Ideas
- Use colorful tiles for a Mediterranean look.
- Add a roof or pergola for shade and protection.
- Incorporate planter boxes to blend with garden beds.
Sustainability Considerations
- Use reclaimed materials for eco-friendly construction.
- Capture and reuse gray water for landscape irrigation, where allowed.
Example: The EPA notes that outdoor water use accounts for nearly 30% of total household use in the U.S., highlighting the value of efficient outdoor fixtures.
Troubleshooting And Common Pitfalls
Dealing With Low Water Pressure
- Check for kinks or blockages in supply lines.
- Ensure faucets and aerators are free from mineral buildup.
- Upgrade to larger diameter supply tubing if necessary.
Preventing Leaks And Water Damage
- Use plumber’s tape on all threaded joints.
- Tighten connections, but avoid over-tightening which can crack fittings.
- Inspect seals and caulking regularly.
Managing Drainage Issues
- Ensure slope in drain lines for proper flow.
- Clean out French drains or dry wells annually.
- Install a trap under the sink to block odors if connected to a sewer.
Handling Freezing Temperatures
- Insulate all exposed pipes.
- Use self-draining or frost-proof faucets.
- Drain water lines before winter.
Example: In my experience, skipping winterization even once can lead to burst pipes and expensive repairs.
Avoiding Code Violations
- Always check with local authorities before connecting to potable water or sewage.
- Use approved materials and installation methods.
- Retain documentation for inspections and resale.
For more detailed plumbing advice, visit How To Install Kitchen Sink Plumbing.
Cost Breakdown And Project Timeline
Average Costs
Costs can vary widely based on materials and complexity:
| Component | Budget ($) | Mid-Range ($) | High-End ($) |
|---|---|---|---|
| Sink | 30-70 | 100-300 | 400+ |
| Faucet | 20-50 | 75-200 | 250+ |
| Base/Countertop | 60-150 | 200-600 | 800+ |
| Plumbing Supplies | 40-80 | 100-200 | 300+ |
| Labor (if hired) | 0 (DIY) | 400-800 | 1000+ |
| Total | 150-350 | 475-1600 | 2750+ |
Sample Project Timeline
- Planning and Permits: 1-2 days
- Material Sourcing: 1 day
- Base Construction: 1-2 days
- Plumbing and Sink Installation: 1 day
- Finishing Touches: 1 day
Total time: 4-7 days for most DIYers, depending on complexity and weather.
Frequently Asked Questions
What Is The Best Way To Prevent An Outdoor Sink From Freezing In Winter?
The most effective approach is to install frost-proof faucets and fully drain all water supply lines before freezing temperatures arrive. Additionally, use pipe insulation and consider self-draining valves. For seasonal sinks, disconnect hoses and bring portable parts indoors to avoid freeze damage.
Can I Use An Outdoor Sink For Food Prep If It’s Connected To A Garden Hose?
You can, but ensure the hose is labeled potable (drinking water safe). Many standard hoses contain materials that can leach chemicals, making them unsafe for cooking or drinking. Use only hoses and fittings certified for potable water and flush the hose before each use.
Do I Need A Permit To Install An Outdoor Sink?
Permit requirements depend on your location and how the sink is plumbed. If you’re connecting to the municipal water supply or sewer, a permit and inspection are usually mandatory. For gray water systems or hose-fed sinks, permits may not be required, but always check with your local building department first.
How Can I Make My Outdoor Sink More Eco-friendly?
Use reclaimed materials for construction, and consider a rainwater catchment system for non-potable tasks like gardening. Install a gray water drain that irrigates landscape beds where allowed. Choose water-saving faucets and aerators to minimize consumption.
Can I Install A Garbage Disposal In An Outdoor Sink?
Yes, but only if your sink is connected to a proper sewer or septic system. The disposal must be rated for outdoor use, and you’ll need a GFCI-protected electrical outlet. Avoid using a disposal if your drain is a French drain or gray water system, as food waste can clog or damage these types of drains. For more, see How To Install A Garbage Disposal.
Building an outdoor sink is a rewarding project that adds significant convenience and value to any backyard. With thoughtful planning, quality materials, and attention to detail, your new sink will stand up to the elements and serve your needs for years to come.
Whether you opt for a simple garden setup or a full-featured outdoor kitchen installation, following these steps ensures a functional, durable, and attractive result that seamlessly integrates with your outdoor lifestyle.