Outdoor sinks are a staple of modern patios, gardens, and workspaces, offering convenience for everything from gardening to outdoor cooking. However, as temperatures drop or when the sink won’t be used for a while, draining it becomes essential to avoid costly damage and maintain hygiene.
Too often, homeowners overlook this step until they’re faced with cracked pipes, pooling water, or even foul odors. Knowing exactly how to drain an outdoor sink can save you money, prevent repairs, and extend the life of your plumbing investment.
Whether you’re preparing for winter, troubleshooting drainage issues, or simply closing down your outdoor kitchen for the season, understanding the right techniques is crucial. This guide offers step-by-step instructions, expert insights, and practical examples tailored to every outdoor sink setup.
From basic gravity-fed drains to more advanced systems connected to household plumbing, you’ll find the comprehensive strategies and actionable tips you need, all based on real-world experience and the latest plumbing standards.
Key Takeaways
- Draining your outdoor sink prevents pipe damage, mold growth, and costly repairs, especially before freezing weather.
- There are multiple drainage methods, including direct soil drainage, greywater reuse, and connection to main sewer lines.
- Essential tools include a bucket, pipe wrench, pliers, and protective gloves for safe and effective draining.
- Regular maintenance and proper winterization maximize your outdoor sink’s lifespan.
- Real-world examples highlight common mistakes and best practices for different drainage setups.
- Consulting local regulations is important, improper drainage can lead to fines or environmental issues.
Credit: www.reddit.com
Understanding Outdoor Sink Drainage Systems
Outdoor sinks come in various designs, each with unique drainage requirements. Before you begin, it’s important to identify the type of drainage system your sink uses, as the draining process will differ accordingly.
Gravity-fed Drainage
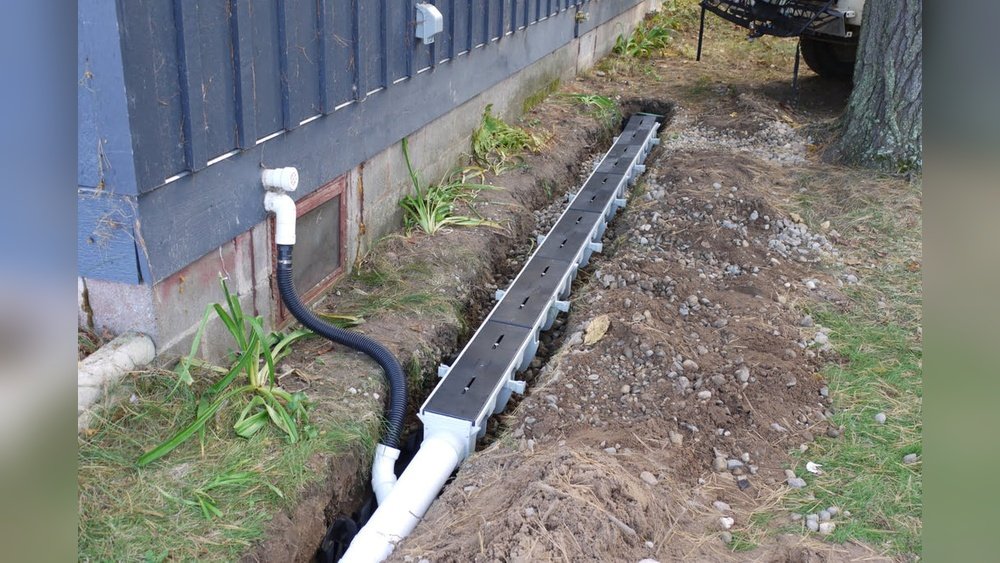
The most common and simplest setup, gravity-fed drainage uses a sloped pipe to allow water to flow directly from the sink to a designated area, such as a dry well, French drain, or garden bed. These systems are typically found in backyard or garden installations where wastewater is reused for irrigation.
Connection To Main Sewer Or Septic
Some outdoor sinks are plumbed directly into the home’s main sewer or septic system. This setup ensures safe disposal of wastewater but is subject to local plumbing codes. Draining these sinks involves additional steps to prevent sewage gas backflow and protect pipes from freezing.
Portable And Temporary Sinks
Portable sinks, often used for events or temporary workspaces, usually feature removable tanks for both freshwater supply and greywater collection. Draining these involves manually emptying the greywater tank at approved disposal sites.
Comparison Table: Drainage System Types
| Drainage Type | Advantages | Limitations | Best For |
|---|---|---|---|
| Gravity-Fed | Low cost, simple to install, eco-friendly reuse | Not suitable for harsh winter climates | Gardens, warm regions |
| Main Sewer/Septic | Safe wastewater disposal, meets code | Costly to install, risk of freeze damage | Permanent outdoor kitchens |
| Portable Tank | Mobility, no plumbing needed | Limited capacity, manual emptying required | Events, temporary setups |
Understanding which system you have is the foundation for choosing the right draining and maintenance strategy.
Essential Tools And Safety Precautions
Before starting, gather the necessary tools and take safety measures to ensure a smooth and hazard-free draining process.
Must-have Tools
Having the right equipment streamlines the process and helps prevent accidental damage:
- Bucket or large container (for catching residual water)
- Pipe wrench and adjustable pliers (for loosening fittings)
- Protective gloves (for hygiene and safety)
- Plumber’s tape (for re-sealing threaded connections)
- Shop vacuum (for removing standing water in pipes)
- Flashlight (for visibility under sinks or in dim areas)
Personal Safety Measures
Water from outdoor sinks can contain bacteria, chemicals, or debris. Always:
- Wear protective gloves and closed-toe shoes.
- If using cleaning agents, ensure proper ventilation.
- Avoid direct skin contact with stagnant or soiled water.
- Keep children and pets away from the work area.
Environmental Considerations
Improper drainage can impact local soil and water quality. Check local regulations regarding greywater disposal and never drain hazardous substances (like paint or solvents) onto your property.
Example: Safety In Action
When I drained my own outdoor sink after a summer of potting plants, I wore gloves and eye protection. Despite careful draining, residual dirty water splashed out, a reminder that even simple jobs require basic safety gear.

Credit: www.youtube.com
Step-by-step Guide: Draining Different Outdoor Sink Setups
Each sink type requires a tailored approach. Follow the steps below based on your specific installation.
Gravity-fed Outdoor Sink
- Shut Off Water Supply
- Turn off any connected outdoor faucet or supply valve.
- Open the sink faucet to relieve pressure.
- Disconnect Drain Pipe
- Place a bucket beneath the drain trap (U-shaped pipe).
- Use a pipe wrench or pliers to loosen slip nuts and remove the trap.
- Allow water to drain into the bucket.
- Flush the Drain Line
- Pour a small amount of clean water through the sink to flush debris.
- Use a shop vacuum to remove lingering water if needed.
- Inspect and Clean
- Check for blockages or buildup in the pipe.
- Clean the trap thoroughly before reassembly or storage.
- Store or Winterize Components
- Dry all parts completely to prevent rust or mold.
- If winterizing, store the trap indoors.
Outdoor Sink Connected To Main Sewer/septic
- Close Water Supply and Drain
- Shut off supply valves.
- Open the faucet and allow water to fully drain.
- Remove and Drain Trap
- Place a bucket under the trap and carefully disconnect it.
- Let water drain, then clean and dry the trap.
- Blow Out Remaining Water
- Use compressed air or a shop vacuum to clear water from horizontal drain lines.
- This step is crucial to prevent freezing and pipe bursts.
- Seal Openings Temporarily
- Cap or cover open drain lines to prevent sewer gas from entering.
- Use plumber’s tape for a tight seal.
Portable Outdoor Sink With Tank
- Turn Off Water Supply
- Close the faucet and disconnect water supply lines.
- Remove Greywater Tank
- Detach the tank carefully and carry it to an approved disposal site.
- Empty and Rinse Tank
- Dispose of wastewater according to local guidelines.
- Rinse and dry the tank before reassembly or storage.
- Clean and Inspect Connections
- Check for leaks or wear before next use.
Step-by-step Table: Draining Methods
| Step | Gravity-Fed Sink | Sewer/Septic Sink | Portable Sink |
|---|---|---|---|
| 1 | Shut off water | Shut off water | Turn off supply |
| 2 | Disconnect trap | Remove trap | Remove tank |
| 3 | Flush line | Blow out lines | Empty tank |
| 4 | Clean & store parts | Seal drains | Rinse tank |
:max_bytes(150000):strip_icc()/SCP_256_02-15c01089ce5e4403b721a22eaae6e260.jpg)
Credit: www.bhg.com
Winterization And Long-term Maintenance
Proper winterization is essential for outdoor sinks in cold climates. Failing to remove water from pipes and fixtures can lead to costly freeze damage.
Why Winterization Matters
According to the American Red Cross, frozen pipes can burst and cause thousands of dollars in water damage. In my experience, even a small amount of trapped water can crack PVC or metal pipes once temperatures drop below freezing.
Winterization Steps
- Completely Drain All Water
- Follow the steps in the previous section to remove all water from supply and drain lines.
- Use Compressed Air
- Blow out both supply and drain lines with compressed air to remove hidden moisture.
- Add Non-Toxic Antifreeze
- For sinks with complex plumbing, pour RV/marine antifreeze into traps and drain lines. This special antifreeze is safe for plumbing and the environment.
- Disconnect and Store Hoses
- Remove and store any flexible hoses or attachments indoors.
- Seal or Cover Fixtures
- Place insulated covers over faucets and exposed pipes.
Routine Maintenance Tips
- Inspect for leaks every season and after heavy use.
- Clean drain traps regularly to avoid clogs.
- Check for odors or slow draining, which can indicate a problem.
- Reassemble carefully in spring, ensuring all seals and connections are tight.
Pro Tip:
If your sink is used seasonally, label each part during disassembly. This makes reassembly faster and helps prevent mistakes.
Real-world Example: Cost Of Neglected Winterization
A neighbor in my area left his outdoor kitchen sink undrained one winter. By spring, the drain trap had split, requiring a full replacement and repair to the patio. The repair bill exceeded $350, far more than the cost of basic winterizing supplies and 30 minutes of effort.
Troubleshooting Common Drainage Problems
Even well-maintained outdoor sinks can develop drainage issues. Recognizing and addressing these problems early prevents bigger headaches.
Slow Draining Or Standing Water
Common Causes:
- Clogged trap or drain line (food, soil, debris)
- Improper slope in the drain pipe
- Frozen water in the line
Solutions:
- Remove and clean the trap.
- Use a plumber’s snake or auger for deeper blockages.
- Adjust pipe slope as needed.
- For freezing, thaw pipes gently with warm towels, never with an open flame.
Foul Odors
Common Causes:
- Dry or dirty trap
- Sewer gas backflow
- Organic material buildup
Solutions:
- Clean and refill the trap with water (or antifreeze in winter).
- Ensure seals are tight and traps are not dried out.
- Use mild cleaners, never harsh chemicals, which can damage pipes and harm the environment.
Leaks Around Fittings
Common Causes:
- Worn or cracked washers
- Loose slip nuts or joints
- Freezing damage
Solutions:
- Replace washers or gaskets.
- Tighten fittings with a wrench, being careful not to overtighten.
- Replace damaged pipes or consult a plumber for major repairs.
Case Study: Diy Drain Trap Fix
A homeowner in Illinois reported slow drainage after heavy fall leaves clogged his outdoor sink’s trap. After removing the trap, he found a compacted mass of leaves and soil. Cleaning and reassembling the trap restored full flow, proving that most issues can be solved with basic DIY skills and regular maintenance.
When To Call A Professional
If you suspect a major blockage, pipe damage, or have a sink tied to a complex plumbing system, it’s best to consult a licensed plumber. This is especially true if your local regulations require code compliance or if you notice persistent sewage odors.
For more detailed plumbing installation tips, refer to guides such as How To Install Kitchen Sink Plumbing.
Eco-friendly Drainage And Water Reuse
With growing concern for water conservation, many homeowners are exploring ways to reuse greywater from outdoor sinks. However, it’s important to do so safely and legally.
Greywater Reuse Basics
Greywater is gently used water from sinks, showers, and washers (excluding toilet water). Outdoor sink water can be diverted to gardens or lawns, reducing water waste and lowering your utility bills.
Safety And Legal Requirements
- Only use biodegradable soaps and cleaners in sinks where greywater will be reused.
- Check local codes, some municipalities prohibit or tightly regulate greywater reuse.
- Never use greywater for edible garden beds unless permitted and properly filtered.
Simple Greywater System Setup
- Install a diverter valve on your drain line.
- Direct outflow to a mulch basin or underground soakaway.
- Monitor for odor or pooling, which may indicate a problem.
Comparison Table: Standard Vs. Eco-friendly Drainage
| Feature | Standard Drainage | Greywater Reuse |
|---|---|---|
| Installation | Straightforward, often code-compliant | May require permits and filtration |
| Environmental Impact | Higher water waste | Reduces water use, eco-friendly |
| Maintenance | Minimal | Regular inspection, clog prevention |
| Legal Restrictions | Few (follow code) | Varies by location |
For comprehensive information on greywater and its safe use, consult resources like the Wikipedia entry on Greywater.
Example: Garden Irrigation With Sink Water
A family in California installed a simple diverter system for their outdoor sink, redirecting rinse water to a flower bed. By using only eco-friendly soap, they reduced their irrigation needs and saved on water bills, all while complying with local greywater regulations.
Real-world Examples And Short Case Studies
Learning from real scenarios helps you anticipate challenges and apply proven solutions.
Example 1: Preparing For A Sudden Freeze
During an unexpected early freeze in Colorado, one homeowner quickly drained his outdoor sink by following the gravity-fed method. He used a shop vacuum to clear standing water, added non-toxic antifreeze to the trap, and covered exposed pipes. His proactive steps prevented freeze damage, saving hundreds in repairs.
Example 2: Draining A Sink Before A Major Storm
A gardener in Florida drained her outdoor sink before a hurricane. After disconnecting the trap and storing it indoors, she noticed roots encroaching on the drain line. Addressing the issue early helped her avoid future blockages and ensured proper drainage during heavy rains.
Example 3: Upgrading To A Permanent Drainage Solution
An urban homeowner initially used a portable outdoor sink but found frequent tank emptying inconvenient. After researching local codes, he installed a permanent drain connected to his home’s main sewer line, following guidance from How To Install A New Kitchen Sink. The upgrade improved convenience and met all legal requirements.
Example 4: Cost-benefit Of Regular Maintenance
A DIYer kept a maintenance log for his outdoor sink, cleaning the trap and checking for leaks every spring and fall. Over five years, he avoided any major issues, demonstrating that regular upkeep saves both time and money in the long run.
Frequently Asked Questions
How Often Should I Drain My Outdoor Sink?
It depends on your usage and climate. If you live in an area with freezing winters, you should drain and winterize your outdoor sink every fall, before the first freeze. For seasonal use or event setups, drain after each major use or when the sink will be idle for more than a week.
Year-round users should inspect and clean the drain system at least twice a year.
Can I Use Outdoor Sink Greywater For Vegetable Gardens?
Generally, it’s not recommended to use greywater from outdoor sinks for edible gardens unless you have a certified filtration system and use only plant-safe, biodegradable soaps. Many local regulations prohibit using greywater on food crops due to the risk of bacterial contamination.
Always check your local codes and guidelines first.
What If I Notice A Persistent Odor After Draining My Sink?
A lingering odor could indicate a dry trap, organic buildup, or even a breach in your drain line. Try refilling the trap with clean water (or RV antifreeze in winter) and cleaning out any debris. If the smell persists, inspect for leaks or consult a plumber to check for deeper issues like a damaged vent or sewer backflow.
Do I Need A Permit To Modify My Outdoor Sink Drain?
In many areas, any modification involving connection to your main sewer or changes to the drainage system requires a permit and inspection. This ensures compliance with building codes and environmental regulations. Simple gravity-fed or portable systems may not require permits, but it’s always best to confirm with your local building department.
Is It Safe To Add Bleach Or Harsh Chemicals To Clear A Clog In My Outdoor Sink?
No, adding bleach or strong chemicals can damage pipes, harm the environment, and create hazardous fumes. For minor clogs, mechanical methods like a plumber’s snake or manual cleaning are safer and more effective. For stubborn clogs, opt for enzyme-based cleaners or consult a professional.
Draining an outdoor sink is a straightforward process, but the details matter. With the right tools, a careful approach, and attention to your unique setup, you can protect your plumbing and enjoy hassle-free outdoor living year-round. Whether you’re preparing for winter, upgrading your system, or troubleshooting a stubborn drain, these best practices will help you avoid common pitfalls and maximize your investment.
Always consult local codes and, when in doubt, reach out to a professional plumber to ensure safety and compliance.