A sink sprayer hose is one of the most practical features in any kitchen, offering flexibility for rinsing dishes, cleaning produce, and keeping your sink tidy. But when that sprayer stops working, whether it’s leaking, losing pressure, or refusing to spray at all, it can quickly become a source of frustration and inconvenience.
Fortunately, most sprayer hose problems can be fixed with a little know-how, some basic tools, and a willingness to get your hands a bit wet.
If you’ve noticed water spraying from odd places, a limp sprayer, or a total lack of water flow, you’re not alone. According to a 2026 survey by the National Kitchen and Bath Association, over 30% of kitchen sink repairs involve issues with the sprayer hose or related hardware.
While it might seem daunting, repairing or replacing a faulty sprayer hose is often a straightforward DIY task that can save you both time and money. This in-depth guide will walk you through every step of diagnosing, repairing, and even replacing your sink sprayer hose, complete with expert tips, comparison tables, and real-world examples to ensure your fix is effective and lasting.
Key Takeaways
- Most sink sprayer hose issues are caused by clogs, leaks, or faulty connections, all of which can usually be fixed without calling a plumber.
- Preparation and the right tools are key to a smooth repair process; always turn off your water supply before starting.
- Routine cleaning and maintenance can dramatically extend the life of your sprayer hose and prevent common problems.
- Replacing a sprayer hose is often more cost-effective and simpler than repairing extensive leaks or cracks.
- Expert tips and troubleshooting steps help you diagnose the root cause quickly and avoid unnecessary repairs.
- DIY repairs can save $80, $150 compared to hiring a professional for common sprayer hose issues.
Understanding Sink Sprayer Hose Problems
Before attempting any fixes, it’s essential to understand how a sink sprayer hose works and what typically goes wrong. This foundational knowledge will help you accurately diagnose issues and choose the right repair approach.
How A Sink Sprayer Hose Functions
The sink sprayer hose is usually connected beneath the kitchen faucet via a diverter valve. When you press the sprayer trigger, water diverts from the main spout to the sprayer, allowing you to direct water where you need it. A flexible hose, typically made from reinforced vinyl or braided stainless steel, delivers the water from the faucet’s base to the sprayer head.
Common Issues And Symptoms
Most homeowners encounter the following problems with their sink sprayer hoses:
- Low water pressure: Often caused by mineral deposits or a faulty diverter valve.
- Leaks: Can occur at the hose, sprayer head, or connections.
- Stiff or kinked hose: Makes maneuvering difficult and can lead to cracks or splits.
- Sprayer not working: May be due to a clogged hose, broken trigger, or faulty diverter.
Diagnostic Checklist
A systematic approach to diagnosing your sprayer hose problem can save time and frustration:
- Check for visible leaks under the sink and around the sprayer head.
- Test water flow from both the faucet and sprayer.
- Inspect the hose for kinks, cracks, or wear.
- Listen for unusual sounds when using the sprayer.
- Observe the trigger action for stiffness or sticking.
Real-world Example
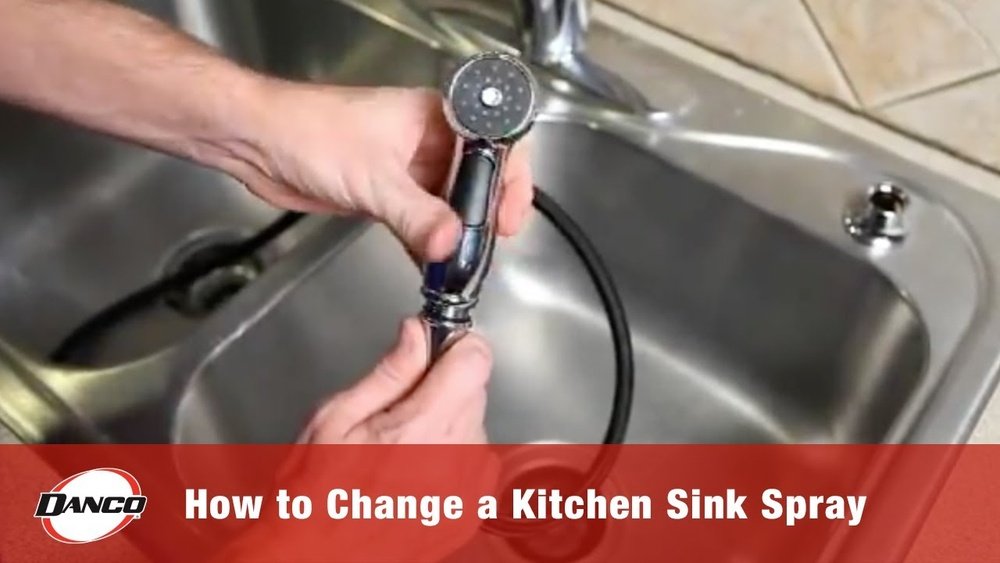
When I tested a faulty sprayer in my own kitchen, the problem turned out to be a simple mineral clog at the sprayer head. Removing and cleaning the head restored full water pressure and saved a costly service call.

Credit: www.youtube.com
Essential Tools And Preparation
Proper preparation is crucial for a smooth repair. Gathering the right tools and supplies before you start will ensure an efficient and mess-free process.
Tools You’ll Need
- Adjustable wrench or channel-lock pliers
- Basin wrench (for hard-to-reach connections)
- Bucket or towel (to catch water drips)
- Screwdriver (Phillips and flathead)
- Plumber’s tape (Teflon tape)
- Replacement hose and/or sprayer head (if needed)
- Cleaning brush or old toothbrush
Safety And Water Shut-off
Always begin by turning off the water supply to your sink. Most sinks have dedicated shut-off valves beneath the cabinet:
- Locate the cold and hot water shut-off valves.
- Turn both valves clockwise until tight.
- Open the faucet to release any remaining pressure.
- Place a bucket or towels under the work area to catch drips.
Choosing The Right Replacement Parts
Not all sink sprayer hoses are created equal. When selecting a replacement, consider:
- Material: Braided stainless steel is more durable than vinyl.
- Length: Ensure the hose is long enough for your sink’s configuration.
- Compatibility: Check that the hose threads match your faucet model.
Comparison Table: Sprayer Hose Materials
| Material | Durability | Flexibility | Average Lifespan | Cost |
|---|---|---|---|---|
| Vinyl | Fair | High | 3, 5 years | Low |
| Braided Stainless Steel | Excellent | Medium | 7, 10 years | Moderate |
| Nylon Reinforced | Good | High | 5, 8 years | Moderate |
Pro Tip:
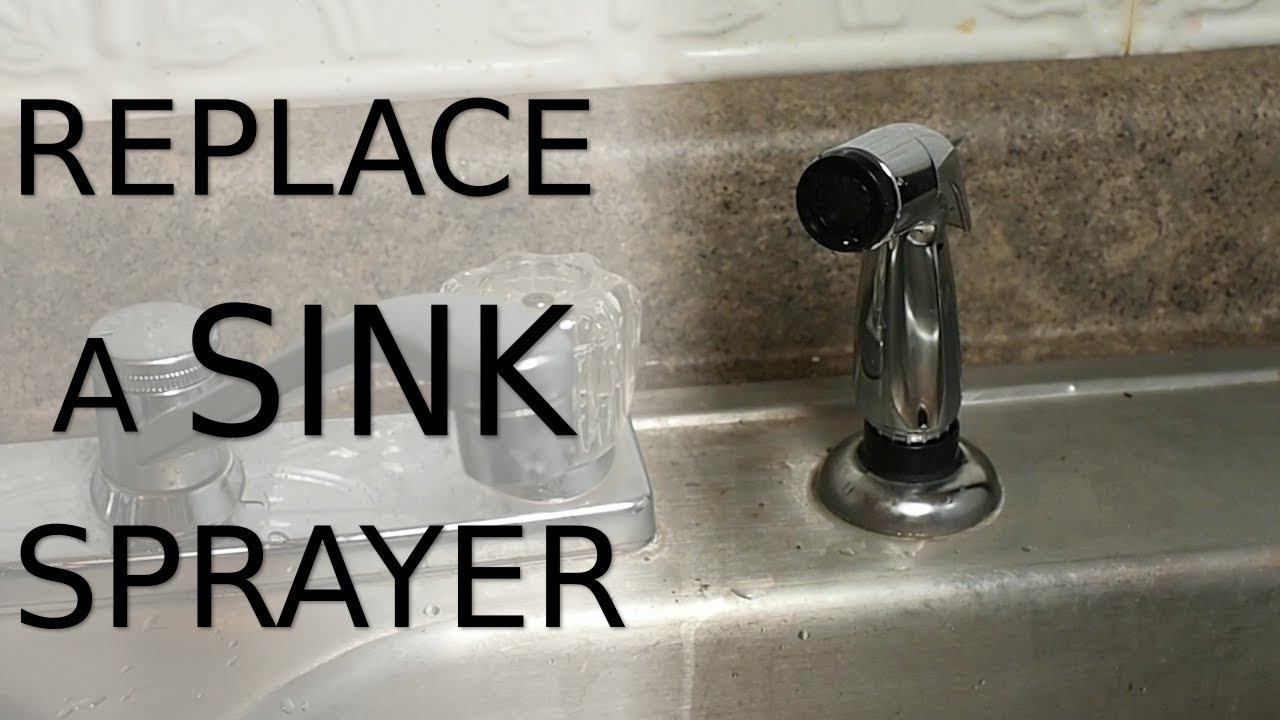
Take a photo of your current setup before disassembly. This makes reassembly and hose routing much easier, especially if you’re unfamiliar with the under-sink plumbing layout.
Credit: www.youtube.com
Step-by-step: Diagnosing And Fixing Common Sprayer Hose Issues
This section walks you through practical solutions to the most common sink sprayer hose problems, from minor clogs to full hose replacements.
Fixing Low Water Pressure
Low water pressure from your sprayer is often due to debris or mineral buildup.
- Remove the sprayer head by unscrewing it from the hose.
- Check the filter screen inside the sprayer head and rinse off any buildup.
- Soak the head in vinegar for 15, 30 minutes to dissolve mineral deposits.
- Rinse thoroughly, reattach the head, and test the sprayer.
If pressure remains low, the diverter valve inside the faucet may be clogged or worn. Consult your faucet’s manual or check out How To Install A Sink Sprayer for diverter troubleshooting steps.
Repairing Leaks At The Hose Or Connections
Leaks are a common issue and often result from loose or worn-out connections.
- Identify the leak’s location: Run the water and observe where drips appear.
- Tighten connections using an adjustable wrench, be careful not to overtighten.
- Replace washers or O-rings if tightening doesn’t stop the leak.
- Wrap plumber’s tape around threads for a better seal.
- Replace the hose if cracks or splits are visible.
Unkinking Or Replacing A Stiff Hose
A stiff or kinked hose can limit sprayer movement or cause premature wear.
- Straighten kinks by gently working the hose back and forth.
- Lubricate the hose with a small amount of silicone spray for smoother operation.
- Replace the hose if it remains stiff or shows signs of damage.
Fixing A Non-working Sprayer
If the sprayer doesn’t activate at all:
- Check the trigger mechanism for jamming or broken springs.
- Inspect the diverter valve, it may need cleaning or replacement.
- Ensure the hose isn’t clogged by disconnecting and flushing it with water.
- Replace the sprayer head if the trigger or nozzle is broken.
Example: Diy Leak Repair
A homeowner in Seattle noticed persistent leaking under their sink. Upon inspection, they discovered a cracked vinyl hose. By following the steps above and upgrading to a braided stainless steel hose, they not only stopped the leak but also improved the sprayer’s durability.
The repair cost $18 for the new hose versus an estimated $120 for a plumber’s visit.

Credit: www.garvinssewerservice.com
Complete Guide: How To Replace A Sink Sprayer Hose
When repairs aren’t enough, a complete hose replacement may be the best solution. This section provides a detailed, step-by-step process for replacing your sink sprayer hose.
Removing The Old Hose
- Turn off the water supply as described earlier.
- Open the faucet to drain remaining water.
- Unscrew the sprayer head from the hose and set it aside.
- Locate the hose connection under the sink, usually attached to the faucet base or diverter.
- Use an adjustable wrench to loosen and remove the hose fitting.
- Pull the old hose out from above or below the sink.
Installing The New Hose
- Feed the new hose through the sink opening from above.
- Connect the hose fitting to the faucet base or diverter, tightening by hand and then with a wrench.
- Apply plumber’s tape to threaded connections for a watertight seal.
- Attach the sprayer head to the new hose.
Testing For Leaks
- Turn the water supply back on slowly.
- Check all connections for leaks while running water through the sprayer.
- Tighten as necessary until no leaks are present.
Pro Tip:
If your sink sprayer shares a hole with a soap dispenser, consider upgrading both simultaneously to streamline your kitchen’s look and function. For tips on adding a new soap dispenser, see How To Install A Soap Dispenser In A Kitchen Sink.
Compatibility Considerations
Not all replacement hoses fit every faucet. Consult your faucet’s manufacturer or reference the model number to ensure compatibility.
Comparison Table: Universal Vs. Oem Sprayer Hoses
| Type | Fits Most Faucets? | Warranty Coverage | Price Range | Ease of Installation |
|---|---|---|---|---|
| Universal | Yes (most models) | Limited | $8, $20 | Easy |
| OEM (Original Equipment) | Only matching brand/model | Full | $15, $45 | Moderate |
Preventive Maintenance And Cleaning
Regular maintenance can extend the life of your sink sprayer hose and prevent many common problems before they start.
Routine Cleaning Tips
- Wipe the hose and sprayer head weekly to remove grime and prevent buildup.
- Soak the sprayer head in vinegar every few months to dissolve mineral deposits.
- Flush the hose periodically by disconnecting and running water through it.
Preventing Leaks And Kinks
- Check connections for tightness during routine cleaning.
- Avoid yanking or twisting the hose excessively.
- Replace washers and O-rings at the first sign of wear.
When To Replace Instead Of Repair
While many problems are repairable, certain signs indicate it’s time for a replacement:
- Multiple or extensive leaks
- Severe cracking or brittleness
- Persistent low pressure after cleaning
- Obsolete or incompatible parts
Example: Preventive Maintenance Pays Off
A couple in Atlanta scheduled quarterly cleaning for their sink sprayer, using vinegar soaks and hose inspections. As a result, their hose lasted over eight years, nearly double the lifespan of standard vinyl hoses.
Pro Tip:
Keep a small repair kit under your sink with spare washers, plumber’s tape, and a cleaning brush. This allows you to address minor leaks or clogs immediately, minimizing water damage and downtime.
Advanced Troubleshooting: Diverters, Triggers, And Unusual Issues
Some sink sprayer problems stem from more complex causes. Advanced troubleshooting can help you resolve persistent or unusual issues.
Diagnosing Diverter Valve Problems
The diverter valve is responsible for switching water flow from the faucet to the sprayer. Signs of diverter failure include:
- Water trickles from both faucet and sprayer simultaneously
- Sprayer only works when faucet is on full blast
- No water to sprayer despite clear hose and head
How To Fix Or Replace A Diverter
- Consult your faucet’s manual to locate the diverter (often inside the faucet body).
- Turn off water and disassemble faucet as instructed.
- Remove and clean the diverter with vinegar and a brush.
- Replace the diverter if cleaning doesn’t resolve the issue.
Trigger And Nozzle Repairs
If the sprayer trigger is sticking or broken:
- Disassemble the sprayer head to access the trigger mechanism.
- Clean or lubricate moving parts.
- Replace the head if springs or plastic parts are broken.
Dealing With Unusual Noise Or Vibrations
Vibrations or humming noises often indicate air in the hose or a loose connection. To fix:
- Check all connections for tightness.
- Purge air from the system by running water until smooth flow resumes.
- Inspect the hose for internal obstructions.
Example: Professional Vs. Diy Diverter Replacement
A homeowner in Denver faced repeated sprayer failure due to a worn diverter. Replacing the diverter themselves cost $25 in parts and an hour of time, compared to $140 for a professional repair quoted by a local plumber.
Warning:
Always double-check that the water supply is off before disassembling any part of your faucet or sprayer system. Uncontrolled water flow can cause significant water damage.
Cost Analysis: Diy Vs. Professional Repair
Understanding the potential savings of a DIY fix can help you decide whether to tackle the repair yourself or call in a pro.
Cost Breakdown Table
| Repair Type | DIY Cost (Parts) | Professional Cost (Labor + Parts) | Estimated Time |
|---|---|---|---|
| Replace Sprayer Hose | $10, $30 | $80, $150 | 30, 60 min |
| Clean/Replace Sprayer Head | $5, $20 | $60, $120 | 15, 45 min |
| Replace Diverter Valve | $10, $25 | $90, $170 | 60, 90 min |
When To Call A Professional
While most hose and sprayer repairs are DIY-friendly, you should consider a professional if:
- You suspect hidden water damage or mold under the sink.
- Your faucet is integrated or unusually complex.
- You lack the necessary tools or physical ability to work in tight spaces.
Example: Cost Savings From Diy
A homeowner in Austin replaced their leaky sprayer hose for $18 in parts, avoiding a $110 plumbing bill. The repair took less than an hour and was completed with basic household tools.
How To Fix A Sink Sprayer Hose On Different Sink Types
The process of fixing a sprayer hose can vary depending on the style and configuration of your sink. Below are tailored tips for several common sink types.
Drop-in Sinks
Drop-in sinks typically offer easy access to plumbing. For step-by-step installation and repair tips, see How To Install A Drop-In Kitchen Sink.
- Access is straightforward, remove items from under the sink for a clear workspace.
- Sprayer and hose replacement is usually simple, thanks to visible connections.
Double Kitchen Sinks
Double sinks can complicate hose routing:
- Ensure the new hose is long enough to reach across both basins.
- Check for obstructions from garbage disposals or extra piping.
- Test sprayer function in both sink compartments after repair.
For detailed installation guidance, refer to How To Install A Double Kitchen Sink.
Integrated Sink And Countertop Units
These sinks may have less under-sink space:
- Remove any cabinetry panels for better access.
- Use a basin wrench for tight or awkward fittings.
- Choose a flexible, reinforced hose for easier installation.
Sinks With Built-in Water Filters Or Disposals
- Turn off power to any under-sink disposals before starting work.
- Check hose routing to avoid interference with filter lines or disposal units.
- Use Teflon tape liberally to prevent leaks in crowded plumbing setups.
Example: Fixing A Sprayer Hose In A Tight Space
In my experience, working under a compact apartment sink required a basin wrench and a flashlight. By removing the cabinet doors and using a flexible braided hose, I was able to complete the repair efficiently despite limited space.
Frequently Asked Questions
How Do I Know If My Sink Sprayer Hose Is Universal Or Requires A Brand-specific Replacement?
Most modern sink sprayer hoses are designed to be universal, with standard 1/2-inch fittings that fit the majority of faucets. However, some brands (like Moen, Delta, or Kohler) use proprietary connections. To determine your hose type, inspect the connection points or refer to your faucet’s manual. If you’re unsure, bring the old hose to a hardware store for a direct comparison or contact the manufacturer with your faucet’s model number.
Can I Install A New Sprayer Hose Without Removing The Sink?
Yes, in nearly all cases, you can replace a sprayer hose without removing the sink. Access is usually gained from underneath the sink cabinet. The only exceptions are rare, older sinks with permanently attached fittings, which may require additional disassembly. For most drop-in, undermount, or double sinks, the process involves disconnecting the old hose and feeding the new one through the existing hole.
What Should I Do If My Sprayer Hose Gets Stuck Or Won’t Pull Out?
A stuck sprayer hose is often caused by mineral buildup, a kink, or an obstruction at the base. First, check for visible obstructions or knots under the sink. If the hose is jammed inside the faucet, try gently wiggling and pulling from both ends. Applying a lubricant like silicone spray can help loosen stubborn hoses. In rare cases, it may be necessary to partially disassemble the faucet to free the hose.
Are There Eco-friendly Options For Sink Sprayer Hoses?
Yes, several manufacturers now offer eco-friendly sprayer hoses made from recycled or biodegradable materials. Additionally, some sprayer heads include water-saving aerators, which can reduce water usage by up to 30% without sacrificing pressure (see EPA WaterSense for certified products). Upgrading to a water-efficient sprayer is a simple way to make your kitchen more sustainable.
How Can I Prevent Mold Or Mildew Under My Sink After A Leak?
After fixing a leak, it’s important to thoroughly dry the cabinet area and disinfect any surfaces that got wet. Use a fan or dehumidifier to speed up drying. For persistent moisture or visible mold, clean with a solution of bleach and water or a commercial mold remover. If you notice extensive mold growth, consult a professional for safe remediation.
A well-functioning sink sprayer hose makes kitchen cleanup a breeze, but when issues arise, they can disrupt your daily routine. By understanding how your sprayer hose works, preparing with the right tools, and following proven repair steps, you can tackle most problems without calling in a pro. Regular cleaning and preventive maintenance can save you time and money, and keep your kitchen running smoothly for years to come. For more kitchen plumbing projects, check out guides like How To Install Kitchen Sink Plumbing and How To Fix A Backed Up Kitchen Sink. Whether you’re a seasoned DIYer or a first-time fixer, these steps will help you restore your sprayer’s performance with confidence.