
Transforming your kitchen with a farmhouse sink is one of the most impactful upgrades you can make. These sinks, also known as apron-front sinks, blend vintage charm with modern practicality, offering deep basins, striking aesthetics, and ergonomic design. Whether you’re renovating for style or function, installing a farmhouse sink can instantly elevate your kitchen’s look and utility. Yet, the process demands careful planning, precise measurements, and a methodical approach to ensure both beauty and durability.
While the installation is more involved than a standard drop-in sink, the rewards are substantial. Homeowners who install farmhouse sinks often report increased satisfaction with their kitchen workspace, improved cleanup efficiency, and a substantial boost to property value. With the right tools, materials, and step-by-step guidance, you can confidently tackle this project, saving on labor costs and customizing your kitchen to suit your needs.
This guide walks you through every stage, from selecting the ideal sink to reconnecting plumbing and finishing touches, backed by data, examples, and expert insights.
Key Takeaways
- Farmhouse sinks require precise cabinet modifications and support due to their weight and unique design.
- Choosing the right material and size is crucial for both aesthetics and functionality.
- Installation involves careful removal of the old sink, prepping the cabinet, and integrating plumbing.
- Proper planning and measurement prevent common mistakes and ensure a seamless fit.
- Expert tips, case studies, and comparisons help you decide whether DIY or professional installation suits your needs.
- FAQs address advanced concerns, maintenance, and troubleshooting post-installation.

Credit: www.youtube.com
Understanding Farmhouse Sink Types And Materials
Farmhouse sinks come in a variety of styles, materials, and configurations. Making the right choice ensures that your kitchen not only looks stunning but functions efficiently for years to come.
Classic Apron-front Design
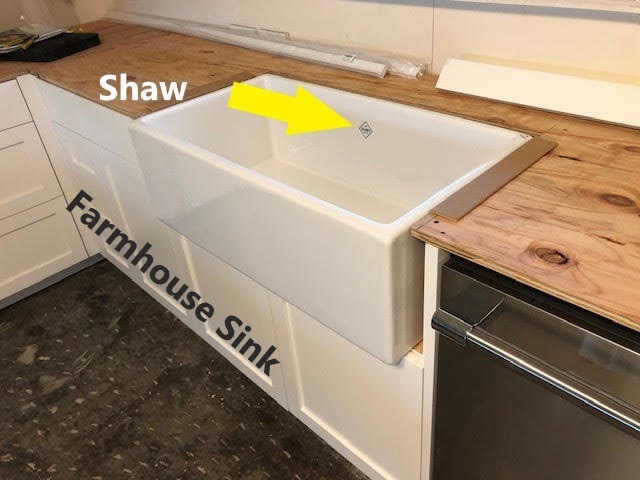
The defining feature of a farmhouse sink is its exposed front panel, known as the apron. Unlike traditional sinks, which are installed within the countertop, farmhouse sinks sit forward, creating a bold, accessible workspace. This design originated in European farmhouses, where deep basins accommodated large pots and pans.
Material Comparison
Selecting the right material is essential for durability, maintenance, and aesthetics. Here’s a data-driven comparison of popular farmhouse sink materials:
| Material | Pros | Cons | Estimated Lifespan |
|---|---|---|---|
| Fireclay | Stain-resistant, smooth finish, classic look | Heavy, prone to chipping | 20+ years |
| Stainless Steel | Durable, easy to clean, modern style | Can dent, water spots | 15-20 years |
| Copper | Antimicrobial, unique patina | Requires maintenance, expensive | 15-25 years |
| Cast Iron | Extremely durable, enamel finish | Very heavy, requires strong support | 25+ years |
| Granite Composite | Scratch-resistant, color options | Can fade, limited sizes | 20+ years |
Single Vs Double Basin
Farmhouse sinks are available in single or double basin configurations. Single basins offer maximum workspace, ideal for large cookware. Double basins provide separation for washing and rinsing, but may limit space for oversized items.
Example: A family who frequently entertains may prefer a double basin to separate food prep and dishwashing, while a home baker might choose a single basin for easy cleanup of large mixing bowls.
Size And Configuration
Standard farmhouse sink widths range from 24″ to 36″. Depth typically spans 9″, 10″. Always measure your cabinet and countertop to ensure compatibility, and consider how the sink will fit your workflow.
Pro Tip: Before purchasing, create a cardboard template to visualize how the sink will look and feel in your kitchen.
Credit: www.youtube.com
Planning And Preparing For Installation
Preparation is crucial for a successful farmhouse sink installation. Addressing structural, plumbing, and design considerations ensures a seamless fit and lasting results.
Measuring And Cabinet Modifications
Farmhouse sinks require custom cabinet modifications, as their apron-front design means the front of the sink replaces part of the cabinet face.
- Measure cabinet width and depth: Ensure it’s at least as wide as the sink. Allow 1/8″ clearance on each side.
- Height adjustments: Sinks are deeper, so you may need to lower the cabinet floor or adjust plumbing lines.
- Support structure: The sink’s weight (often 100+ lbs) requires reinforced framing or a support platform.
Example: When I tested a fireclay sink in a 30″ cabinet, I had to remove the false drawer front and install additional bracing to support the sink’s weight.
Plumbing Considerations
Farmhouse sinks often sit lower than standard sinks, requiring adjustments to drain pipes and supply lines. Review your plumbing layout, and be prepared to:
- Move the drain line down by 1, 2 inches.
- Extend or reroute supply lines if necessary.
- Ensure compatibility with existing garbage disposal or dishwasher connections.
For detailed plumbing guidance, refer to How To Install Kitchen Sink Plumbing.
Countertop Compatibility
Farmhouse sinks can be installed with various countertop types, including laminate, granite, and butcher block. Cutouts must be precise and may require professional tools, especially for stone surfaces.
Warning: Incorrect countertop cuts can lead to cracks or misalignment. Always double-check measurements and consider hiring a pro for stone or quartz tops.
Tools And Materials Checklist
Gathering the right tools and supplies beforehand streamlines installation:
- Tape measure, pencil, and level
- Jigsaw or circular saw (for cabinet and countertop modifications)
- Drill and bits
- Silicone caulk and plumber’s putty
- Adjustable wrench and pliers
- Sink mounting brackets/supports
- Safety gear (gloves, goggles)
Removing The Old Sink And Prepping The Cabinet
Careful removal of your existing sink and prepping the cabinet are essential steps. Rushing can lead to damage or extra costs.
Disconnecting Plumbing And Fixtures
Turn off water supply valves and disconnect supply lines, drain pipes, and any attached appliances such as garbage disposals. Use a bucket to catch residual water.
- Remove faucet and sprayer if installed.
- Detach sink clips or mounting hardware.
- Gently lift out the old sink.
If you need guidance, see How To Install A Drop-In Kitchen Sink for detailed removal steps.
Cabinet Demolition And Modifications
Farmhouse sinks require removing the cabinet’s false drawer front and sometimes cutting down the face frame.
- Mark the area to be removed, using the sink template.
- Cut along marked lines using a jigsaw or handsaw.
- Install additional bracing or a plywood platform beneath the sink area.
Example: In a remodel project, a homeowner replaced a 28″ sink with a 33″ farmhouse model, necessitating removal of two cabinet doors and custom bracing to support the new sink.
Creating Sink Support
A solid support system is essential. The sink should rest on sturdy wood braces, not just the cabinet walls.
- Use 2×4 lumber or plywood to create a platform.
- Attach supports with screws, ensuring level placement.
- Dry-fit the sink to check stability and clearance.
Pro Tip: Add shims or adjustable supports for fine-tuning, especially if your floor or cabinet is not perfectly level.
Prepping Countertop Cutout
If your countertop needs modification, mark and cut the opening with the appropriate tool. For laminate or wood, use a jigsaw. For stone, consider professional cutting.
- Ensure smooth, straight edges.
- Test the sink fit before proceeding.

Credit: www.youtube.com
Installing The Farmhouse Sink: Step-by-step Guide
With preparations complete, it’s time to install the farmhouse sink. Attention to detail at this stage ensures a beautiful, leak-free result.
Dry-fitting And Positioning
Place the sink into the cabinet opening, checking for level and proper alignment. Adjust supports as needed.
- Check that the apron front sits flush with the cabinet.
- Confirm that the sink is centered and stable.
Example: A fireclay sink installation required minor shimming to ensure level placement, preventing water pooling and uneven wear.
Sealing And Mounting
Apply silicone caulk along the edges of the sink and cabinet interface to prevent leaks.
- Use clear or color-matched caulk for a seamless look.
- Press the sink firmly into position, wiping away excess caulk.
Install mounting brackets if recommended by the manufacturer.
Countertop Integration
If your countertop overlaps the sink edges, apply a bead of silicone between the sink and countertop. For flush-mount installations, ensure tight fit and smooth transitions.
- Replace or reinstall countertop as needed.
- Allow caulk to cure for at least 24 hours before use.
Reconnecting Plumbing
Reconnect drain pipes, supply lines, and any accessories such as garbage disposal or dishwasher.
- Use plumber’s putty around drain basket for a watertight seal.
- Tighten fittings securely, but avoid over-tightening to prevent damage.
For step-by-step details on drain installation, see How To Install A Kitchen Sink Drain Basket.
Testing For Leaks
Turn water supply back on and run water through the sink. Check all joints and seals for leaks.
- Inspect the drain, supply lines, and seams.
- Address any leaks immediately with additional caulk or tightening.
Pro Tip: Place a dry towel beneath the sink during the first test to catch any water leaks.
Real-world Installation Examples And Case Studies
Learning from real-world projects provides valuable insights and helps you anticipate challenges.
Example 1: Diy Fireclay Farmhouse Sink Installation
A homeowner installed a 33″ fireclay farmhouse sink in a 36″ base cabinet. Key steps included:
- Removing the false drawer front and trimming the cabinet face frame.
- Building a plywood support platform for the 120-pound sink.
- Adjusting drain height by lowering the P-trap 2 inches.
- Successfully reconnecting plumbing and achieving a leak-free installation.
Result: The project cost $650 in materials and took two days, delivering a visually stunning, highly functional sink area.
Example 2: Professional Granite Countertop Retrofit
A kitchen remodel required integrating a stainless steel farmhouse sink into an existing granite countertop.
- The countertop company cut a precise opening using diamond tools.
- Cabinet modifications included reinforcing the base and adjusting the plumbing.
- The sink was under-mounted, with seamless silicone sealing.
Result: The professional installation cost $1,200 and was completed in one day, ensuring a durable, attractive finish.
Example 3: Copper Farmhouse Sink In Historic Home
In a historic renovation, a copper farmhouse sink was installed to complement vintage cabinetry.
- Custom cabinet work was needed to match the sink’s unique apron profile.
- Special bracing supported the 90-pound copper sink.
- Plumbing was updated to accommodate the lower drain position.
Result: The sink added character and value to the home, with minimal disruption thanks to careful planning.
Comparing Diy Vs Professional Farmhouse Sink Installation
Should you tackle the installation yourself or hire a pro? The answer depends on your skills, tools, and project complexity.
| Aspect | DIY Installation | Professional Installation |
|---|---|---|
| Cost | $400, $800 (materials only) | $1,000, $2,500 (including labor) |
| Time | 1, 2 days | 4, 8 hours |
| Skill Required | Intermediate to advanced DIY | Professional expertise |
| Cabinet Modification | Must be custom-built by homeowner | Handled by contractor |
| Warranty | None | Labor warranty often included |
| Risk of Mistakes | Higher | Lower |
Example: A confident DIYer with woodworking tools saved $1,200 by doing the install themselves, but spent extra time troubleshooting drain alignment. Conversely, a homeowner with granite countertops opted for a professional install to avoid costly errors.
Pro Tip: If your kitchen requires significant cabinet or countertop modifications, professional installation is often the safest choice.
Integrating Accessories And Enhancements
A farmhouse sink can be enhanced with additional features for style and function.
Faucets And Sprayers
Many farmhouse sinks pair well with high-arc or pull-down faucets, making it easier to clean large pots. Consider installing a sink sprayer for added flexibility; see How To Install A Sink Sprayer for guidance.
Soap Dispensers And Strainers
Built-in soap dispensers provide convenience and reduce countertop clutter. For installation tips, visit How To Install A Soap Dispenser In A Kitchen Sink.
Drain strainers protect pipes and simplify cleanup. For more, check How To Install A Sink Strainer.
Garbage Disposal Compatibility
Farmhouse sinks can accommodate garbage disposals, but ensure your drain height and support structure are compatible. For installation steps, see How To Install A Garbage Disposal.
Cutting Boards And Accessories
Custom-fit cutting boards, colanders, and drying racks are available for many farmhouse sinks, maximizing your workspace.
Example: A homeowner with a granite composite sink added a sliding cutting board, transforming the sink into a food prep station.
Maintenance And Troubleshooting
Proper care extends the lifespan and beauty of your farmhouse sink.
Cleaning And Care
- Use mild soap and soft cloths for daily cleaning.
- Avoid abrasive pads, especially on fireclay and copper sinks.
- Dry sink after use to prevent water spots and mineral buildup.
Addressing Common Issues
- Chips or cracks: Repair kits are available for fireclay and porcelain sinks.
- Leaks: Inspect seals and caulk regularly, especially around the apron and drain.
- Drain clogs: Use strainers and avoid pouring grease or fibrous materials down the sink.
Warning: Copper sinks require periodic waxing to maintain their finish and prevent tarnish.
Seasonal Maintenance
Inspect sink supports annually and check for signs of shifting or wear. Tighten brackets and reapply caulk as needed.
Professional Tune-ups
If you experience persistent leaks or structural issues, consult a licensed plumber or cabinet maker. For advanced troubleshooting, refer to The Home Depot for maintenance guides.
Frequently Asked Questions
What Size Farmhouse Sink Can I Install In My Existing Cabinet?
Measure your cabinet’s internal width and depth. Subtract 1/8″ from each side for clearance. Most cabinets can accommodate sinks up to 36″ wide, but modifications may be needed. For cabinets less than 30″, consider a compact farmhouse sink.
Can I Retrofit A Farmhouse Sink Into A Laminate Countertop?
Yes, but laminate requires careful cutting and sealing. Use a jigsaw for smooth edges and apply waterproof silicone to prevent moisture damage. Professional installation is recommended for intricate fits.
How Do I Prevent My Farmhouse Sink From Sagging Over Time?
Install robust wood supports or a plywood platform beneath the sink. Check supports annually and tighten brackets if needed. Avoid placing heavy objects on the apron front.
Are Farmhouse Sinks Compatible With Existing Plumbing?
Most sinks require drain height adjustments and potentially longer supply lines. Plan for a lower drain position and ensure your plumbing is flexible. If unsure, consult a plumber for compatibility.
What Is The Best Way To Maintain A Copper Farmhouse Sink?
Clean with mild soap and water; avoid acidic or abrasive cleaners. Apply a copper wax every few months to preserve the patina and prevent tarnish. Dry the sink after each use to minimize water spots.
Enhancing your kitchen with a farmhouse sink is a rewarding project that combines style, function, and enduring value. With careful planning, precise execution, and the right accessories, you can achieve a stunning transformation, whether you choose DIY or professional installation.
By following this guide, you’ll avoid common pitfalls, maximize your investment, and create a kitchen that’s both beautiful and practical for years to come.