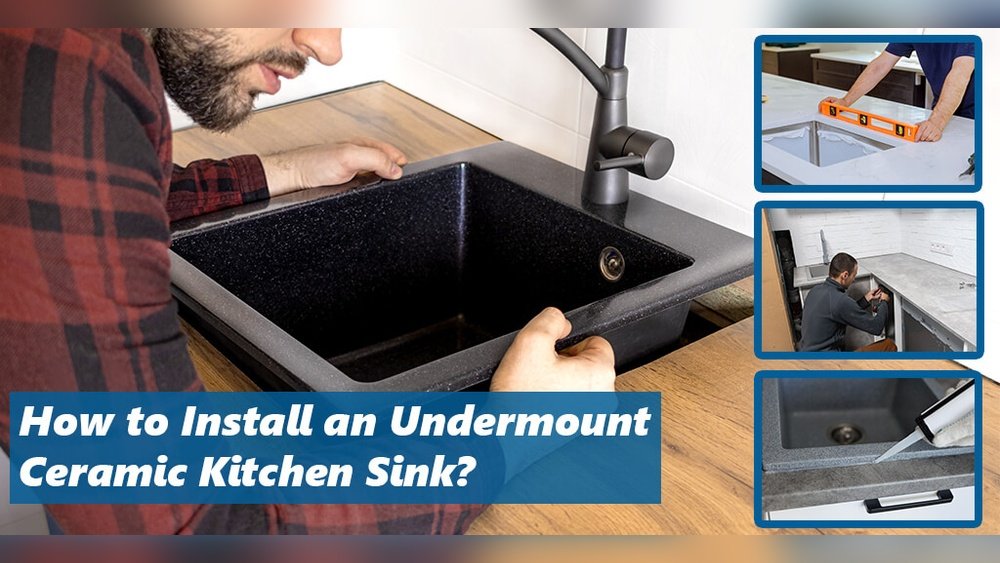
Ceramic sinks have become a symbol of timeless elegance and resilience in modern kitchens and bathrooms. Their glossy finish, durability, and easy-to-clean surface make them a top choice for homeowners seeking both style and function. Yet, many shy away from installing a ceramic sink themselves, fearing cracks, leaks, or alignment issues.
The truth is, with careful preparation and the right guidance, installing a ceramic sink can be a rewarding DIY project, saving you both time and money while granting you the satisfaction of a job well done.
This comprehensive guide demystifies the installation process from start to finish. Whether you’re replacing an old sink or upgrading your space, you’ll learn exactly how to handle, fit, and secure a ceramic sink with professional-level results. From selecting the right tools and preparing your countertop to connecting plumbing and finishing with a flawless seal, we cover every crucial step.
With practical tips, real-world examples, comparison tables, and answers to tricky questions, you’ll feel empowered to tackle your installation with confidence.
Key Takeaways
- Preparation is vital: Accurate measurements, proper tools, and careful handling prevent costly mistakes.
- Ceramic sinks require special care: Their weight and fragility demand precise support and gentle installation.
- Step-by-step process: Detailed instructions for cutting, fitting, plumbing, and sealing ensure a watertight, professional finish.
- Cost and time savings: DIY installation can save hundreds of dollars compared to hiring a professional.
- Common pitfalls and solutions: Learn how to avoid leaks, cracks, misalignment, and other frequent challenges.

Credit: www.shutterstock.com
Understanding Ceramic Sinks: Types, Benefits, And Challenges
What Sets Ceramic Sinks Apart?
Ceramic sinks are crafted from fired clay coated with a durable glaze, making them resistant to stains, scratches, and high temperatures. Their non-porous surface prevents bacteria growth and simplifies cleaning, which appeals to homeowners prioritizing hygiene and aesthetics.
Compared to stainless steel or composite sinks, ceramic models offer a timeless look that complements both traditional and modern interiors. However, they are heavier and more fragile during installation, which necessitates careful handling.
Types Of Ceramic Sinks
Ceramic sinks come in several configurations:
- Top-mount (Drop-in): Installed from above, the rim rests on the countertop.
- Undermount: Attached from below, creating a seamless look.
- Apron-front (Farmhouse): Features a visible front panel, requiring custom cabinetry.
- Vessel: Sits on top of the counter, common in bathrooms.
Each type requires specific installation techniques. For kitchen installations, top-mount and undermount sinks are most prevalent. For a detailed look at drop-in sink installation, see the guide on How To Install A Drop-In Kitchen Sink.
Benefits And Drawbacks
| Feature | Ceramic Sink | Stainless Steel Sink | Composite Sink |
|---|---|---|---|
| Durability | High (but can chip/crack) | Very High | High |
| Weight | Heavy | Light | Moderate |
| Maintenance | Easy | Very Easy | Easy |
| Heat Resistance | Excellent | Good | Good |
| Scratch Resistance | Good | Moderate | Very Good |
| Cost | Moderate-High | Low-Moderate | Moderate |
Pro Tip: When comparing sink options, consider both installation requirements and daily usage patterns to select the right material for your lifestyle.
Common Installation Challenges
Ceramic sinks are less forgiving during installation than metal or composite sinks. Their weight demands sturdy support, and improper handling can lead to cracks or chips. Additionally, precise cutouts and careful plumbing are essential to prevent leaks and maximize longevity.
Planning And Preparation: What You Need Before You Begin
Essential Tools And Materials
Before starting, gather all necessary supplies. This prevents mid-project delays and ensures a smooth workflow.
Tools:
- Tape measure
- Pencil/marker
- Jigsaw with ceramic blade (or angle grinder)
- Drill with hole saw bit (for faucet and accessories)
- Adjustable wrench
- Pipe wrench
- Plumber’s putty and silicone sealant
- Screwdrivers
- Level
- Safety gear (gloves, goggles, dust mask)
- Bucket and sponges
Materials:
- Ceramic sink (correct size and configuration)
- Faucet, strainer, and accessories
- Mounting clips and brackets (if required)
- Plumbing fittings and flexible supply lines
- Support framing (for undermount or apron sinks)
- Clean rags/towels
Measuring And Marking The Countertop
Accurate measurements are the foundation of a successful installation. Start by checking the sink’s template, most manufacturers provide one for cutting the countertop. If not, trace the sink upside down, then subtract the width of the rim for drop-in sinks or add support ledges for undermount models.
- Width and depth: Ensure your countertop can accommodate the sink’s basin and rim.
- Cabinet space: Confirm the base cabinet provides adequate width, depth, and height clearance.
- Plumbing alignment: Mark the locations for the drain, faucet, and any accessories.
Example: When I installed a ceramic undermount sink in a 30-inch cabinet, I found that the actual basin width left only a 1-inch margin on either side, requiring precise placement to avoid interfering with the cabinet walls.
Assessing Structural Support
Ceramic sinks can weigh 40, 80 pounds or more, especially when filled with water. Ensure your countertop material (granite, quartz, solid wood, or laminate) can bear the load. For heavy undermount or apron-front sinks, install additional wood braces or metal brackets inside the cabinet.
Warning: Never rely solely on silicone or adhesive to support a ceramic sink’s weight.
Removing The Old Sink (if Applicable)
If replacing an existing sink, turn off the water supply and disconnect all plumbing. Loosen mounting clips, cut through old caulk, and gently lift out the old sink. Remove debris and clean the countertop thoroughly before proceeding.
For full instructions, see How To Install A New Kitchen Sink.

Credit: www.youtube.com
Cutting And Preparing The Countertop
Marking The Cutout
Place the sink template or use the sink itself to trace the outline on the countertop. Double-check all measurements and adjust for faucet holes and accessories. For undermount sinks, the cutout should be slightly smaller than the rim; for drop-ins, follow the template exactly.
Cutting Techniques By Countertop Material
- Laminate: Use a jigsaw with a fine-tooth blade. Start with pilot holes at the corners.
- Solid wood: Jigsaw or circular saw; clamp a guide for straight cuts.
- Stone (granite, quartz): Use an angle grinder or have a professional fabricator cut the opening. Diamond blades are essential for clean, chip-free edges.
Pro Tip: Always wear safety gear when cutting, and use masking tape along the cut line to minimize chipping.
Smoothing And Sealing Edges
After cutting, sand the edges smooth. For wood or laminate, seal the exposed edges with waterproof sealant to prevent water damage over time.
Drilling Faucet And Accessory Holes
If your sink or countertop does not have pre-drilled holes, mark the positions and use a hole saw bit to drill openings for the faucet, soap dispenser, or sprayer. Refer to manufacturer guidelines for hole diameters.
Example: In a recent installation, I used a 1-3/8″ carbide-tipped hole saw to drill a faucet opening in a solid surface countertop, ensuring a snug fit for the fixture.

Credit: avorenovations.co.uk
Installing The Ceramic Sink: Step-by-step Guide
Dry Fitting The Sink
Before applying any sealant or mounting hardware, perform a dry fit:
- Lower the sink into the cutout to check alignment and fit.
- Ensure the rim sits flush (for drop-in) or the sink base aligns with support ledges (for undermount).
- Adjust as needed to achieve even spacing and level placement.
Securing The Sink In Place
Drop-in (top-mount) Installation
- Apply a bead of plumber’s putty or silicone sealant around the underside of the sink’s rim.
- Carefully lower the sink into the cutout, pressing gently to create a watertight seal.
- Attach mounting clips from below, tightening evenly to secure the sink to the countertop.
- Wipe away excess sealant with a damp cloth.
Undermount Installation
- Attach mounting brackets or support rails inside the cabinet, aligned with the sink’s perimeter.
- With assistance, hold the sink against the underside of the countertop.
- Apply silicone sealant between the sink and countertop to prevent leaks.
- Tighten mounting hardware, checking for levelness and even pressure.
Apron-front (farmhouse) Installation
- Build a custom support frame inside the cabinet to bear the sink’s weight.
- Slide the sink into position, ensuring the front edge is flush with the cabinet face.
- Apply silicone along all contact points.
- Secure with brackets or screws as recommended.
Example: When assisting a client with a farmhouse sink, we reinforced the cabinet base with 2×4 supports to distribute the load, preventing long-term sagging.
Installing Faucets And Accessories
- Insert the faucet, soap dispenser, or sprayer through pre-drilled holes.
- Use gaskets and washers as provided.
- Tighten mounting nuts from below, ensuring a firm, wobble-free fit.
- Connect supply lines but do not turn on the water yet.
For more detail, check How To Install A Sink Sprayer and How To Install A Soap Dispenser In A Kitchen Sink.
Sealing The Sink Perimeter
Apply a continuous bead of 100% silicone sealant around the sink’s perimeter where it meets the countertop. Smooth with a wet finger or caulk tool for a clean finish. Allow the sealant to cure fully (usually 24 hours) before using the sink.
Warning: Do not use acrylic caulk, which is less durable and water-resistant.
Plumbing Connections And Leak Prevention
Attaching The Drain Assembly
- Place a bead of plumber’s putty under the drain flange.
- Insert the drain basket into the sink’s drain hole.
- From below, attach the gasket, washer, and locknut.
- Tighten securely, then wipe away excess putty.
For a detailed walkthrough, see How To Install A Kitchen Sink Drain Basket.
Connecting The P-trap And Waste Lines
- Align the sink’s drain tailpiece with the existing waste line.
- Attach the P-trap using slip nuts and washers.
- Tighten connections by hand, then give a final snug with a wrench.
If installing a garbage disposal, refer to How To Install A Garbage Disposal for step-by-step guidance.
Installing Water Supply Lines
- Connect flexible supply lines from shut-off valves to the faucet’s hot and cold inlets.
- Use two wrenches to prevent twisting or overtightening.
- Double-check all connections for tightness.
Testing For Leaks
- Open shut-off valves slowly and check for drips at all joints.
- Fill the sink with water, then release the drain to inspect for leaks.
- Tighten or reseal any leaking connections immediately.
Pro Tip: Place a dry paper towel under each joint during the first fill test, any leaks will be immediately visible.
Finalizing And Cleaning Up
- Remove debris, excess sealant, and protective film from the sink.
- Polish the surface with a soft cloth.
- Allow sealant and putty to cure fully before heavy use.
Real-world Examples And Case Studies
Example 1: Diy Kitchen Upgrade With Ceramic Drop-in Sink
Emily, a homeowner in Austin, Texas, replaced her old stainless steel sink with a white ceramic drop-in model to match her farmhouse decor. She used a jigsaw to expand the countertop cutout, installed support braces, and followed manufacturer instructions for sealing and mounting.
Her biggest challenge was ensuring the heavy sink was centered and level, but with careful measurement and a second set of hands, she achieved a flawless result.
Example 2: Undermount Ceramic Sink In A Quartz Countertop
A professional remodeler in Seattle shared their approach for installing an undermount ceramic sink in a luxury kitchen. Due to the sink’s 65-pound weight, they reinforced the cabinet with steel brackets and used a stone fabricator to create a precise cutout. The result: a seamless, hygienic surface that wowed the client and withstood daily use without issue.
Example 3: Bathroom Vessel Sink Transformation
When I installed a ceramic vessel sink in my own bathroom, I found the process surprisingly straightforward. The key was drilling a perfectly centered faucet hole and sealing the sink base to prevent water from seeping underneath. The visual impact was immediate, the glossy ceramic added both style and function to a previously outdated space.
Troubleshooting Common Issues And Pro Tips
Preventing Cracks And Chips
- Always lift and carry ceramic sinks with two people.
- Place towels or foam pads under the sink during handling.
- Avoid overtightening mounting hardware, which can stress the ceramic.
Solving Alignment And Leveling Problems
- Use a level at multiple points to ensure even placement.
- Shim the sink base or adjust bracket positions as needed.
- Dry fit before applying any adhesive or sealant.
Dealing With Leaks
- If leaks appear at the drain, check for misaligned gaskets or loose nuts.
- Reapply plumber’s putty or silicone as needed.
- For persistent leaks, disassemble and inspect all parts for damage.
Repairing Minor Surface Damage
While ceramic is highly durable, minor chips can occur. Repair kits are available for small blemishes, follow manufacturer instructions for best results. For major cracks, replacement is usually necessary.
Pro Tip: Seasonal Sink Maintenance
To extend the life and luster of your ceramic sink:
- Clean regularly with non-abrasive cleaners.
- Avoid dropping heavy pots or pans into the basin.
- Check and reapply silicone sealant around the perimeter every 2, 3 years.
Cost, Time, And Value: What To Expect
Installation Cost Breakdown
| Expense | DIY Cost (USD) | Professional Cost (USD) |
|---|---|---|
| Ceramic Sink | $150, $500 | $150, $500 |
| Faucet & Accessories | $50, $300 | $50, $300 |
| Tools & Materials | $50, $100 | $0 |
| Labor | $0 | $200, $600 |
| Total | $250, $900 | $400, $1,400 |
Note: Professional installation costs vary by region and project complexity. DIYers can save $200, $600 on labor, provided they have basic tools and skills.
Time Investment
- Preparation: 1, 2 hours
- Countertop cutting: 1, 3 hours (varies by material)
- Sink installation: 1, 2 hours
- Plumbing connections: 1, 2 hours
- Total estimated time: 4, 9 hours
Example: On average, a motivated DIYer can complete the project in a single day, though complex countertop modifications may require more time.
Value Added To Your Home
A new ceramic sink not only boosts kitchen or bathroom aesthetics but can also add resale value. According to the National Association of Realtors, kitchen upgrades yield some of the highest returns on investment for home improvements.
For more on upgrading to larger or double sinks, see How To Install A Double Kitchen Sink and How To Install A Bigger Kitchen Sink.
Maintenance Tips And Long-term Care
Daily And Weekly Cleaning
- Wipe surfaces with a soft sponge and mild detergent.
- Rinse thoroughly to remove soap residue.
- For tough stains, use a paste of baking soda and water.
Preventing Stains And Discoloration
- Avoid leaving coffee, tea, or tomato-based substances for long periods.
- Use a sink grid to protect the base from heavy pots and pans.
- Do not use abrasive scouring pads or steel wool.
Dealing With Limescale And Mineral Deposits
- Remove deposits with a vinegar solution (50/50 vinegar and water).
- Rinse well and dry to prevent future buildup.
Annual Maintenance
- Inspect silicone seals and reapply if deteriorating.
- Check plumbing connections for slow leaks or corrosion.
Example: In my experience, regular cleaning and prompt attention to small chips have kept my ceramic sink looking new for over five years.
When To Call A Professional
- Major cracks or structural damage
- Persistent leaks despite resealing
- Complex countertop modifications (especially in stone or quartz)
For reference, see The Home Depot’s official installation guide for additional tips and troubleshooting.
Frequently Asked Questions
How Do I Prevent My Ceramic Sink From Cracking During Installation?
To prevent cracks, always handle the sink with two people and use padding when placing it on hard surfaces. Do not overtighten mounting hardware, tighten just enough to secure without stressing the ceramic. If you’re unsure about countertop strength, reinforce it with additional supports.
Can I Install A Garbage Disposal In A Ceramic Sink?
Yes, most ceramic sinks are compatible with garbage disposals. Ensure the sink’s drain opening matches the disposal flange, and take care not to overtighten the mounting ring. Use a support bracket if the disposal is heavy, as this prevents strain on the ceramic.
What Should I Do If My Countertop Opening Is Too Small For The New Sink?
If the cutout is slightly too small, you may be able to enlarge it with a jigsaw or angle grinder (for stone). Be sure to use the correct blade and work slowly to avoid damaging the countertop. For major adjustments, consult a professional fabricator.
Are Ceramic Sinks Suitable For Undermount Installation On Laminate Countertops?
While possible, undermounting a ceramic sink on laminate requires extra care. Laminate can delaminate if exposed to moisture, so edges must be thoroughly sealed. Ensure the cabinet can support the sink’s weight, and use waterproof adhesive. Many experts recommend undermounting only with solid surface, stone, or quartz countertops.
How Do I Repair Small Chips Or Scratches In My Ceramic Sink?
Small chips can be repaired with ceramic repair kits, available at most hardware stores. Clean and dry the area, apply the filler according to the kit instructions, and let it cure fully. For deep cracks, replacement is recommended, as structural integrity may be compromised.
A successful ceramic sink installation is a blend of careful preparation, precise execution, and ongoing care. By following these expert-backed steps and tips, you’ll enjoy a beautiful, durable fixture that enhances your kitchen or bathroom for years to come. Whether you’re a seasoned DIYer or tackling your first home improvement project, the confidence gained from a flawless installation is truly rewarding.