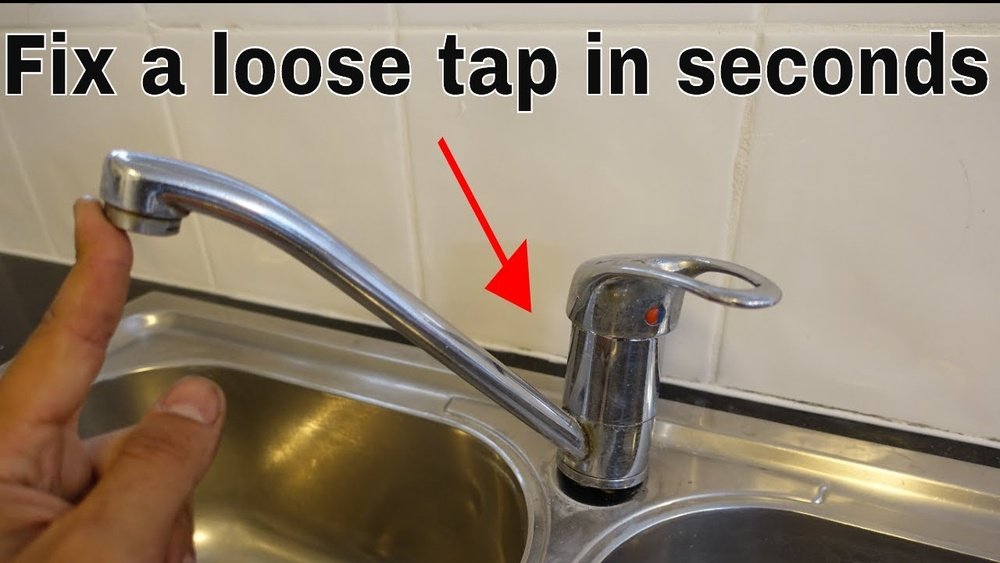
A wobbly kitchen tap is more than just an annoyance, it can lead to leaks, wasted water, and even damage to your countertop or plumbing if left unchecked. Many homeowners postpone fixing a loose faucet, thinking it’s a complex task requiring a professional plumber.
However, with the right tools, a bit of patience, and this expert guide, you can restore stability to your kitchen tap and extend its lifespan.
Having tackled this common kitchen issue myself, I know that most wobbly taps can be fixed in under an hour, often with minimal expense. In this article, you’ll learn not only how to diagnose and repair a loose kitchen faucet, but also why it happens, when a replacement is necessary, and how to prevent it from recurring.
We’ll cover practical step-by-step solutions, illustrate differences between popular tap types, and share real-world examples that make the process approachable for everyone.
Key Takeaways
- A wobbly kitchen tap is usually caused by a loose mounting nut or worn components.
- Most repairs require basic tools and can be completed in under an hour.
- Understanding your tap type is essential for choosing the right fix.
- Preventative maintenance can keep your faucet secure for years.
- Only a small percentage of cases require full faucet replacement.
- DIY repairs can save significant money versus hiring a plumber.

Credit: www.youtube.com
Understanding The Causes Of A Wobbly Kitchen Tap
A shaky or unstable kitchen faucet can disrupt daily tasks and signal underlying problems. To address the issue effectively, it’s important to know what causes it in the first place.
Common Reasons For Tap Instability
The most frequent causes of a wobbly tap are:
- Loose mounting nuts: The nuts that hold the faucet to the sink or countertop can loosen over time due to repeated movement or improper installation.
- Worn washers or gaskets: These components cushion and secure the faucet. If they degrade, the faucet loses its tight seal.
- Deteriorated sealant: The caulk or plumber’s putty around the base may dry out, compromising stability.
- Damaged faucet base or sink: Cracks, rust, or deformation in the tap or sink opening can lead to movement.
- Incorrect installation: If the tap was not properly secured during installation, wobbling is likely.
How Wear And Tear Contribute
Kitchen taps are used dozens of times each day. Over months and years, this repeated motion stresses the mounting hardware. Even high-quality faucets are not immune, vibration, minor leaks, and changes in temperature can all gradually loosen connections.
Types Of Kitchen Taps And Their Vulnerabilities
Different tap designs have unique weak points:
- Single-hole faucets: Tend to wobble if the single mounting nut loosens.
- Bridge faucets: Rely on multiple anchor points, which can fail unevenly.
- Pull-out/pull-down taps: The motion of extending the spout places extra stress on mounting hardware.
- Wall-mounted taps: Less prone to wobbling at the base, but can become loose where the pipes enter the wall.
Understanding your tap’s design will help you pinpoint the likely issue and choose the right repair approach.
Example: What Happened In My Own Kitchen
When I noticed my kitchen tap rocking side-to-side, I found the mounting nut beneath the sink had worked loose over several years of use. A simple tightening fixed the problem completely.
Credit: www.youtube.com
Tools And Materials You’ll Need
Before beginning repairs, gather the necessary tools and materials. Most items are common in DIY toolkits, but a few specialized tools can make the job easier.
Essential Tools
- Adjustable wrench: For tightening or loosening mounting nuts.
- Basin wrench: Designed to reach awkward nuts behind sinks.
- Screwdriver set: Both flathead and Phillips for handle and escutcheon screws.
- Flashlight or headlamp: To illuminate the dark area under the sink.
- Work gloves: Protect your hands during the repair.
- Plumber’s putty or silicone sealant: For resealing the faucet base.
Optional Tools For Challenging Jobs
- Penetrating oil: For rusted or stubborn nuts.
- Channel-lock pliers: For additional grip on large nuts.
- Inspection mirror: To see behind pipes or in tight spaces.
Materials
- Replacement washers/gaskets: If existing ones are worn or missing.
- Mounting kit: Some taps require specific mounting plates or hardware.
- Cleaning cloth: To wipe away debris and old sealant.
Preparation Checklist
- Shut off water supply to the tap.
- Clear out the cabinet under the sink for easy access.
- Lay towels or a bucket under the sink to catch any drips.

Credit: www.youtube.com
Step-by-step Guide: How To Fix A Wobbly Kitchen Tap
Tackling a loose faucet can seem daunting, but by breaking it down into manageable steps, most homeowners can handle the job with confidence.
Step 1: Identify The Source Of The Wobble
First, gently move the tap back and forth to determine where the looseness originates. Check if:
- The tap moves at its base (most common).
- The handles or spout are loose (may require separate repair).
- The entire sink moves (indicates a larger issue).
If the movement is at the base, proceed with tightening the mounting hardware.
Step 2: Shut Off Water Supply
Locate the shut-off valves under your sink and turn them clockwise. Test the tap to ensure water flow stops completely. This prevents accidental leaks or sprays during the repair.
Step 3: Access The Mounting Hardware
Open the cabinet and use a flashlight to find the mounting nuts securing the faucet to the sink or countertop. Remove any items blocking access. For tight spaces, a basin wrench is invaluable.
Step 4: Tighten The Mounting Nut
- Place the wrench or basin wrench on the mounting nut.
- Turn clockwise to tighten. Secure the faucet base with your other hand to keep it aligned.
- Avoid overtightening, which can crack porcelain sinks or strip threads.
Pro Tip: If the nut is rusted or difficult to turn, apply a small amount of penetrating oil, let it sit for 5-10 minutes, then try again.
Step 5: Check For Worn Or Damaged Parts
If tightening the nut doesn’t solve the wobble, inspect:
- Washers/gaskets: Replace any that are compressed, cracked, or missing.
- Mounting hardware: Ensure all parts are present and in good condition.
- Faucet base: Look for corrosion or warping.
Replace parts as needed, following manufacturer instructions.
Step 6: Re-seal The Faucet Base
If you notice old, cracked caulk or plumber’s putty:
- Gently remove the tap (after disconnecting water lines if necessary).
- Clean the area thoroughly.
- Apply a new bead of plumber’s putty or silicone sealant around the base.
- Reinstall and tighten the faucet.
Step 7: Restore Water Supply And Test
Turn the shut-off valves back on. Run the tap and check for leaks or movement. If the faucet remains stable and leak-free, the repair is complete.
Example: Real-world Fix From A Reader
A reader reported that her pull-down kitchen tap became loose after three years. She discovered the mounting nut had loosened, and the rubber gasket had deteriorated. After replacing the gasket and tightening the nut, her tap was as solid as new.
Comparing Repair Methods And When To Replace
While most wobbly taps can be fixed with a simple tightening, sometimes a more thorough approach or even a replacement is warranted. Let’s compare your options.
Table: Comparison Of Common Wobbly Tap Fixes
| Repair Method | Difficulty | Time Required | Cost Estimate | Success Rate |
|---|---|---|---|---|
| Tightening Mounting Nut | Easy | 15, 30 min | $0, $10 | 90% |
| Replacing Washers/Gaskets | Moderate | 30, 60 min | $3, $20 | 85% |
| Resealing Base | Moderate | 30, 90 min | $5, $15 | 80% |
| Full Faucet Replacement | Advanced | 1, 2 hours | $75, $300+ | 100% |
When To Repair Vs. Replace
- Repair: If your tap is less than 10 years old, in good condition, and the wobble is due to loose hardware or minor wear, a repair is usually sufficient.
- Replace: If the tap shows signs of corrosion, persistent leaks, or repeated loosening, consider upgrading to a new model.
Example: Comparing Diy And Professional Repair
A homeowner paid $120 for a plumber to fix a wobbly tap, something that could have been resolved with a $10 wrench and 30 minutes of DIY effort.
Internal Resource
For those considering a full replacement, see our guide on how to install a new kitchen sink for step-by-step instructions.
Preventing Future Wobbles: Maintenance Tips
Once you’ve fixed your kitchen tap, a few easy habits can prevent wobbling from returning.
Regular Checks And Tightening
- Inspect the base of your tap every 3, 6 months for movement.
- Tighten the mounting nut if you notice any slight movement.
- Check for leaks or moisture around the base.
Careful Use
- Avoid using the tap as a handle to support yourself or as a lever for heavy pots.
- Don’t pull excessively on pull-down sprayers.
Sealing And Cleaning
- Keep the area around the faucet base clean and dry.
- Reseal with plumber’s putty or silicone every few years, especially after deep cleans.
Upgrading Hardware
- Invest in high-quality mounting kits for new installations.
- Replace rubber or plastic gaskets with more durable materials when possible.
Example: Preventative Maintenance Success
A family who replaced their cheap rubber washers with premium silicone gaskets reported zero faucet wobble for over five years.
Tap Types: Special Considerations For Each Faucet Style
Different kitchen taps require slightly different approaches for securing the base. Here’s how to address common designs.
Single-handle Faucets
- Usually secured with a single mounting nut.
- Access is straightforward but may be cramped.
- Wobbling often fixed by tightening or replacing a single washer.
Double-handle Faucets
- Two mounting nuts, one for each handle.
- Check both nuts, as wobble may originate from either side.
Pull-out/pull-down Faucets
- Extra movement from the hose increases wear on mounting hardware.
- Inspect both the mounting nut and hose connection for stability.
Bridge Faucets
- Multiple mounting points.
- All nuts must be tight for full stability.
Table: Tap Type Vs. Wobble-prone Areas
| Faucet Type | Most Common Wobble Area | Typical Fix |
|---|---|---|
| Single-Handle | Base/Mounting Nut | Tighten Nut |
| Double-Handle | Either Handle Nut | Tighten Both Nuts |
| Pull-Down/Pull-Out | Base & Hose Connection | Tighten Nut, Check Hose |
| Bridge | Multiple Mounts | Tighten All Nuts |
Internal Resource
If you’re dealing with a complex tap, our guide on how to install a kitchen sink faucet can provide extra detail.
Real-world Examples And Case Studies
Learning from real experiences can be invaluable. Here are several examples that illustrate common challenges and solutions.
Case Study 1: The Apartment Fix
A renter noticed her kitchen tap shifting whenever she used the sprayer. She contacted her landlord, who simply tightened the mounting nut and replaced a worn washer, solving the issue in 20 minutes.
Case Study 2: The Diy Upgrade
An older home had a bridge-style faucet that wobbled due to rusted mounting hardware. The homeowner replaced all washers and upgraded to stainless steel nuts, resulting in a perfectly stable tap.
Case Study 3: The Persistent Problem
A homeowner found that her tap became loose repeatedly, even after tightening. Investigation revealed a hairline crack in the sink material itself, requiring a new sink installation.
Example: When Replacement Was The Only Option
A family with a heavily corroded faucet base chose to install a new model. The replacement not only solved the wobble but improved water pressure and style.
Internal Resource
For more on complex sink jobs, see our article on how to install a double kitchen sink.
Troubleshooting: When The Tap Still Wobbles
If you’ve followed all steps and your kitchen tap is still unstable, further investigation is needed.
Check For Sink Or Countertop Issues
Sometimes the problem isn’t with the tap at all:
- Inspect the sink cutout for cracks or warping.
- Ensure the sink itself is tightly mounted to the countertop.
If the sink moves, it must be re-secured before addressing the tap.
Examine Under-sink Plumbing
- Look for leaks or corrosion around water lines.
- Ensure all supply lines are properly attached and not putting stress on the tap.
Consider Professional Help
If you suspect hidden damage or can’t access the mounting hardware, calling a licensed plumber may be necessary. For example, taps installed in granite or composite countertops may require specialized tools.
Example: Complex Case
A homeowner with a cast iron sink found the tap wobbled due to rusted mounting holes. Only a professional repair could resolve the issue without damaging the sink further.
Internal Resource
If you encounter persistent drainage or backup problems, see our guide on how to fix a backed up kitchen sink.
Cost Analysis: Diy Vs. Hiring A Plumber
Understanding the costs involved can help you decide whether to tackle the repair yourself or call in a professional.
Table: Estimated Costs For Fixing A Wobbly Kitchen Tap
| Solution | DIY Cost | Professional Cost | Time to Complete |
|---|---|---|---|
| Tighten Mounting Nut | $0, $10 | $70, $150 | 15, 30 min |
| Replace Washer/Gasket | $3, $20 | $90, $180 | 30, 60 min |
| Full Replacement | $75, $300+ | $200, $400+ | 1, 2 hours |
Money-saving Tips
- Borrow tools from friends or a local tool library.
- Buy only the parts you need; avoid unnecessary kits.
- Watch tutorials from reputable sources such as Family Handyman.
Internal Resource
For more complex sink and faucet installations, refer to our articles on how to install kitchen sink plumbing and how to install a disposal in a single sink.
When To Call A Plumber: Safety And Warranty Considerations
While most wobbly taps can be fixed DIY, certain scenarios require professional help.
Signs You Need A Plumber
- Persistent leaks after tightening and replacing parts.
- Corroded or rusted mounting hardware.
- Cracked or damaged sink material.
- Inability to access mounting nuts due to obstructions.
- Concerns about damaging expensive countertops (e.g., granite, marble).
Warranty Issues
Some faucets have warranties that require professional installation or repair to remain valid. Always check manufacturer terms before DIY repairs, especially for newer or high-end models.
Safety Concerns
- Shut off electricity to nearby outlets when working under the sink to avoid shock hazards.
- Use a sturdy flashlight and avoid working alone if you’re in a cramped space.
Example: Professional Solution
A homeowner with a granite countertop and a high-end faucet chose to hire a certified plumber to avoid risking damage or voiding the warranty.
External Resource
For more on when to hire a professional, see Consumer Reports.
Frequently Asked Questions
What If My Kitchen Tap Is Still Wobbly After Tightening The Nut?
If tightening the mounting nut didn’t solve the problem, inspect for worn washers, missing gaskets, or damage to the sink or faucet base. Sometimes the underlying countertop or sink cutout may be compromised, requiring additional repairs or professional help.
Can I Use Plumber’s Tape Instead Of Putty To Seal The Faucet Base?
Plumber’s tape (also called PTFE or Teflon tape) is designed for threaded pipe connections, not for sealing flat faucet bases. Instead, use plumber’s putty or silicone sealant for the best watertight seal at the base of your tap.
How Often Should I Check My Kitchen Tap For Looseness?
It’s a good idea to check your kitchen tap every 3, 6 months, especially if you have a pull-out or pull-down model. Regular checks help you catch early signs of loosening before they become a bigger issue.
Is There A Difference Between Fixing A Wobbly Bathroom And Kitchen Tap?
While the general principles are the same, bathroom taps are often smaller and may have different mounting hardware. Kitchen taps, especially those with sprayers, experience more frequent movement and stress, making them more prone to loosening.
What Tools Can Help If I Can’t Reach The Mounting Nut By Hand?
If space under your sink is extremely tight, a basin wrench is the best tool for reaching mounting nuts in hard-to-access spots. An inspection mirror or headlamp can also help you see what you’re doing without straining.
A secure, stable kitchen tap not only improves your daily kitchen experience but also protects your home from leaks and water damage. By understanding the causes of tap wobble, gathering the right tools, and following step-by-step repair methods, you can tackle this common problem with confidence.
Whether you choose a quick DIY fix or opt for professional help, maintaining your faucet ensures years of trouble-free use. For further kitchen plumbing guides, explore our installation resources and keep your kitchen running smoothly.