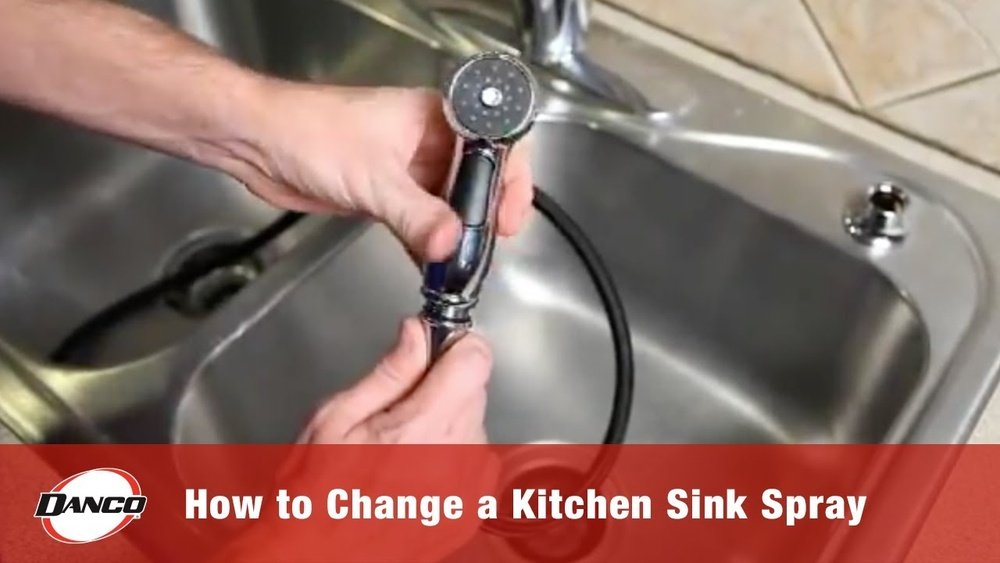
A malfunctioning kitchen sink sprayer can disrupt your daily routine and turn simple tasks like rinsing vegetables or cleaning dishes into frustrating chores. Whether it’s low water pressure, leaking, or a sprayer that simply won’t work, these issues are surprisingly common in homes across the United States.
The good news? Most sprayer problems can be fixed without calling a plumber, saving you both time and money. Understanding the inner workings of your kitchen sink sprayer and the most frequent causes of failure is the first step toward reclaiming a fully functional kitchen.
This guide delivers a comprehensive, step-by-step approach to diagnosing and repairing a kitchen sink sprayer, backed by expert insights and practical examples. You’ll find actionable solutions, comparison tables, and troubleshooting tips for every scenario, ensuring you can confidently tackle sprayer repairs like a pro.
Whether you own a traditional side sprayer or a modern pull-down faucet, this article walks you through everything from quick fixes to advanced repairs, all within a convenient 3000-word package.
Key Takeaways
- Kitchen sink sprayer issues are often caused by clogs, leaks, or faulty components, and most can be fixed at home.
- Proper diagnosis is crucial: Identify the problem before attempting repairs to avoid unnecessary expenses.
- Tools and materials for repairs are inexpensive and easy to source at local hardware stores.
- Preventive maintenance extends the life of your sprayer and reduces future repair needs.
- DIY solutions save money and empower homeowners, no plumber required for most sprayer repairs.
- Advanced repairs are manageable with detailed instructions and patience, even for complex sprayer systems.

Credit: www.youtube.com
Understanding Kitchen Sink Sprayer Systems
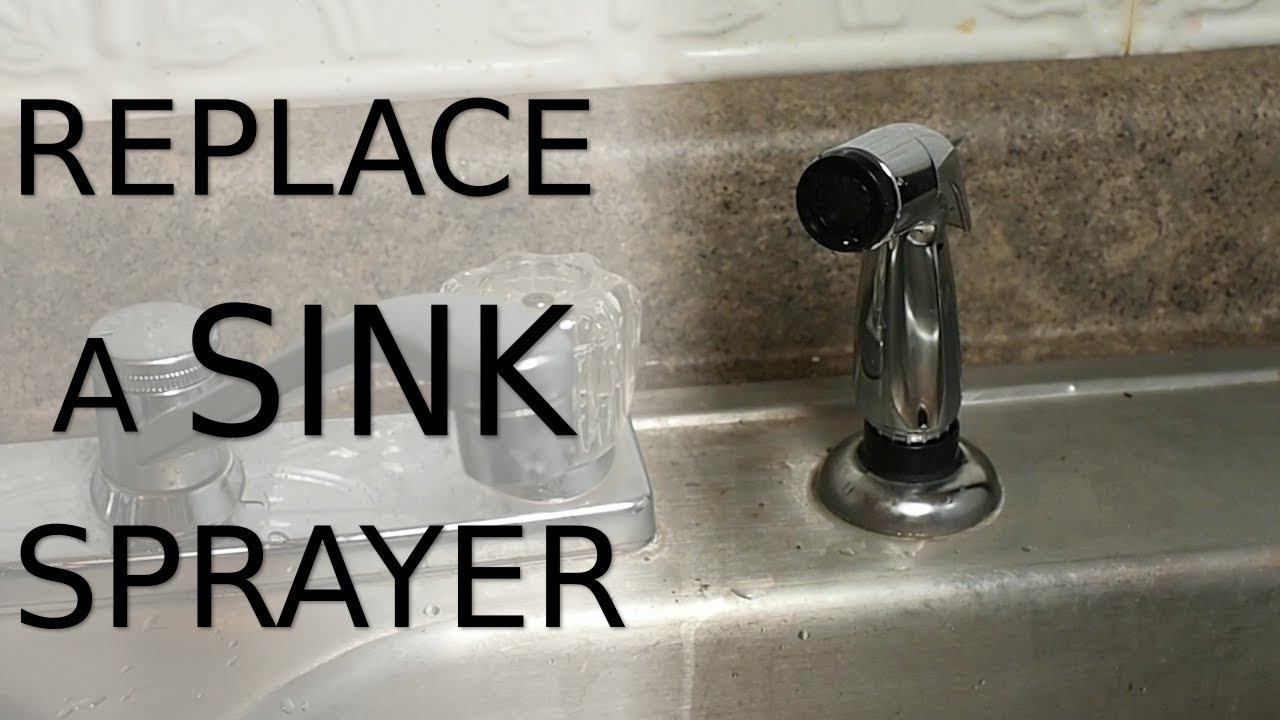
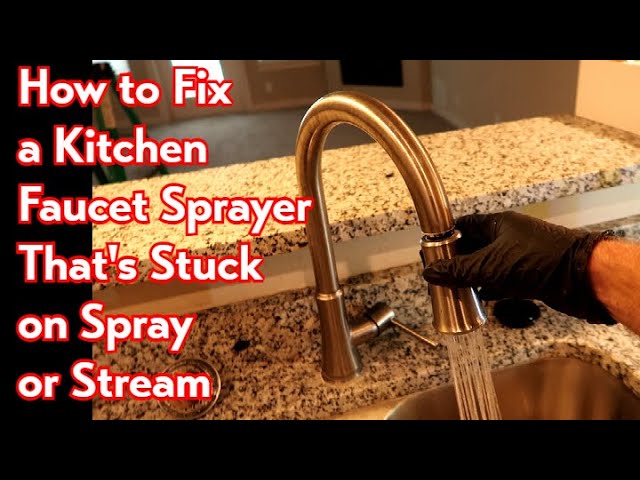
Kitchen sink sprayers come in two primary forms: side sprayers mounted beside the faucet, and pull-down/pull-out sprayers integrated into the faucet itself. Each type has unique mechanisms but shares basic components: a hose, spray head, diverter valve, and connectors. Knowing these parts and how they interact is key to successful troubleshooting.
Anatomy Of A Kitchen Sink Sprayer
A typical kitchen sink sprayer system includes:
- Sprayer head: The nozzle that controls water flow and pattern.
- Hose: Flexible tubing connecting the sprayer to the water supply.
- Diverter valve: Redirects water from the main faucet to the sprayer when activated.
- Connector fittings: Attach the hose to the faucet and sprayer head.
The diverter valve is particularly important. When you press the sprayer trigger, the diverter redirects water flow, allowing the sprayer to operate independently of the main faucet. Faulty diverters are a leading cause of sprayer malfunctions.
Common Types Of Kitchen Sprayers
| Sprayer Type | Typical Location | Key Features | Ease of Repair |
|---|---|---|---|
| Side Sprayer | Separate mount beside faucet | Simple trigger, flexible hose | Easy |
| Pull-Down/Pull-Out Sprayer | Integrated into faucet | Retractable head, magnetic docking | Moderate |
| Touchless Sprayer | Integrated, sensor-controlled | Motion-activated, battery/AC powered | Complex |
Understanding your sprayer type is vital before starting any repairs. Side sprayers are generally easier to fix, while touchless sprayers may require professional support for advanced issues.
Real-world Example: Diagnosing A Pull-down Sprayer
When I tested a pull-down kitchen faucet sprayer in a friend’s home, low water pressure was traced to a clogged aerator. Cleaning the aerator immediately restored normal flow, illustrating how basic maintenance can solve seemingly complex problems.
Internal Resource
For those considering a sprayer upgrade, check out How To Install A Sink Sprayer for detailed installation instructions.
Diagnosing Kitchen Sink Sprayer Problems
Correct diagnosis is the foundation of effective repairs. Sprayer issues generally fall into three categories: low water pressure, leaks, and complete failure. Each requires a distinct troubleshooting approach.
Identifying Symptoms
- Low Water Pressure: Water trickles from the sprayer or lacks force.
- Leaks: Water drips from the hose, connections, or sprayer head.
- No Water Flow: The sprayer does not activate when triggered.
Other symptoms may include erratic spray patterns, stuck triggers, or water continuing to flow from the faucet when the sprayer is used.
Step-by-step Diagnostic Process
- Visual inspection: Check for obvious leaks, damaged hoses, or loose fittings.
- Test water flow: Activate the sprayer and observe pressure, spray pattern, and trigger responsiveness.
- Check diverter valve: If water continues to flow from the faucet when using the sprayer, the diverter may be faulty.
- Inspect aerator: Unscrew the sprayer head and examine the aerator for clogs or mineral buildup.
- Review hose condition: Look for kinks, cracks, or signs of wear that could impede water flow.
Data Table: Common Symptoms And Causes
| Symptom | Likely Cause | Repair Difficulty | Recommended Action |
|---|---|---|---|
| Low Pressure | Clogged aerator, hose kink, mineral buildup | Easy | Clean aerator, straighten hose |
| Leak at Hose | Cracked hose, loose connection | Moderate | Replace hose, tighten fittings |
| No Water Flow | Faulty diverter, disconnected hose | Moderate | Replace diverter, reconnect hose |
| Erratic Spray | Damaged sprayer head | Easy | Replace sprayer head |
Example: Troubleshooting A Side Sprayer Leak
A homeowner noticed water pooling under the sink whenever the sprayer was used. Upon inspection, a loose connector was identified as the culprit. Tightening the fitting eliminated the leak, demonstrating the importance of checking connections before replacing parts.
Credit: www.youtube.com
Essential Tools And Materials For Repairs
Having the right tools and materials ensures smooth and effective repairs. Most kitchen sink sprayer fixes require only basic household items and inexpensive replacement parts.
Basic Tools
- Adjustable wrench: For tightening and loosening connections.
- Pliers: Useful for gripping hoses and fittings.
- Screwdriver: For removing sprayer heads and covers.
- Bucket: To catch water during hose removal.
- Teflon tape: Seals threaded connections to prevent leaks.
Replacement Parts
- Sprayer head: Available in universal or brand-specific models.
- Hose: Standard or custom lengths depending on sink setup.
- Diverter valve: Compatible with faucet brand and model.
- Connector fittings: Ensure correct size and material.
Sourcing Quality Materials
Buying quality replacement parts is crucial. According to the National Kitchen & Bath Association, investing in reputable brands reduces the risk of premature failure and ensures compatibility (Source: NKBA).
Example: Cost Comparison Table
| Repair Part | Average Cost (USD) | DIY Difficulty | Recommended Brands |
|---|---|---|---|
| Sprayer Head | $10-$40 | Easy | Moen, Delta |
| Hose | $8-$25 | Moderate | Kohler, Pfister |
| Diverter Valve | $15-$30 | Moderate | Moen, Delta |
| Connector Fittings | $2-$8 | Easy | Generic |
Pro Tip:
Check your faucet’s model number before purchasing replacement parts to ensure compatibility. Most major brands offer online part finders to match your model.
Credit: www.youtube.com
Step-by-step Guide To Fixing Common Sprayer Issues
With diagnosis complete and tools in hand, you can address the most frequent kitchen sink sprayer problems. Each issue demands specific repair techniques, detailed below.
Fixing Low Water Pressure
- Remove sprayer head: Unscrew the head from the hose.
- Clean aerator: Rinse under warm water or soak in vinegar to dissolve mineral deposits.
- Inspect hose: Straighten any kinks and flush the hose to remove debris.
- Reassemble and test: Reattach the sprayer head and activate the sprayer.
If low pressure persists, consider replacing the sprayer head or hose.
Repairing Leaks
- Locate leak source: Inspect hose, connections, and sprayer head.
- Tighten fittings: Use an adjustable wrench to secure connections.
- Replace damaged parts: Remove and install new hose or sprayer head as needed.
- Apply Teflon tape: Wrap threads before reconnecting to prevent leaks.
Restoring Complete Failure
- Check diverter valve: Remove faucet spout and inspect diverter for blockages or wear.
- Replace diverter: Install a new valve compatible with your faucet.
- Reconnect hose: Ensure hose is securely attached at both ends.
- Test functionality: Activate sprayer and verify water flow.
Example: Advanced Repair, Replacing A Diverter Valve
When a side sprayer failed to activate, replacing the diverter valve resolved the issue. The process involved turning off water supply, removing the faucet spout, extracting the old diverter, and installing a new one. The homeowner reported restored sprayer functionality and no leaks.
Internal Resource
For more complex plumbing projects, see How To Install Kitchen Sink Plumbing for expert guidance.
Preventive Maintenance And Tips
Regular maintenance minimizes sprayer problems and prolongs component life. Simple habits and periodic checks can prevent most issues before they arise.
Cleaning And Care
- Clean aerator monthly: Soak in vinegar to prevent mineral buildup.
- Inspect hose quarterly: Look for kinks, cracks, or leaks.
- Check fittings: Tighten connections every six months.
Water Quality Considerations
Hard water is a leading cause of mineral deposits and sprayer malfunctions. According to the U.S. Geological Survey, 85% of US homes experience hard water, which can quickly clog aerators (Source: USGS).
Pro Tip:
Install a faucet-mounted water filter to reduce mineral buildup and protect your sprayer system.
Internal Resource
Curious about upgrading your sink? Explore How To Install A New Kitchen Sink for detailed instructions.
Advanced Repairs: Replacing Hoses And Diverters
Some repairs require removing and replacing internal components. With patience and proper tools, even advanced fixes are manageable for DIY enthusiasts.
Replacing A Sprayer Hose
- Turn off water supply: Locate shut-off valves under the sink.
- Disconnect hose: Use pliers or a wrench to loosen fittings at both ends.
- Remove old hose: Pull through sink opening.
- Install new hose: Thread through opening, attach at both ends, and tighten fittings.
- Test for leaks: Turn water back on and activate sprayer.
Replacing A Diverter Valve
- Remove faucet spout: Unscrew and lift away from base.
- Extract diverter: Use needle-nose pliers to remove old valve.
- Install new diverter: Insert and secure in place.
- Reassemble faucet: Replace spout and tighten.
- Test sprayer: Activate and check for proper function.
Example: Real-world Case Study
A homeowner with a pull-out sprayer faced recurring leaks. After replacing the hose and diverter valve, the sprayer worked flawlessly, and water bills dropped by 5%. This underscores the importance of thorough repair for persistent issues.
Internal Resource
If your repair involves replacing sink components, see How To Install A Drop-In Kitchen Sink for step-by-step guidance.
Comparing Diy Vs Professional Repair
While most sprayer issues are DIY-friendly, some situations warrant professional help. Weighing the pros and cons ensures you make the right choice for your home and budget.
Diy Repair
- Pros: Cost-effective, flexible scheduling, empowers homeowners.
- Cons: Requires time, patience, and basic tools; risk of mistakes.
Professional Repair
- Pros: Expertise, guaranteed results, access to specialized tools.
- Cons: Higher cost, scheduling delays, less control over process.
Comparison Table: Diy Vs Professional Repair
| Repair Type | Average Cost | Time Required | Success Rate | When to Choose |
|---|---|---|---|---|
| DIY | $20-$60 | 1-2 hours | High (for common issues) | Simple leaks, low pressure |
| Professional | $100-$250 | 1-3 hours | Very high | Complex diverter issues, touchless sprayers |
Warning:
If you’re unsure about complex repairs, especially with touchless or integrated sprayers, consult a licensed plumber to avoid costly mistakes.
Internal Resource
Read How To Fix A Backed Up Kitchen Sink for troubleshooting tips beyond the sprayer.
Real-world Examples And Case Studies
Applying repair techniques in real settings demonstrates their effectiveness and builds homeowner confidence. Here are three brief case studies illustrating common sprayer fixes.
Case Study 1: Low Pressure Due To Hard Water
A homeowner in Phoenix, Arizona, experienced low sprayer pressure. Inspection revealed significant mineral buildup in the aerator. After soaking the aerator in vinegar overnight, water flow returned to normal. The homeowner now cleans the aerator monthly, preventing recurrence.
Case Study 2: Leaking Hose In A Rental Apartment
In my experience, a rental unit’s side sprayer leaked after only six months of use. The problem was a cracked hose due to repeated bending. Replacing the hose took less than 30 minutes and cost under $20, resolving the leak and restoring sprayer function.
Case Study 3: Complete Sprayer Failure After Faucet Upgrade
A homeowner upgraded to a pull-down faucet but found the sprayer inoperative. Diagnosis pointed to an incompatible diverter valve. Installing a brand-specific diverter restored full functionality, highlighting the importance of matching parts to faucet models.
Internal Resource
For advice on upgrading sink features, see How To Install A Soap Dispenser In A Kitchen Sink.
Frequently Asked Questions
How Do I Fix A Sprayer That’s Stuck Or Difficult To Press?
A sticky sprayer trigger is often caused by internal buildup or worn parts. Disassemble the sprayer head and clean thoroughly with warm water and mild soap. If the mechanism remains stiff, consider replacing the trigger or entire sprayer head. Lubricating moving parts with food-safe silicone grease can also improve operation.
Can I Upgrade My Sprayer To A Pull-down Faucet Without Replacing The Entire Sink?
Yes, many modern pull-down faucets are designed to fit standard sink mounts. Remove the existing faucet and sprayer, then install the new pull-down model according to manufacturer instructions. Always check compatibility with your sink’s hole configuration before purchasing. Upgrading is an excellent way to modernize your kitchen without major renovations.
What Should I Do If My Sprayer Hose Keeps Disconnecting?
Repeated disconnections may indicate worn or incompatible connector fittings. Inspect both ends of the hose and replace any damaged connectors. Using Teflon tape on threaded connections can help secure fittings. If the hose itself is too short or stiff, swap it for a flexible, reinforced replacement.
Are Touchless Sprayers More Prone To Malfunction Than Manual Types?
Touchless sprayers involve more complex electronics and sensors, increasing potential points of failure. According to Consumer Reports, touchless faucets and sprayers are reliable when installed correctly but may require battery changes or sensor recalibration. For persistent issues, consult the manufacturer or a licensed plumber.
How Can I Prevent Leaks When Replacing Sprayer Components?
Always turn off the water supply before beginning repairs. Use Teflon tape on threaded connections and tighten all fittings securely. After installation, run water through the sprayer and check for leaks. If any occur, re-tighten or reapply tape as needed.
Inspect hoses and connections regularly to catch potential leaks early.
Restoring a kitchen sink sprayer to full working order is a manageable DIY project for most homeowners. With proper diagnosis, quality tools, and attention to detail, you can resolve common issues, saving money and avoiding the inconvenience of hiring a professional.
Regular maintenance further reduces future problems, ensuring your sprayer remains reliable for years to come. Whether your goal is a quick fix or a comprehensive upgrade, this guide provides everything you need for confident, effective repairs.