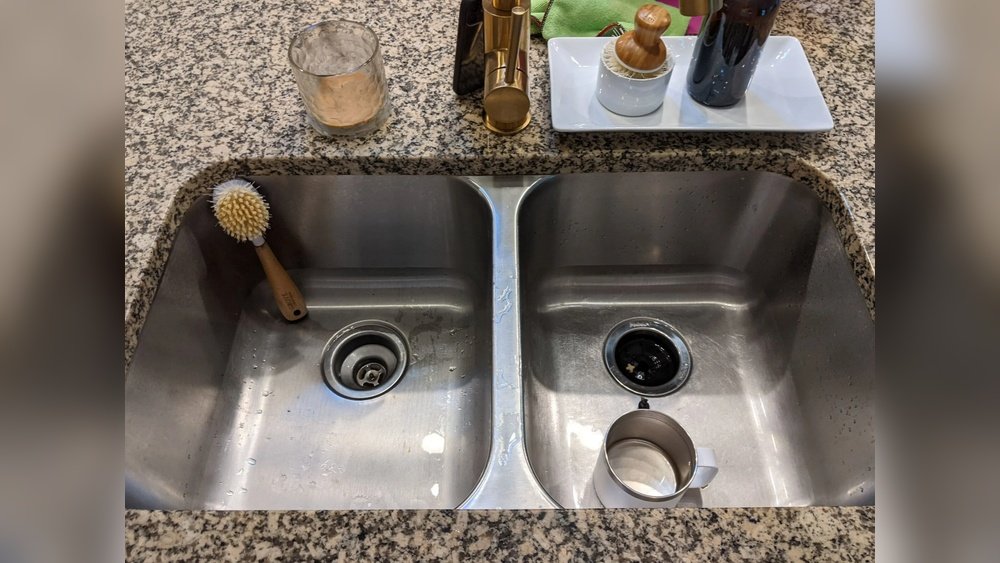
Replacing an undermount sink without removing the countertop might seem like an intimidating project, but with the right knowledge, tools, and preparation, it’s a highly achievable upgrade for most homeowners. Whether your current sink is cracked, leaking, or simply outdated, learning how to swap it out while leaving your countertop intact can save you significant labor costs, time, and disruption.
This process also preserves the integrity of expensive countertop materials like granite or quartz, which can be difficult and costly to remove and reinstall.
This comprehensive guide is designed to walk you step-by-step through the process, from understanding your sink and countertop construction to prepping the workspace, detaching the old undermount sink, and securely installing a new one. Real-world examples, comparison tables, and expert tips are included to ensure clarity and maximize your project’s chances of success.
By following these instructions, you’ll be able to confidently tackle this intermediate-level plumbing and DIY task, boosting both the functionality and the visual appeal of your kitchen or bathroom.
Key Takeaways
- Replacing an undermount sink without removing the countertop is possible with careful preparation and the right tools.
- Thorough assessment of your sink, countertop, and mounting hardware is crucial before starting.
- Proper support and adhesive choices are essential to ensure a secure, leak-free installation.
- Following a systematic removal and installation process minimizes the risk of damage to surrounding surfaces.
- Professional help may be needed for complex plumbing or stone countertop adjustments.
- Routine maintenance after installation will extend the lifespan of your new undermount sink.

Credit: anytimeplumbing.net
Understanding Undermount Sinks And Their Installation
Getting familiar with how undermount sinks are attached and supported is the foundation for a successful replacement. Unlike drop-in sinks, which rest on top of the countertop, undermount sinks are mounted from below, creating a seamless look and making countertop cleaning easier.
Anatomy Of An Undermount Sink Installation
An undermount sink is typically:
- Glued to the underside of the countertop with silicone or epoxy adhesives
- Held in place with metal mounting clips or brackets
- Supported, in some cases, by a wooden frame or additional hardware, especially for heavier materials like cast iron or stone
This installation method requires the countertop to be strong enough to support the sink’s weight, plus any water or dishes inside it. Common countertop materials that accommodate undermount sinks include granite, quartz, solid surface, and some types of marble.
Why Avoid Removing The Countertop?
Removing a countertop to replace the sink can be labor-intensive and risks damaging both the countertop and the backsplash. It also requires disconnecting and reconnecting plumbing, which can further complicate the project. Keeping the countertop in place:
- Saves significant labor and material costs
- Reduces the risk of chipping, cracking, or misaligning the countertop
- Shortens project time and minimizes kitchen or bathroom downtime
Challenges Of Sink Replacement Without Countertop Removal
- Limited Access: Working space is restricted beneath the countertop, particularly at the rear of the sink.
- Adhesive Removal: Old, hardened silicone or epoxy must be thoroughly scraped away.
- Sink Support: Ensuring the new sink is supported during installation is more complex without removing the countertop.
- Precision Fit: The new sink must match the existing cutout almost exactly.
Sink Mounting Types And Compatibility
Understanding your current undermount sink’s mounting type is critical. The three most common are:
- Clip-mounted sinks: Use metal brackets that screw into the countertop’s underside.
- Epoxy/silicone-only mounts: Rely solely on strong adhesives for support.
- Rail or frame support: A wooden or metal frame adds extra support, often used for heavy sinks.
Not all sinks are interchangeable. For example, if your countertop cutout is custom or irregular, you may need to select a new sink of the same shape and size or be prepared for some minor modifications.
Example: Homeowner Replaces Undermount Sink In Quartz Countertop
A homeowner with a 10-year-old quartz countertop noticed leaks around their undermount sink. Rather than removing the countertop, they carefully supported the sink with a floor jack, removed the old silicone and clips, and installed a new stainless steel undermount sink with updated clips and adhesive.
The project took about five hours and cost under $250 in materials.

Credit: www.worldcoppersmith.com
Preparing For Sink Replacement
Careful planning and preparation are essential for a smooth, successful undermount sink replacement. Rushing or skipping steps in this stage can lead to costly mistakes or even damage to the countertop.
Assessing Your Existing Sink And Countertop
Before you begin, examine the following:
- Sink Dimensions: Measure the length, width, depth, and corner radius of your current sink.
- Countertop Cutout: Check for any irregularities or customizations.
- Mounting Hardware: Identify the type and condition of existing clips, brackets, or frames.
- Plumbing Connections: Note the location and type of drain, supply lines, disposal, or dishwasher hookups.
Selecting A Compatible Replacement Sink
Choosing the right replacement undermount sink is crucial. Consider:
- Matching the cutout: Ideally, the new sink should match the existing cutout dimensions within 1/8 inch.
- Material: Stainless steel is easiest to install due to its light weight; composite and cast iron are heavier and may need extra support.
- Bowl configuration: Single, double, or extra-deep bowls must fit your cabinet and plumbing.
Required Tools And Materials
Prepare your workspace with the following:
Tools:
- Adjustable wrench and pliers
- Screwdrivers (Phillips and flathead)
- Putty knife or scraper
- Utility knife
- Oscillating multi-tool (for stubborn adhesive)
- Caulk gun
- Bucket and towels
- Floor jack or stackable supports
Materials:
- New undermount sink (with mounting hardware)
- 100% silicone sealant (kitchen/bath grade)
- Denatured alcohol (for cleaning)
- Replacement drain and plumbing parts (as needed)
- Shims or wood blocks (for temporary support)
Safety And Workspace Preparation
- Turn off water supply lines and disconnect power to garbage disposal if present.
- Clear out everything from under the sink cabinet.
- Lay down drop cloths or cardboard to protect flooring.
- Have a helper available for lifting and positioning heavy sinks.
Pro Tip:
If your countertop is natural stone, avoid using sharp metal tools for adhesive removal as these can scratch or chip the stone. Use a plastic putty knife or a non-marring scraper instead.
Step-by-step Guide: Removing The Old Undermount Sink
The removal process is the most delicate part of the job. Patience and careful technique will prevent costly countertop damage.
1. Disconnect Plumbing And Accessories
- Shut off water supply valves.
- Disconnect water lines from the faucet using an adjustable wrench.
- Remove the drain trap by loosening slip nuts, have a bucket ready for residual water.
- If present, disconnect the garbage disposal and dishwasher drain line.
For more detail on disconnecting and reinstalling plumbing, see How To Install Kitchen Sink Plumbing.
2. Support The Sink From Below
- Place a floor jack, stack of wood blocks, or adjustable supports under the sink basin.
- Gently raise the support until it contacts the sink bottom, don’t apply too much pressure.
3. Remove Mounting Clips Or Brackets
- Locate all mounting clips or brackets around the sink’s perimeter. There are usually 6-10.
- Use a screwdriver or nut driver to loosen and remove each clip. Save them if they’re in good condition.
4. Cut Through Old Adhesive
- Slide a utility knife or putty knife between the sink rim and the countertop.
- Work carefully around the entire perimeter, cutting through the silicone or epoxy sealant.
- For stubborn spots, use an oscillating multi-tool with a flexible scraper blade, taking care not to nick the countertop.
5. Lower And Remove The Sink
- With all hardware and adhesive released, slowly lower the sink using your supports.
- If the sink sticks, gently wiggle it free, don’t use excessive force.
- Lift the sink out from below and remove it from the work area.
6. Clean The Countertop Underside
- Scrape away any remaining silicone or debris with a plastic putty knife.
- Wipe the area with denatured alcohol to ensure a clean, residue-free surface for the new sink.
Example: Removing A Heavy Cast Iron Sink
A homeowner faced a 60-pound cast iron undermount sink. By using a floor jack and two helpers, they safely lowered it after cutting through thick adhesive, avoiding any damage to their marble countertop.
Credit: www.youtube.com
Installing The New Undermount Sink Without Countertop Removal
With the old sink out and the surface prepped, installation is a matter of precision and patience. The following steps apply to most undermount sink models and countertop types.
1. Dry Fit The New Sink
- Test-fit the new sink by lifting it into place from below.
- Check for an even, tight fit all around the cutout, there should be no gaps.
- Confirm that mounting holes line up with the countertop’s underside or that new holes can be drilled if needed.
2. Apply Adhesive Sealant
- Run a generous, continuous bead of 100% silicone sealant around the sink’s rim.
- For extra strength on heavy sinks, use a two-part epoxy in combination with silicone.
3. Lift And Position The Sink
- With a helper, lift the sink into position from below, pressing the rim firmly against the countertop underside.
- Use your floor jack or support blocks to hold the sink tightly in place.
Warning: Ensure the sink is centered and aligned front-to-back and side-to-side before tightening any hardware.
4. Install Mounting Clips Or Brackets
- Attach the clips or brackets according to the manufacturer’s instructions.
- Tighten evenly in a star pattern, gradually drawing the sink up against the countertop.
- Avoid over-tightening, which could crack stone or solid-surface materials.
5. Clean Excess Sealant
- Immediately wipe away any squeezed-out silicone with a paper towel and denatured alcohol.
6. Allow Adhesive To Cure
- Most silicone adhesives require at least 12-24 hours to fully cure.
- Do not reconnect plumbing or use the sink until the adhesive is completely set.
7. Reconnect Plumbing And Accessories
- Reinstall the drain, faucet, supply lines, garbage disposal, and dishwasher connections.
- Check all connections for leaks before running water at full pressure.
For guidance on installing specific sink components, see How To Install A Kitchen Sink Faucet and How To Install A Sink Drain.
Example: Installing A Double-bowl Stainless Sink
When a homeowner replaced their single-bowl undermount with a double-bowl model, they used temporary shims to align the bowls perfectly, then installed new clips and let the silicone cure overnight. The result was a snug, leak-free fit and improved kitchen functionality.
Tools, Materials, And Cost Comparison
To help plan your project, here’s a detailed comparison of the tools, materials, and average costs involved in a DIY undermount sink replacement versus hiring a professional.
| Item | DIY Replacement | Professional Replacement |
|---|---|---|
| New Undermount Sink | $120, $450 | $120, $450 |
| Adhesive/Sealant | $8, $20 | Included |
| Mounting Hardware | $15, $40 | Included |
| Plumbing Parts | $20, $50 | Included |
| Labor | $0 (self-performed) | $350, $900 |
| Tools | $0, $60 (if needed) | Included |
| Total Cost | $163, $570 | $500, $1,400 |
Note: Costs vary based on sink size, material, local rates, and complexity.
Real-world Examples And Case Studies
Learning from others’ experiences can help you anticipate challenges and see what’s possible.
Example 1: Quick Stainless Sink Swap In A Laminate Countertop
A DIY enthusiast with a standard 33-inch stainless undermount sink in a laminate countertop completed the replacement in one afternoon. Using basic hand tools and a $15 tube of silicone, they saved over $400 compared to a professional quote.
Example 2: Upgrading To A Farmhouse Sink
A family wanted to upgrade to a farmhouse undermount sink but didn’t want to remove their granite countertop. With careful measurements and some minor cabinet modifications, they installed the new sink using heavy-duty clips and extra silicone support. Their main challenge was ensuring proper support for the heavier sink, which they solved with added wooden braces.
Example 3: Addressing A Leaking Composite Sink
A homeowner discovered persistent water damage under their composite undermount sink. After removing the old sink and finding warped plywood supports, they replaced both the sink and the supports, sealing everything with waterproof silicone. The repair not only fixed the leak but also prevented future mold issues.
Troubleshooting Common Issues
Even with careful planning, challenges can arise. Here’s how to address some of the most frequent problems encountered during undermount sink replacement.
Sink Doesn’t Fit The Cutout
- Problem: The new sink is too large or too small for the existing countertop opening.
- Solution: If the sink is slightly too small, use additional silicone and wider mounting clips. If too large, you may need to select a different sink or carefully enlarge the cutout with a router, consult a countertop professional for stone surfaces.
Countertop Damage
- Problem: Chips or cracks occur while removing the old sink.
- Solution: Small chips can be repaired with color-matched epoxy. For major cracks, consult a countertop repair specialist.
Adhesive Won’t Release
- Problem: Old silicone or epoxy is stubborn and prevents sink removal.
- Solution: Use an oscillating multi-tool with a flexible scraper blade, working slowly. Apply denatured alcohol to soften silicone.
Leaks After Installation
- Problem: Water leaks from the sink rim or drain.
- Solution: Remove and reapply silicone sealant. Ensure the sink is evenly clamped and that the drain gasket is properly seated.
Example: Correcting A Misaligned Sink
A homeowner noticed their new sink was slightly off-center after installation. They loosened the clips before the silicone fully cured, repositioned the sink, and retightened everything for a perfect fit.
Maintenance And Long-term Care
Once your new undermount sink is in place, proper maintenance will ensure it stays secure and leak-free for years.
Inspecting The Seal
- Check the silicone bead around the sink rim every six months.
- Reapply sealant if you notice gaps, peeling, or mold.
Preventing Excess Weight
- Avoid filling the sink with extremely heavy pots or dishes that could strain the adhesive and mounting hardware.
- For large or heavy sinks, periodically check the support brackets for tightness.
Cleaning And Stain Removal
- Use non-abrasive cleaners to avoid scratching the sink or countertop.
- For stainless steel sinks, wipe dry after use to prevent water spots.
- For composite or granite sinks, refer to manufacturer recommendations for cleaning and avoiding harsh chemicals.
Dealing With Minor Leaks
- If you detect minor leaks, dry the area thoroughly and apply a bead of silicone to the affected spot.
- For persistent leaks, inspect mounting clips and consider reseating the sink.
Pro Tip:
Regularly check under the sink for signs of water damage or mold, especially if your kitchen sees heavy use. Early detection is key to preventing major repairs.
Data Table: Sink Materials And Installation Difficulty
To help you choose the best replacement sink, here’s a comparison of common undermount sink materials and their relative installation challenges.
| Sink Material | Weight | Support Needed | Installation Difficulty | Comments |
|---|---|---|---|---|
| Stainless Steel | Light | Standard clips/silicone | Easy | Most DIY-friendly |
| Composite Granite | Medium | Extra clips, possibly wood support | Moderate | Heavier than steel; needs careful alignment |
| Cast Iron | Heavy | Strong frame/supports | Challenging | Best for two-person install; support critical |
| Fireclay | Very Heavy | Custom frame or brackets | Hard | Often requires professional help |
When To Call A Professional
While many homeowners can tackle undermount sink replacement themselves, certain situations call for professional assistance:
- Stone countertop modifications: If your new sink doesn’t fit and stone cutting is required.
- Heavy sinks: Cast iron, fireclay, or oversized sinks may exceed DIY lifting capacity.
- Plumbing rerouting: Complex drain or supply line changes may require a licensed plumber.
- Warranty concerns: Countertop warranties may require professional sink installation.
According to the National Kitchen & Bath Association, professional installation is recommended for projects involving structural changes or specialty materials.
Frequently Asked Questions
How Can I Ensure My New Undermount Sink Won’t Fall Out Without Removing The Countertop?
Use the combination of high-quality silicone adhesive and all available mounting clips or brackets. For heavier sinks, install temporary wood supports or braces during curing, and consider adding extra hardware if possible. Always allow the adhesive to fully cure before reconnecting plumbing or using the sink.
What If My New Sink Is A Slightly Different Shape Than The Old One?
A sink with a similar size and corner radius may still fit, but gaps can occur. Use additional silicone to fill minor gaps, or purchase wider mounting clips. If the difference is significant, consult a countertop specialist to modify the cutout, especially for stone or quartz surfaces.
Can I Replace A Double-bowl Sink With A Single-bowl Undermount Sink?
Yes, as long as the new single-bowl sink matches the existing cutout dimensions or is slightly larger. Ensure that your cabinet and plumbing can accommodate the change, and be prepared to adjust drain locations. For more on double sink setups, see How To Install A Double Kitchen Sink.
What’s The Best Adhesive For Undermount Sinks?
100% silicone sealant rated for kitchen and bath use is the most common and effective adhesive for undermount sinks. For extra security, especially with heavy sinks, a two-part epoxy can be used in conjunction with silicone. Always follow the sink manufacturer’s recommendations.
How Do I Prevent Leaks After Installing My New Sink?
Apply a continuous bead of silicone around the entire sink rim and ensure all mounting clips are snug. After installation, check for leaks under the sink after running water and correct any gaps with additional sealant. Routine inspection every few months will help catch any future issues early.
Replacing an undermount sink without removing the countertop is a challenging but highly rewarding DIY project. With careful planning, the right materials, and attention to detail, you can achieve professional-level results while saving hundreds of dollars. Whether upgrading to a modern stainless steel model or resolving a stubborn leak, following these steps will help you preserve your countertop investment and enjoy a refreshed, functional sink for years to come.