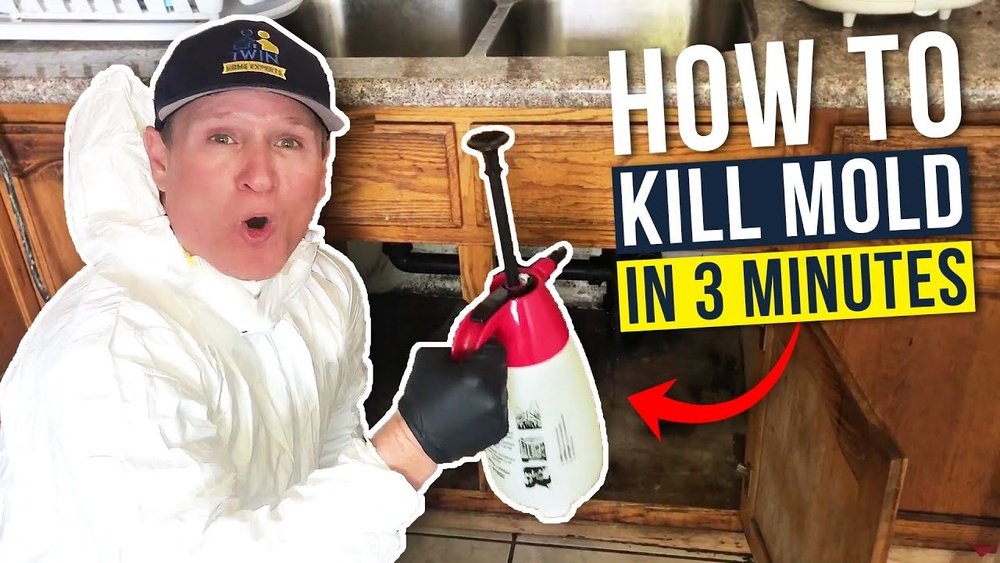
Mold under the sink is an all-too-common household issue that can go unnoticed until it becomes a significant health and structural problem. Whether you’ve just noticed a musty odor or discovered a patch of black, green, or white growth beneath your kitchen or bathroom sink, addressing mold promptly is crucial.
Left unchecked, mold can compromise indoor air quality, damage cabinetry, and even lead to respiratory issues for you and your family. Understanding the causes, removal steps, and prevention strategies is essential for maintaining a healthy home.
In my experience as a homeowner and after consulting with industry experts, I’ve learned that mold remediation beneath the sink requires more than just a surface clean. It demands a systematic approach, identifying moisture sources, choosing the right cleaning agents, and ensuring long-term prevention.
This comprehensive guide will walk you through each stage, from diagnosis to cleanup, and provide actionable tips backed by data and real-world examples. Whether you’re a DIY enthusiast or considering professional help, you’ll find the insights you need to fix mold under the sink effectively.
Key Takeaways
- Mold under the sink is primarily caused by leaks, high humidity, and poor ventilation.
- Immediate action is vital to prevent health risks and structural damage.
- Proper protective gear, thorough cleaning, and drying are essential for safe removal.
- Regular inspections and moisture control are crucial for long-term prevention.
- For severe or persistent mold, consult certified professionals for remediation.
Understanding Mold Under The Sink
Mold thrives in damp, dark, and poorly ventilated areas, making the space beneath your sink an ideal breeding ground. Understanding why mold appears here can help you not only remove it but also prevent future outbreaks.
Common Causes Of Mold Growth
- Leaky Pipes and Fixtures: Even minor drips from water supply lines, drain pipes, or faucet connections can create persistent moisture, fueling mold growth.
- High Humidity Levels: Humidity above 60% provides the ideal environment for mold spores to thrive, especially in homes with inadequate ventilation.
- Poor Ventilation: Limited airflow beneath the sink allows moisture to linger, accelerating mold development.
- Standing Water: Spills, overflows, or unnoticed puddles can soak cabinetry materials, providing a mold-friendly substrate.
Health Risks Associated With Mold
Exposure to mold spores can lead to a range of health issues, especially for those with allergies, asthma, or compromised immune systems. The Centers for Disease Control and Prevention (CDC) warns that symptoms may include:
- Nasal stuffiness
- Eye irritation
- Wheezing or respiratory distress
- Skin rashes
In severe cases, prolonged exposure may result in chronic respiratory illnesses. For more detailed health guidance, see the CDC Mold FAQ.
Identifying Mold Under The Sink
Mold under the sink is often visible as black, green, or white patches on cabinet walls, flooring, or pipes. Other signs include:
- Musty odors
- Warped or discolored wood
- Peeling paint or laminate
- Excessive condensation on pipes
Early detection is critical. A regular inspection routine can catch mold before it spreads, saving you time and money on remediation.

Credit: www.puroclean.com
Initial Assessment And Preparation
Before you begin mold removal, a careful assessment and proper preparation are essential for safety and effectiveness.
Assessing The Severity
Not all mold outbreaks are created equal. Use the following table to evaluate the extent of your mold issue:
| Severity Level | Size of Affected Area | Recommended Action |
|---|---|---|
| Minor | Up to 10 sq. ft. | DIY removal |
| Moderate | 10, 30 sq. ft. | DIY with caution or consult a professional |
| Severe | Over 30 sq. ft. | Professional remediation |
Warning: If you see extensive mold, suspect black mold (Stachybotrys chartarum), or have health concerns, seek professional help.
Gathering Tools And Materials
For safe and effective mold removal, assemble these supplies:
- Protective gear: N95 respirator, gloves, goggles, long sleeves
- Plastic sheeting and tape: To seal off the area
- Stiff brush or sponge
- Bucket and spray bottle
- Cleaning agents: White vinegar, hydrogen peroxide, or commercial mold remover
- Disposable rags or towels
- Fan or dehumidifier
- Trash bags
Safety Precautions
- Always ventilate the area by opening windows or using an exhaust fan.
- Avoid mixing cleaning chemicals (e.g., bleach with ammonia).
- Keep children and pets away until cleaning is complete.
Pro Tip: Photograph the affected area before you start. This helps track progress and may be necessary for insurance claims.

Credit: www.firstandlastrestoration.com
Step-by-step Mold Removal Process
Thorough and systematic mold removal is vital for long-term success. Each step below is designed to eliminate mold and minimize recurrence.
Step 1: Locate And Stop The Moisture Source
- Inspect all visible pipes, fittings, and caulking for leaks.
- Tighten loose connections or replace faulty parts.
- Dry any standing water with towels or a wet/dry vacuum.
If you’re installing or repairing plumbing, refer to guides like How To Install Kitchen Sink Plumbing for best practices.
Step 2: Isolate The Area
- Use plastic sheeting and tape to seal off the workspace.
- Shut off HVAC vents to prevent spore spread.
Step 3: Remove Contaminated Materials
- Take out items stored beneath the sink.
- Discard porous materials (e.g., paper, cardboard, heavily damaged wood) in sealed trash bags.
- For minor damage, clean and dry salvageable items.
Step 4: Clean Mold From Surfaces
Choose your cleaning solution based on surface type and mold severity:
| Cleaning Solution | Surface Suitability | Effectiveness |
|---|---|---|
| White Vinegar (undiluted) | Most non-porous surfaces | Good for light to moderate mold |
| Hydrogen Peroxide (3%) | Non-porous and some porous surfaces | Effective for moderate mold |
| Commercial Mold Remover | Varies by product | Best for stubborn or extensive mold |
- Spray the solution generously onto affected surfaces.
- Scrub with a stiff brush or sponge.
- Wipe down with clean water and dry thoroughly.
Warning: Do not use bleach on wood, as it may not penetrate deeply enough to kill all mold spores.
Step 5: Dry The Area Completely
- Use fans, heaters, or a dehumidifier to expedite drying.
- Ensure all surfaces are completely dry before restocking the cabinet.
Step 6: Optional, Apply A Mold Inhibitor
- Consider using a mold-resistant spray on vulnerable surfaces.
- Follow the manufacturer’s instructions for application.
Step 7: Monitor For Recurrence
- Inspect the area weekly for the next month.
- Address any signs of moisture or new mold promptly.

Credit: www.moldguy.ca
Real-world Examples And Case Studies
Understanding real-life scenarios can help you approach mold remediation with confidence.
Example 1: Minor Mold Outbreak In A Rental Apartment
A tenant in a city apartment discovered small black patches under the kitchen sink. Upon inspection, a loose drain trap was found dripping onto the cabinet base. The tenant:
- Tightened the trap
- Cleaned the area with white vinegar
- Used a fan to dry the cabinet
Result: The mold did not return, and the landlord was notified to inspect the plumbing during routine maintenance.
Example 2: Severe Mold In An Older Home
A homeowner found extensive mold beneath a bathroom sink, caused by a slow leak over several months. The affected area exceeded 20 sq. ft. The homeowner opted for professional remediation. The remediation team:
- Removed and replaced damaged cabinetry
- Treated all surfaces with a commercial mold inhibitor
- Installed a new ventilation system
Result: No mold recurrence after six months and improved indoor air quality.
Example 3: Diy Mold Removal With Persistent Humidity
In my experience, after fixing a small leak under my own kitchen sink and cleaning the mold, I noticed a recurring musty smell. Using a hygrometer, I measured humidity levels at 65%. I installed a small dehumidifier and kept the cabinet doors open for several hours each week.
This simple change eliminated both the smell and mold recurrence.
Comparing Diy Vs. Professional Mold Remediation
Choosing between a do-it-yourself approach and hiring professionals depends on the severity, your experience, and the risk to health or property.
| Aspect | DIY Remediation | Professional Remediation |
|---|---|---|
| Cost | Low (typically under $100 for supplies) | High (ranges from $500, $3,000+) |
| Effectiveness | Good for minor outbreaks | Best for severe or toxic mold |
| Safety | Requires strict precautions | Professionals follow strict protocols |
| Time Required | 1, 3 hours for small jobs | Several hours to days |
| Warranty | None | Often includes guarantees |
Pro Tip: For outbreaks over 10 sq. ft. or if you have health concerns, consult a certified mold remediation company. Check credentials and reviews before hiring.
Preventing Mold Under The Sink
Long-term mold prevention is more cost-effective and healthier than repeated cleanups. Implement these strategies to keep your under-sink area dry and mold-free.
Routine Inspections
- Check for leaks, condensation, and musty odors every 1, 2 months.
- Use a flashlight to inspect dark corners and behind pipes.
Moisture Control
- Fix leaks immediately, delays can worsen mold problems.
- Avoid storing wet items (sponges, rags) beneath the sink.
- Place a moisture-absorbing product (e.g., silica gel, baking soda) in the cabinet.
Improve Ventilation
- Keep cabinet doors open occasionally to allow airflow.
- Install a vent or small fan if the area is prone to humidity.
- In bathrooms, use exhaust fans during and after showers.
Use Mold-resistant Materials
When renovating or replacing cabinetry, choose materials with mold resistance:
| Material | Mold Resistance | Best Use |
|---|---|---|
| Melamine-coated particleboard | Good | Cabinet walls and shelving |
| PVC panels | Excellent | Cabinet base and sides |
| Solid hardwood (sealed) | Moderate | High-end cabinetry |
Regular Cleaning
- Wipe down under-sink surfaces with a vinegar solution monthly.
- Remove clutter to allow airflow and easy inspection.
Additional Resources
If you’re planning a kitchen or bathroom upgrade, explore these guides for related plumbing and installation advice:
When To Seek Professional Help
Some mold problems go beyond the scope of DIY. Recognizing when to call in experts protects your health and property.
Signs You Need A Professional
- Mold covers more than 10 sq. Ft.
- Family members experience persistent respiratory issues or allergic reactions.
- Mold recurs despite repeated cleaning and moisture control.
- There is visible structural damage (rotted wood, collapsing cabinets).
- You suspect black mold or other toxic varieties.
How To Choose A Mold Remediation Specialist
- Look for certifications (e.g., IICRC, NORMI).
- Request references and check online reviews.
- Ensure the company provides an assessment, written estimate, and warranty.
Insurance Considerations
- Check your homeowner’s policy for mold coverage.
- Document damage with photos and save all receipts.
Example: Professional Remediation Success
A family in Florida noticed persistent mold under their kitchen sink despite repeated cleaning. A certified remediation team identified a hidden leak behind the wall, removed affected drywall and cabinetry, treated the space with antimicrobial agents, and coordinated repairs with their insurance provider.
The mold did not return, and the family reported improved air quality.
For detailed insights on mold and remediation standards, consult the EPA’s Mold Remediation Guide.
Frequently Asked Questions
What Is The Best Cleaning Solution For Mold Under The Sink?
For most non-porous surfaces, undiluted white vinegar or 3% hydrogen peroxide is effective for light to moderate mold. For stubborn or extensive growth, a commercial mold remover designed for household use is recommended. Always follow manufacturer instructions and wear protective gear during application.
Can Mold Under The Sink Make My Family Sick?
Yes, exposure to mold can cause respiratory issues, allergies, and irritation, especially for children, the elderly, or those with weakened immune systems. If anyone in your household develops unexplained symptoms, consult a healthcare provider and consider professional mold assessment.
Is It Safe To Use Bleach To Clean Mold?
Bleach can kill surface mold on non-porous materials but is less effective on porous surfaces like wood or drywall, as it may not penetrate deeply enough to eliminate spores. Overuse of bleach can also cause harmful fumes. For most situations, vinegar or hydrogen peroxide is safer and equally effective.
How Do I Prevent Mold From Coming Back After Cleaning?
Address the underlying moisture source, fix leaks, improve ventilation, and keep the area dry. Regular inspections and cleaning with vinegar can help prevent recurrence. Consider using mold-resistant materials or sprays for added protection.
Should I Replace Cabinetry After Mold Removal?
Replacement is necessary if mold has caused structural damage (warping, rot) or if porous materials remain contaminated. For minor cases where surfaces are fully cleaned and dried, replacement may not be needed. When in doubt, consult a contractor or remediation specialist.
Mold under the sink doesn’t have to spell disaster. By acting quickly, using the right methods, and prioritizing prevention, you can keep your home healthy and safe. Whether tackling a small patch yourself or working with professionals on a larger problem, remember that vigilance and routine maintenance are your best defenses against mold.