Building your own sink base cabinet can be one of the most rewarding DIY projects for your kitchen or bathroom renovation. Not only does it give you full control over size, style, and materials, but it also offers significant cost savings compared to purchasing custom cabinetry.
Whether you’re an experienced woodworker or a motivated beginner, constructing a sturdy, attractive cabinet tailored to your sink and plumbing needs is absolutely achievable with the right planning and guidance.
In this comprehensive guide, you’ll learn every step of the process, from planning and material selection to assembly, finishing, and installation. By the end, you’ll have the knowledge and confidence to create a professional-grade sink base cabinet that fits perfectly into your space and supports your plumbing fixtures for years to come.
Plus, you’ll discover practical tips, real-world examples, and essential comparisons to ensure your project goes smoothly from start to finish.
Key Takeaways
- Building a sink base cabinet requires careful planning, accurate measurements, and the right materials.
- Proper construction ensures durability, ease of plumbing access, and a customized fit for your sink.
- Key steps include material selection, cutting, assembling, finishing, and installing the cabinet.
- Real-world examples and data-driven comparisons help you avoid common mistakes.
- DIY cabinet construction can save up to 50% over buying pre-made units, depending on materials and labor.
- Practical tips and expert insights are included for both beginners and intermediate DIYers.
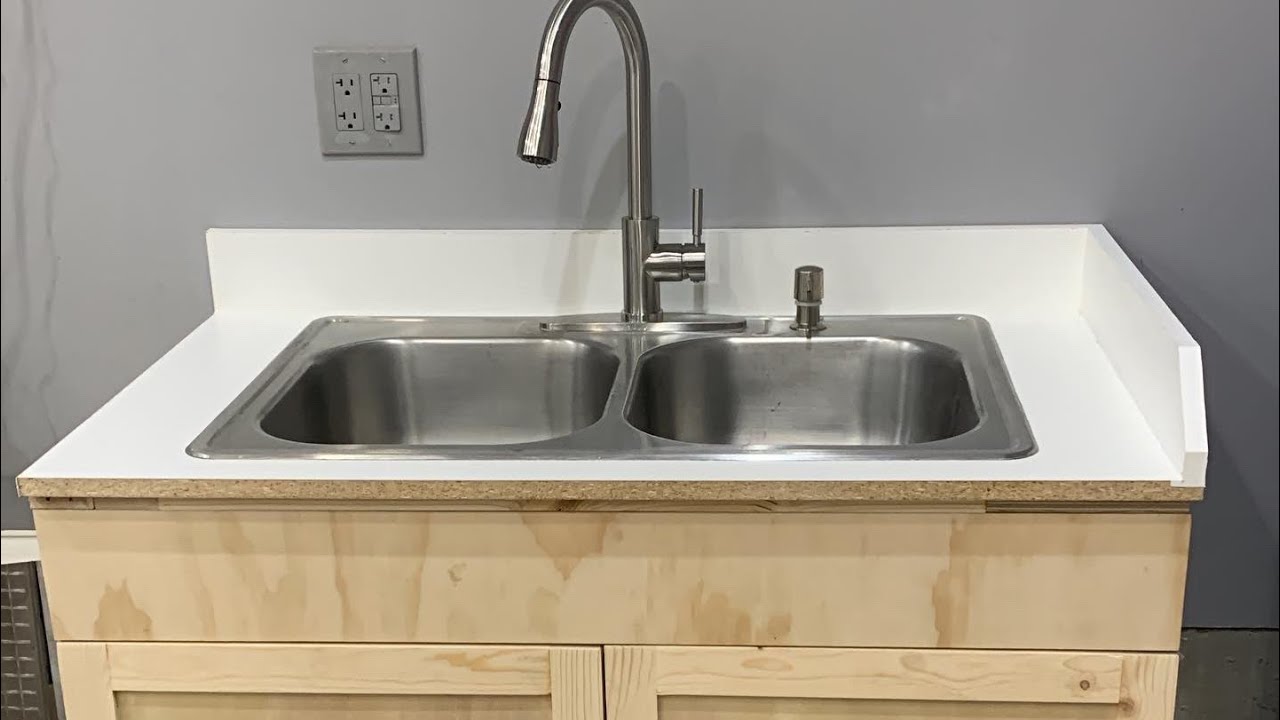
Credit: www.youtube.com
Planning Your Sink Base Cabinet
Before picking up a saw or buying lumber, the success of your sink base cabinet hinges on thorough planning. This stage determines not only the ease of construction but also how well your cabinet will function and last.
Determining Cabinet Size And Placement
Start by measuring the space where the cabinet will go. The standard sink base cabinet width is typically 30″, 33″, or 36″ for kitchens, but you can adjust dimensions to suit your room and sink. Allow at least 3″ of clearance on either side of the sink and remember to account for plumbing and appliance locations.
- Width: Commonly 30″, 36″
- Depth: Standard is 24″ (front to back)
- Height: Usually 34.5″ (not including countertop)
Pro Tip: Sketch a floor plan and elevation to visualize the final look and avoid surprises during installation.
Selecting The Right Sink
The type and size of the sink dramatically affect your cabinet design. Drop-in, undermount, farmhouse, and vessel sinks all require different cutouts and support methods.
For more information on sink installation types, see How To Install A Drop-In Kitchen Sink.
Considering Plumbing And Functionality
Leave enough open space in the rear and base of the cabinet for plumbing pipes, traps, and garbage disposal units. If you plan to install a disposal or additional accessories like a soap dispenser, mark these on your plans.
Case Study: Custom Fit For A Farmhouse Sink
A homeowner in Boston needed a sink base cabinet for a heavy farmhouse sink. By customizing the face frame and reinforcing the base, they achieved a perfect fit and strong support, while saving nearly $400 compared to a custom order.
Credit: www.youtube.com
Tools And Materials Needed
Selecting quality materials and the right tools is crucial for a durable, professional result. Investing in good supplies pays off with a longer-lasting cabinet and easier assembly.
Essential Tools
- Circular saw or table saw for straight cuts
- Jigsaw for notching pipes or cutting sink opening
- Drill/driver for assembling components
- Clamps to hold pieces during gluing/screwing
- Measuring tape, square, and level for accuracy
- Sanding block or power sander
- Safety gear: Goggles, hearing protection, dust mask
Recommended Materials
| Component | Best Material | Alternatives | Notes |
|---|---|---|---|
| Cabinet Box | 3/4″ plywood | MDF, particleboard | Plywood is strongest and most water-resistant |
| Face Frame | Hardwood (maple, oak) | Pine, poplar | Hardwood is more durable and finishes better |
| Back Panel | 1/4″ plywood | 1/8″ hardboard | Use thicker panel for heavy sinks |
| Base | 3/4″ plywood | Solid wood | Must support sink and plumbing weight |
| Fasteners | 1-1/4″ wood screws | Pocket hole screws, finish nails | Use pocket holes for cleaner look |
| Finish | Paint or polyurethane | Stain, lacquer | Choose based on kitchen design |
Hardware And Accessories
- Hinges (concealed or surface mount)
- Drawer slides (if adding drawers)
- Door and drawer pulls
- Adjustable leveling feet (especially on uneven floors)
Example: Material Cost Comparison
A DIY builder priced out materials for a 36″ cabinet and found the following:
- Plywood and lumber: $110
- Hardware: $35
- Finish: $25
- Total: $170 (vs. $400, $600 for a pre-made unit)
Cutting And Preparing The Cabinet Parts
With your measurements and materials ready, it’s time to cut and prepare the cabinet pieces. Accuracy here is critical, mistakes can throw off your entire build.
Measuring And Marking
Double-check all measurements before making cuts. Mark each piece clearly with a pencil and use a square for straight lines.
Cutting Panels And Frame Pieces
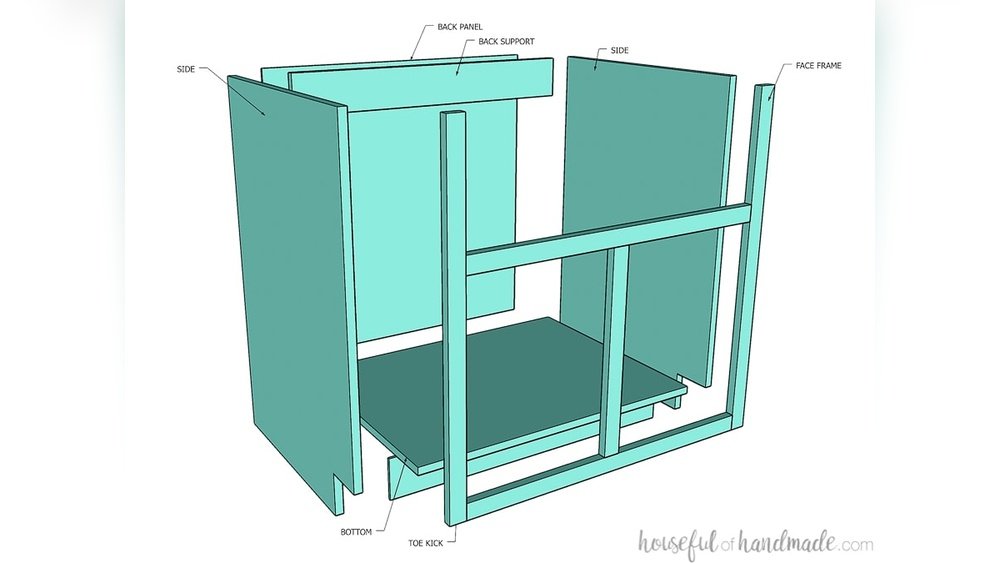
- Sides and bottom: Cut from 3/4″ plywood.
- Face frame: Rip hardwood to 1.5″, 2″ wide strips.
- Back panel: Cut thinner plywood to fit.
If using a circular saw, clamp a straightedge as a guide to avoid wandering cuts.
Drilling For Fasteners
Drill pocket holes or pilot holes in the appropriate locations (typically the ends of side panels and face frame components). This ensures strong, split-free joints.
Notching For Plumbing
Use a jigsaw to cut notches or holes in the rear or base panel for water supply lines, drains, and electrical as needed.
Example: For a double sink, a builder left a 6″ x 10″ opening in the cabinet back for easy plumbing access, saving time on installation.
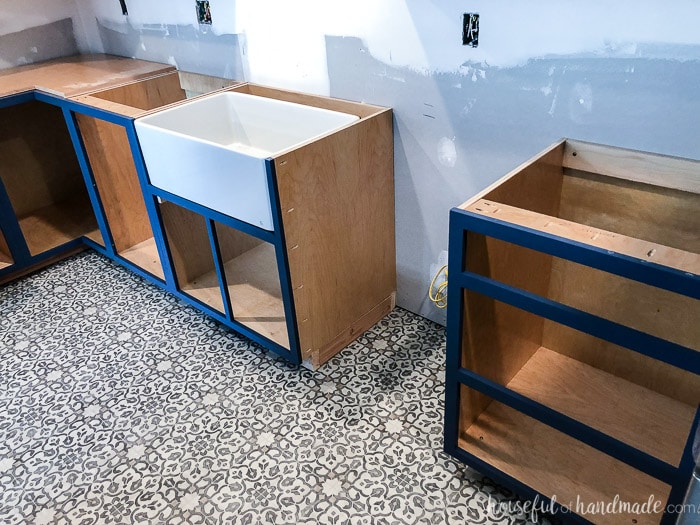
Credit: housefulofhandmade.com
Assembling The Cabinet Box
Assembling the cabinet box is where your project starts to take real shape. Take your time to ensure everything is square and secure.
Dry Fitting Components
Before gluing or screwing, dry fit all pieces. This lets you confirm alignment and make minor adjustments.
Joining Panels
- Apply wood glue to edges.
- Secure sides to bottom panel with pocket screws or wood screws.
- Attach the back panel (rebated or overlapped).
Clamp panels while fastening to maintain alignment.
Installing The Face Frame
- Lay out the face frame pieces and assemble with pocket screws or biscuits.
- Attach the frame to the cabinet box with glue and finish nails or screws.
- Ensure the frame is flush with the cabinet sides and bottom.
Reinforcing The Sink Base
If your sink is heavy (e. g. , cast iron or stone), add extra blocking or a cross brace underneath the sink area.
Pro Tip: Use a level to check for squareness and flatness after assembly. Shim if necessary before moving to the next step.
Example: Supporting A Heavy Sink
A DIYer in Seattle built a custom support cradle under their farmhouse sink using 2×4 blocking, preventing sagging and water damage over time.
Adding Doors, Drawers, And Shelves
With the main box complete, focus shifts to the cabinet’s functional elements. Customizing doors and shelves improves both storage and accessibility.
Building Doors
- Slab doors: Easiest to make, cut 3/4″ plywood to size, edge-band for a clean look.
- Panel doors: Frame and panel construction adds a traditional touch. Use rails, stiles, and a center panel.
Sand all edges smooth and pre-drill holes for hinges.
Installing Drawers
If your base cabinet includes drawers (common on wider units):
- Build simple plywood boxes.
- Attach drawer fronts.
- Install slides according to manufacturer’s instructions.
Adjustable Shelves
Cut shelf panels to fit inside the box. Drill shelf pin holes at regular intervals for adjustable storage.
Hanging Doors And Adjusting Fit
- Install hinges on door and cabinet face frame.
- Adjust doors for even gaps and smooth operation.
- Attach door and drawer pulls.
Example: A homeowner added a pull-out trash drawer inside their sink base, maximizing under-sink storage and keeping the kitchen tidy.
Finishing And Protecting The Cabinet
A durable, attractive finish protects your cabinet from moisture, stains, and everyday wear and tear.
Sanding
- Sand all surfaces with 120- and 220-grit paper.
- Round over sharp edges for safety and comfort.
- Remove dust with a tack cloth or vacuum.
Priming And Painting
- Apply a high-quality wood primer if painting.
- Use latex or oil-based enamel for kitchen cabinets.
- Apply 2, 3 thin coats for best durability.
Staining And Sealing
If you prefer a natural wood look:
- Stain evenly with a brush or rag.
- Seal with polyurethane, sanding lightly between coats.
Pro Tip: Pay extra attention to finishing the sink cutout and any exposed plywood edges, these areas are most vulnerable to water damage.
Moisture Protection
Consider lining the base or shelf with a waterproof mat or finish. This is especially important for kitchen cabinets subject to leaks or spills.
Installing The Sink Base Cabinet
Proper installation ensures your cabinet is level, secure, and ready to accept plumbing and a countertop.
Placing And Leveling
- Move the cabinet into position.
- Use a level and shims to ensure the cabinet sits flat and square.
- Check alignment with adjacent cabinets or walls.
Securing To Wall And Floor
- Anchor the cabinet to wall studs with 2, 3″ screws through the back or mounting rail.
- If needed, secure the base to the floor (especially on uneven surfaces).
Connecting Plumbing
Install the sink, faucet, and plumbing fixtures according to manufacturer instructions. For step-by-step guides, see How To Install Kitchen Sink Plumbing.
Final Adjustments
- Re-check door and drawer alignment.
- Touch up paint or finish as needed.
- Clean all surfaces before installing the countertop.
Case Study: Professional-quality Diy Installation
A couple in Chicago built and installed their own sink base cabinet for a double bowl undermount sink. By carefully following each step, they achieved a seamless installation, saving $600 on labor and matching their cabinet perfectly to the rest of their kitchen.
Common Mistakes And How To Avoid Them
Learning from others’ experiences can save you time, money, and frustration. Here are some of the most frequent pitfalls and how to sidestep them.
Inaccurate Measurements
Cutting panels even 1/8″ off can result in poor fit and gaps. Always measure twice, cut once, and label parts clearly.
Poor Material Selection
Choosing cheap particleboard or non-water-resistant MDF can lead to swelling and failure under a sink. Stick with plywood or hardwood for longevity.
Weak Joinery
Using only nails or glue can cause joints to loosen over time. Reinforce all connections with screws or pocket holes.
Insufficient Plumbing Clearance
Failing to provide enough space for pipes, valves, or a garbage disposal leads to last-minute, awkward modifications. Plan plumbing cutouts in advance.
Skipping Moisture Protection
Leaving raw wood exposed to water is a recipe for rot. Always finish all surfaces and consider lining the base with a waterproof mat.
Comparison Table: Cabinet Materials
| Material | Water Resistance | Strength | Cost (relative) | Best For |
|---|---|---|---|---|
| Plywood | High | High | Medium | Kitchen cabinets |
| MDF | Low | Medium | Low | Painted surfaces |
| Particleboard | Low | Low | Lowest | Temporary cabinets |
| Hardwood | Medium | High | High | Face frames, doors |
Customizing For Special Features
Your sink base cabinet can incorporate features that make daily use more convenient and increase resale value.
Pull-out Trash And Recycling Bins
Maximize under-sink storage with pull-out bins on heavy-duty slides. This keeps waste hidden and accessible.
Built-in Soap Or Water Dispensers
Drill additional holes in the countertop or face frame for accessories like soap dispensers. For installation instructions, see How To Install A Soap Dispenser In A Kitchen Sink.
Integrated Dishwasher Or Appliance Panels
Design the adjacent cabinet panel to match your dishwasher for a seamless look.
Child Safety And Accessibility
Add soft-close hinges, child locks, or toe-kick drawers for customized safety and storage.
Example: Accessibility Upgrade
A builder added a low, pull-out shelf in a bathroom sink base for a family member with limited mobility, greatly improving accessibility and independence.
Comparing Diy Vs. Pre-made Cabinets
Is building your own sink base worth it compared to buying off-the-shelf or custom units? Here’s a data-driven look.
| Factor | DIY Build | Pre-Made | Custom Ordered |
|---|---|---|---|
| Cost | Low, Medium ($150, $400) |
Medium ($400, $800) |
High ($700, $2000+) |
| Time Required | 10, 20 hours | 1, 2 hours (install only) | 2, 4 weeks (production) |
| Customization | Unlimited | Limited | High |
| Durability | High (if quality materials) | Medium | High |
| Tools/Skill Needed | Moderate | Low | None |
Pro Tip: If you have basic woodworking tools and skills, building your own cabinet offers the best value and fit for most homeowners.
Maintenance And Long-term Care
A well-built sink base cabinet can last for decades with proper care. Preventing water damage and routine maintenance are key.
Cleaning
- Wipe up spills immediately to prevent finish damage.
- Clean doors and shelves with a damp cloth and mild soap.
Inspecting For Leaks
Regularly check under the sink for drips or moisture. Catching leaks early prevents swelling and mold.
Re-sealing Or Repainting
Every few years, touch up worn areas or reapply polyurethane to keep the cabinet looking fresh.
Adjusting Hardware
Tighten hinges, slides, and pulls as needed to maintain smooth operation.
Example: After five years, a DIY cabinet in a busy family kitchen only needed minor touch-ups and a new coat of finish, proof that quality materials and construction pay off.
Frequently Asked Questions
What Is The Difference Between A Sink Base Cabinet And A Regular Base Cabinet?
A sink base cabinet is specifically designed to house a sink and accommodate plumbing. It typically lacks a top or has a removable panel, features a larger opening for pipes, and often omits drawers directly under the sink to allow space for the basin and plumbing. Regular base cabinets may have full tops and more drawers.
Can I Build A Sink Base Cabinet Without Advanced Woodworking Tools?
Yes, a sink base cabinet can be built with basic tools like a circular saw, drill, and clamps. While a table saw and pocket hole jig make the process easier and more precise, careful measurement and patience can produce great results with simpler tools.
How Can I Waterproof The Inside Of My Sink Base Cabinet?
To protect your cabinet from leaks and moisture, use a high-quality polyurethane or marine varnish on all interior surfaces, especially the base. You can also install a removable plastic or silicone liner under the sink for extra insurance. Consider using water-resistant plywood for the base panel.
Is It Possible To Retrofit A Garbage Disposal Into A Diy Sink Base Cabinet?
Absolutely. When building your cabinet, ensure you leave enough clearance for a garbage disposal unit and access for the drain and power connections. If you decide to add a disposal later, you may need to enlarge the plumbing cutout or remove a section of the shelf. For step-by-step instructions, see How To Install A Garbage Disposal.
Where Can I Find Detailed Plans Or Blueprints For Sink Base Cabinets?
There are many resources online, including woodworking forums, manufacturer websites, and home improvement platforms like Family Handyman. These often include downloadable PDFs and cut lists tailored to standard sink sizes.
A well-planned, properly built sink base cabinet can dramatically enhance both the function and appearance of your kitchen or bath. In my experience, the satisfaction of crafting a custom solution that fits your space perfectly, and supports your plumbing for years, is worth every hour spent.
With the right tools, materials, and guidance, you can achieve professional results at a fraction of the cost of buying new. Happy building!