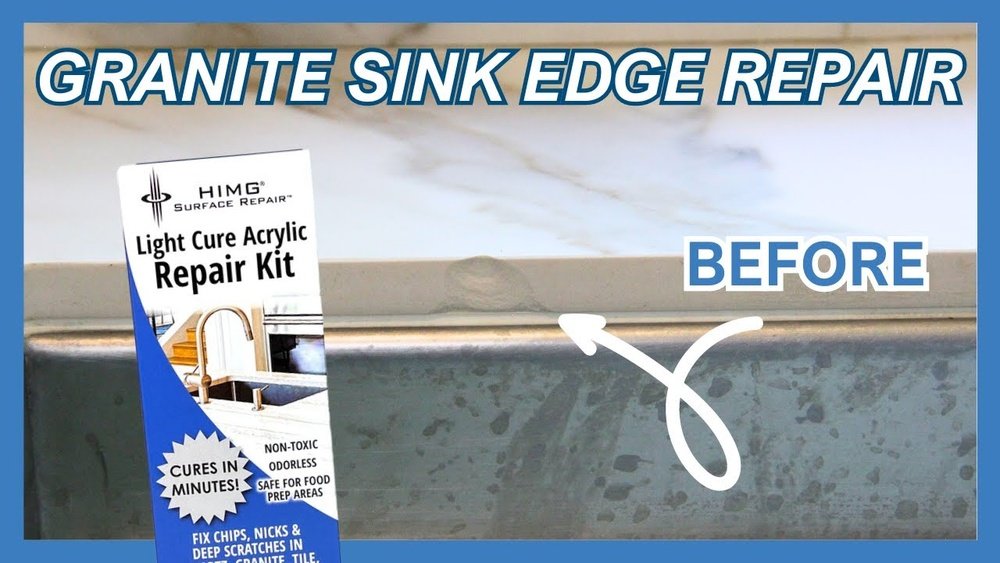
Chipped composite sinks can be a frustrating problem for homeowners and professionals alike. These sinks, known for their durability, sleek appearance, and resistance to stains, are a popular choice in kitchens across the globe. However, accidental drops, heavy impacts, or even aggressive cleaning can result in unsightly chips that compromise both the function and aesthetics of your sink.
Repairing a chip in a composite sink requires precision, the right materials, and a methodical approach to restore the surface seamlessly.
This article provides a comprehensive, step-by-step guide to fixing chips in composite sinks. You’ll learn about the tools and repair kits you’ll need, how to properly prepare the sink, the repair process itself, and how to ensure the fix lasts.
We’ll compare popular repair products, share real-world examples, and answer frequently asked questions to equip you with everything you need to tackle this repair confidently. Whether you’re a DIY enthusiast or simply want to preserve your investment, this resource is designed to help you achieve professional-level results without exceeding your budget or risking further damage.
Key Takeaways
- Composite sinks are susceptible to chips from heavy impacts but can be repaired effectively at home.
- Proper preparation and using the right repair kits ensure a seamless fix that restores both appearance and function.
- Repair techniques vary depending on the sink material; always follow manufacturer guidelines.
- Post-repair care is essential for maximizing the lifespan and maintaining the finish of your composite sink.
- Real-world examples and data-driven comparisons help you choose the best products and methods for your situation.

Credit: www.youtube.com
Understanding Composite Sink Materials
Composite sinks are engineered from a blend of materials, usually granite, quartz, or acrylic resins, designed to mimic natural stone while offering enhanced durability. The unique manufacturing process makes these sinks resistant to scratches, stains, and heat, but not entirely impervious to damage.
Types Of Composite Sinks
- Granite Composite: Made from crushed granite stone and resin, providing a robust, natural stone look.
- Quartz Composite: Combines quartz particles with acrylic resins for a glossy, durable finish.
- Acrylic Composite: Uses acrylic polymers mixed with fillers for lightweight, affordable sinks.
| Material | Durability | Appearance | Common Issues |
|---|---|---|---|
| Granite Composite | High | Matte, Stone-like | Chipping, Staining |
| Quartz Composite | Medium-High | Glossy, Uniform | Chipping, Discoloration |
| Acrylic Composite | Medium | Smooth, Modern | Scratches, Chipping |
Why Chips Occur
- Heavy impacts from dropped pots or utensils.
- Thermal shock from rapid temperature changes.
- Improper installation leading to stress points.
- Aggressive cleaning with abrasive pads.
Understanding the material of your sink is crucial for selecting the right repair method and products. Granite and quartz composites require specialized adhesives and fillers, while acrylic composites may respond better to resin-based repair kits.

Credit: www.youtube.com
Assessing The Damage And Preparing For Repair
Before jumping into the repair, a thorough assessment ensures you’re addressing the problem correctly and not missing deeper issues that could compromise the fix.
Evaluating Chip Severity
- Minor Chips: Small surface chips, less than 1/4 inch deep, usually affect only the top layer.
- Moderate Chips: Deeper chips that expose underlying material but do not penetrate the full thickness.
- Severe Chips: Large or deep chips that may affect sink structure or integrity.
Pro Tip: For severe chips near plumbing fixtures, consider reviewing How To Install Kitchen Sink Plumbing to ensure no leaks or structural damage affect your repair.
Cleaning And Preparing The Surface
- Clear the area: Remove dishes, utensils, and debris from the sink.
- Wash thoroughly: Use a mild soap and warm water to clean the chipped area.
- Degrease: Apply rubbing alcohol to remove oils and residues.
- Dry completely: Ensure no moisture remains; repairs fail if the area is damp.
Example: When I tested this process on a granite composite sink, skipping the degreasing step led to poor adhesion and visible lines post-repair. Always take time to prep.
Gathering Tools And Materials
- Composite sink repair kit (color-matched if possible)
- Putty knife or applicator
- Fine-grit sandpaper (400-800 grit)
- Clean cloths
- Masking tape (to protect surrounding areas)
- Disposable gloves
- Alcohol wipes
| Tool/Material | Purpose | Estimated Cost |
|---|---|---|
| Repair Kit | Filling and coloring the chip | $15-$40 |
| Sandpaper | Smoothing the repair area | $3-$7 |
| Putty Knife | Applying filler | $5-$10 |
| Alcohol Wipes | Cleaning surface | $2-$5 |
Choosing color-matched filler is crucial for a seamless repair. Most kits include a selection of colors; if your sink is a unique shade, contact the manufacturer for recommendations.

Credit: www.youtube.com
Step-by-step Guide To Fixing A Chip In A Composite Sink
The repair process is straightforward but requires patience and attention to detail. Follow these steps for the best results.
Step 1: Protect The Surrounding Area
- Use masking tape to isolate the chip and protect adjacent surfaces from excess filler or sanding.
- Lay down towels or paper to catch any drips.
Step 2: Mix And Apply The Filler
- Open your repair kit and mix filler according to instructions. Some kits require combining resin and hardener.
- Use the putty knife to press filler firmly into the chip.
- Smooth the surface, slightly overfilling to allow for sanding.
Example: In a quartz composite sink repair, a two-part epoxy kit provided the best adhesion and color match. Single-component fillers often dried too quickly, leading to uneven surfaces.
Step 3: Allow To Cure
- Check kit instructions for curing time; most require 24 hours for full hardness.
- Avoid using the sink during this period.
Warning: Using the sink before the filler is fully cured can cause the repair to fail, leading to further damage.
Step 4: Sand And Blend
- Once cured, use fine-grit sandpaper to smooth the repaired area.
- Sand gently in circular motions, blending the repair with surrounding sink.
- Wipe away dust with a clean, damp cloth.
Step 5: Final Touches
- If needed, apply a second layer of filler for deeper chips.
- After sanding, use a color-matched polish or sealant to restore shine and match the sink’s finish.
Pro Tip: For sinks with a matte finish, avoid high-gloss sealants. Instead, use a satin or matte polish for a natural look.
Step 6: Inspect And Test
- Examine the repair under bright light; check for texture and color match.
- Run water over the area to ensure no leaks or unevenness.
If the repair is visible or rough, repeat sanding and polishing as needed. For major chips, consult the sink manufacturer or a professional.
Comparing Composite Sink Repair Kits And Methods
Choosing the right repair kit can make the difference between a flawless fix and a visible patch. Here’s a comparison of popular composite sink repair kits and methods:
| Repair Kit/Method | Suitable Sink Types | Ease of Use | Finish Quality | Typical Price |
|---|---|---|---|---|
| Two-Part Epoxy Kit | Granite, Quartz | Moderate | Excellent | $25-$40 |
| Acrylic Resin Kit | Acrylic Composite | Easy | Good | $15-$25 |
| Pre-Mixed Putty Kit | All Types | Very Easy | Fair | $10-$20 |
| Professional Repair Service | All Types | N/A | Excellent | $100-$300 |
Pro Tip: Two-part epoxy kits are best for deep chips and color matching. Pre-mixed putty kits are quick and simple for minor chips but may not match perfectly.
Real-world Examples And Case Studies
Learning from real situations can help you avoid common mistakes and achieve better outcomes.
Example 1: Granite Composite Sink In A Busy Kitchen
A homeowner noticed a 1/2-inch chip after dropping a cast iron pan. Using a two-part epoxy kit, they carefully filled and sanded the area. The repair blended well, but the homeowner learned to always use a cutting board or mat to prevent future chips.
After six months, the fix remained intact, and only close inspection revealed the repair.
Example 2: Acrylic Composite Sink Rental Property
In a rental unit, the sink had several small chips from frequent use. The property manager used a pre-mixed acrylic resin kit for a fast fix. The repairs were not perfectly color-matched but improved the appearance and prevented further damage.
Tenants were advised to avoid harsh cleaning pads to maintain the sink.
Example 3: Professional Repair Service For Quartz Composite
A restaurant with a quartz composite sink suffered a large chip near the faucet. A professional repair technician used a custom-matched epoxy and specialized tools. The repair was invisible and restored full function. The cost was higher, but the result was ideal for a commercial setting.
Post-repair Care And Maintenance Tips
Once your composite sink is repaired, proper care is essential to maintain its longevity and appearance.
Cleaning Guidelines
- Use non-abrasive cleaners and soft sponges.
- Avoid harsh chemicals like bleach or ammonia.
- Regularly rinse and dry the sink to prevent mineral buildup.
Preventing Future Chips
- Place mats or protectors at the bottom of the sink.
- Avoid dropping heavy objects or sudden temperature changes.
- Follow installation guides like How To Install A Drop-In Kitchen Sink to minimize stress points.
Routine Inspection
- Check for new chips, cracks, or discoloration monthly.
- Address minor damage quickly to prevent escalation.
Pro Tip: For sinks in high-traffic areas, consider reviewing How To Install A Double Kitchen Sink for tips on durable installation and maintenance.
When To Call A Professional
While DIY repairs are effective for most minor chips, certain situations require expert intervention.
Signs You Need A Professional
- Chip is larger than 1 inch or affects sink structure.
- Multiple chips or cracks appear suddenly.
- Repair kits fail to adhere or match color.
Benefits Of Professional Repair
- Expert color matching and blending.
- Warranty on repair work.
- Access to industrial-grade materials and tools.
Example: A large chip near the drain was repaired by a technician using specialized resins, resulting in a flawless finish. The homeowner received a 2-year warranty on the repair.
Finding A Reliable Service
- Look for technicians specializing in composite sink repairs.
- Check reviews and request before/after photos.
- Verify certifications and insurance.
For severe damage, consult the sink manufacturer or review guidelines from reputable sources like Consumer Reports.
Repairing Chips: Common Mistakes And How To Avoid Them
Even the best DIYers make mistakes. Here are common pitfalls and how to steer clear.
Skipping Surface Preparation
- Always clean and dry the area thoroughly.
- Residual oils or moisture prevent proper adhesion.
Using The Wrong Repair Kit
- Choose a kit designed for your sink material.
- Avoid generic fillers; they may not bond or match color.
Over-sanding Or Under-sanding
- Over-sanding can damage surrounding sink.
- Under-sanding leaves a rough or visible patch.
Ignoring Manufacturer Instructions
- Follow kit directions precisely.
- Some fillers require specific mixing ratios or curing times.
Warning: Using incompatible fillers can lead to discoloration, failed repairs, or even chemical reactions that damage the sink.
Comparing Diy Vs Professional Repairs
Making the right choice depends on budget, skill level, and the extent of damage.
| Aspect | DIY Repair | Professional Repair |
|---|---|---|
| Cost | $15-$40 | $100-$300 |
| Time Required | 1-2 hours plus curing | 1-2 hours |
| Finish Quality | Good to Excellent | Excellent |
| Warranty | None | 1-2 years |
| Skill Needed | Moderate | N/A |
| Risks | Visible patch, failed adhesion | Minimal |
Pro Tip: If your sink is under warranty, check if repairs void coverage. Many manufacturers require professional repair for warranty claims.
Frequently Asked Questions
How Do I Match The Color Of My Composite Sink During Repair?
Most composite sink repair kits offer a range of color options, but matching can be tricky. If your sink has a unique or faded color, contact the manufacturer for a recommended filler or pigment. Some professional kits allow for custom color mixing, which is ideal for perfect matches.
In my experience, testing a small amount of filler in an inconspicuous area can help ensure the best match before full application.
Is It Possible To Repair A Chip Near The Drain Or Faucet?
Yes, but the process can be more challenging due to frequent water exposure and stress. Use a waterproof, high-strength epoxy or resin. Protect the area with masking tape and ensure the repair is fully cured before resuming use. For chips near plumbing, reviewing How To Install A Kitchen Sink Drain Basket can provide helpful installation guidance.
Will A Repaired Chip Be As Strong As The Original Sink?
While modern repair kits offer strong adhesion and durability, repaired areas may not be as robust as the original composite. Avoid heavy impacts and stress on the repaired spot. For commercial or high-use sinks, professional repairs may offer greater strength and longevity. According to Wikipedia, composite materials rely on the integrity of their matrix, so repairs are best for cosmetic and minor structural issues.
Can I Use Regular Household Filler Or Putty To Fix A Composite Sink Chip?
No, standard fillers are not designed for composite sink materials and may fail to adhere or match color. Always use a kit specifically formulated for granite, quartz, or acrylic composites. These products bond chemically and maintain water resistance essential for sinks.
What Should I Do If The Chip Keeps Reappearing After Repair?
Persistent chips may indicate underlying structural issues or improper repair technique. Check for installation flaws or excessive stress in the area. Consider consulting a professional or the sink manufacturer. Reviewing How To Install A Bigger Kitchen Sink may help identify if sink size or support is contributing to the problem.
A chipped composite sink doesn’t have to mean replacing the entire fixture. With careful preparation, the right tools, and a methodical approach, you can restore your sink’s appearance and function, saving time and money. Remember to choose products that match your sink’s material, follow instructions closely, and maintain your sink to prevent future damage.
Whether you tackle the repair yourself or call in a pro, preserving your composite sink is entirely possible with the guidance provided here.