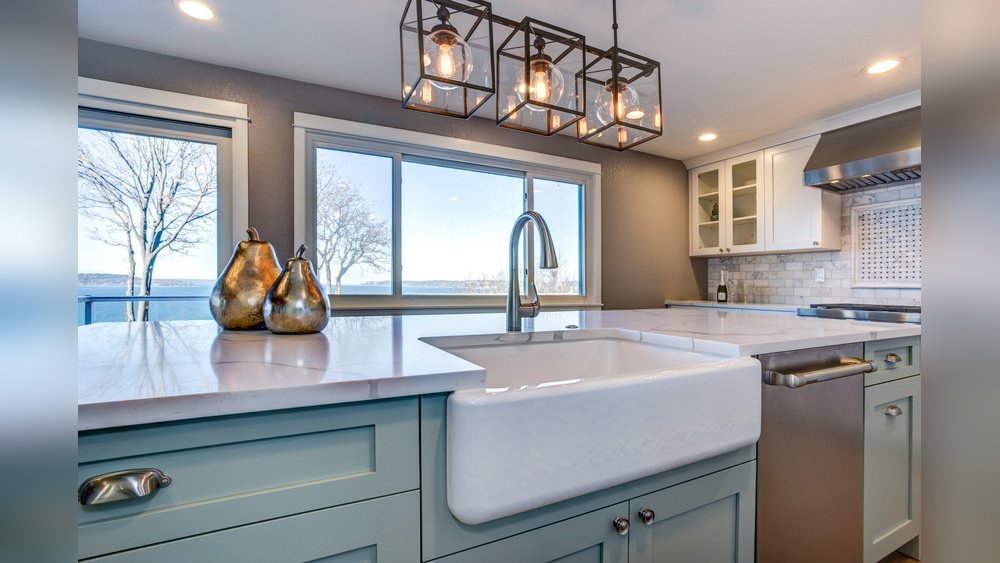
Transforming your kitchen with a farmhouse sink paired with a luxurious granite countertop instantly elevates both aesthetic appeal and functionality. The farmhouse, or apron-front, sink has soared in popularity for its deep basin and timeless look, while granite remains a top countertop choice for its durability and elegance. However, combining these two elements requires careful planning and precise installation techniques to ensure structural integrity, water-tightness, and enduring beauty.
Many homeowners underestimate the complexity of installing a farmhouse sink with granite. Unlike standard drop-in or undermount sinks, the apron-front design demands custom countertop cuts, specialized support, and a keen understanding of both plumbing and stonework. Whether you’re a DIY enthusiast or coordinating with contractors, understanding each step is crucial for a flawless result.
This comprehensive guide provides expert insights, practical tips, and data-driven comparisons so you can confidently install your farmhouse sink with granite countertops, achieving a stunning, lasting centerpiece for your kitchen.
Key Takeaways
- Farmhouse sinks require custom installation steps when paired with granite countertops, including extra structural support.
- Accurate measuring and countertop cutting are vital to avoid costly mistakes and ensure a perfect fit.
- The right choice of materials, tools, and professional help can significantly affect the outcome and long-term durability.
- Waterproofing and proper sealing at the sink-granite interface prevent leaks and damage.
- This guide offers detailed, step-by-step instructions, real-world examples, and troubleshooting advice for a successful installation.
Understanding Farmhouse Sinks And Granite Countertops
The combination of a farmhouse sink and granite countertop offers both visual impact and practical benefits, but only if you understand their unique properties and requirements.
Types Of Farmhouse Sinks
Farmhouse sinks come in several materials, each with distinct characteristics:
- Fireclay: Durable, non-porous, resists stains and scratches.
- Cast iron: Classic look, heavy, may chip if struck hard.
- Stainless steel: Modern, lighter, easy to clean, can dent.
- Copper: Unique patina over time, antimicrobial, requires special care.
Most farmhouse sinks are apron-front, meaning the front face is exposed and extends past the cabinetry. This design impacts both cabinet and countertop preparation.
Why Granite Countertops?
Granite remains a top choice for kitchens due to its:
- Strength and durability: With proper care, granite can last decades.
- Heat and scratch resistance: Ideal for busy kitchens.
- Aesthetic versatility: Wide range of colors, patterns, and finishes.
- Added home value: Granite kitchens often increase property appeal.
However, granite is heavy and brittle during cutting, requiring professional tools and handling.
Challenges Of Combining Farmhouse Sinks With Granite
Installing a farmhouse sink with granite countertops introduces unique challenges:
- Support requirements: Farmhouse sinks are heavy; granite adds significant weight.
- Precise cutouts: Granite must be cut to exact sink dimensions for a snug fit.
- Sealing and waterproofing: Essential to prevent water damage at the interface.
- Cabinet modifications: Standard sink bases need reinforcement or resizing.
Pro Tip: Always check manufacturer instructions for both your sink and countertop material before starting any installation.

Credit: www.youtube.com
Planning Your Installation
A successful installation starts with thorough planning. This phase covers measurements, material selection, and logistics to avoid costly surprises.
Measuring For A Farmhouse Sink
Accurate measurements are the foundation of a seamless fit. Here’s how:
- Width: Measure cabinet opening, ensure it’s wider than the sink’s outermost edge.
- Height: Farmhouse sinks typically replace the top drawer; measure from the cabinet base to the countertop.
- Depth: Check from the front of the cabinet to the wall; leave room for faucet and backsplash.
- Countertop overhang: Decide whether you want the granite flush, overlapping, or slightly set back from the sink apron.
Record all measurements and double-check before ordering materials or making cuts.
Assessing Cabinet And Countertop Compatibility
- Cabinet: A standard sink cabinet might not support a farmhouse sink’s weight. Reinforcement or custom cabinetry may be needed.
- Countertop: Granite slabs must be thick enough (often 3 cm) for structural integrity, and the cutout must match the sink’s profile.
Tools And Materials Checklist
Gather these essentials:
- Safety gear: Goggles, gloves, dust mask
- Measuring tape and level
- Power drill and bits
- Jigsaw with diamond blade (for granite)
- Silicone caulk (mold-resistant)
- 2×4 lumber (for support frame)
- Shims and clamps
- Plumbing wrenches and supplies
- Support brackets (if required)
Deciding Between Diy And Professional Help
Installing a farmhouse sink with granite is an advanced project. Consider hiring a professional stone fabricator for granite cutting. Plumbing and cabinet modification can be DIY with skills, but outsourcing ensures safety and quality for most homeowners.
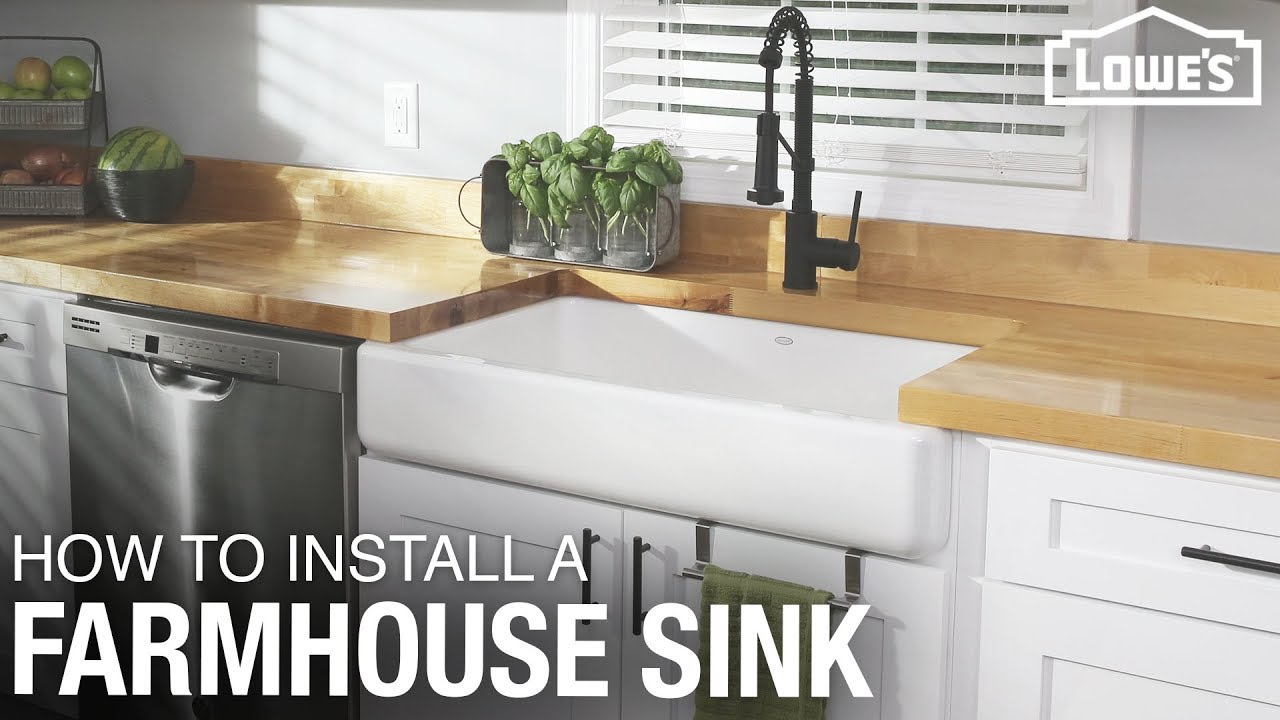
Example: A homeowner attempted a DIY granite cutout using a standard jigsaw, resulting in cracks and a $1,200 replacement slab. Professional stoneworkers use wet saws and templating for precise, clean results.
Credit: www.youtube.com
Preparing The Space
Before installation, ensure your kitchen is ready and all components fit perfectly.
Modifying The Cabinet
- Remove doors and drawers: Take out the top drawer (if present) and doors for access.
- Reinforce base: Use 2x4s to build a support frame under the sink area, distributing weight to cabinet sides.
- Cut or notch face frame: Some farmhouse sinks require notching the front of the cabinet to accommodate the apron.
Creating The Sink Cutout In Granite
Granite cutting is the riskiest step. Here’s the process:
- Template creation: Use a cardboard or plywood template to trace the sink’s outline on the granite.
- Mark the cut: Double-check alignment with cabinet and faucet location.
- Protect the slab: Support granite on sawhorses with foam padding.
- Cutting: Use a wet diamond blade saw to minimize dust and reduce the chance of cracks. Go slowly, following the template.
- Edge finishing: Polish edges for a smooth, chip-free finish.
Warning: Cutting granite generates silica dust, which is hazardous. Always wear a respirator and work outdoors or in a well-ventilated area.
Dry-fitting The Sink
Before final installation, perform a dry fit:
- Place the sink in the cabinet opening and ensure it sits level.
- Check for any cabinet or countertop interference.
- Confirm that plumbing lines up with sink drains.
This step allows you to make adjustments without risking permanent errors.
Preparing Plumbing Connections
- Shut off water supply.
- Disconnect old sink plumbing.
- Inspect pipes and fittings: Replace any corroded or damaged parts.
For further guidance on plumbing specifics, see How To Install Kitchen Sink Plumbing.

Credit: www.youtube.com
Step-by-step Installation Process
With preparations complete, it’s time to install your farmhouse sink and granite countertop.
Building The Support Frame
A farmhouse sink’s weight, especially when filled with water or dishes, requires sturdy support:
- Measure sink base: Cut 2x4s to fit snugly inside the cabinet base.
- Create a frame: Assemble a rectangle that supports all sink edges.
- Install cross supports: For larger sinks, add center braces.
- Secure to cabinet: Use screws to anchor the frame to the cabinet walls.
Example: In my experience, using construction adhesive in addition to screws adds long-term stability and prevents shifting.
Installing The Farmhouse Sink
- Set the sink: Gently lower it onto the support frame, ensuring it’s centered and level.
- Check apron alignment: The sink’s front should be flush with or slightly proud of the cabinet face.
- Adjust with shims: Use wooden shims to fine-tune level and height.
- Confirm fit: Ensure the sink sits snugly beneath the granite cutout.
Attaching The Granite Countertop
- Apply silicone: Run a bead of mold-resistant silicone caulk along the top edge of the sink and cabinet.
- Lower the granite: Carefully place the countertop onto the cabinet and over the sink cutout.
- Check seams: Inspect the joint between sink and granite; adjust as needed for a tight, even fit.
- Clamp (if necessary): Use clamps to hold the granite in place while silicone cures (typically 24 hours).
Sealing And Waterproofing
Proper sealing is critical to prevent leaks:
- Seal the sink-granite interface: Apply a continuous bead of waterproof silicone between the sink lip and granite.
- Smooth the joint: Use a caulk tool or wet finger for a neat finish.
- Wipe excess: Clean off any excess before it dries.
Connecting Plumbing
- Install drain and strainer: Attach according to manufacturer’s instructions.
- Reconnect supply lines: Tighten all fittings securely.
- Test for leaks: Run water and check all connections, including the seal between sink and granite.
For a detailed look at installing sink accessories, see How To Install A Sink Strainer and How To Install A Sink Drain.
Common Mistakes And How To Avoid Them
Awareness of frequent pitfalls can save you time, money, and frustration.
Inaccurate Measurements
- Problem: Even a quarter-inch error can make the sink or countertop unusable.
- Solution: Always measure twice, cut once. Use templates and have a second person verify dimensions.
Insufficient Support
- Problem: Skimping on cabinet reinforcement leads to sagging or collapse.
- Solution: Build a robust support frame; consult a carpenter if unsure.
Poor Sealing
- Problem: Inadequate caulking allows water to seep between the sink and granite.
- Solution: Use high-quality, mold-resistant silicone; apply a continuous, even bead.
Rushed Granite Cutting
- Problem: Fast or uneven cutting cracks the granite.
- Solution: Use slow, steady passes with a wet saw. If in doubt, hire a professional.
Overlooking Plumbing Alignment
- Problem: Misaligned drains require expensive rework.
- Solution: Dry-fit all plumbing before final installation; adjust as necessary.
Not Checking Level
- Problem: An unlevel sink causes drainage issues and looks unprofessional.
- Solution: Use a spirit level at every stage: frame, sink, and countertop.
Table: Common Issues And Solutions
| Issue | Impact | Solution |
|---|---|---|
| Incorrect Measurements | Sink or countertop won’t fit | Double-check with templates |
| Weak Cabinet Support | Sagging, possible collapse | Reinforce with 2×4 frame |
| Poor Waterproofing | Leaks, mold growth | Use high-quality silicone |
| Cracked Granite | Costly replacement | Hire professional for cuts |
Real-world Examples And Case Studies
Learning from real experiences can clarify best practices and prevent setbacks.
Example 1: Diy Success With Professional Help
A homeowner in Austin, TX planned to install a fireclay farmhouse sink with a 3 cm granite countertop. After initial research, they opted to hire a granite fabricator for the cutout, while handling the cabinet reinforcement and sink placement themselves. The result was a flawless fit and a leak-free finish, demonstrating that combining professional and DIY efforts can balance cost and quality.
Example 2: Cabinet Modification Challenge
In a 1970s kitchen remodel, the existing sink base was too narrow. The installer removed the cabinet’s face frame, widened the opening, and reinforced it with 2x4s. After dry-fitting the sink, they discovered the drain was off-center, requiring a new P-trap.
The project finished on schedule, with the homeowner reporting increased satisfaction with the deep, accessible basin.
Example 3: Professional Vs. Diy Cost Comparison
A small renovation firm quoted $2,500 for a full farmhouse sink and granite install, including all materials and labor. By hiring a pro for only the granite work ($800) and performing the rest themselves, the homeowner reduced total costs to $1,400, saving over 40% without sacrificing quality.
Table: Diy Vs. Professional Installation Costs
| Installation Step | DIY Cost (USD) | Professional Cost (USD) |
|---|---|---|
| Cabinet Modification | $150 | $400 |
| Granite Cutout | $200 (tool rental) | $800 |
| Sink Installation | $0 (self) | $300 |
| Plumbing | $50 (parts) | $200 |
| Total | $400 | $1,700 |
Note: Prices vary by region and project scope. Always request multiple quotes.
Comparing Sink Mounting Methods
The installation method you choose affects both cost and durability. Here’s a comparison of the three most common approaches:
Table: Farmhouse Sink Mounting Methods
| Mounting Method | Pros | Cons | Best For |
|---|---|---|---|
| Undermount | Clean lines, easy cleaning | Requires precise cut, potential for leaks | Modern kitchens, seamless look |
| Flush Mount | Balanced appearance, easy installation | Visible seam, harder to clean edge | Traditional or transitional styles |
| Above Counter | Simple to install, less risk of leaks | Visible rim, raised edge can trap debris | Budget projects, retrofits |
Pro Tip: For granite countertops, undermount or flush mount installations are most popular due to their clean integration and ease of maintenance.
Maintenance And Care After Installation
Protect your investment by following best practices for cleaning and maintaining both your farmhouse sink and granite countertop.
Daily Cleaning
- Farmhouse sink: Use a soft sponge and mild soap; avoid abrasive pads.
- Granite countertop: Wipe with a damp cloth and pH-neutral cleaner; dry to prevent water spots.
Stain And Scratch Prevention
- For sinks: Promptly rinse away acidic foods, coffee, or wine.
- For granite: Use cutting boards and trivets; never cut directly on the stone.
Resealing Granite
Granite countertops should be resealed every 1-3 years depending on use and manufacturer recommendations. To check if resealing is needed:
- Sprinkle water on the surface.
- If water beads, the seal is intact.
- If water soaks in, reseal promptly.
Checking For Leaks
Periodically inspect the caulk and plumbing beneath the sink. If you spot moisture, replace the silicone and tighten fittings immediately.
For more maintenance tips, see How To Fix A Backed Up Kitchen Sink.
Troubleshooting And Repair Tips
Even with careful installation, issues can arise. Here’s how to address common problems.
Leaks At The Sink-countertop Joint
- Solution: Remove old caulk, thoroughly dry the area, and apply a new bead of waterproof silicone.
Sink Sagging Or Shifting
- Solution: Inspect the support frame; reinforce with additional lumber and brackets if needed.
Cracked Granite
- Solution: For hairline cracks, use granite repair epoxy. For major breaks, consult a professional stoneworker for replacement.
Drain Or Plumbing Issues
- Solution: Check for loose fittings or misaligned pipes. If persistent, consider upgrading to flexible plumbing connectors.
For step-by-step plumbing fixes, visit How To Install A Disposal In A Single Sink.
When To Hire A Professional
Certain situations make professional installation not just preferable, but necessary:
- Complex granite cuts: Intricate shapes or fragile slabs are best handled by experienced fabricators.
- Structural modifications: If cabinet or wall changes are extensive.
- Plumbing upgrades: If moving drain lines or installing new supply lines.
- Warranty requirements: Some sink or countertop warranties require professional installation.
Example: According to the National Kitchen & Bath Association, improper installation is the leading cause of countertop and sink warranty claims.
Selecting The Right Contractor
- Check credentials: Look for state licensing and insurance.
- Review portfolios: Ask for before-and-after photos of similar projects.
- Get multiple quotes: Ensure pricing and scope are clear.
- Ask about experience: Prioritize contractors with farmhouse sink and granite expertise.
Frequently Asked Questions
What Type Of Silicone Should I Use Between My Farmhouse Sink And Granite?
For sealing the joint between a farmhouse sink and granite countertop, use a 100% mold-resistant silicone caulk rated for kitchen and bath applications. Silicone with antimicrobial properties is ideal, as it helps prevent mold and mildew growth in damp areas. Brands specifically labeled as “kitchen/bath” or “stone-safe” are recommended to avoid staining the granite.
Can I Retrofit A Farmhouse Sink Into Existing Granite Countertops?
Retrofitting a farmhouse sink into an existing granite countertop is possible but requires precision. You’ll need to cut the existing granite to fit the apron-front sink, which may involve removing additional countertop material and modifying the base cabinet. This process should be handled by a professional granite fabricator to avoid damaging the countertop and to ensure a watertight fit.
Is It Possible To Install A Garbage Disposal With A Farmhouse Sink And Granite?
Yes, a garbage disposal can be installed with a farmhouse sink and granite countertop. Ensure the sink’s drain opening and under-cabinet space are compatible with your disposal unit. Reinforce the cabinet base to support the added weight, and use vibration-dampening mounting hardware to protect both the sink and granite. For a step-by-step guide, see How To Install A Garbage Disposal.
How Do I Prevent Cracks In Granite During Installation?
To minimize the risk of cracking granite during installation, always use the correct wet diamond blade tools and support the slab fully during cutting and transport. Never force a cut or lift granite by unsupported edges. Professionals use templating and gentle handling techniques, and you should do the same if attempting DIY work.
What Are The Pros And Cons Of Top-mount Versus Undermount Farmhouse Sinks With Granite?
Top-mount farmhouse sinks are easier to install, as the rim sits atop the granite, reducing the risk of leaks. However, the raised edge can catch debris. Undermount sinks offer a seamless look and make countertop cleaning easier but require precise granite cuts and professional sealing to prevent water ingress. Your choice depends on your kitchen style preferences and your willingness to maintain the seam.
Pairing a farmhouse sink with a granite countertop is an investment in both style and function. With the right planning, precise execution, and ongoing care, you’ll enjoy a beautiful, durable centerpiece for years to come. For further reading, explore best practices from resources like Houzz or consult local kitchen professionals for personalized advice.