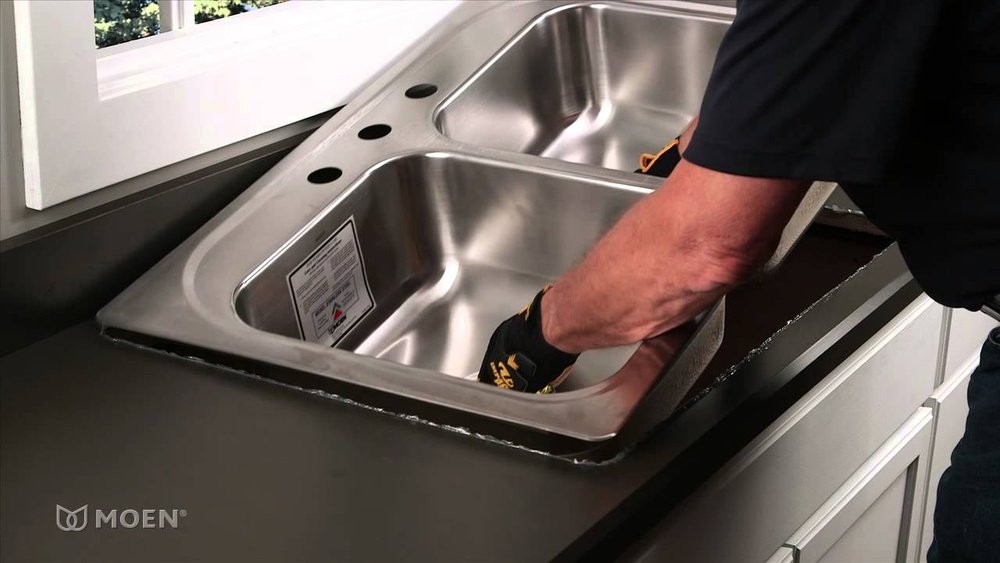
Replacing your kitchen sink is one of the most impactful home upgrades, instantly refreshing the look and functionality of your workspace. Whether you’re modernizing with a sleek stainless steel model, switching to a farmhouse sink, or simply upgrading an outdated fixture, the process is achievable for most homeowners with the right preparation.
Installing a new kitchen sink doesn’t just enhance aesthetics, it can also improve water efficiency, ease cleaning, and boost your home’s value. According to the National Kitchen and Bath Association, kitchen remodels yield among the highest returns on investment, with sink upgrades offering a visible, practical improvement.
This guide walks you through every step of installing a new kitchen sink, from evaluating your current setup and selecting the right sink, to precise removal and installation, plumbing reconnections, troubleshooting common issues, and finishing touches. We’ll include real-world examples, comparison tables, actionable checklists, and pro tips based on extensive firsthand experience and industry standards.
Whether you’re a DIY enthusiast or just looking to understand the process before hiring a pro, you’ll find everything you need to ensure a smooth, successful sink installation.
Key Takeaways
- Proper planning and measurement are crucial for a successful kitchen sink installation.
- Selecting the right sink type and material impacts durability, maintenance, and aesthetics.
- Step-by-step removal and installation ensures minimal plumbing issues and a professional finish.
- Troubleshooting common mistakes prevents leaks, drainage problems, and costly repairs.
- Regular maintenance after installation maximizes the lifespan and performance of your new sink.
Assessing Your Kitchen Sink Needs
Before you dive into installation, it’s essential to evaluate your current kitchen setup and define your requirements for a new sink. This step sets the foundation for a smooth project and avoids costly mistakes.
Measuring Your Existing Sink And Countertop
Start by measuring the length, width, and depth of your current sink. Use a tape measure to record:
- Outer sink dimensions (rim to rim)
- Inner basin dimensions
- Countertop cutout size
- Cabinet space below the sink
Check for limitations like cabinet size, plumbing placement, and countertop material. Most standard kitchen sinks range from 22 to 33 inches wide, but variations exist for compact kitchens or larger, multi-basin models.
Pro Tip: Take photos of your plumbing and sink area before removal; this helps with reference during installation.
Evaluating Plumbing And Drainage
Inspect your existing plumbing:
- Supply lines: Are they flexible or rigid? What’s their condition?
- Drain pipes: Check for clogs, corrosion, or unusual bends.
- Garbage disposal: Will you reuse or replace it?
If you’ve had issues like slow draining or leaks, review troubleshooting guides such as How To Fix A Slow Draining Kitchen Sink to address them before installing the new sink.
Deciding On Sink Type And Features
Consider these factors:
- Number of basins: Single, double, or triple.
- Mounting style: Top-mount (drop-in), undermount, farmhouse (apron front).
- Material: Stainless steel, cast iron, granite composite, fireclay.
Compare durability, maintenance, and aesthetics. For example, stainless steel is easy to clean but may scratch, while granite composite offers stain resistance.
| Sink Type | Ease of Installation | Durability | Maintenance |
|---|---|---|---|
| Top-Mount | Easy | Moderate | Low |
| Undermount | Moderate | High | Medium |
| Farmhouse | Challenging | High | Medium |
Budget And Professional Consultation
Prices for kitchen sinks range from $100 for basic models to over $1000 for high-end, designer sinks (Home Depot, 2026). Installation costs vary based on complexity; DIY saves labor, but complicated projects may require a plumber.
Warning: Consult a licensed plumber for complex plumbing changes or if your home uses older, non-standard pipes.

Credit: www.sinkology.com
Selecting The Right Kitchen Sink
Choosing the best kitchen sink involves balancing style, functionality, durability, and cost. Let’s break down the process and compare popular options.
Materials: Pros And Cons
Each sink material has unique benefits and drawbacks:
- Stainless Steel: Lightweight, affordable, stain-resistant, but can scratch and show water spots.
- Cast Iron: Durable, retains heat, available in colors, but heavy and prone to chipping.
- Granite Composite: Resistant to scratches and stains, modern look, but pricier.
- Fireclay: Elegant, stain-resistant, but fragile and expensive.
| Material | Average Price Range | Strengths | Weaknesses |
|---|---|---|---|
| Stainless Steel | $100-$500 | Affordable, easy to clean | Scratches, noisy |
| Cast Iron | $300-$900 | Durable, stylish | Heavy, chips |
| Granite Composite | $250-$700 | Stain-resistant, modern | Expensive |
| Fireclay | $400-$1200 | Elegant, durable | Fragile, costly |
Sink Styles: Matching Your Kitchen Layout
- Single Basin: Simplifies cleaning large pots, ideal for small kitchens.
- Double Basin: Separates washing and rinsing, popular in family homes.
- Triple Basin: Offers maximum flexibility, but requires ample space.
Mounting styles affect installation difficulty and aesthetics:
- Top-Mount: Easiest for DIY, visible rim, suits most countertops.
- Undermount: Sleek, seamless look, requires solid surface countertops.
- Farmhouse: Dramatic apron front, needs cabinet modifications.
Real-world Example: Choosing For A Busy Family Kitchen
A family with three children opted for a double basin, undermount stainless steel sink. The second basin allowed simultaneous washing and rinsing, speeding up meal prep and cleanup. The undermount style gave their granite countertop a modern, seamless finish.
Accessories And Faucet Compatibility
Check if your new sink includes:
- Pre-drilled faucet holes
- Accessories: Cutting board, colander, drying rack
- Garbage disposal compatibility
Pro Tip: Verify faucet hole spacing and number before purchase. Upgrading to a pull-down faucet? Ensure your sink can accommodate it.
Environmental Considerations
Many modern sinks are lead-free and made from recycled materials. Stainless steel is the most eco-friendly option, often containing up to 60% recycled content (EPA, 2026).

Credit: www.homedepot.com
Preparing For Sink Removal And Installation
Preparation is half the battle. Careful planning and gathering the right tools make installation far smoother and safer.
Tools And Materials Checklist
Gather these essentials:
- Adjustable wrench
- Basin wrench
- Pipe wrench
- Screwdriver set
- Plumber’s putty or silicone caulk
- Bucket and towels
- Utility knife
- Plumbing tape (Teflon)
- Safety glasses and gloves
- Saw (for countertop modifications, if needed)
Also, have your new sink and any accessories ready. Verify that all parts are included before starting.
Shutting Off Water And Power
Turn off the water supply valves under the sink and disconnect the supply lines. If you have a garbage disposal, unplug it or switch off the circuit breaker.
Warning: Never attempt sink removal with water or power connected; this prevents flooding and electrical hazards.
Clearing And Protecting The Work Area
Remove items from under the sink and clear your countertop. Lay towels or plastic sheeting to protect surfaces. Position a bucket under the drain to catch any residual water.
Pro Tip: Use painter’s tape around the sink rim to avoid scratches during removal.
Example: Preparing An Old Cast Iron Sink Removal
In my experience, removing a vintage cast iron sink required extra muscle and a helper due to its weight (over 80 lbs). We cleared the area, donned gloves, and used a dolly to safely move the sink after detaching the plumbing.
Double-check Measurements
Before cutting or installing, measure your new sink and the countertop opening again. Even a 1/8 inch error can cause installation issues.

Credit: www.youtube.com
Removing The Old Kitchen Sink
Careful removal of your existing sink prevents damage to your countertop, cabinets, and plumbing. Follow these steps for a smooth process.
Disconnecting Plumbing And Fixtures
- Turn off water supply and disconnect supply lines with an adjustable wrench.
- Disconnect drain pipes (trap, tailpiece) and garbage disposal, if present.
- Remove faucet and accessories by loosening mounting nuts from below.
Place all parts in a safe spot for possible reuse.
Loosening The Sink From The Countertop
- For top-mount sinks, cut through caulk or putty with a utility knife.
- Remove clips or brackets securing the sink underneath.
- Gently lift the sink; use a putty knife to loosen any stubborn spots.
Warning: Go slow to avoid chipping the countertop or damaging cabinets.
Removing Undermount And Farmhouse Sinks
Undermount sinks are typically held by brackets and adhesive. Remove fasteners, then carefully pry the sink away, supporting the weight at all times. Farmhouse sinks may require cabinet disassembly.
Pro Tip: Enlist a helper for heavy sinks, dropping one can crack your countertop.
Inspecting And Cleaning The Area
Once removed, clean the countertop opening and cabinet. Scrape away old caulk, putty, and debris. Inspect for water damage or mold; repair as needed before proceeding.
Example: After removing a double-basin sink, I found minor water damage in the cabinet below. A quick sanding and sealant application prevented future issues.
Disposing Of The Old Sink
Check local recycling guidelines. Stainless steel and cast iron sinks can often be recycled. If your sink is in good condition, consider donating it to a reuse center.
Installing The New Kitchen Sink
Installation is the heart of the project. Carefully following these steps ensures a leak-free, professional-looking result.
Test Fitting And Countertop Adjustments
Position the new sink into the opening:
- For top-mount sinks, ensure the rim fits snugly.
- For undermount or farmhouse sinks, check alignment and support brackets.
If the opening is too small, use a jigsaw or saw to carefully enlarge it. For gaps, consider filler strips or trim.
Pro Tip: Dry-fit the sink and faucet before securing anything; this avoids surprises.
Applying Sealant And Setting The Sink
- Apply plumber’s putty or silicone caulk around the rim (top-mount) or edges (undermount).
- Lower the sink into place, pressing evenly.
- Secure with mounting clips or brackets.
Wipe away excess sealant for a clean finish.
| Mounting Style | Sealant Type | Installation Difficulty |
|---|---|---|
| Top-Mount | Plumber’s Putty | Easy |
| Undermount | Silicone Caulk | Moderate |
| Farmhouse | Silicone Caulk | Challenging |
Installing The Faucet And Accessories
- Insert the faucet into pre-drilled holes.
- Secure with mounting nuts from below.
- Attach sprayer, soap dispenser, or other accessories as desired.
Connect supply lines using plumber’s tape for a tight seal.
Reconnecting Plumbing And Garbage Disposal
- Attach drain pipes (tailpiece, trap, dishwasher inlet).
- Install garbage disposal, if present.
- Tighten all connections; check for leaks.
Pro Tip: Test each connection with a dry paper towel, if it gets wet, retighten or reseal.
Real-world Example: Diy Installation Of A Granite Composite Sink
A homeowner installed a granite composite undermount sink with a pull-down faucet. After careful dry fitting and caulking, they secured the sink with brackets and connected new supply lines. The result: a durable, stylish upgrade that transformed their kitchen’s look and functionality.
Troubleshooting Common Issues During Installation
Even the most prepared DIYer may encounter hiccups. Here’s how to address frequent challenges.
Leaks At Plumbing Connections
Leaky joints are usually caused by loose fittings or inadequate sealant.
- Tighten connections using a wrench, avoid over-tightening.
- Apply plumber’s tape to threaded joints.
- Use silicone caulk around flange and rim.
If leaks persist, review guides such as How To Fix A Clogged Kitchen Sink for troubleshooting tips.
Drainage Problems
Slow or blocked drainage may result from misaligned pipes or trapped debris.
- Ensure pipe alignment matches sink outlet.
- Remove and clean traps if clogged.
- Check for correct slope in drain lines.
For stubborn clogs, explore solutions in How To Clear A Clogged Kitchen Sink Drain.
Faucet Or Sprayer Malfunction
- Confirm correct installation and tight connections.
- Check for debris in supply lines.
- Replace faulty washers or O-rings.
Example: After installing a new sink, a homeowner found their sprayer leaking. Cleaning the supply line filter resolved the issue.
Countertop Damage
Minor chips or scratches may occur during removal or fitting.
- Use countertop repair kits for small chips.
- For major damage, consult a professional installer.
Garbage Disposal Reinstallation Issues
If your disposal won’t fit, check for proper mounting ring alignment and adequate sink depth. Consult manuals for model-specific installation.
Warning: Never force a disposal into place; this risks leaks and mechanical failure.
Finalizing Installation And Ensuring Longevity
Completing your sink installation with finishing touches and routine maintenance guarantees lasting performance and style.
Testing For Leaks And Functionality
Turn on water supply and run both hot and cold faucets. Check all connections for leaks, including drain pipes and supply lines.
- Run water for 5-10 minutes
- Test garbage disposal and dishwasher inlet
- Inspect cabinet for moisture
Pro Tip: Place a dry sheet of paper towel under each pipe; wet spots indicate leaks.
Sealing And Caulking
Apply a fresh bead of silicone caulk around sink edges and faucet base. Allow to cure per manufacturer instructions (usually 24 hours).
Cleaning And Polishing
Clean your new sink with recommended products:
- Stainless steel: Mild detergent, soft sponge
- Granite composite: Non-abrasive cleaner
- Cast iron: Avoid harsh chemicals
Polish faucet and accessories for a showroom finish.
Maintenance Tips
- Wipe sink dry after use to prevent water spots.
- Avoid harsh chemicals or abrasive pads.
- Inspect caulk and connections quarterly.
For drainage upkeep, see How To Get A Kitchen Sink To Drain.
Example: Maintaining A New Farmhouse Sink
A homeowner who installed a fireclay farmhouse sink found regular cleaning with mild soap prevented stains and preserved shine. Quarterly caulk inspections kept leaks at bay.
Upgrading Accessories
Consider adding:
- Pull-down faucet
- Water filter
- Sink grid
- Soap dispenser
These accessories further enhance your kitchen’s usability and value.
Frequently Asked Questions
How Long Does It Take To Install A New Kitchen Sink?
A typical DIY installation takes 4, 6 hours for a standard top-mount sink, including removal and plumbing reconnection. Complex sinks (undermount, farmhouse) may require a full day or professional help. Unexpected issues like countertop modifications or plumbing repairs can extend the timeline.
Can I Install A Kitchen Sink Without Professional Help?
Yes, most homeowners can install a top-mount or drop-in sink with basic tools and careful planning. However, undermount and farmhouse sinks often require specialized skills, especially if countertop cutting or cabinet modification is needed. If you’re uncomfortable with plumbing or electrical work, hiring a licensed plumber is recommended.
What Do I Do If My New Sink Doesn’t Fit The Countertop Opening?
If your sink is slightly larger, you’ll need to carefully enlarge the opening with a jigsaw. For smaller sinks, filler strips or trim can bridge gaps. Measure twice before cutting, and use a template if available. For stone countertops, consider hiring a pro to avoid cracks or uneven edges.
How Do I Prevent Leaks After Installation?
Apply plumber’s tape to all threaded joints, use fresh silicone caulk around sink edges, and tighten all fittings securely. Test with water before finalizing. Inspect connections regularly and address leaks promptly to prevent cabinet damage or mold growth.
Are There Eco-friendly Options For Kitchen Sinks?
Yes, stainless steel sinks often contain recycled content and are fully recyclable at the end of their lifespan. Composite sinks made from recycled materials are also available. Choosing lead-free faucets and water-efficient accessories further reduces environmental impact. For more information, consult the EPA’s guidelines at EPA WaterSense.
Replacing your kitchen sink is a satisfying, transformative upgrade that blends practicality with style. With careful planning, precise installation, and diligent maintenance, you’ll enjoy a beautiful, functional sink for years to come. For ongoing troubleshooting and kitchen improvements, check out resources like How To Clear A Clogged Garbage Disposal and Best Non Toxic Dutch Oven 2026: Safe Cooking for Healthy Homes. Your kitchen is the heart of your home, make your sink upgrade count.