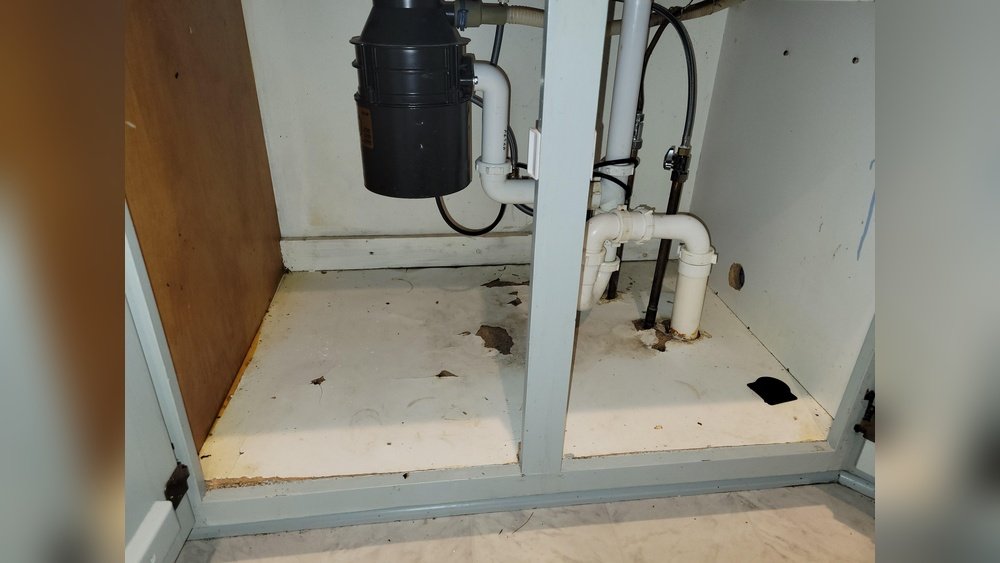
Is the bottom of your cabinet under the sink damaged? Maybe it got wet or started to rot. This part of the cabinet often gets wet. Water leaks can cause the wood to weaken. When this happens, you need to replace the cabinet floor. It is not very hard if you follow the right steps.
Why Replace the Cabinet Floor under the Sink?
The cabinet floor holds your cleaning supplies, trash bin, or other items. If it is weak, it can break and cause spills. Water damage can make the wood soft and moldy. A new cabinet floor keeps your cabinet safe and clean.
What You Will Need
Before starting, gather these tools and materials:
- Measuring tape
- Pencil
- Circular saw or hand saw
- Drill with screwdriver bit
- Hammer
- Nails or wood screws
- Wood glue (optional)
- New plywood or cabinet-grade board
- Sandpaper
- Paint or wood sealant (optional)
- Safety glasses
- Work gloves
Step 1: Clear Out the Cabinet
Take everything out from under the sink. Remove trash cans, cleaning bottles, and other items. This gives you space to work and see the damage well.
Step 2: Turn Off Water Supply (Optional but Safe)
If you need to move pipes or want to be safe, turn off the water valves. Usually, these are under the sink. Turn them clockwise to close. This step is for safety.
Step 3: Remove the Cabinet Floor
Look at the bottom board inside the cabinet. It may be nailed or screwed in place. Use a screwdriver or hammer to remove screws or nails. If the wood is soft or damaged, it might break when removing.
Carefully pull out the old cabinet floor. If it is glued, you might need to cut it out with a saw. Wear gloves and safety glasses to protect yourself.
Step 4: Measure the Space
Now, measure the length and width of the empty cabinet bottom. Use your tape measure and pencil. Write down these numbers. This helps you cut the new board to the right size.
Step 5: Cut the New Cabinet Floor
Take your new plywood or cabinet board. Mark the measurements on it with your pencil. Double-check the numbers before cutting. Use a saw to cut the board carefully along the marks. Sand the edges to make them smooth.
Credit: www.reddit.com
Step 6: Check for Pipes and Holes
Look under your sink for pipes. Sometimes pipes go through the cabinet floor. If so, mark where the pipes are on your new board. Cut holes for the pipes before installing the board.

Credit: www.youtube.com
Step 7: Install the New Cabinet Floor
Put the new board inside the cabinet. Fit it carefully around pipes and edges. It should sit flat and tight. If you want, add some wood glue under the board for extra hold.
Use nails or screws to fix the board in place. Make sure it is strong and does not move. Avoid over-tightening screws to prevent wood damage.
Step 8: Seal or Paint (Optional)
To protect your new cabinet floor, you can paint or seal it. Use water-resistant paint or wood sealant. This helps stop future water damage. Let it dry before putting anything back inside.
Step 9: Put Everything Back
Move your cleaning supplies and other items back into the cabinet. Try to keep heavy things off the edges. This helps keep the cabinet floor strong for longer.
Tips for Preventing Damage in the Future
- Check pipes regularly for leaks.
- Use a plastic tray under the sink to catch drips.
- Keep the cabinet dry and clean.
- Fix leaks as soon as you see them.
Summary Table: Steps to Replace Cabinet Floor
| Step | What to Do |
|---|---|
| 1 | Clear out the cabinet |
| 2 | Turn off water supply (optional) |
| 3 | Remove old cabinet floor |
| 4 | Measure cabinet bottom |
| 5 | Cut new board to size |
| 6 | Cut holes for pipes if needed |
| 7 | Install and fix new floor |
| 8 | Seal or paint (optional) |
| 9 | Return items to cabinet |
Final Thoughts
Replacing the cabinet floor under a sink is doable for most people. It takes time and care. But the results are worth it. Your cabinet will be strong and clean again. Plus, you stop future water damage problems.
Take your time and follow each step. If you are careful, your cabinet will look good and last for years. Good luck with your project!
Frequently Asked Questions
How Do I Remove The Old Cabinet Floor Under A Sink?
Start by emptying the cabinet and disconnecting plumbing if needed. Use a pry bar and hammer to lift out the damaged floor carefully.
What Materials Work Best For Cabinet Floor Replacement?
Plywood or moisture-resistant MDF are good choices. They resist water and provide strong support for the cabinet base.
How Do I Measure The Cabinet Floor Accurately?
Measure the width and depth inside the cabinet space. Double-check measurements before cutting the new floor piece.
Can I Replace The Cabinet Floor Without Plumbing Help?
Yes, but turn off the water supply first. Avoid damaging pipes by working gently around plumbing lines.