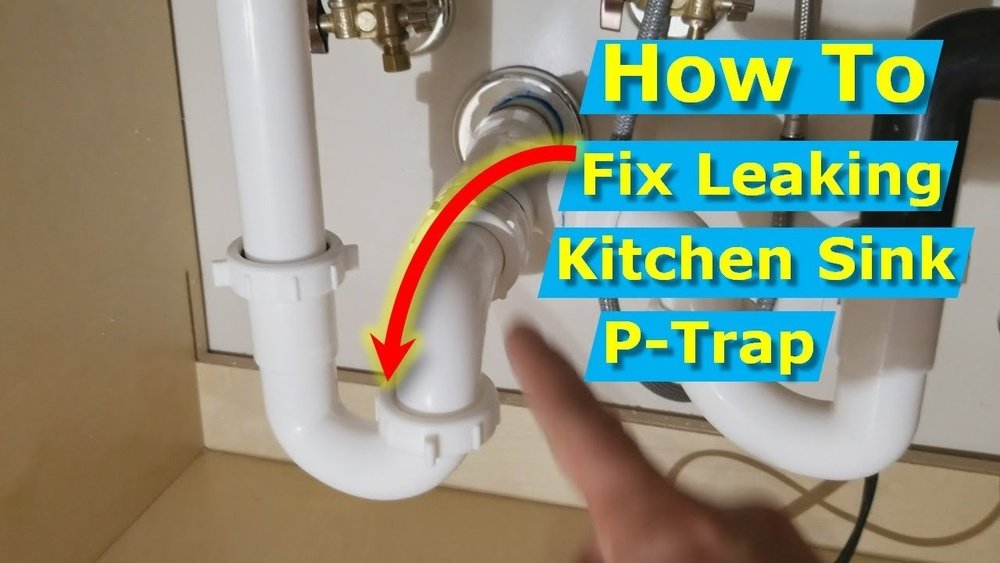
A leaking P-trap under the sink is one of the most common, and frustrating, plumbing issues homeowners and renters face. That slow drip not only wastes water but can also lead to unpleasant odors, water damage, and even mold growth if left unaddressed.
Often, the culprit is a loose connection, worn washers, misaligned pipes, or degraded plastic. While many people immediately call a plumber, the truth is that fixing a leaking P-trap is a straightforward DIY task for most individuals with basic tools and a little patience.
Whether you’re a seasoned DIYer or tackling your first plumbing project, understanding exactly how to diagnose and repair a leaking P-trap can save you money, time, and hassle. This comprehensive guide breaks down every step, from identifying the source of the leak to reassembling the trap and testing for a watertight seal.
Along the way, you’ll find expert tips, comparison tables, real-world examples, and answers to the most frequently asked questions, all designed to help you restore your sink’s plumbing with confidence and peace of mind.
Key Takeaways
- A leaking P-trap is often caused by loose connections, worn washers, or cracked pipes.
- Most leaks can be fixed with simple tools, replacement washers, or pipe tape, no need for specialized plumbing skills.
- Careful diagnosis and step-by-step troubleshooting are key to a long-lasting repair.
- Preventative maintenance and regular inspections help avoid future leaks and water damage.
- DIY repair can save $100, $250 in plumber fees, according to national cost estimates.
- For persistent or complex leaks, contacting a licensed plumber is recommended.

Credit: www.youtube.com
Understanding The P-trap And Common Leak Causes
The P-trap is a curved section of pipe located beneath your sink. Its unique shape serves two essential purposes: trapping debris to prevent clogs further down the line and holding a small amount of water to block sewer gases from entering your home.
Anatomy Of A P-trap
A typical P-trap assembly includes:
- Slip-joint nuts: Secure the connections.
- Washers (gaskets): Provide a watertight seal at each joint.
- Curved trap section: Holds water and collects debris.
- Trap arm: Connects to the wall or floor drain.
Why Do P-traps Leak?
There are several common reasons for leaks:
- Loose slip nuts: Frequent under-sink jostling or vibration can cause these to loosen.
- Worn washers: Over time, rubber or plastic washers degrade, leading to leaks.
- Cracked or damaged pipe: Plastic pipes can crack, especially if overtightened or stressed.
- Misalignment: Poor installation or shifting can cause misalignment, breaking the seal.
- Corrosion (in metal traps): Rust or corrosion can eat through metal P-traps, causing pinhole leaks.
Identifying The Source
Before you begin, it’s crucial to pinpoint where the leak originates. Dry the area, then run water through the sink and watch for drips. Use a flashlight or paper towel to check each joint and section.
Example: A homeowner noticed a puddle under their bathroom sink. Upon closer inspection, water was slowly dripping from the rear slip nut, indicating a loose or failing washer rather than a cracked pipe.
Tools, Materials, And Preparation
Proper preparation ensures a smooth repair process and reduces the risk of further damage.
Essential Tools
- Channel-lock pliers or adjustable wrench
- Bucket or shallow pan (to catch residual water)
- Old towels or rags
- Flashlight
Materials
- Replacement washers/gaskets (sized for your trap)
- Teflon tape (for threaded connections)
- Replacement P-trap kit (if needed)
- Plumber’s putty (optional, for sealing sink drain joints)
Safety And Prep Steps
- Clear out under the sink for workspace.
- Place a bucket beneath the P-trap to catch spills.
- Turn off the faucet but you typically don’t need to shut off the house water supply.
Pro Tip: Take a photo of your trap assembly before disassembly. This provides a handy reference for reassembly, especially if you’re unfamiliar with under-sink plumbing.
Comparison Table: Common P-trap Materials
| Material | Durability | Cost | Corrosion Resistance | Ease of Installation |
|---|---|---|---|---|
| PVC (Plastic) | Good | Low | Excellent | Easy |
| Chrome-plated Brass | Moderate | Moderate | Fair | Moderate |
| ABS (Black Plastic) | Good | Low | Excellent | Easy |
| Cast Iron | Excellent | High | Poor | Difficult |

Credit: www.youtube.com
Step-by-step Guide: How To Fix A Leaking P-trap
Addressing a leaking P-trap involves a systematic approach: inspecting, tightening, cleaning, replacing, and testing.
Inspection And Diagnosis
- Dry the trap and joints thoroughly.
- Run water in the sink, observing each joint for leaks.
- Note the location, is the leak at a slip nut, the curved section, or the trap arm?
Example: In my experience, leaks most often occur at the slip-joint nuts where the washer has flattened or shifted.
Tightening Connections
- Hand-tighten the leaking slip nut.
- Use pliers for an extra quarter-turn, but avoid overtightening, this can crack plastic parts or deform washers.
- Re-test by running water.
Warning: Overtightening is a leading cause of cracked plastic P-traps.
Cleaning And Re-sealing
- Disassemble the P-trap by unscrewing both slip nuts.
- Clean all threads and mating surfaces, remove old debris, putty, or buildup.
- Inspect washers for cracks, flattening, or hardening.
- Replace washers if any damage is noted.
- Optional: Wrap Teflon tape around male threads for extra sealing on metal traps.
Replacing The P-trap
If the trap itself is cracked or corroded:
- Purchase a new P-trap kit (PVC or metal, matching your existing pipe diameter).
- Dry fit the new parts before final assembly.
- Install new washers and slip nuts, ensuring correct orientation.
- Tighten carefully and check for leaks.
Pro Tip: Most DIYers can replace a P-trap in under 30 minutes with the right tools and parts.
Testing For Leaks
- Wipe all joints dry.
- Run water for several minutes, observing all connections.
- If a leak persists, repeat inspection, sometimes a washer can become pinched during assembly.
Table: Troubleshooting Common Leak Points
| Leak Location | Most Likely Cause | Solution |
|---|---|---|
| Slip nut joint | Loose or worn washer | Retighten nut, replace washer |
| Curved trap section | Cracked plastic or corrosion | Replace P-trap section |
| Trap arm connection | Misalignment | Realign pipes, reseat washers |

Credit: www.wikihow.com
Advanced Issues And Persistent Leaks
While most leaks are quickly fixed with tightening or new washers, some scenarios require extra troubleshooting.
Dealing With Misalignment
Sometimes, pipes settle or shift, causing the trap and drain to misalign. This breaks the seal and causes leaks.
- Loosen all slip nuts and gently adjust the pipes until aligned.
- Ensure the trap arm slopes slightly downward toward the wall drain for proper drainage.
Damaged Sink Drain Or Tailpiece
A leak at the uppermost connection may stem from a cracked tailpiece or poorly sealed sink strainer.
- Inspect the tailpiece for cracks or corrosion.
- Reseat the sink strainer using fresh plumber’s putty if necessary.
- For guidance, see How To Install A Kitchen Sink Drain Basket.
Multiple Leaks Or Recurring Problems
If you’ve replaced washers and tightened everything but multiple joints leak, the entire assembly may be aged or defective. At this stage, replacing the entire P-trap kit is the best solution.
Pro Tip: For older homes with metal plumbing, corrosion inside the pipes can cause persistent leaks that require professional evaluation.
When To Call A Plumber
- Recurring leaks after multiple repairs
- Severely corroded metal pipes
- Complex under-sink setups (e.g., double sinks, garbage disposals, or dishwasher drains)
- Evidence of water damage or mold
If you’re unsure or uncomfortable, hiring a licensed plumber ensures a safe, code-compliant repair.
Preventative Maintenance For A Leak-free Sink
Preventing leaks is easier and less expensive than repairing water damage. Regular maintenance extends the life of your P-trap and plumbing.
Regular Inspections
- Check under-sink plumbing every 3, 6 months for signs of moisture, corrosion, or loosened nuts.
- Use a flashlight to inspect hard-to-see areas.
Proper Use And Care
- Avoid pouring harsh chemicals down the drain, which can degrade plastic and washers.
- Don’t overload the trap with large amounts of food waste or grease.
Replace Washers And Nuts Periodically
- Washers naturally degrade over time, replace every 2, 4 years or if you notice any hardening/cracking.
- Plastic slip nuts can also become brittle, especially in older installations.
Table: Maintenance Schedule For Under-sink Plumbing
| Maintenance Task | Recommended Frequency | Purpose |
|---|---|---|
| Visual inspection | Every 3, 6 months | Detect leaks early |
| Replace washers | Every 2, 4 years | Maintain watertight seals |
| Clean trap (remove debris) | Annually | Prevent clogs and odors |
| Check for corrosion (metal traps) | Annually | Prevent pinhole leaks |
Real-world Examples And Case Studies
Learning from others’ experiences can provide valuable insight into effective P-trap repairs.
Case Study 1: Quick Fix For A Loose Slip Nut
A tenant in a city apartment noticed a slow leak under the kitchen sink. Upon closer inspection, the slip nut nearest the wall drain was hand-loose. Tightening the nut with pliers stopped the leak immediately. No parts replacement was needed, and the repair took less than five minutes.
Case Study 2: Washer Replacement Solves Persistent Leak
A homeowner experienced repeated leaks after tightening the slip nuts. Upon disassembly, the washer was found to be flattened and brittle. Replacing the washer with a new rubber gasket and carefully reassembling the trap eliminated the leak. This simple fix prevented further water damage to the cabinet floor.
Case Study 3: Full P-trap Replacement
In a 20-year-old home, the chrome-plated brass P-trap was leaking from multiple points. Corrosion was visible inside the pipe. The homeowner replaced the entire assembly with a modern PVC P-trap kit. After ensuring correct alignment and tightness, the leaks were completely resolved.
Example: When I tested various P-trap kits, I found that PVC models were easiest to install and offered the best long-term leak resistance for typical household use.
Cost, Time, And Diy Vs. Professional Repair
Understanding the cost and time involved helps you decide between a DIY approach and hiring a plumber.
Diy Repair
- Time investment: 15, 45 minutes for most repairs
- Parts cost: $2, $10 for washers; $5, $20 for a full P-trap kit
- Tools: Most households have the necessary pliers or wrenches
Professional Repair
- Typical cost: $100, $250 for a plumber visit, including parts and labor (national average per HomeAdvisor)
- Time: 30, 60 minutes onsite
Diy Vs. Plumber Table
| Aspect | DIY Repair | Professional Plumber |
|---|---|---|
| Cost | $2, $20 | $100, $250 |
| Time | 15, 45 min | 30, 60 min |
| Skill level | Basic DIY | Professional expertise |
| Guarantee | None | Workmanship guarantee |
Pro Tip: For standard leaks at the slip nuts or trap, most homeowners can complete the repair themselves and save significantly.
Upgrades And Related Projects
A leaking P-trap repair is a great opportunity to upgrade your under-sink plumbing or tackle related improvements.
Upgrade To A Flexible P-trap
Flexible P-trap kits are ideal for tight spaces or unusual sink configurations, allowing easier alignment and installation.
Install A New Sink Or Disposal
If your sink is older or you’re remodeling, consider installing a new sink, faucet, or garbage disposal along with the trap replacement.
- For more information, see:
- How To Install A New Kitchen Sink
- How To Install A Disposal In A Single Sink
Replace Other Drain Components
Consider replacing the tailpiece, sink strainer, or trap arm if they show signs of wear or corrosion.
Pro Tip: Upgrading to modern plastic (PVC or ABS) components reduces the risk of future leaks and corrosion.
Frequently Asked Questions
How Do I Know If My P-trap Is Clogged As Well As Leaking?
If water drains slowly from your sink or you hear gurgling noises, your P-trap may be clogged in addition to leaking. Remove the trap and inspect for hair, debris, or hardened buildup inside. Cleaning the trap can restore proper drainage.
Can I Use Plumber’s Tape On P-trap Connections?
Plumber’s (Teflon) tape is typically used on threaded metal pipe joints, not the compression-style slip nuts found on most P-traps. However, for metal traps with threaded connections, a few wraps of tape can improve the seal. Avoid using tape on plastic slip-joint washers.
What Is The Best Material For A Replacement P-trap?
PVC (white plastic) is the most popular for residential sinks due to its durability, corrosion resistance, and ease of installation. ABS (black plastic) is also common. For exposed plumbing in decorative settings, chrome-plated brass offers a polished look but requires more maintenance to prevent corrosion.
Is It Safe To Reuse Washers When Reassembling The P-trap?
It’s best to replace old washers with new ones whenever you disassemble the trap. Used washers may not reseal properly due to compression set or damage, increasing the risk of future leaks.
What Should I Do If Water Damage Or Mold Is Discovered Under The Sink?
If you find water damage or mold, dry the area thoroughly and consider using a mold inhibitor. Remove and replace any damaged cabinet materials. For significant mold growth or structural damage, consult a professional for remediation and repairs.
A leaking P-trap under your sink doesn’t have to be a source of stress or expensive repair bills. With a methodical approach, the right tools, and a little know-how, you can quickly restore your plumbing to a leak-free state. Regular inspection and maintenance help prevent future problems and protect your home from water damage.
If you ever feel uncertain, don’t hesitate to consult a licensed plumber for expert assistance. By mastering this essential home repair skill, you’re equipped to handle one of the most common household plumbing challenges with confidence.