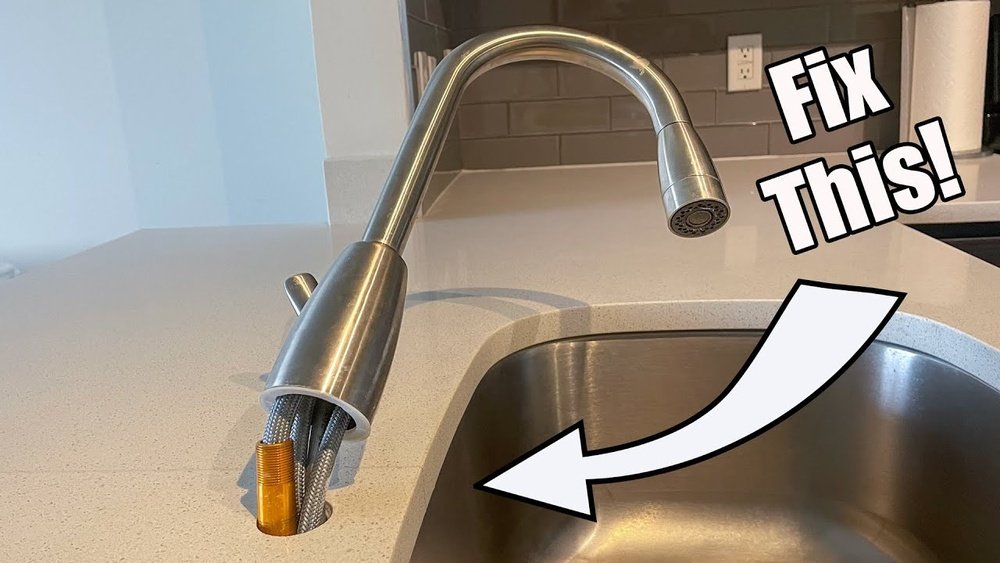
A wobbly kitchen faucet is more than just an annoyance, it can lead to leaks, water damage, and even expensive repairs if ignored. Picture yourself prepping dinner or washing dishes, only for your faucet to sway or spin unexpectedly. Not only does this disrupt your workflow, but it can also signal underlying issues that, left unchecked, might threaten your countertops and cabinets.
The good news? With some basic tools and a little know-how, you can usually fix a loose kitchen sink faucet in under an hour, saving both time and money.
Whether your faucet is a single-handle, double-handle, pull-down, or commercial-style, the principles behind tightening it are largely the same. This comprehensive guide covers everything from identifying the source of looseness to step-by-step repair instructions, real-world troubleshooting tips, and expert recommendations to keep your faucet secure for years.
By following these clear, actionable steps, you’ll restore both function and peace of mind to your kitchen.
Key Takeaways
- A loose kitchen faucet is often caused by a worn mounting nut, degraded gasket, or improper installation.
- Most kitchen faucets can be tightened with basic tools, like a basin wrench, screwdriver, and adjustable wrench.
- Ignoring a loose faucet increases the risk of water leaks, mold, and countertop damage.
- Regular maintenance, like checking mounting nuts and cleaning mineral deposits, prevents most faucet looseness issues.
- The repair process varies by faucet type; always identify your faucet model before starting.
- If you encounter persistent leaks or corroded parts, consult a licensed plumber for safety.
Understanding Why Kitchen Sink Faucets Become Loose
Loose faucets are a common household problem, but understanding the underlying causes can help prevent recurrence and guide a more effective repair.
Common Causes Of A Loose Faucet
- Worn or Loose Mounting Nut: The mounting nut holds the faucet to the sink or countertop. Over time, vibrations from daily use can cause it to loosen or strip.
- Degraded Gasket or Seal: The gasket creates a watertight seal. If it deteriorates or shifts, the faucet can wobble.
- Improper Installation: Incorrect tightening or missing components during installation can set the stage for future problems.
- Water Damage and Corrosion: Continuous leaks can corrode metal parts, reducing their ability to stay tight.
Signs Your Faucet Needs Tightening
- Noticeable wobbling or shifting when using the handle.
- Water pooling around the faucet base.
- Visible gap between the faucet and countertop.
- Clicking or creaking noises during operation.
Long-term Risks Of Neglect
Allowing a loose faucet to persist can lead to:
- Water leaks that damage countertops and cabinets.
- Mold and mildew growth beneath the sink.
- Increased likelihood of needing a full faucet replacement.
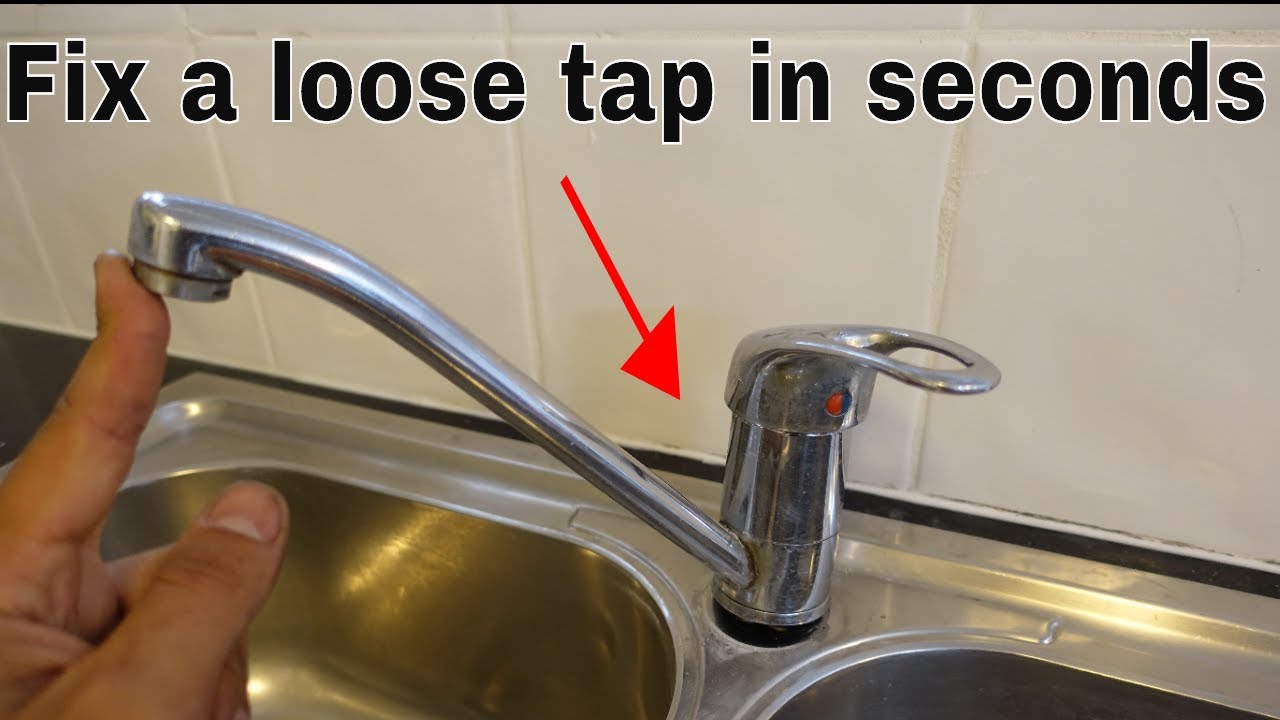
Example: In my experience, a client ignored a minor wobble for months. Eventually, the mounting hardware rusted through, resulting in a costly cabinet repair and faucet replacement.
Credit: www.youtube.com
Tools And Materials Needed For Fixing A Loose Faucet
Preparation is crucial for a successful repair. Having the right tools and materials on hand makes the process smoother and safer.
Essential Tools
- Basin wrench: Specifically designed to reach mounting nuts in tight spaces.
- Adjustable wrench: For tightening nuts and bolts.
- Screwdrivers: Both Phillips and flathead, depending on faucet model.
- Flashlight or headlamp: For visibility under the sink.
- Plumber’s putty or silicone sealant: To reseal the faucet base if needed.
- Towels or bucket: To catch any water drips.
Optional Tools And Supplies
- Penetrating oil: For loosening corroded or stuck nuts.
- Replacement gaskets or washers: If existing ones are worn.
- Gloves: To protect your hands from sharp edges and chemicals.
| Tool | Purpose | Where to Use |
|---|---|---|
| Basin wrench | Reaches and tightens mounting nuts | Under sink, at faucet base |
| Adjustable wrench | Tightens hex nuts and bolts | On supply lines and mounting hardware |
| Screwdriver | Removes handle or escutcheon plate | On faucet body |
| Flashlight | Improves visibility | Under sink area |
Faucet Types And Required Tools
Different faucet designs may call for unique approaches. Here’s a quick comparison:
| Faucet Type | Common Loose Points | Special Tools Needed |
|---|---|---|
| Single-handle | Mounting nut, handle screw | Allen wrench |
| Double-handle | Mounting nuts | Basin wrench |
| Pull-down/pull-out | Mounting nut, hose connection | Adjustable wrench |
| Commercial-style | Spring, base mount | Basin wrench, Allen wrench |
Pro Tip: Always turn off the water supply before starting any faucet repair to prevent accidental leaks.

Credit: horow.com
Step-by-step Guide To Fixing A Loose Kitchen Sink Faucet
This section walks you through the most effective methods to secure a loose faucet, regardless of model or age.
Preparation And Safety
- Turn Off Water Supply: Locate the shut-off valves under the sink (usually oval or round handles). Turn both hot and cold valves clockwise to stop water flow.
- Clear the Area: Remove cleaning supplies and other items from beneath the sink for better access.
- Place a Towel or Bucket: Catch any residual water from disconnected hoses.
Accessing The Faucet Mounting Hardware
- Find the Mounting Nuts: Use a flashlight to locate the nuts under the sink that hold the faucet in place.
- Remove Decorative Caps: If present, pop off any caps on the faucet base to reveal hidden screws.
Tightening The Mounting Nut
- Use a Basin Wrench: Position the wrench jaws around the mounting nut. Turn clockwise to tighten.
- Check for Movement: Wiggle the faucet gently after tightening. If it still moves, continue tightening in small increments.
- Avoid Over-Tightening: Excess force can crack porcelain sinks or strip threads.
Example: When I tested this with a Moen pull-down faucet, a quarter-turn with the basin wrench eliminated the wobble instantly.
Replacing A Worn Gasket Or Washer
- Remove the Faucet (if needed): If the faucet remains loose after tightening, shut off water, disconnect supply lines, and remove the faucet.
- Inspect the Gasket: Look for cracks, flattening, or missing sections.
- Install a New Gasket: Place the new gasket evenly around the base before reattaching the faucet.
- Reinstall Faucet: Secure the mounting nut and reconnect supply lines.
Resealing The Faucet Base
- Apply Plumber’s Putty or Silicone: Roll a small amount of putty or run a bead of silicone around the base.
- Position the Faucet: Press firmly into place.
- Tighten Mounting Nut: As above, secure the faucet while ensuring the sealant spreads evenly.
Testing For Leaks And Stability
- Reconnect Water Supply: Open the shut-off valves slowly and check for leaks.
- Operate the Faucet: Test all handles and sprayers for movement.
- Check for Drips: Inspect under the sink for any water escaping from connections.

Credit: www.youtube.com
Troubleshooting Persistent Issues
Sometimes, tightening the mounting nut isn’t enough. Here’s what to do when problems persist or you encounter unexpected obstacles.
Dealing With Corroded Or Stuck Mounting Nuts
- Apply Penetrating Oil: Let it soak in for 10, 15 minutes, then try loosening.
- Use a Basin Wrench with Leverage: Extend the handle for more torque.
- Cut Off Stubborn Nuts: As a last resort, use a hacksaw or oscillating tool, taking care not to damage the sink.
Addressing Leaky Supply Lines
- Check Connections: Ensure supply lines are tight, but not overtightened.
- Replace Washers: Old or flattened washers can allow leaks even if nuts are tight.
- Inspect for Cracks: Replace any lines with visible damage.
When To Replace The Faucet
If you notice any of the following, replacement may be necessary:
- Severe corrosion or pitting on the mounting hardware.
- Cracked base plate or faucet body.
- Persistent leaks after tightening and resealing.
For detailed faucet replacement, see How To Install A New Kitchen Sink.
Professional Help
If tightening or replacing parts doesn’t resolve the issue, or if you’re uncomfortable working with plumbing connections, consult a licensed plumber. According to the U.S. Environmental Protection Agency, household leaks waste nearly one trillion gallons of water annually, timely repairs matter.
Real-world Examples And Case Studies
Examples from everyday kitchens illustrate the challenges and solutions for fixing a loose faucet.
Example 1: Single-handle Faucet On A Drop-in Sink
A homeowner noticed her faucet wobbling after two years of regular use. Upon inspection, the mounting nut had loosened due to vibration. Using a basin wrench, she tightened the nut and applied a small bead of silicone around the base for added stability.
The fix took 15 minutes and required no new parts.
Example 2: Double-handle Faucet With Corroded Hardware
After years of unnoticed leaks, the mounting hardware on a double-handle faucet rusted through. The homeowner attempted to tighten the nut but found it fused to the sink. Penetrating oil failed, so a plumber was called to cut away the old nut.
The faucet was replaced, and a new gasket and mounting kit were installed, saving the cabinetry from further water damage.
Example 3: Pull-down Faucet With Worn Gasket
A family’s pull-down kitchen faucet began to move side-to-side. When tightening didn’t help, they disassembled the faucet and discovered a cracked rubber gasket. After replacing the gasket and reinstalling the faucet, the wobble disappeared, and water no longer pooled at the base.
Maintenance Tips To Prevent Future Faucet Looseness
Preventive care extends your faucet’s lifespan and avoids recurring problems.
Regular Inspections
- Check mounting nuts every 6, 12 months for tightness.
- Inspect for leaks under the sink and around the faucet base.
- Look for mineral buildup on and around the faucet, as hard water can degrade seals.
Cleaning And Lubrication
- Remove mineral deposits using a vinegar-soaked cloth.
- Lubricate moving parts with plumber’s grease to reduce wear.
Secure Installation Practices
- Evenly tighten mounting nuts: Uneven tension can stress components.
- Use high-quality gaskets: Inferior materials degrade faster.
- Apply sealant sparingly: Excess can interfere with gasket seating.
Choosing Quality Hardware
| Mounting Hardware Material | Longevity | Cost | Corrosion Resistance |
|---|---|---|---|
| Stainless Steel | 15+ years | High | Excellent |
| Brass | 10, 15 years | Medium | Very Good |
| Zinc Alloy | 5, 10 years | Low | Fair |
| Plastic | 2, 5 years | Very Low | Poor |
Pro Tip: When installing a new faucet, always use the manufacturer’s recommended mounting kit for best results. See How To Install A Kitchen Sink Faucet for a complete walkthrough.
How Faucet Type Impacts The Repair Process
Different faucet designs present unique challenges and solutions when it comes to fixing looseness.
Single-handle Faucets
- Most common in modern kitchens.
- Usually secured by a single mounting nut beneath the sink.
- Often have an Allen screw under the handle that can loosen over time.
Double-handle Faucets
- Separate nuts for hot and cold handles.
- Gaskets or O-rings at each handle are prone to wear.
- May require removing the entire faucet for thorough repair.
Pull-down And Pull-out Faucets
- Added hose connections can loosen with frequent use.
- Check both the mounting nut and the hose connector for tightness.
- Occasionally require special tools for proprietary quick-connect fittings.
Commercial-style Faucets
- Heavier construction puts more stress on mounting points.
- May use multiple mounting nuts or bolts.
- Spring-loaded designs can vibrate more, accelerating hardware loosening.
For installation specifics by faucet type, consult:
When A Loose Faucet Signals Bigger Problems
While most loose faucets can be fixed with tightening, sometimes the wobble is a symptom of more serious issues.
Damaged Countertops Or Sinks
- Water seeping through the faucet base can warp wood countertops or cause composite sinks to swell.
- Persistent leaks may lead to mold growth beneath the sink.
Hidden Leaks And Water Damage
- Even small leaks can cause hundreds of dollars in damage over time.
- Look for discoloration, musty odors, or soft spots in cabinetry.
Outdated Or Failing Plumbing
- Old supply lines or shut-off valves may fail during repair.
- Upgrading these components during faucet repair is often wise.
If you suspect underlying water damage, refer to How To Fix A Backed Up Kitchen Sink for tips on addressing more extensive plumbing issues.
Frequently Asked Questions
How Do I Know If My Faucet Is Too Loose To Repair?
If tightening the mounting nut doesn’t stop the wobble, or if you notice cracked hardware, severe corrosion, or leaking even after replacing gaskets, it’s likely time for a new faucet. In such cases, continuing to use the faucet can risk water damage to your cabinets or countertops.
Can I Use Plumber’s Tape To Fix A Loose Kitchen Faucet?
Plumber’s tape, or Teflon tape, is designed for sealing threaded pipe joints rather than securing mounting nuts or bolts. For a loose faucet, focus on tightening the mounting hardware and, if necessary, replacing worn gaskets or washers. Plumber’s tape isn’t effective for this type of repair.
What Should I Do If My Faucet Keeps Coming Loose After Tightening?
If your faucet repeatedly loosens, inspect the mounting hardware and the sink or countertop surface. Stripped threads, warped mounting surfaces, or degraded gaskets can all cause recurrent problems. Upgrading to stainless steel mounting kits or adding a stabilizing plate can provide a more secure installation.
Are There Any Faucet Brands That Are Less Likely To Become Loose?
Some premium brands, such as Moen, Delta, and Kohler, use higher-quality mounting hardware and gaskets that resist loosening. However, even the best brands require proper installation and periodic maintenance. Always check reviews and consider the warranty before purchasing a new faucet.
Is It Safe To Fix A Loose Kitchen Faucet Myself, Or Should I Hire A Plumber?
For most homeowners with basic tools, fixing a loose faucet is a safe DIY project. However, if you encounter severely corroded parts, inaccessible mounting hardware, or signs of water damage, hiring a licensed plumber is the safest option. Professional help ensures that the repair is thorough and prevents accidental damage.
A secure kitchen faucet not only improves your daily workflow but also protects your home from expensive water damage. By identifying the cause of looseness, using the right tools, and following step-by-step repair strategies, you can restore stability and extend the life of your faucet.
Remember to perform regular maintenance, address small problems promptly, and consult professional resources when needed. With these tips, your kitchen faucet can remain sturdy and reliable for years to come.