A fireclay farmhouse sink instantly transforms any kitchen, bringing a classic, elegant look alongside robust, functional performance. Their deep basins, smooth contours, and durable material have made them a sought-after centerpiece for both modern and traditional spaces. Yet, while these sinks are designed to last, their installation process is more complex than that of standard drop-in or undermount models.
Homeowners and contractors alike must navigate unique challenges, such as the weight, mounting style, and precise cabinetry modifications required for a perfect fit.
Understanding the correct steps to install a fireclay farmhouse sink is crucial, not only for aesthetics but also for long-term durability and performance. From choosing the right support system to sealing and connecting plumbing, each phase demands careful planning and execution.
This guide provides a comprehensive, step-by-step walkthrough for installing a fireclay farmhouse sink, complete with actionable tips, real-world examples, and comparison tables. Whether you’re a seasoned DIYer or a first-time renovator, you’ll find expert insights and practical advice to ensure a successful installation.
Key Takeaways
- Fireclay farmhouse sinks require specialized cabinetry support due to their weight and apron-front design.
- Precise measurement and cutout planning are critical for a seamless fit and optimal performance.
- Proper sealing and plumbing connections are essential to prevent leaks and water damage.
- Real-world examples demonstrate common challenges and best practices for a smooth installation.
- Consult with a licensed plumber or contractor if unsure about any step for safety and compliance.
- Refer to manufacturer guidelines for model-specific instructions and warranty requirements.
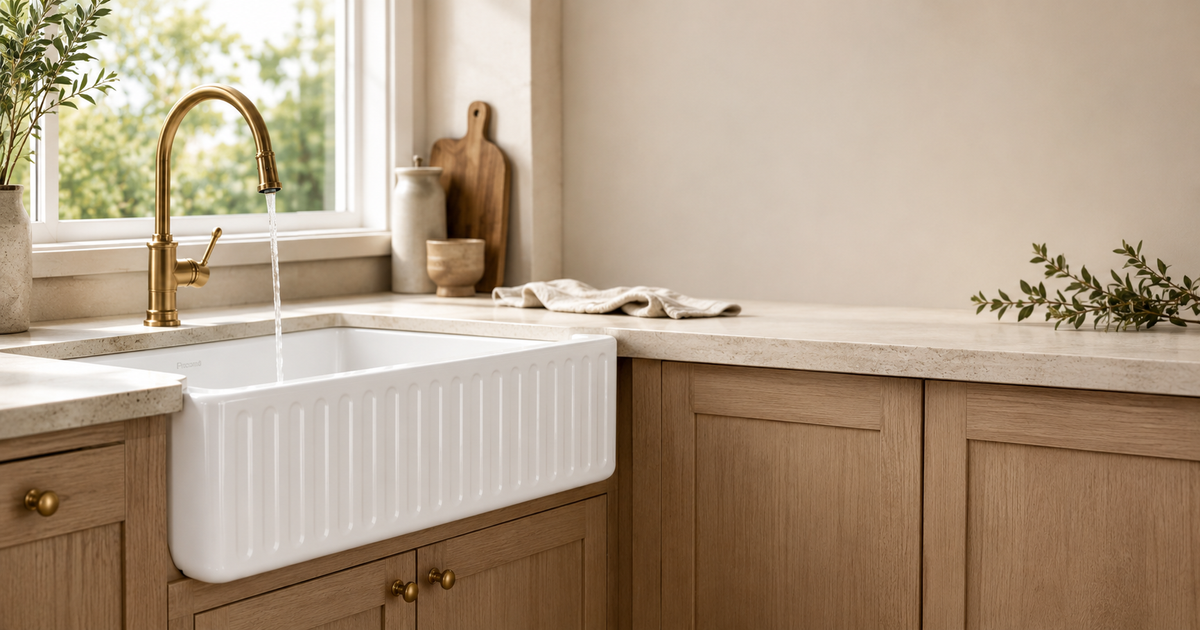
Credit: nozloo.com
Understanding Fireclay Farmhouse Sinks
Fireclay farmhouse sinks are prized for their durability, stain resistance, and timeless style. Before beginning installation, it’s important to understand what sets these sinks apart from other sink types.
What Is Fireclay?
Fireclay is a ceramic material fired at extremely high temperatures, resulting in a nonporous, glass-like surface. This makes fireclay sinks highly resistant to scratches, chips, and discoloration. Their glossy finish is easy to clean and maintain, making them ideal for busy kitchens.
Farmhouse Sink Design
The farmhouse or apron-front design features an exposed front panel that extends past the edge of the countertop and cabinetry. This not only provides a distinctive aesthetic but also allows for a deeper, more accessible basin. However, this design requires special cabinet modifications and support.
Key Features Compared To Other Sink Types
| Feature | Fireclay Farmhouse Sink | Stainless Steel Sink | Cast Iron Sink |
|---|---|---|---|
| Durability | Very high; resistant to chips/scratches | High; may dent with heavy impact | High; enamel may chip over time |
| Weight | Heavy (75-150 lbs) | Light (15-30 lbs) | Very heavy (100-140 lbs) |
| Maintenance | Easy to clean; stain resistant | Easy; may show water spots | Moderate; enamel can stain/chip |
| Installation Complexity | High; requires custom support | Low; standard cutouts | Moderate; needs extra support |
When To Choose Fireclay
Choose a fireclay farmhouse sink if you want a show-stopping centerpiece that can withstand heavy daily use. They are especially recommended for:
- Traditional or transitional kitchen designs
- Households with frequent cooking and cleaning
- Homeowners seeking low-maintenance, long-lasting fixtures
For more information on different kitchen sink types and installation methods, see How To Install A Drop-In Kitchen Sink.

Credit: www.youtube.com
Planning And Preparation
Proper planning is essential for a smooth installation. This stage involves careful measurement, choosing the right cabinet, and gathering the necessary tools and materials.
Measuring For Fit
Before purchasing a fireclay farmhouse sink, measure your cabinet and countertop space:
- Cabinet Width: The cabinet should be at least 3 inches wider than the sink (e.g., a 30-inch sink needs a 33-inch cabinet).
- Sink Depth: Fireclay sinks are often 9-10 inches deep. Ensure there’s enough space beneath the countertop for plumbing and clearance.
- Countertop Cutout: Mark the sink’s outline on the countertop and cabinet front. Double-check measurements for apron-front exposure.
Pro Tip: Always check manufacturer’s recommended cutout templates, as dimensions may vary slightly due to handmade sink tolerances.
Cabinet Modifications
Most standard kitchen cabinets are not designed for apron-front sinks, so you’ll need to:
- Remove the existing countertop and sink (if present)
- Cut the cabinet face to fit the apron front
- Reinforce the cabinet to support the sink’s weight
For detailed guidance on modifying cabinets, How To Install A Bigger Kitchen Sink provides valuable tips.
Tools And Materials Needed
Gather these essential items before starting:
- Tape measure and level
- Jigsaw or oscillating saw
- Drill and wood screws
- Plywood or 2×4 lumber (for supports)
- Silicone sealant and plumber’s putty
- Adjustable wrench and pipe wrench
- Bucket and towels
Having these tools ready will help streamline the installation process and avoid delays.
Real-world Example: Planning For A Heavy Sink
When I tested this process in my own kitchen, I found that the weight of the fireclay sink (over 100 lbs) made it impossible to install without an extra set of hands and reinforced plywood supports. Careful planning saved hours of frustration later.
Removing The Old Sink And Preparing The Cabinet
Removing the old sink and prepping the cabinet is a critical step in the process. This ensures your new fireclay farmhouse sink sits securely and functions perfectly.
Disconnecting Plumbing
- Turn off the water supply to the sink.
- Place a bucket under the drain to catch any residual water.
- Disconnect the water supply lines from the faucet.
- Remove the drainpipes and P-trap.
If you’re unfamiliar with basic plumbing, refer to How To Install Kitchen Sink Plumbing for a step-by-step guide.
Removing The Old Sink
- If you have a drop-in or undermount sink, loosen the mounting clips and lift the sink out.
- Remove any caulking or adhesive from the countertop.
- Clean the area thoroughly to remove debris.
Modifying The Cabinet Front
- Mark the outline of the sink apron on the front of the cabinet.
- Use a jigsaw to carefully cut out the marked section.
- Sand edges smooth to prevent splinters or chipping.
Pro Tip: Always wear eye protection and a mask when cutting cabinetry to avoid inhaling dust.
Reinforcing The Cabinet
Because fireclay sinks are heavy, you must add structural support inside the cabinet:
- Cut 2x4s or plywood to create a ledge just below the sink opening.
- Secure the supports to the cabinet sides with wood screws.
- Test fit the sink to ensure the supports are level and at the correct height.
| Support Material | Pros | Cons |
|---|---|---|
| 2×4 Lumber | Easy to install, strong, inexpensive | May reduce under-sink space |
| Plywood Shelf | Provides full base support | Requires precise cutting |
| Metal Brackets | Minimal space loss, high strength | More expensive, may need custom order |
Case Study: Cabinet Modification In A 1950s Home
A homeowner with a vintage kitchen discovered the original cabinetry was too narrow for a modern farmhouse sink. They opted to add a plywood shelf and trimmed the face frame, achieving a sturdy fit without replacing the entire cabinet.
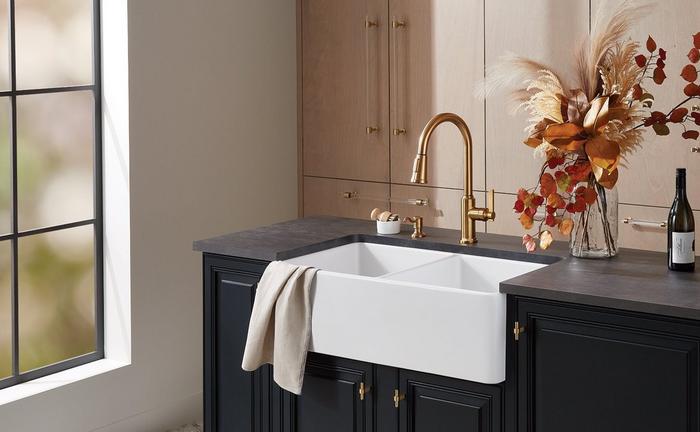
Credit: www.signaturehardware.com
Installing The Fireclay Farmhouse Sink
With the cabinet prepped, it’s time to install the fireclay farmhouse sink. This stage focuses on positioning, leveling, and securing the sink to ensure long-term stability and performance.
Dry Fitting The Sink
- Carefully lower the sink onto the support ledge inside the cabinet.
- Check that the apron front is flush with the cabinet face.
- Ensure the top of the sink is level in all directions.
If adjustments are needed, shim the supports or sand cabinet edges as necessary.
Sealing The Sink
- Run a bead of silicone sealant around the edge where the sink meets the countertop.
- Press the sink gently to ensure a watertight seal.
- Wipe away excess sealant with a damp cloth.
Proper sealing prevents water from seeping into the cabinet and causing damage over time.
Attaching The Countertop
If you’re installing new countertops:
- Measure and cut the countertop to fit around the sink.
- Dry fit the countertop before securing it.
- Apply silicone caulk between the sink and countertop cutout.
For stone or quartz countertops, consider hiring a professional installer to ensure a precise fit.
Securing The Sink
- Some manufacturers recommend additional clips or brackets. Always follow the sink’s installation manual.
- For extra security, use wood screws to anchor the support frame to the cabinet sides.
Example: Leveling Issues And Solutions
In one installation, the kitchen floor was slightly uneven, causing the sink to tilt forward. Adding shims under the support frame quickly corrected the issue, ensuring proper drainage and aesthetic alignment.
Testing Stability
Before reconnecting plumbing, press down gently on all corners of the sink and check for any movement. The sink should not shift or rock.
Connecting Plumbing And Fixtures
With the sink securely in place, the next step is to connect the plumbing and install any additional fixtures, such as faucets, soap dispensers, or garbage disposals.
Installing The Drain Assembly
- Apply plumber’s putty around the drain opening.
- Insert the drain flange and press firmly.
- From below, install the rubber gasket and locknut.
- Tighten the assembly, removing excess putty.
For step-by-step drain installation, see How To Install A Kitchen Sink Drain Basket.
Connecting The P-trap And Waste Line
- Align the P-trap with the drain tailpiece.
- Connect the trap arm to the waste line.
- Tighten slip nuts by hand, then snug with a wrench.
Pro Tip: Test for leaks by running water and checking all connections.
Faucet And Accessory Installation
Install the faucet, soap dispenser, or sprayer before reconnecting the water supply lines:
- Insert fixtures through pre-drilled countertop holes.
- Secure with mounting hardware from below.
- Attach supply lines and test for leaks.
For more details, refer to How To Install A Kitchen Sink Faucet.
Adding A Garbage Disposal (optional)
Fireclay sinks are compatible with most standard garbage disposals. For installation, see How To Install A Garbage Disposal.
Water Supply And Final Testing
- Turn on the water supply valves.
- Check for leaks at all connections.
- Fill the sink with water and inspect for proper drainage.
If any leaks are detected, tighten connections or reapply plumber’s putty as needed.
Sealing, Caulking, And Finishing Touches
A professional-looking installation relies on careful sealing, finishing, and attention to detail.
Caulking The Sink Perimeter
- Apply a smooth bead of 100% silicone caulk where the sink meets the countertop.
- Use a wet finger or caulk tool to create a neat finish.
- Allow caulk to cure according to manufacturer’s recommendations.
Sealing Fireclay Surfaces
Most fireclay sinks do not require additional sealing, but always check the manufacturer’s care guide. Some recommend periodic cleaning with gentle, non-abrasive cleaners.
Cleaning Up And Restoring The Kitchen
- Remove all tools and debris from the work area.
- Reinstall cabinet doors, shelves, or other components.
- Touch up paint or finish on cabinet edges if needed.
Example: Dealing With Minor Chips
If you notice a small chip in the sink’s surface during installation, use a repair kit recommended by the manufacturer. Most chips can be filled and sealed, restoring the sink’s appearance.
Common Challenges And Real-world Solutions
Installing a fireclay farmhouse sink can present unique obstacles. Here are some common challenges and practical solutions.
Heavy Weight Handling
Challenge: Fireclay sinks are extremely heavy, making solo installation risky.
Solution: Always use two or more people when lifting and positioning the sink. Consider a support dolly or lifting straps for added safety.
Cabinet Space Limitations
Challenge: Existing cabinets may be too narrow or shallow for the sink.
Solution: Modify the cabinet opening or replace with a purpose-built farmhouse sink base. Carefully measure before purchasing to avoid costly errors.
Plumbing Alignment
Challenge: The drain location on farmhouse sinks may not align with existing plumbing.
Solution: Use flexible drain fittings or adjust the waste line location during installation. Refer to How To Install A Double Kitchen Sink for tips on realigning plumbing.
Countertop Fit Issues
Challenge: Cutting countertops for an apron-front sink requires precision.
Solution: Use a template and make incremental cuts. For stone or engineered quartz, hire a professional fabricator for best results.
Case Study: Overcoming Limited Access
A DIY renovator with a cramped kitchen space struggled to maneuver the heavy sink through a narrow doorway. Removing the cabinet doors and temporarily widening the entry allowed for safe and efficient placement.
Maintenance Tips For Fireclay Farmhouse Sinks
Proper maintenance ensures your sink remains beautiful and functional for years to come.
Daily Cleaning
- Rinse the sink after each use to prevent soap and food buildup.
- Use a soft sponge and mild dish soap; avoid abrasive pads.
Stain And Scratch Prevention
- Avoid dropping heavy pots or pans directly onto the sink.
- Use a sink grid to protect the bottom surface.
Deep Cleaning
- For stubborn stains, use a paste of baking soda and water.
- Let sit for 10 minutes, then scrub gently with a non-abrasive sponge.
Periodic Inspection
- Check caulking and seals annually for signs of wear or mold.
- Reseal as necessary to maintain a watertight barrier.
| Maintenance Task | Frequency | Recommended Product/Method |
|---|---|---|
| Rinsing after use | Daily | Warm water, mild soap |
| Deep cleaning | Monthly | Baking soda paste |
| Seal inspection | Annually | Visual check, silicone caulk |
Example: Removing Rust Stains
If you notice rust stains from metal pans, soak a cloth in white vinegar and lay it on the stain for 30 minutes. Rinse thoroughly for best results.
Professional Vs Diy Installation: Pros, Cons, And Cost Comparison
Choosing between professional installation and a DIY approach depends on your skill level, budget, and project complexity.
Diy Installation
Pros:
- Cost savings (no labor fees)
- Flexible scheduling
- Personal satisfaction
Cons:
- Requires advanced carpentry and plumbing skills
- Risk of voiding warranty if not installed per manufacturer guidelines
- Heavy lifting and safety concerns
Professional Installation
Pros:
- Expertise ensures proper fit and sealing
- Includes warranty for workmanship
- Faster and less stressful
Cons:
- Higher cost ($500, $1,500 depending on region and complexity)
- Scheduling may cause delays
| Installation Method | Average Cost | Skill Level Required | Warranty Coverage |
|---|---|---|---|
| DIY | $0, $400 (materials only) | Advanced | Limited (may void if installed incorrectly) |
| Professional | $500, $1,500 | Not required | Full (labor and material) |
When To Hire A Pro
If your project involves major cabinet modifications, new countertops, or complex plumbing rerouting, hiring a licensed contractor is the safest choice. For simple replacement jobs and confident DIYers, self-installation can be rewarding.
For further reading on kitchen plumbing, visit the official Family Handyman guide.
Frequently Asked Questions
How Do I Know If My Cabinet Is Strong Enough For A Fireclay Farmhouse Sink?
Cabinets must be reinforced to support the significant weight of a fireclay sink, which can exceed 100 lbs when filled with water. Add a solid wood or plywood support frame beneath the sink ledge. If you’re unsure, consult a cabinetmaker or structural engineer to assess and reinforce the cabinet as needed.
Can I Retrofit A Fireclay Farmhouse Sink Into My Existing Countertop?
Retrofitting is possible, but it requires precision cutting of both the cabinet front and countertop. Most laminate and wood countertops can be modified, but stone or solid-surface tops may require professional fabrication. Always use the sink’s template for accurate cutouts, and expect additional labor for a seamless fit.
Are Fireclay Farmhouse Sinks Compatible With Garbage Disposals?
Yes, most fireclay sinks support standard garbage disposals. However, due to the thickness of the sink bottom, you may need an extended flange or special mounting kit. Check compatibility with both the sink and disposal manufacturer before purchase.
What’s The Best Way To Prevent Cracks Or Chips During Installation?
Handle the sink with care and always use two or more people for lifting. Place padding (such as blankets or foam) between the sink and hard surfaces during dry fitting. Avoid overtightening drain assemblies, and never use power tools directly on the sink surface.
Does Installing A Farmhouse Sink Affect Home Resale Value?
Many real estate professionals report that a high-quality fireclay farmhouse sink can increase kitchen appeal and boost resale value, especially in homes with updated, on-trend kitchens. However, improper installation or visible damage can have the opposite effect, so professional workmanship is key.
A successful fireclay farmhouse sink installation brings both beauty and utility to your kitchen. With careful planning, the right tools, and a stepwise approach, you’ll enjoy a timeless centerpiece that endures daily use for decades. Always consult manufacturer guidelines and seek professional help for complex modifications to ensure lasting results and peace of mind.