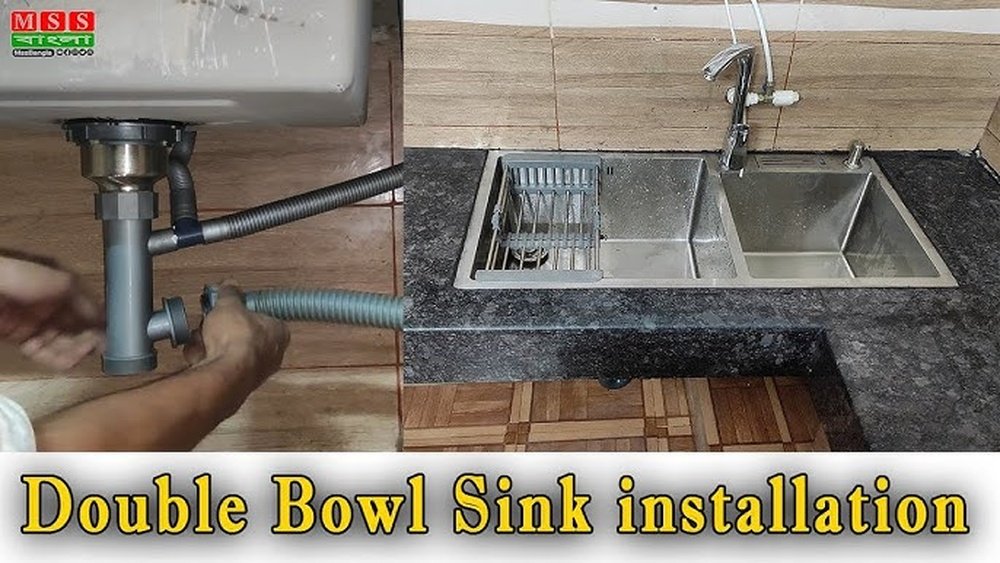
Every modern kitchen deserves a blend of functionality and style, and installing a double kitchen sink is one of the most impactful upgrades you can make. Not only does a double sink streamline meal preparation and cleanup, but it also adds genuine resale value and convenience to your kitchen space.
Yet, despite its clear benefits, the installation process is often perceived as daunting, especially for homeowners tackling it themselves for the first time.
Fortunately, with careful planning, the right tools, and a systematic approach, you can successfully install a double kitchen sink, whether you’re replacing an old single-bowl unit or renovating your entire kitchen. This guide provides a comprehensive, step-by-step roadmap, drawn from years of hands-on experience and the best practices recommended by professionals.
By following these detailed instructions and practical tips, you can confidently complete your project, avoid common pitfalls, and enjoy the many advantages of a well-installed double kitchen sink.
Key Takeaways
- Installing a double kitchen sink significantly improves kitchen workflow and utility.
- Careful planning, precise measurement, and the right tools are essential for a successful installation.
- This guide covers every phase: Preparation, removal, plumbing, installation, and finishing touches.
- Real-world examples and data-driven comparisons help you make informed choices about materials, layouts, and plumbing configurations.
- Troubleshooting tips and FAQs address common challenges and ensure your sink remains functional for years.
Understanding Double Kitchen Sink Benefits And Options
Double kitchen sinks have become a staple in modern homes, offering enhanced flexibility and efficiency. Before diving into the installation, it’s important to understand what makes them a superior choice and which options best suit your needs.
Types Of Double Kitchen Sinks
Double sinks come in a variety of configurations, each designed for specific preferences and kitchen layouts. The most popular types include:
- Equal bowl: Both basins are the same size, ideal for multitasking.
- Offset bowl: One basin is larger, the other smaller, useful for washing large pans while still having a rinse bowl.
- Low-divide: A lower divider between bowls for easier transfer of large pots.
Materials: Pros And Cons
Selecting the right material is crucial for durability and aesthetics. Here’s a quick comparison of the most common choices:
| Material | Pros | Cons | Estimated Lifespan |
|---|---|---|---|
| Stainless Steel | Durable, affordable, easy to clean | Prone to scratches, noisy | 15, 30 years |
| Porcelain | Classic look, stain-resistant | Chips/cracks, heavier | 20, 25 years |
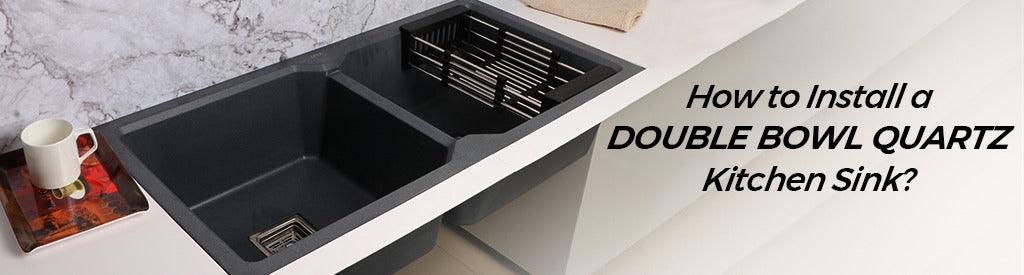
| Composite Granite | Scratch & heat resistant, modern | Expensive, can stain | 25+ years |
| Cast Iron | Extremely durable, retains heat | Very heavy, installation challenge | 30+ years |
Pro Tip: If your countertop can’t support heavy materials like cast iron, opt for a lighter composite or stainless-steel option.
Real-world Example: Choosing The Right Sink
When the Smith family remodeled their kitchen, they opted for a composite granite double sink due to its durability and sleek appearance. Their decision was influenced by the need for a low-maintenance solution that could handle frequent use and resist stains from coffee and wine.
Comparing Double Vs. Single Sink Functionality
A double sink allows you to:
- Soak dishes in one bowl while rinsing in the other
- Separate prep and cleanup tasks for food safety
- Install accessories like colanders or cutting boards for added utility
In contrast, a single-bowl sink may be more suitable for compact kitchens or when washing large baking trays is a priority.
Credit: lipkahome.com
Planning And Preparation For Installation
Proper preparation is the foundation of a smooth installation process. From measuring your space to gathering tools and materials, every detail matters.
Measuring And Assessing Your Countertop
The first step is to determine whether your current countertop can accommodate a double sink. Measure the existing sink opening and compare it with the dimensions of your new double basin.
- Standard double sink size: 33” x 22”
- Minimum cabinet width required: 36 inches
If you need to enlarge the cutout, ensure you have the right tools (jigsaw, circular saw) and always check for support structures or plumbing below.
Tools And Materials Checklist
Gather the following items before starting your project:
- Double kitchen sink (with mounting hardware)
- Faucet (if replacing)
- Plumber’s putty and silicone caulk
- Adjustable wrench, pipe wrench, channel-lock pliers
- Basin wrench
- Screwdriver (Phillips and flathead)
- Bucket and towels
- Hacksaw or PVC cutter
- Jigsaw (if modifying countertop)
- Tape measure and marker
- Level
- Supply lines and P-trap kit
Shutting Off Water And Power
Before any removal or installation, always turn off water supply valves under the sink. If your sink has a garbage disposal or dishwasher, turn off the power at the breaker panel as well.
Pro Tip: Take a photo of your existing plumbing setup for easy reference during reassembly.
Example: Planning For A Retrofit
When retrofitting a double sink into an older home, I found that measuring the cabinet width and depth was crucial. Many vintage cabinets are narrower than modern standards, which may require custom modifications or professional help.
:max_bytes(150000):strip_icc()/double-sink-plumbing-differences-and-how-to-install-5209390-hero-7f75ec5f09884dcf842b4dbeda3bec20.jpg)
Credit: www.thespruce.com
Removing The Old Sink And Preparing The Area
The removal phase requires patience and attention to detail, especially to avoid damaging existing cabinetry or plumbing.
Disconnecting Plumbing And Fixtures
Begin by placing a bucket under the P-trap to catch residual water. Then, disconnect:
- Water supply lines (use adjustable wrench)
- P-trap and drainpipes (loosen slip nuts)
- Garbage disposal (if present; unplug and twist to release)
- Dishwasher drain hose (if connected to sink drain)
Carefully set aside all reusable hardware.
Detaching The Old Sink
Most sinks are held in place with mounting clips or caulk. Loosen clips from below using a screwdriver, then cut through old caulk with a utility knife. Gently lift the sink out.
Warning: Porcelain and cast iron sinks can be extremely heavy, get help if needed.
Cleaning And Inspecting The Countertop
Thoroughly scrape away old caulk and debris, then inspect the countertop for damage or rot. Repair or reinforce as needed to ensure a stable installation surface.
Modifying The Sink Opening (if Required)
If the cutout needs adjustment, use a template provided with the new sink. Trace the outline, drill starter holes at corners, and carefully cut with a jigsaw. Smooth edges with sandpaper.
Example: Unexpected Obstructions
When removing an old sink for a client, we discovered an electrical wire stapled to the underside of the countertop. Always check beneath the surface before cutting to avoid damaging hidden utilities.

Credit: www.youtube.com
Installing The Double Kitchen Sink
With your workspace prepped, you’re ready to install the new sink. This process varies slightly depending on whether you have a drop-in or undermount model.
Fitting And Securing The Sink
- Dry-fit the sink into the opening to ensure a proper fit.
- Apply a bead of plumber’s putty or silicone caulk around the rim (drop-in) or underside (undermount).
- Lower the sink into place, pressing firmly to seal.
- For drop-in sinks, attach mounting clips underneath and tighten evenly. For undermount, secure with brackets and allow caulk to cure.
Pro Tip: Use a level to confirm the sink sits evenly. Adjust as needed before tightening clips fully.
Installing The Faucet And Accessories
It’s often easier to install the faucet, sprayer, and soap dispenser before placing the sink. Follow the manufacturer’s instructions, applying plumber’s putty under the faucet base to prevent leaks.
- Connect supply lines but leave valves off until plumbing is complete.
Sealing And Finishing Touches
Smooth excess putty or caulk from the rim for a watertight finish. Allow adhesives to cure according to product instructions before using the sink.
Real-world Example: Undermount Installation
A homeowner with granite countertops chose an undermount double sink for a seamless look. The installation required precise measuring and strong adhesive, but the result was a sleek, easy-to-clean workspace.
Plumbing Connections And Drain Assembly
Plumbing is often the trickiest part of double sink installation, especially when adapting from a single-bowl setup. Understanding the right configuration is essential for proper drainage and compliance with plumbing codes.
Configuring The Drains
Double sinks can be plumbed in two main ways:
- Standard configuration: Both bowls drain into a single P-trap.
- Separate configuration: Each bowl has its own trap, less common, may violate local code.
The most popular and code-compliant approach is to connect both drains to a single trap via a tee fitting.
Connecting The Drains: Step-by-step
- Install basket strainers in each bowl, sealing with plumber’s putty.
- Assemble tailpieces and connect to each strainer.
- Attach a waste tee to join both tailpieces.
- Install the P-trap below the waste tee, aligning with the wall drain.
- Tighten all slip nuts by hand, then snug with pliers.
Pro Tip: Dry-fit all parts before final tightening to ensure proper alignment and slope.
Garbage Disposal And Dishwasher Hookup
If you have a garbage disposal:
- Mount it to one bowl (usually the deeper one).
- Connect the discharge outlet to the waste tee.
- If connecting a dishwasher, attach its drain hose to the disposal inlet (remove knockout plug first).
Leak Testing
With connections complete, turn on the water supply and run both hot and cold taps. Check for leaks at every joint. Tighten as needed.
Example: Addressing A Common Drain Issue
A friend installed a double sink but noticed slow drainage in one bowl. The culprit was improper pitch in the drainpipe, causing water to back up. Ensuring a slight downward slope (1/4” per foot) from the tee to the trap solved the problem.
Finishing Steps: Caulking, Reconnecting Appliances, And Clean-up
The final phase ensures your installation is secure, visually appealing, and fully functional.
Caulking The Perimeter
Apply a thin bead of silicone caulk around the edge where the sink meets the countertop. Smooth with a wet finger or caulk tool for a neat finish. Allow to cure before exposing to water.
Reconnecting Electrical And Appliances
- Garbage disposal: Plug back in and test operation.
- Dishwasher: Ensure the drain hose is firmly attached and not kinked.
Cleaning And Final Inspection
Wipe down the sink and surrounding area with a damp cloth. Run water in both bowls, checking for leaks and proper drainage. Inspect the underside for any signs of moisture.
Pro Tip: Register Your Sink And Faucet
Many manufacturers offer extended warranties if you register your products online. Keep receipts and documentation handy.
Example: Seamless Installation Experience
After helping a neighbor install a stainless-steel double sink, we found that careful clean-up and caulking not only improved the kitchen’s appearance but also prevented water damage over time.
Troubleshooting And Maintenance Tips
Even a perfectly installed sink can encounter occasional issues. Proactive maintenance and quick troubleshooting help extend its life and performance.
Common Installation Pitfalls
- Leaky drains: Usually due to loose slip nuts or inadequate plumber’s putty.
- Slow drainage: Caused by improper slope or blocked P-trap.
- Wobbling sink: Result of loose mounting clips or uneven countertop.
If you encounter persistent drainage problems, consult resources like how to fix a backed up kitchen sink or how to clear a clogged kitchen sink drain.
Regular Cleaning And Care
- Stainless steel: Use non-abrasive cleaners and avoid leaving acidic foods on the surface.
- Composite: Wipe with mild soap and water; avoid harsh chemicals.
- Porcelain: Avoid dropping heavy pots to prevent chipping.
When To Call A Professional
If you encounter complex plumbing reroutes, electrical issues with a garbage disposal, or structural countertop damage, hiring a licensed plumber or contractor is the safest route. For more on resolving drain issues, see how to fix kitchen sink not draining.
Case Study: Preventing Future Problems
A family who installed a double sink themselves noticed a musty smell weeks later. Investigation revealed a minor leak at the waste tee joint. Tightening the slip nut and reapplying plumber’s putty resolved the issue, proving the importance of double-checking every connection.
Double Kitchen Sink Installation Cost And Time Comparison
Choosing between DIY and hiring a professional depends on your skills, budget, and timeline. Here’s a comparison table to guide your decision:
| Installation Method | Estimated Cost | Time Required | Pros | Cons |
|---|---|---|---|---|
| DIY | $200, $600 (materials only) | 4, 8 hours | Save money, learn new skills | Risk of mistakes, no warranty |
| Professional | $500, $1,500 (including labor) | 2, 4 hours | Fast, guaranteed quality | Higher cost, scheduling needed |
Pro Tip: Get multiple quotes from licensed plumbers before deciding. Some professionals offer bundled services, including disposal and faucet installation.
Double Kitchen Sink Styles And Accessory Comparison
To help you choose the best setup for your kitchen, here’s a table comparing popular double sink styles and compatible accessories:
| Sink Style | Best For | Compatible Accessories | Ease of Installation |
|---|---|---|---|
| Drop-in | Most countertops | Colander, cutting board, grids | Easy |
| Undermount | Stone or solid surfaces | Roll-up rack, in-sink drying mat | Moderate |
| Low-Divide | Large pots/pans | Divider rack | Moderate |
| Offset Bowl | Multi-tasking | Basket strainer, soap dispenser | Easy |
For additional inspiration on healthy kitchen upgrades, explore Best Non Toxic Dutch Oven 2026: Safe Cooking for Healthy Homes and Best Oven Roasted Vegetables 2026: Top Picks for Healthy Home Cooking.
Frequently Asked Questions
How Do I Know If My Cabinet Can Support A Double Kitchen Sink?
Measure the width of your base cabinet. Most standard double sinks require at least 36 inches of cabinet width. Check the cabinet’s depth and height as well. Cabinets made from particleboard or showing signs of water damage may need reinforcement before supporting a heavier sink, such as cast iron or granite composite. If you’re unsure, consult a professional or refer to manufacturer recommendations.
Can I Install A Garbage Disposal With A Double Kitchen Sink?
Yes, a garbage disposal can be installed on either basin of a double sink, typically the deeper bowl. Ensure the disposal unit is compatible with your sink’s drain size and that your plumbing layout allows for proper drainage. You’ll also need to connect the dishwasher drain hose (if present) to the disposal inlet.
Always follow local plumbing codes and manufacturer instructions for safe installation.
What Plumbing Changes Are Needed When Replacing A Single Sink With A Double?
You’ll need to modify the drain assembly to accommodate two tailpieces converging into a single P-trap via a waste tee. Existing drain lines may need to be lengthened or rerouted. Pay attention to maintaining a proper slope for drainage and comply with local codes. For more on adapting drain assemblies, see resources like Family Handyman.
How Do I Prevent Leaks At The Sink Rim And Drain Connections?
Use plumber’s putty under basket strainers and silicone caulk at the sink rim for a watertight seal. Tighten all slip nuts by hand, then snug with pliers, avoid overtightening, which can crack fittings. Run water and inspect each joint for drips. If leaks persist, disassemble and reapply putty or caulk as needed.
Is It Possible To Install A Double Sink In A Laminate Countertop?
Yes, most laminate countertops can accommodate a drop-in double sink. Ensure the cutout is the correct size and that the countertop is free from moisture damage. Use a jigsaw with a fine blade to avoid chipping the laminate surface. For undermount sinks, laminate is generally not recommended due to potential water infiltration at the cut edge.
Installing a double kitchen sink is a rewarding DIY project that can dramatically improve your kitchen’s usability and appearance. With careful planning, precise execution, and a commitment to quality, you’ll enjoy the convenience of two bowls for years to come.
Whether you’re upgrading for function, style, or both, following this comprehensive guide ensures that your new double sink is a perfect fit for your home and lifestyle.