Installing undermount sink brackets may seem hard. But with the right steps, it is easy. This guide will help you install them safely and correctly.
What Are Undermount Sink Brackets?
Undermount sink brackets hold the sink under the countertop. They keep the sink strong and steady. Without these brackets, the sink can fall or move.
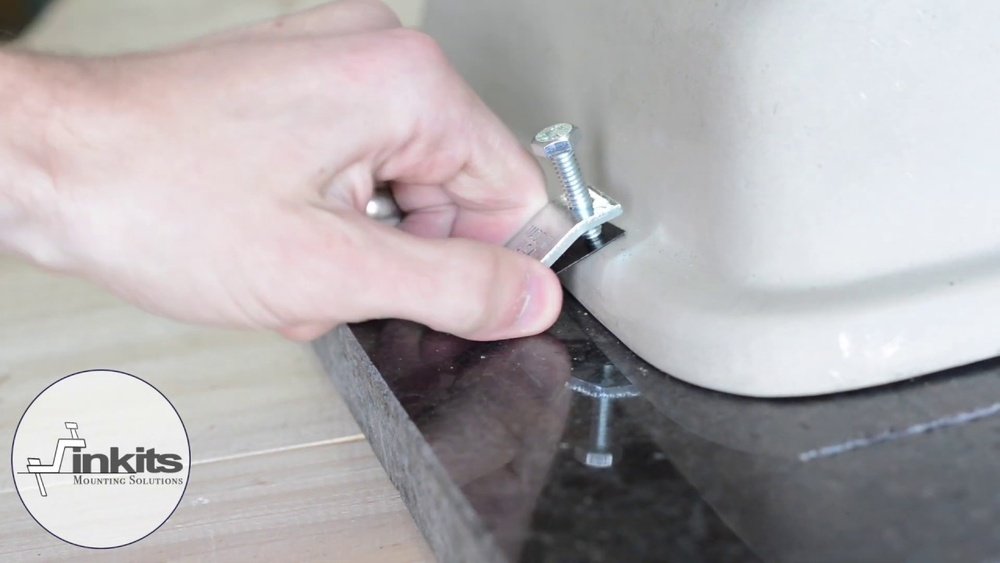
These brackets are metal pieces. They attach to the cabinet and the sink. They carry the weight of the sink and water inside it.
Why Use Undermount Sink Brackets?
- They make your sink stable and safe.
- They help to avoid damage to your countertop.
- They keep the sink in the right place.
- They make cleaning easier, no sink edges on top.
What You Need Before Installation
Get these tools and materials ready:
| Tools | Materials |
|---|---|
| Screwdriver (Phillips or flat) | Undermount sink brackets |
| Drill with drill bits | Screws (usually come with brackets) |
| Measuring tape | Silicone sealant |
| Pencil or marker | Cleaning cloth |
| Clamps (optional but helpful) | Protective gloves (optional) |

Credit: www.youtube.com
Step-by-Step Guide to Install Undermount Sink Brackets
Step 1: Prepare Your Workspace
Clear the cabinet under the sink. Remove any items that block your work. Clean the area well. This helps you work safely and neatly.
Step 2: Measure And Mark
Use your measuring tape to find the right bracket positions. Most brackets go evenly spaced around the sink edge. Usually, four brackets are enough.
Mark the spots with a pencil or marker. Make sure the marks are straight and even. This step is very important for balance.
Step 3: Attach The Brackets To The Cabinet
Hold the bracket in place on the mark. Use your drill to make small pilot holes. These holes help screws go in easily.
Then, screw the bracket to the cabinet sides. Do not tighten screws fully yet. Leave them a little loose to adjust later.
Step 4: Position The Sink
Lift the sink carefully. Place it under the countertop. Align the sink edges with the countertop edges.
Use clamps to hold the sink in place if you have them. If not, ask someone to help you hold it steady.
Step 5: Attach The Brackets To The Sink
Bring the sink and brackets close together. Slide the bracket arms under the sink lip. Then, screw the bracket onto the sink.
Tighten the screws slowly. Make sure the sink stays in place. Check the position from above to see if it is correct.
Step 6: Tighten All Screws
Once the sink is well positioned, tighten all screws fully. This makes the sink strong and secure.
Double-check the brackets and screws. Make sure nothing is loose or moving.
Step 7: Seal The Sink
Apply silicone sealant around the sink edges. This stops water from leaking under the sink.
Use a clean finger or tool to smooth the sealant. Let it dry as the sealant instructions say.
Step 8: Clean Up
Remove any excess sealant or dust. Clean your tools and workspace. Put back items you removed from the cabinet.
Your undermount sink is now installed and ready to use.
Tips for a Successful Installation
- Check that your sink and brackets fit your cabinet before starting.
- Use protective gloves to avoid cuts from sharp metal parts.
- Ask for help if the sink is heavy or hard to handle alone.
- Take your time. Rushing can cause mistakes or damage.
- Read the bracket instructions carefully. Different brands may vary.

Credit: crowleysgranite.com
Common Mistakes to Avoid
- Not measuring correctly before drilling holes.
- Tightening screws before positioning the sink.
- Skipping the silicone sealant step.
- Using the wrong screws or tools.
- Ignoring safety and wearing no gloves.
Frequently Asked Questions
What Tools Do I Need To Install Undermount Sink Brackets?
You need a drill, screwdriver, tape measure, pencil, and level. These tools help ensure accurate and secure bracket installation.
How Do I Measure For Undermount Sink Bracket Placement?
Measure the sink edges and cabinet space carefully. Mark bracket spots for even support and proper alignment.
Can I Install Undermount Sink Brackets Alone?
Yes, but having a helper is better for holding the sink steady. It makes the process safer and easier.
What Type Of Screws Work Best For Sink Brackets?
Use stainless steel screws to avoid rust and provide strong support. They are durable in wet environments.
Conclusion
Installing undermount sink brackets is doable with patience. Follow each step carefully. Gather all tools and materials first. Measure and mark well. Secure the brackets to both cabinet and sink. Seal edges with silicone to prevent leaks.
This simple process will give you a strong, clean sink setup. Enjoy your kitchen with a neat undermount sink!