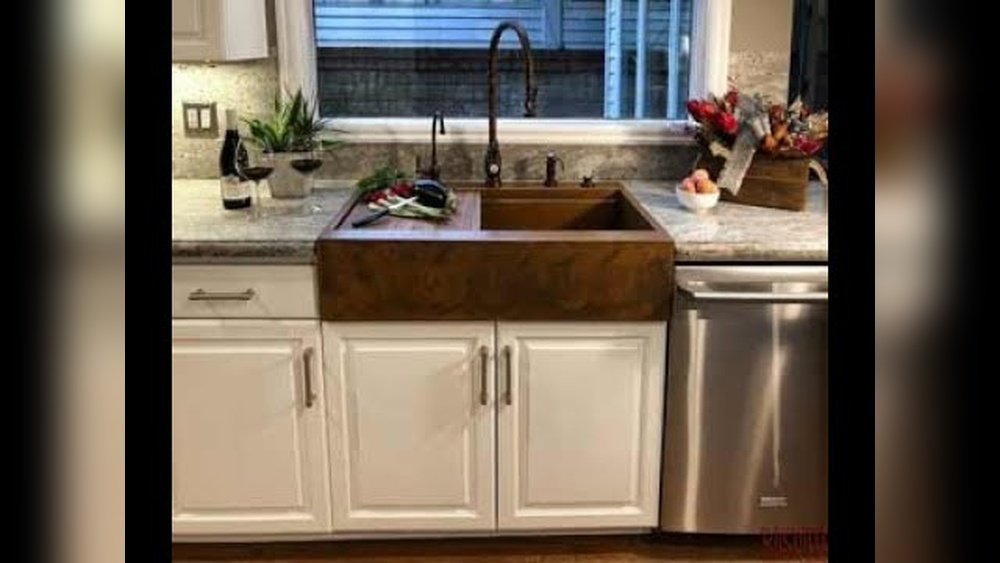
Installing an apron front sink can change the look of your kitchen. These sinks are also called farmhouse sinks. They have a big front that sticks out from the cabinet. This style looks nice and is very useful. If you want to add one to your kitchen, you can do it yourself. This guide will help you install an apron front sink in your existing cabinet. Follow the steps carefully to get the best result.
What You Will Need
Before you start, gather these tools and materials:
- Apron front sink
- Measuring tape
- Pencil or marker
- Jigsaw or saw
- Drill and drill bits
- Screwdriver
- Pipe wrench or adjustable wrench
- Silicone sealant
- Plumber’s putty
- New faucet and drain parts (if needed)
- Wood screws
- Support brackets (if required)
Credit: www.atthepicketfence.com
Step 1: Measure Your Cabinet and Sink
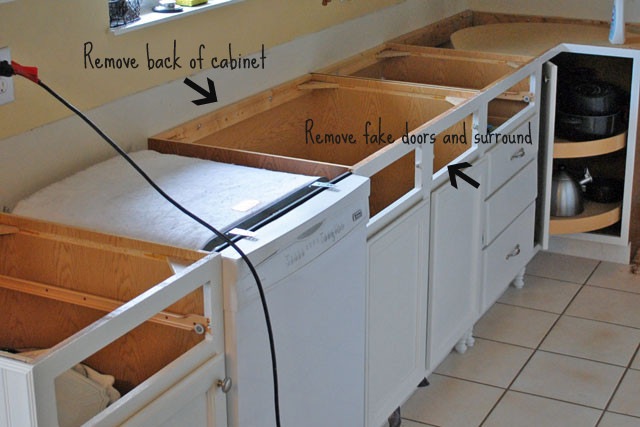
First, measure your cabinet’s width, height, and depth. Write down these numbers. Then, measure the apron front sink. The sink is usually bigger than a normal sink. You must check if your cabinet can hold the sink. The sink will stick out in front, so your cabinet front might need changes. You will cut the cabinet face to fit the sink.
Step 2: Remove the Old Sink
Turn off the water supply to the sink. Next, disconnect the water pipes and drain pipes with a wrench. Remove the old faucet if you plan to replace it. Use a screwdriver to remove any mounting clips holding the old sink. Carefully lift out the old sink. If it is stuck, gently tap with a tool to loosen it. Clean the cabinet area well once the old sink is out.
Step 3: Prepare the Cabinet
You will need to cut the front of the cabinet. The apron front sink will hang out, so the cabinet face is in the way. Use your pencil and measuring tape to mark the area to cut. The cut should fit the sink’s front edge perfectly. Double-check your measurements before cutting. Use a jigsaw or saw to cut the cabinet face carefully. Smooth the cut edges with sandpaper to avoid splinters.
Step 4: Add Support Inside the Cabinet
Apron front sinks are heavy. Your cabinet must hold the weight well. Check if the cabinet has enough support inside. You might need to add wooden braces or brackets. Attach support brackets under the sink area. Use wood screws to fix the supports firmly. This will keep the sink steady when you use it.
Step 5: Install the Faucet and Drain (Optional)
If your sink does not have a faucet or drain, install them now. It is easier to do this before putting the sink in place. Follow the instructions that come with your faucet and drain parts. Use plumber’s putty around the drain to stop leaks. Tighten all connections but do not force them too much. Check that everything fits and works.
Step 6: Place the Apron Front Sink
Now it is time to put the sink in the cabinet. With help if needed, lift the sink carefully. Slide the sink into the cabinet opening. The front apron should fit over the cut cabinet face. Make sure the sink sits level and is centered. If the sink rocks, adjust the support brackets or use shims to fix it. Check the sink’s position before sealing.
Step 7: Seal the Sink
To stop water from leaking, apply silicone sealant. Run a bead of sealant around the sink edge where it meets the countertop and cabinet. Smooth the sealant with your finger or a tool. Wipe away any extra sealant immediately. Let the sealant dry as the instructions say. This step helps keep your cabinet dry and clean.

Credit: www.youtube.com
Step 8: Connect the Water and Drain Pipes
Reconnect the water supply lines to the faucet. Use a wrench to tighten the connections gently. Connect the drain pipes to the sink drain. Make sure all connections are tight but not over-tightened. Turn on the water and check for leaks. Look under the sink carefully while water runs. Fix any leaks by tightening connections or adding plumber’s tape.
Step 9: Final Checks
Check that the sink is secure and does not move. Test the faucet and drain to make sure they work well. Clean the sink and surrounding area to remove dust and sealant residue. Wait for the sealant to cure fully before using the sink heavily. This can take a few hours or a day depending on the sealant type.
Tips for a Successful Installation
- Always measure twice before cutting.
- Ask for help when lifting the sink.
- Use supports to hold the sink firmly.
- Work slowly to avoid mistakes.
- Use quality tools for better results.
Why Choose an Apron Front Sink?
Apron front sinks look charming and classic. They have a big basin for washing large pots. The front apron helps protect the cabinet from water. These sinks often last a long time because they are made of strong materials. Installing one can give your kitchen a fresh, new look. They also make kitchen work easier and more comfortable.
| Step | What to Do | Tools Needed |
|---|---|---|
| 1 | Measure cabinet and sink | Measuring tape, pencil |
| 2 | Remove old sink | Wrench, screwdriver |
| 3 | Cut cabinet face | Jigsaw, saw, pencil |
| 4 | Add supports inside cabinet | Wood screws, drill |
| 5 | Install faucet and drain (if needed) | Wrench, plumber’s putty |
| 6 | Place and secure apron front sink | Help from another person |
| 7 | Seal sink edges with silicone | Silicone sealant |
| 8 | Connect water and drain pipes | Wrench, plumber’s tape |
| 9 | Final checks and cleaning | None |
Frequently Asked Questions
What Tools Are Needed To Install An Apron Front Sink?
Basic tools include a drill, jigsaw, screwdriver, measuring tape, and plumber’s wrench. Safety gear like gloves and goggles is also important.
How Do You Measure The Cabinet For An Apron Sink?
Measure the cabinet width, depth, and height carefully. Ensure the sink size fits inside the cabinet opening.
Can I Install An Apron Sink Without Changing The Cabinet?
Yes, but you may need to modify the cabinet front for the sink apron. Cutting or removing parts might be necessary.
How Do You Support The Weight Of An Apron Front Sink?
Use strong mounting clips or brackets under the sink. Adding extra support inside the cabinet may be required.
Conclusion
Installing an apron front sink in your cabinet is possible with some care. Follow the steps from measuring to sealing carefully. Make sure your cabinet supports the sink weight. Take your time cutting and fitting the sink. Use the right tools and materials for the best result. You will enjoy a beautiful and practical kitchen sink for years. This project adds style and function to your home.