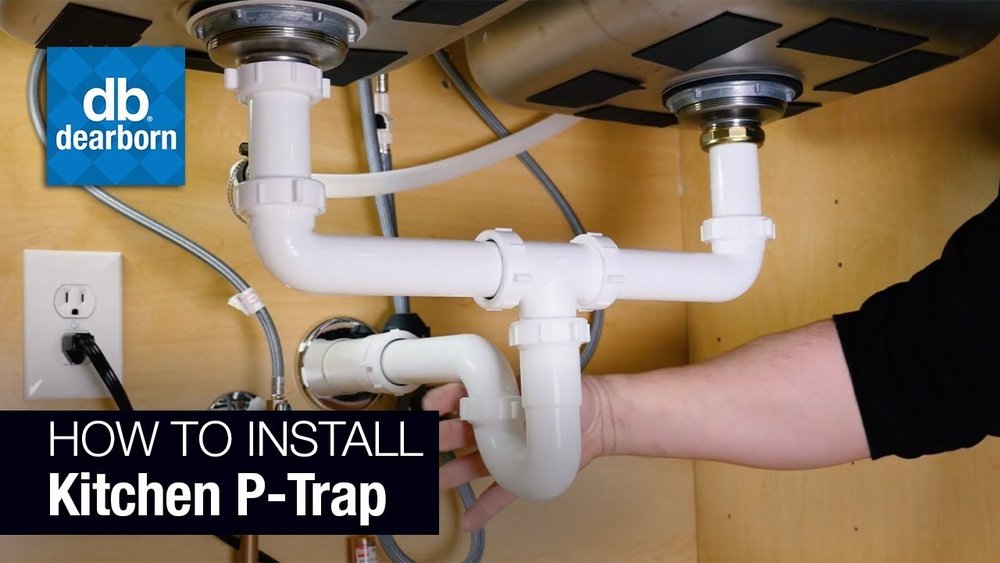
Installing a P-trap under a kitchen sink is a useful skill. It helps stop bad smells from coming into your home. The P-trap also catches small objects that might fall down the drain.
If you want to learn how to install a P-trap, this guide will help. We will explain the steps in simple words. You don’t need to be an expert to do this.
What Is a P-Trap?
A P-trap is a pipe shaped like the letter “P”. It is under your sink. It holds some water inside. This water acts like a barrier. It stops bad smells and gases from coming back up the drain.
The P-trap is very important in your kitchen plumbing. Without it, your kitchen might smell bad. Also, it helps keep the pipes clean and stops clogs.
Tools and Materials You Will Need
Before you start, gather these tools and materials:
- New P-trap kit (includes pipes and washers)
- Adjustable wrench or pliers
- Bucket or small bowl
- Towel or rag
- Plumber’s tape (optional)
- Flashlight (if the area under the sink is dark)

Credit: www.youtube.com
Step 1: Turn Off the Water Supply
First, turn off the water supply to your kitchen sink. Usually, there are small shut-off valves under the sink. Turn these valves clockwise until they stop. This stops water from flowing while you work.
If you cannot find the valves, turn off the main water supply to your home. This step prevents water spills during installation.
Step 2: Place a Bucket Under the Sink Drain
Put a bucket or bowl under the sink drain pipe. This will catch any water left inside the pipes. It also helps keep the area clean.
Use a towel or rag to dry any water that spills. This keeps your workspace safe and tidy.
Step 3: Remove the Old P-Trap
If you have an old P-trap, you need to remove it first. Use your adjustable wrench or pliers to loosen the slip nuts. These are the round nuts that connect the pipes.
Turn the nuts counterclockwise to loosen. Be careful, as some water may spill out. Remove the old P-trap and set it aside.
Step 4: Check the Drain Pipes
Look at the pipes under your sink. Make sure they are clean and not damaged. Wipe any dirt or old plumber’s tape off the threads.
This helps the new P-trap fit well and prevents leaks.
Step 5: Assemble the New P-Trap
Take your new P-trap kit. It usually has three parts:
- Tailpiece (the straight pipe that connects to the sink drain)
- Trap bend (the curved part that holds water)
- Trap arm (the pipe that connects to the wall drain)
Start by attaching the tailpiece to the sink drain. Use the slip nut and washer that come with the kit. Hand tighten the nut, but do not over-tighten.
Next, connect the trap bend to the tailpiece. Make sure the curved part faces down. This is where water will stay to block smells.
Finally, connect the trap arm to the wall drain pipe. Again, use the slip nut and washer. Tighten by hand.
/replacing-a-sink-p-trap-2718773-hero-f3f65fbc400e41438c4d8280de025fc6.jpg)
Credit: www.thespruce.com
Step 6: Align the Pipes Properly
Make sure all parts fit well and line up. The pipes should not be bent or forced. If needed, adjust the length by twisting or sliding pipes slightly.
Proper alignment prevents leaks and makes your plumbing work better.
Step 7: Tighten All Slip Nuts
Now, use your wrench or pliers to tighten all slip nuts. Turn them clockwise. Do this gently. Do not overtighten, as this can crack plastic parts.
Hand tightening is usually enough. The wrench helps make sure the nuts are snug.
Step 8: Check for Leaks
Turn the water supply back on slowly. Let water run through the sink drain. Watch all the joints carefully.
If you see any water dripping, tighten the nuts a little more. Use a towel to dry the area and check again.
If leaks continue, turn off the water and try adjusting the washers inside the connections.
Step 9: Clean Up
Once you are sure there are no leaks, clean up your workspace. Remove the bucket and towels. Wipe any water spills.
Your new P-trap is now installed and working well.
Tips for Installing a P-Trap
| Tip | Why It Helps |
|---|---|
| Use new washers with the P-trap | Prevents leaks and ensures a tight seal |
| Do not overtighten slip nuts | Protects pipes from cracking or damage |
| Check pipe alignment before tightening | Makes sure water flows smoothly without leaks |
| Have a bucket ready to catch spills | Keeps your floor dry and clean |
| If parts don’t fit, use plumber’s tape | Improves the connection between threads |
Why You Should Do It Yourself
Installing a P-trap yourself saves money. You avoid paying a plumber. It is also a good learning experience.
With this guide, you can do the job in one hour or less. Plus, you can fix small leaks later easily.
When to Call a Professional
Sometimes, the pipes under your sink are old or damaged. If you see cracks or rust, it is best to call a plumber.
If your plumbing system is very different or complex, professionals can help. Safety first.
Summary
Installing a P-trap under your kitchen sink is simple. You need the right tools and parts. Follow these easy steps:
- Turn off the water supply.
- Put a bucket under the drain.
- Remove the old P-trap.
- Clean and check pipes.
- Assemble the new P-trap.
- Align pipes properly.
- Tighten all slip nuts.
- Check for leaks.
- Clean up your workspace.
Take your time and be careful. You will have a fresh-smelling kitchen in no time. Good luck with your installation!
Frequently Asked Questions
What Is A P-trap And Why Is It Important?
A P-trap is a curved pipe under the sink. It stops sewer gases from entering your home. It also helps catch debris to prevent clogs.
How Do I Know If My P-trap Needs Replacement?
Look for leaks, bad smells, or slow drainage. These signs mean the P-trap may be damaged or clogged. Replacing it can fix these issues.
Can I Install A P-trap Without Plumbing Experience?
Yes, basic tools and instructions are enough. Take your time and follow safety tips. Watching a tutorial can help too.
What Tools Do I Need To Install A P-trap?
You will need a pipe wrench, pliers, and plumber’s tape. A bucket is useful to catch water. Also, have replacement washers ready.