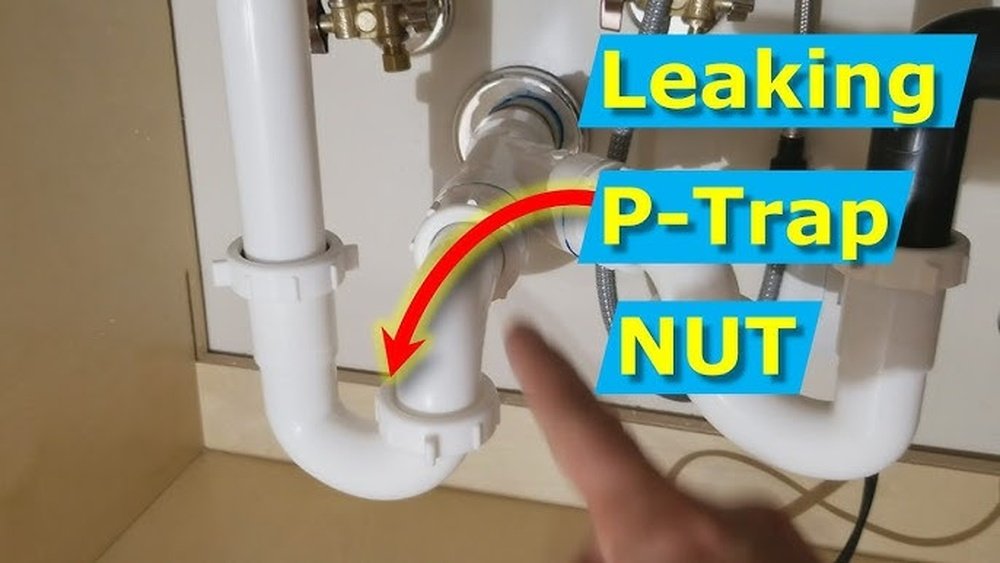
A cracked pipe under your sink can rapidly escalate from a minor annoyance to a major household headache. Whether the pipe is leaking slowly or gushing water, ignoring the problem risks water damage, mold growth, and costly repairs. The good news is that with some basic tools, careful assessment, and the right repair techniques, you can often fix a cracked pipe yourself and restore your sink’s plumbing integrity.
This comprehensive guide demystifies every step of fixing a cracked pipe under the sink, from diagnosis and material selection to hands-on repair and prevention strategies. Drawing on expert plumbing advice, real-world case studies, and practical comparison tables, you’ll learn how to tackle this issue efficiently, saving money, protecting your home, and boosting your DIY confidence.
Whether your sink is in the kitchen or bathroom, and regardless of the pipe material, this article arms you with actionable information and best practices for a safe, lasting fix.
Key Takeaways
- Identifying the exact type and location of the crack is crucial before starting repairs.
- Choosing the right repair method depends on pipe material, crack size, and accessibility.
- DIY fixes are feasible for small cracks, but large or structural damage may require professional intervention.
- Preventative maintenance and regular inspections can help avoid future pipe failures.
- The guide includes comparison tables, real-world examples, and expert tips for effective repairs.

Credit: www.wikihow.com
Understanding Pipe Types And Common Causes Of Cracks
Before tackling repairs, it’s essential to understand the variety of pipes commonly found under sinks and what causes them to crack. This knowledge ensures you select the best repair approach for your specific situation.
Types Of Pipes Found Under Sinks
Most sinks use one of these pipe materials:
- PVC (Polyvinyl Chloride): Common in modern homes, lightweight, easy to cut and join.
- Copper: Durable, but susceptible to corrosion and pinhole leaks over time.
- Galvanized Steel: Older homes often feature these; prone to rust and cracking.
- ABS (Acrylonitrile Butadiene Styrene): Black plastic, similar to PVC but slightly more brittle.
| Pipe Material | Durability | Ease of Repair | Common Issues |
|---|---|---|---|
| PVC | High | Easy | Cracking, joint leaks |
| Copper | Very High | Moderate | Pinhole leaks, corrosion |
| Galvanized Steel | Medium | Difficult | Rust, cracking |
| ABS | Medium | Easy | Brittleness, cracks |
What Causes Pipes To Crack?
Cracks usually result from:
- Age and wear: Materials degrade, especially in older plumbing.
- Freezing temperatures: Water expands as it freezes, causing splits.
- Physical impacts: Dropped objects or shifting cabinetry can stress pipes.
- Improper installation: Poor joining or support can create weak points.
Example: In my experience, a kitchen sink pipe cracked after a cleaning bottle fell and knocked the trap, highlighting how everyday accidents can trigger leaks.
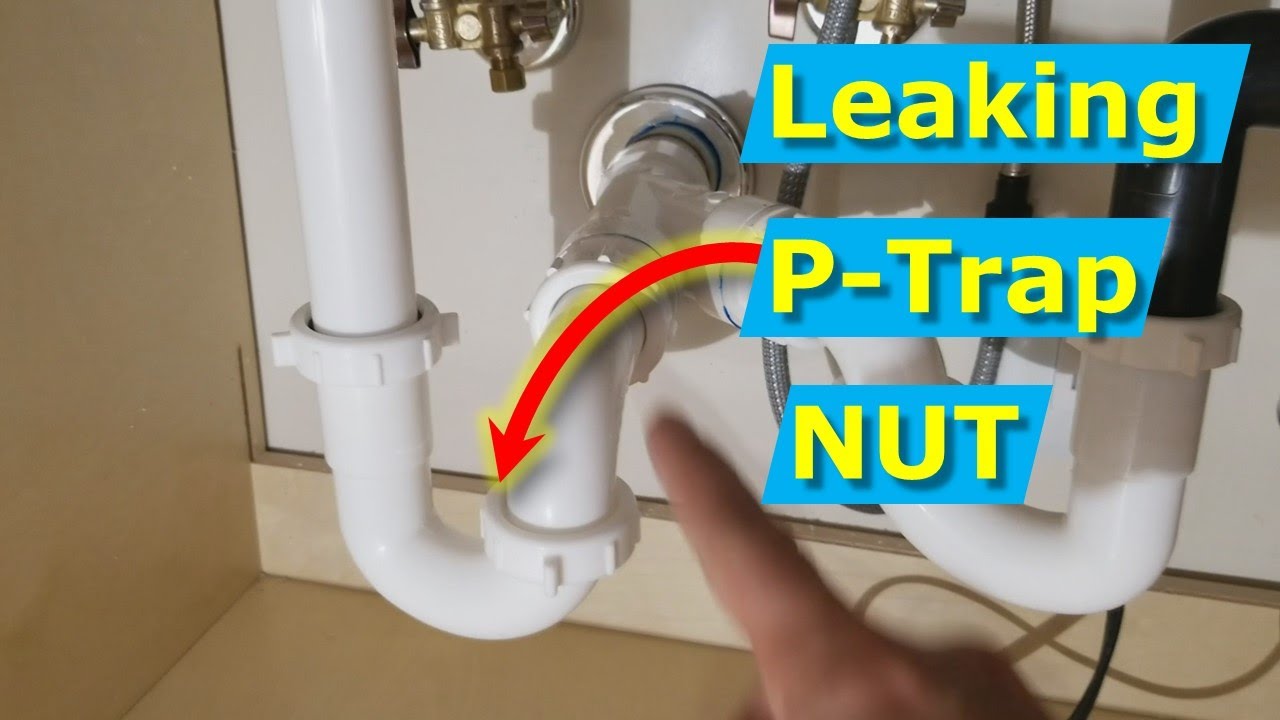
Spotting Early Warning Signs
Watch for these indicators:
- Water stains or puddles under the sink.
- Musty odors signaling hidden moisture.
- Visible cracks or bulges in pipe sections.
Early detection is key to minimizing damage and repair costs.
Credit: www.youtube.com
Diagnosing The Crack: Step-by-step Inspection
Thorough diagnosis sets the stage for an effective repair. Here’s how to inspect your sink’s pipes and pinpoint the problem.
Gathering Tools For Inspection
You’ll need:
- Flashlight for visibility.
- Paper towels to trace moisture.
- Mirror for hard-to-see spots.
- Gloves to protect your hands.
Locating The Crack
- Remove items from under the sink.
- Use a flashlight to check all pipe surfaces, including the back and underside.
- Run water for a few seconds; observe for drips or water trails.
- Dry the pipe with a towel, then check for new moisture after running water again.
Pro Tip: Place a dry paper towel under the pipe. If it becomes wet, you’ve found the leak’s general area.
Assessing Crack Severity
Cracks generally fall into three categories:
- Hairline cracks: Thin, barely visible; minor leaks.
- Small splits: Up to 1 inch; more noticeable dripping.
- Large fractures: Several inches; rapid water loss, possible pipe movement.
| Crack Type | Symptoms | Recommended Action |
|---|---|---|
| Hairline | Slow drip, faint water stains | Sealant or tape repair |
| Small Split | Steady leak, visible crack | Epoxy or partial replacement |
| Large Fracture | Heavy leak, loose pipe | Full pipe replacement |
Identifying Pipe Material
Check pipe color and texture:
- White/cream: PVC
- Black: ABS
- Metallic: Copper or galvanized steel
Knowing the material is crucial for selecting compatible repair products.
Checking For Additional Damage
Inspect connections, joints, and fittings for:
- Corrosion
- Discoloration
- Loose hardware
Sometimes, cracks stem from deeper issues, so a thorough check prevents missed problems.
Choosing The Right Repair Method
The optimal repair method depends on crack size, pipe material, and accessibility. Let’s explore the options.
Temporary Vs. Permanent Repairs
Not all repairs are equal. Here’s how they compare:
| Repair Type | Longevity | Difficulty | Cost |
|---|---|---|---|
| Pipe Tape | Weeks to months | Easy | Low |
| Epoxy Putty | Months to years | Moderate | Medium |
| Pipe Replacement | Decades | Advanced | High |
Pipe Tape And Sealants
Pipe repair tape (like silicone or self-fusing tape) wraps around hairline cracks for a quick seal. It’s ideal for emergencies but should be considered a short-term fix.
Waterproof sealants or caulks can plug small leaks, especially in plastic pipes. Ensure the product is rated for plumbing use and compatible with your pipe material.
Epoxy Putty And Patch Kits
Epoxy putty is a popular solution for small splits. It’s pliable, forms a strong bond, and resists water once cured. Patch kits often combine epoxy with mesh for added strength, especially for larger cracks.
Warning: Epoxy isn’t suitable for high-pressure pipes or flexible joints, so check manufacturer guidelines.
Partial Or Full Pipe Replacement
For large fractures or metal pipes with corrosion, replacement is the safest, longest-lasting solution. This may mean swapping out a section or the entire trap assembly.
- PVC and ABS are easy to cut and join.
- Copper and galvanized steel require special tools and fittings.
If you’re unsure, consider calling a professional plumber or reviewing guides like Home Depot Plumbing Guide.
Real-world Example
A homeowner with a cracked PVC drain under their kitchen sink used pipe tape for immediate relief, but the leak persisted. They upgraded to epoxy putty and achieved a watertight seal lasting over a year. Eventually, they replaced the pipe for a permanent fix.

Credit: www.wikihow.com
Step-by-step Guide: Fixing A Cracked Pipe Under Sink
This section walks you through a detailed repair process tailored to each crack type and pipe material.
Preparing The Area
- Turn off the water supply.
- Place a bucket under the pipe to catch drips.
- Clean the pipe with mild detergent and let it dry.
Repairing Hairline Cracks
- Wrap pipe repair tape tightly around the crack, overlapping by at least 2 inches.
- Press firmly to ensure a watertight seal.
- Test by running water for a few minutes.
Fixing Small Splits With Epoxy
- Mix epoxy putty according to package instructions.
- Apply a generous layer over the crack, pressing into the gap.
- Smooth the surface; allow 1-2 hours to cure.
- Once cured, run water and check for leaks.
Pro Tip: Use sandpaper to roughen the pipe surface before applying epoxy for better adhesion.
Replacing Damaged Pipe Sections
If the crack is extensive or the pipe is corroded:
- Measure and mark the damaged section.
- Use a hacksaw (for PVC/ABS) or pipe cutter (for metal) to remove the segment.
- Dry-fit a new piece, ensuring proper alignment.
- Apply primer and solvent cement (for plastic) or compression fittings (for metal).
- Assemble and tighten all connections.
For a detailed installation guide, see How To Install Kitchen Sink Plumbing.
Testing Your Repair
- Run water and observe for leaks.
- Check all joints and repaired areas.
- If water persists, reapply sealant or consider replacement.
Case Study: Bathroom Sink Pipe Repair
A family discovered a small split in their bathroom’s ABS drain pipe. Using epoxy putty and mesh, they patched the crack and restored function. The repair lasted three years, demonstrating the effectiveness of careful DIY solutions.
Tools And Materials: What You Need For The Job
Equipping yourself properly makes the repair safer and more efficient.
Essential Tools
- Adjustable wrench
- Pipe cutter or hacksaw
- Flashlight
- Bucket
- Gloves
- Sandpaper
Materials
- Pipe repair tape
- Epoxy putty or patch kit
- Replacement pipe section
- Pipe primer and solvent cement (for PVC/ABS)
- Compression fittings (for metal)
Comparison Table: Tool Effectiveness
| Tool | Purpose | Pipe Types | Ease of Use |
|---|---|---|---|
| Pipe Cutter | Clean pipe cuts | Metal, plastic | Moderate |
| Hacksaw | Versatile cutting | Plastic, thin metal | Easy |
| Adjustable Wrench | Tighten/loosen fittings | All types | Easy |
| Epoxy Putty | Seal cracks | Plastic, metal | Easy |
Safety Tips
- Wear gloves and eye protection.
- Ventilate the area if using strong adhesives or solvents.
- Dispose of old pipe sections responsibly.
Warning: If a crack is near electrical wiring or the water supply can’t be shut off, consult a licensed plumber.
Preventing Future Pipe Cracks
Addressing the root causes of pipe damage minimizes future headaches and keeps your plumbing in top shape.
Regular Inspections
Check pipes every 6-12 months for:
- Signs of wear
- Loose fittings
- Corrosion
Document any changes and act promptly if issues arise.
Controlling Temperature Extremes
Prevent freezing and expansion by:
- Insulating pipes in cold climates.
- Keeping cabinet doors open during severe cold to allow warm air flow.
According to the U.S. Department of Energy, insulating plumbing reduces the risk of freezing and bursting pipes.
Protecting Pipes From Physical Damage
- Avoid storing heavy objects under the sink.
- Install protective shields or brackets for exposed pipes.
Using Quality Materials
When repairing or replacing pipes, invest in:
- Certified, high-quality pipe sections
- Name-brand adhesives and sealants
Cheap, off-brand products often fail sooner, leading to repeat repairs.
Example: Preventative Maintenance Success
A homeowner began regular pipe checks after a costly leak. Early detection of a hairline crack allowed a quick patch, avoiding water damage and expensive restoration.
When To Call A Professional Plumber
While many repairs are DIY-friendly, certain situations demand expert intervention.
Signs You Need Professional Help
- Large or structural cracks
- Multiple leaks
- Persistent water after repeated repairs
- Complicated pipe layouts
- Nearby electrical hazards
Benefits Of Hiring A Plumber
- Access to specialized tools and materials.
- Professional assessment ensures long-term safety.
- Guarantees and warranties on workmanship.
For guidance on installing or upgrading sink plumbing, visit How To Install A Drop-In Kitchen Sink.
Cost Considerations
Plumber fees range from $150 to $400 for standard repairs, depending on location and complexity. Investing in professional service can prevent costly damage and ensure compliance with local codes.
Example: Professional Pipe Replacement
A household with repeated leaks opted for a licensed plumber. The pro replaced the entire trap assembly, fixed improper slopes, and eliminated future leak risks, saving time and money over repeated DIY attempts.
Real-world Examples And Short Case Studies
Learning from others’ experiences can clarify what to expect and inspire confidence in your repair approach.
Example 1: Diy Pipe Tape Success
A renter noticed water stains under their kitchen sink. Using silicone pipe tape, they wrapped a hairline crack and stopped the leak instantly. The tape held for six months until the landlord replaced the pipe.
Example 2: Epoxy Putty For Abs Pipe
A homeowner patched a small split in their bathroom’s ABS pipe with epoxy putty. The repair lasted three years, demonstrating the durability of quality products and careful application.
Example 3: Full Pipe Replacement
In my experience, a large crack in a galvanized steel pipe required full replacement. After cutting out the damaged section and installing new PVC, the leak was eliminated for over a decade.
Example 4: Preventative Maintenance Pays Off
Regular inspections led to the early discovery of a minor crack. Quick action with pipe tape prevented a full-blown leak and water damage.
Frequently Asked Questions
What Should I Do If I Can’t Identify The Pipe Material Under My Sink?
If you’re unsure about your pipe’s material, take a photo and compare it to online resources like the Wikipedia Plumbing Fittings Guide. You can also bring the photo to your local hardware store for expert advice.
Can I Use Super Glue Or Household Adhesives To Fix A Cracked Pipe?
Household glues are not designed for plumbing use and typically fail when exposed to water and pressure. Use only plumbing-rated sealants, epoxy, or tape for a reliable fix.
Is It Safe To Use Plumbing Repair Tape For Drinking Water Pipes?
Most pipe repair tapes are safe for drain lines but not for potable water pipes unless specifically labeled as drinking water safe. Always check product specifications and local codes.
How Can I Tell If A Crack Is Affecting My Sink’s Structural Integrity?
If the crack is accompanied by movement, loud noises, or repeated leaks, it may indicate structural damage. Inspect surrounding areas for sagging or loose fittings. Consult a plumber if you notice any instability.
Are There Eco-friendly Options For Pipe Repair And Replacement?
Yes, many modern plumbing products are made from recycled materials and use low-VOC adhesives. Look for certified eco-friendly products and dispose of old pipes responsibly according to local recycling guidelines.
A cracked pipe under your sink doesn’t have to spell disaster. By understanding pipe types, diagnosing cracks accurately, and applying the correct repair methods, you can restore your plumbing with confidence. Regular inspections and preventative maintenance help avoid future issues, while knowing when to call a professional ensures your home stays safe and dry. Whether you’re patching a hairline crack or replacing a damaged section, this guide equips you to handle the challenge efficiently. For further reading on sink upgrades and plumbing, explore resources like How To Install A Double Kitchen Sink and How To Fix A Backed Up Kitchen Sink.