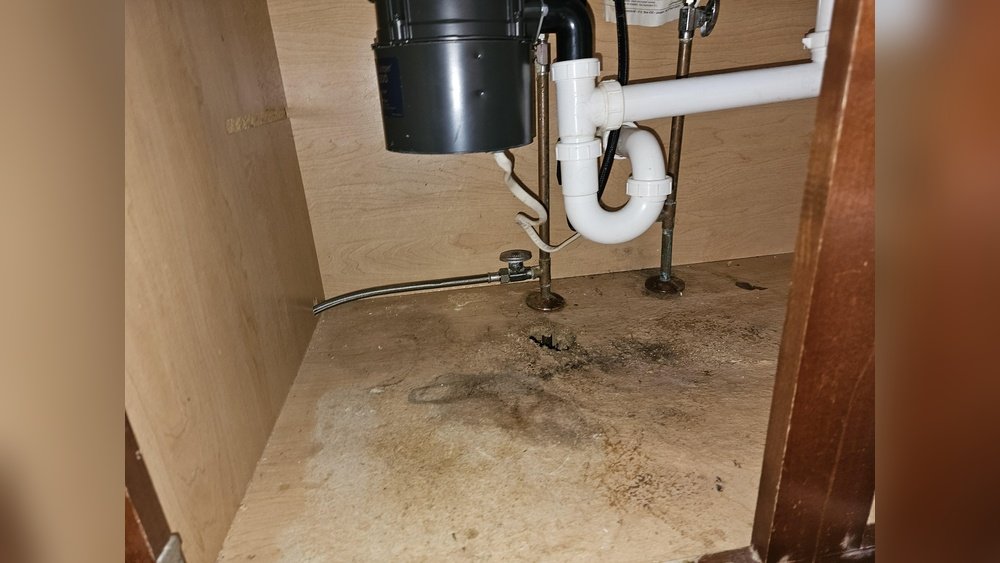
Rotted wood under a kitchen sink is a common problem. It happens because of water leaks or spills. If you ignore it, the wood can break and cause more damage. Fixing rotted wood is important. You can save your kitchen and avoid bigger repairs.
What You Need to Know Before Starting
Replacing rotted wood is not very hard. But you need some tools and materials. Also, patience helps a lot. Taking your time will make the work better.
Make sure to turn off the water supply before you start. This stops water from spilling while you work. Also, clear the area under your sink. Remove all items so you can work safely.
Tools and Materials You Will Need
- Protective gloves: Keep your hands safe from splinters and dirt.
- Screwdriver: To remove screws holding the cabinet parts.
- Hammer and pry bar: To remove the old rotted wood.
- Measuring tape: To measure the new wood piece.
- Replacement wood: Use plywood or cabinet-grade wood.
- Wood screws: To fix the new wood in place.
- Wood glue or wood filler: To fill small gaps or cracks.
- Sandpaper: To smooth the wood surface before painting.
- Paint or wood sealant: To protect the new wood from water.
- Caulk and caulking gun: To seal edges and prevent water leaks.
- Bucket and towels: To catch any water during work.
Step 1: Check the Damage
Open the cabinet door and look at the wood carefully. Use a screwdriver or knife to press the wood. If it feels soft or crumbles, it is rotted. Look for dark spots or mold. These are signs of water damage.
Check how much wood is damaged. If it is only a small part, you might be able to fix it with wood filler. But if the wood is soft or breaks easily, you need to replace it.
Credit: www.reddit.com
Step 2: Remove the Old Rotted Wood
First, take out anything stored under the sink. Then, use the screwdriver to remove screws holding the wood panel. If the wood is nailed, use a hammer and pry bar to pull nails and lift the wood out.
Be careful when removing the wood. Do not damage pipes or plumbing. Move slowly and watch your hands. Dispose of the rotted wood safely.
Step 3: Measure and Cut New Wood
Use the measuring tape to get the size of the removed wood piece. Measure length, width, and thickness carefully. Write down the numbers to avoid mistakes.
Take the measurements to a hardware store or cut the wood yourself if you have tools. Make sure the new wood fits well in the space. It should sit flat and cover the entire area.
Step 4: Prepare the Area
Before installing new wood, clean the area well. Remove dust, dirt, and any small wood pieces. You can use a vacuum or damp cloth. Let the area dry completely before continuing.
If you see any mold, clean it with a mixture of water and vinegar. This stops mold from growing again.
Step 5: Install the New Wood
Place the new wood piece where the old wood was. Check if it fits well. If it is too big, sand the edges to make it smaller.
Use wood glue on the edges to help hold the wood. Then, fix the wood using screws. Screw them in tight but do not crack the wood.
If you find any small gaps, fill them with wood filler. Let the glue and filler dry as the instructions say. This usually takes a few hours.

Credit: www.youtube.com
Step 6: Sand and Paint the Wood
After the wood glue and filler dry, sand the surface smooth. Use fine sandpaper to avoid rough spots. This makes the wood look better and helps paint stick.
Apply paint or wood sealant to protect the wood. Use water-resistant paint for the best results. Paint all sides of the wood, including edges. This stops water from damaging the wood again.
Let the paint dry completely before putting anything back under the sink.
Step 7: Seal and Prevent Water Damage
Use caulk to seal around the edges of the wood and cabinet. This stops water from leaking into the wood. Apply a thin line of caulk and smooth it with your finger or a tool.
Check your plumbing for leaks. Fix any dripping pipes or loose connections. This prevents future water damage.
Tips for Keeping Your Cabinet Dry
- Always wipe up spills quickly.
- Use a waterproof mat under the sink area.
- Check pipes regularly for leaks.
- Keep the cabinet door open after using water to dry it out.
- Install a small water alarm to warn about leaks.
Summary Table: Steps to Replace Rotted Wood
| Step | What to Do | Tools Needed |
|---|---|---|
| 1 | Check wood for rot and damage | Screwdriver or knife |
| 2 | Remove old rotted wood | Hammer, pry bar, screwdriver |
| 3 | Measure and cut new wood | Measuring tape, saw |
| 4 | Clean and prepare the area | Vacuum, cloth, vinegar |
| 5 | Install new wood with glue and screws | Wood glue, screws, screwdriver |
| 6 | Sand and paint the new wood | Sandpaper, paint, brush |
| 7 | Seal edges and prevent leaks | Caulk, caulking gun |
Final Thoughts
Replacing rotted wood under your kitchen sink takes time. But it is worth it. You protect your home and keep it safe from water damage. Follow each step carefully. Use the right tools and materials. And always be safe when working.
With a little work, your cabinet will look new again. You will feel proud of fixing it yourself. Remember to check the area often to stop rot from coming back.
Frequently Asked Questions
How Do I Identify Rotted Wood Under My Kitchen Sink?
Look for soft, crumbly wood that feels damp or smells musty. Dark stains and mold growth are common signs too.
What Tools Do I Need To Replace Rotted Wood Under Sink?
You need a screwdriver, pry bar, saw, measuring tape, wood patch, and wood sealant. Safety gloves and goggles are helpful too.
How Long Does It Take To Replace Rotted Wood Under A Kitchen Sink?
The job usually takes 2 to 4 hours depending on damage size and skill level. Drying time for sealant may add extra hours.
Can I Replace Rotted Wood Myself Or Hire A Professional?
Simple repairs can be done by most homeowners safely. For large damage or plumbing concerns, a professional is safer.