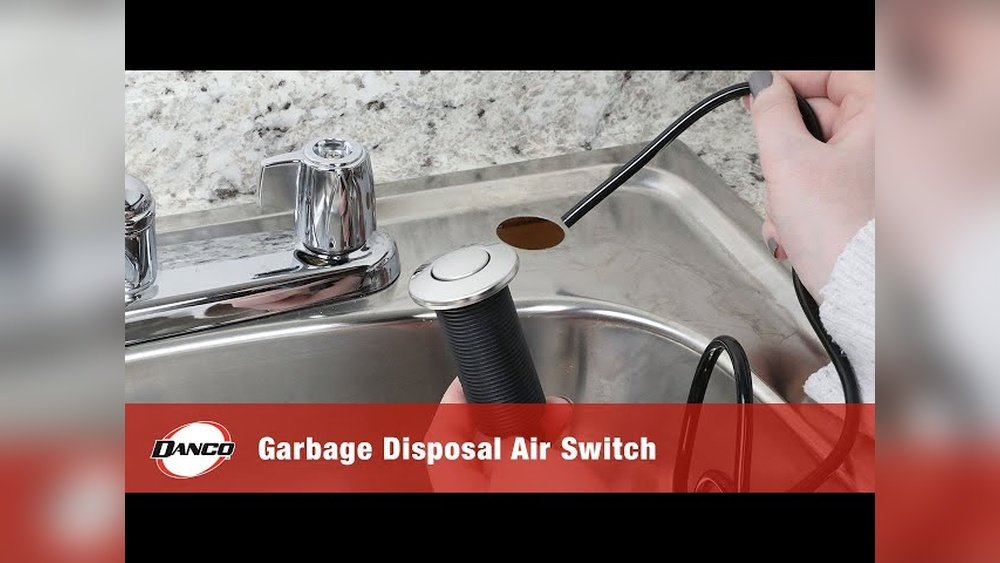
Installing an air switch for your garbage disposal is a smart idea. It makes your kitchen safer and easier to use. You don’t have to touch any electrical switches with wet hands. This guide will help you install the air switch step by step.
What is an Air Switch for Garbage Disposal?
An air switch is a button you press to turn on your garbage disposal. It uses air pressure to send a signal to the disposal. This means it is safe to use around water. It is usually placed on the kitchen sink or countertop.
Why Use an Air Switch?
- It keeps electricity away from water.
- It is easy to press, even with wet hands.
- It looks neat and clean on your sink.
- It is safer than a regular switch.
What You Need Before Starting
Before you start, gather these tools and parts:
| Item | Purpose |
|---|---|
| Air switch kit | Includes button, air hose, and control box |
| Drill with hole saw bit (1 1/4 inch) | To make a hole in sink or countertop |
| Screwdriver | To tighten screws |
| Wrench | To disconnect and connect plumbing parts |
| Electrical tape | To secure wires |
| Bucket and towels | To catch water during installation |
Step 1: Turn Off Power
First, safety is very important. Go to your home’s electrical panel. Find the circuit breaker for the garbage disposal. Switch it off. Double-check by pressing the disposal switch. Make sure it does not work.
Step 2: Choose a Spot for the Air Switch Button
Look at your sink or countertop. Pick a spot that is easy to reach. Usually, people put it near the faucet. The button needs a 1 1/4 inch hole. Make sure there is space under the sink for the control box.
Step 3: Drill the Hole
Use the drill with a hole saw bit. Slowly drill the hole where you want the button. Be careful not to crack the sink or countertop. If your sink is stainless steel, it may take more time. Clean the edges of the hole after drilling.
Step 4: Install the Air Switch Button
Take the air switch button from the kit. Insert it into the hole from the top. The button should fit snugly. From underneath, screw the mounting nut to hold the button in place. Tighten it by hand until secure.
Step 5: Connect the Air Hose
Now, connect the air hose to the bottom of the air switch button. The hose carries air pressure when you press the button. Make sure the hose fits tightly to avoid leaks.
Step 6: Mount the Control Box
The control box is the part that turns the disposal on and off. Find a dry spot under the sink to attach it. Use screws or double-sided tape. Connect the other end of the air hose to the control box.
Credit: www.youtube.com

Credit: www.youtube.com
Step 7: Connect the Control Box to the Disposal
Locate the electrical wires on your garbage disposal. Usually, there are two wires: black (hot) and white (neutral). Disconnect the existing disposal switch wires if needed.
Connect the control box wires to the disposal wires. Match black to black, white to white. Use wire nuts to secure the connections. Wrap them with electrical tape for safety.
Step 8: Plug in the Control Box
The control box usually plugs into a power outlet under the sink. Plug it in. Make sure the cord is away from water and sharp objects.
Step 9: Test the Air Switch
Turn the circuit breaker back on. Press the air switch button. The garbage disposal should start. Press again to stop it. If it does not work, check your connections and try again.
Tips for a Successful Installation
- Read the air switch kit instructions carefully.
- Work slowly and carefully to avoid mistakes.
- Keep water away from electrical parts during installation.
- If you feel unsure, ask a helper or professional.
- Use a flashlight to see under the sink better.
Benefits of Installing an Air Switch
Using an air switch improves kitchen safety. It reduces the chance of electric shocks. It also protects children and pets. Plus, it looks better than a wall switch or button. You avoid drilling holes in walls or cabinets.
Common Problems and How to Fix Them
| Problem | Cause | Solution |
|---|---|---|
| Disposal does not start | Loose wire connections | Check and tighten wire nuts |
| Air switch button stuck | Dirt or debris in button | Clean the button and hole |
| Air hose leaks air | Hose not tight | Push hose firmly on both ends |
| Control box not powering disposal | Power outlet off or faulty | Check outlet with another device |
Frequently Asked Questions
What Tools Do I Need To Install An Air Switch?
You need a drill, screwdriver, wrench, and plumber’s putty. Also, have the air switch kit ready.
How Do I Connect The Air Switch To The Disposal?
Attach the air hose to the switch and the disposal’s air button. Secure both ends tightly.
Can I Install An Air Switch Without An Electrician?
Yes, air switches are safe and simple to install by yourself. No special electrical skills are needed.
Where Should I Place The Air Switch Button?
Place it on the sink or countertop, near the disposal. It should be easy to reach.
Conclusion
Installing an air switch for your garbage disposal is easy. It makes your kitchen safer and cleaner. Follow these steps carefully. Use the right tools and parts. Take your time. Soon, you will have a safe, easy-to-use switch right on your sink.
Enjoy your safer kitchen and worry less about water and electricity.