Installing a bathroom sink drain with an overflow is a common home project. It may seem hard at first. But with some simple steps, you can do it yourself. This guide will help you understand each step clearly.
What Is a Sink Drain With Overflow?
A sink drain with overflow has an extra hole near the top of the sink basin. This hole stops water from spilling over the edge. When water reaches the overflow hole, it drains safely away.
This type of drain helps protect your bathroom from water damage. Many bathroom sinks come with this feature. So, it is important to know how to install it correctly.
Tools and Materials You Will Need
Before you start, gather these tools and materials:
- New bathroom sink drain with overflow
- Plumber’s putty or silicone sealant
- Adjustable wrench
- Pipe wrench or slip-joint pliers
- Bucket or bowl (to catch water)
- Old towels or rags
- Cleaning sponge or cloth
Having these ready will make the job easier and faster.
Step 1: Turn Off the Water Supply
First, turn off the water supply to the sink. Usually, there are small valves under the sink. Turn them clockwise to close.
If you cannot find the valves, turn off the main water supply for your home. This step prevents water from leaking while you work.
Step 2: Remove the Old Drain
Place a bucket under the sink drain to catch any water left inside.
Use a wrench to loosen the nut holding the drain pipe. Carefully remove the drain pipe and the drain flange from the sink.
Clean the sink drain opening. Remove any old plumber’s putty or sealant. This will help the new drain fit better.
Step 3: Prepare the New Drain
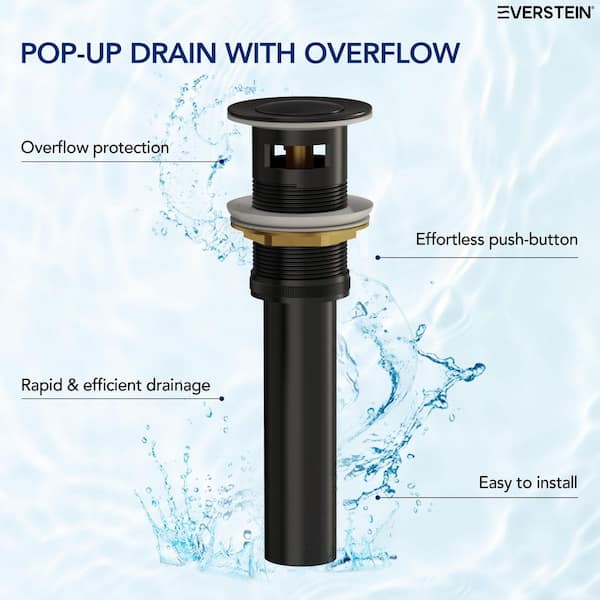
Take the new drain and check if the overflow hole matches your sink. The drain should have a small pipe or channel for the overflow water.
Apply plumber’s putty or silicone sealant around the drain flange. This seals the drain and stops leaks.
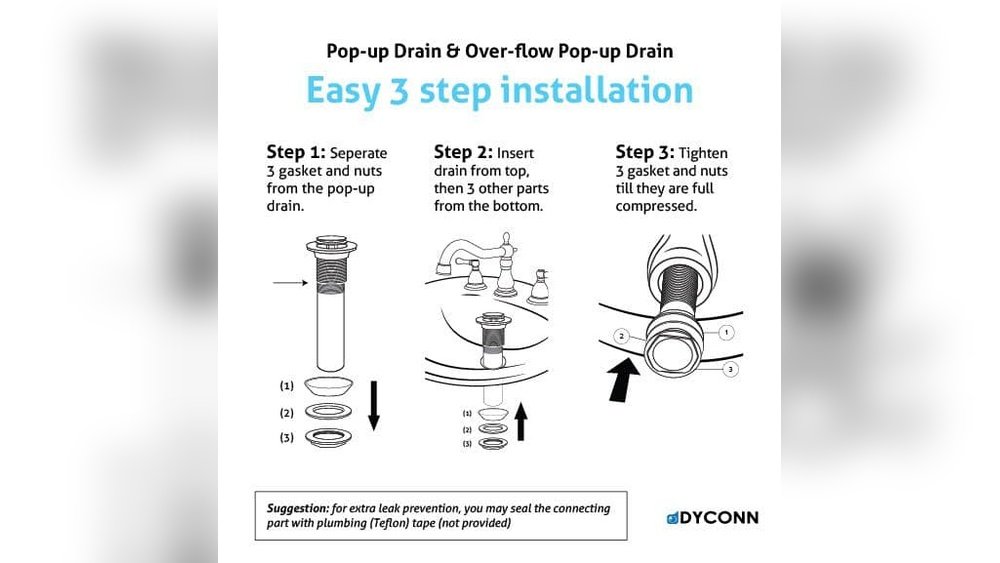
Step 4: Install the Drain Flange
Insert the drain flange into the sink drain hole. Press it firmly so it sticks well.
Under the sink, slide the rubber gasket and metal washer onto the drain pipe. Then screw on the lock nut.
Use a wrench to tighten the lock nut. Do not overtighten. Tighten just enough to hold the drain in place.
Step 5: Connect the Overflow Tube
Now connect the overflow tube from the drain to the overflow hole on the sink.
Most drains have a small pipe or channel for the overflow water. Make sure it fits snugly into the sink’s overflow opening.
Check that the overflow tube is not bent or blocked. Water should flow freely from the overflow hole to the drain.
Credit: www.homedepot.com
Step 6: Attach the Drain Tailpiece
Attach the drain tailpiece to the bottom of the drain assembly.
The tailpiece connects the drain to the P-trap and drain pipe in your plumbing.
Use the slip-joint nut and washer to secure the tailpiece. Hand-tighten first, then use a wrench to finish.
Step 7: Reconnect the P-Trap
Reconnect the P-trap pipe to the drain tailpiece.
Tighten all the nuts and washers. Make sure the connections are secure but not too tight.
The P-trap prevents sewer gases from coming into your bathroom.
Step 8: Test for Leaks
Turn on the water supply valves slowly.
Run water into the sink and let it fill up. Check the drain and overflow connections for leaks.
If you see water dripping, tighten the connections slightly. Use a cloth to dry and watch again.
Tips for a Successful Installation
- Work slowly and carefully. Rushing can cause mistakes.
- Use plumber’s putty or silicone sealant to avoid leaks.
- Keep old towels handy for spills and drips.
- Check all connections twice before finishing.
- If unsure, ask for help from a friend or plumber.
Common Problems and How to Fix Them
| Problem | Cause | Solution |
|---|---|---|
| Water leaks under sink | Loose nuts or missing sealant | Tighten nuts and add plumber’s putty |
| Overflow hole not draining | Overflow tube blocked or misaligned | Clear blockage and fit tube correctly |
| Drain pipe smells bad | Improper P-trap connection | Check P-trap for leaks and fit well |
| Water drains slowly | Clogged drain or pipes | Clean drain and remove debris |

Credit: www.amazon.com
Why Use a Drain With Overflow?
Overflow drains keep your bathroom safe. They stop water from spilling onto floors.
This can save your home from water damage. Overflows give you peace of mind.
They are easy to install and work well with most sinks.
Frequently Asked Questions
What Tools Do I Need To Install A Bathroom Sink Drain With Overflow?
You need a wrench, plumber’s putty, a bucket, and Teflon tape. These tools help secure the drain and prevent leaks.
How Do I Prevent Leaks Around The Sink Drain?
Apply plumber’s putty under the drain flange before tightening it. Tighten connections firmly but avoid over-tightening to prevent damage.
Can I Install An Overflow Drain On Any Bathroom Sink?
Most sinks with an overflow hole support overflow drains. Check your sink design to confirm before purchasing parts.
How Long Does It Take To Install A Sink Drain With Overflow?
The installation typically takes 30 to 60 minutes for beginners. Time varies depending on your experience and sink type.
Conclusion
Installing a bathroom sink drain with overflow is a simple task. You only need some basic tools and a bit of patience.
Follow these steps carefully. Turn off water, remove old drain, fit new drain with sealant, connect overflow tube, attach tailpiece, and test for leaks.
This DIY project can save money and help you learn useful skills. Plus, it keeps your bathroom safe from water spills.
Take your time, be careful, and enjoy your new sink drain!