Removing a kitchen faucet may sound like a job for a plumber, especially if you don’t have the right tools. One tool most people recommend is the basin wrench. But what if you don’t own one or can’t find it? The good news: you can still remove your kitchen faucet without a basin wrench. With a little creativity and some household tools, you can tackle this task yourself. This guide will show you how to do it step by step, safely and efficiently.
Whether your faucet is leaking, outdated, or simply needs replacing, you don’t have to let the lack of a basin wrench stop you. We’ll cover everything you need to know—from understanding your faucet’s design to choosing alternative tools, avoiding common mistakes, and handling unexpected problems.
Why Remove A Kitchen Faucet Without A Basin Wrench?
A basin wrench is designed for tight spaces under sinks, making it a favorite among plumbers. But many homes don’t have one, and not everyone wants to buy a tool for a one-time job. Plus, older homes or unique sinks might need different solutions. Learning how to remove a kitchen faucet without this tool gives you flexibility and saves you money.
Let’s look at some reasons you might skip the basin wrench:
- You don’t own one and don’t want to buy or borrow
- The space under your sink is too tight for bulky tools
- Your faucet’s nuts are accessible by other means
- You want to use common tools already at home
Removing a faucet without a basin wrench is also a practical skill. You might even find it easier, depending on your sink’s design.
Understanding Your Kitchen Faucet’s Setup
Before you start, it’s important to know what you’re working with. Kitchen faucets come in different styles, but most are attached to the sink with mounting nuts. These nuts are usually under the sink, holding the faucet base in place.
Here’s what you’ll usually find:
- Mounting nuts: Hold the faucet to the sink or countertop
- Supply lines: Carry water to the faucet; usually flexible or copper
- Spray hose (optional): For faucets with a pull-out sprayer
Some faucets have single-hole designs, others use three-hole. Older faucets may have larger, corroded nuts. Knowing your setup helps you plan which tools to use.
Take a flashlight and look under your sink before starting. Notice how much space you have, how the nuts are positioned, and whether there is rust or buildup.
Tools And Materials You’ll Need
You don’t need a basin wrench, but you do need other basic tools. Most are probably in your toolbox or easy to borrow.
- Adjustable wrench: For loosening larger nuts
- Channel-lock pliers: For gripping and turning nuts
- Socket wrench set: Useful for tight spaces
- Screwdriver: Flat or Phillips, depending on your faucet
- Penetrating oil (like WD-40): For rusty or stuck nuts
- Utility knife: To cut sealant or caulk
- Towel or bucket: To catch water drips
- Work gloves: For safety and better grip
- Flashlight or headlamp: For dark spaces under the sink
Optional:
- Mini hacksaw: If a nut won’t budge and needs cutting
- Putty knife: To remove old caulk or putty
It’s smart to have all tools ready before you start. This saves time and avoids frustration.
Preparing To Remove The Faucet
Preparation is key for any plumbing job. Skipping these steps can lead to leaks, injury, or damage to your sink and countertop.
1. Turn Off The Water Supply
Find the shutoff valves under your sink. There are usually two—one for hot and one for cold. Turn them clockwise to close. If your valves are stuck or missing, shut off your home’s main water supply.
After turning off, open the faucet to release pressure and let any water drain out.
2. Clear The Area
Remove anything stored under your sink. This gives you space to work and keeps your things dry.
Place a towel or bucket under the faucet area to catch any water when you disconnect supply lines.
3. Disconnect The Water Supply Lines
Use an adjustable wrench or pliers to loosen the nuts connecting the supply lines to the faucet. Hold the pipe steady with one hand to avoid twisting or breaking it.
If the nuts are stuck, spray a little penetrating oil and wait a few minutes. Be patient—forcing can damage pipes.
4. Take Photos
Snap a few pictures of how everything looks before you start removing parts. This makes reassembly or installing a new faucet much easier.
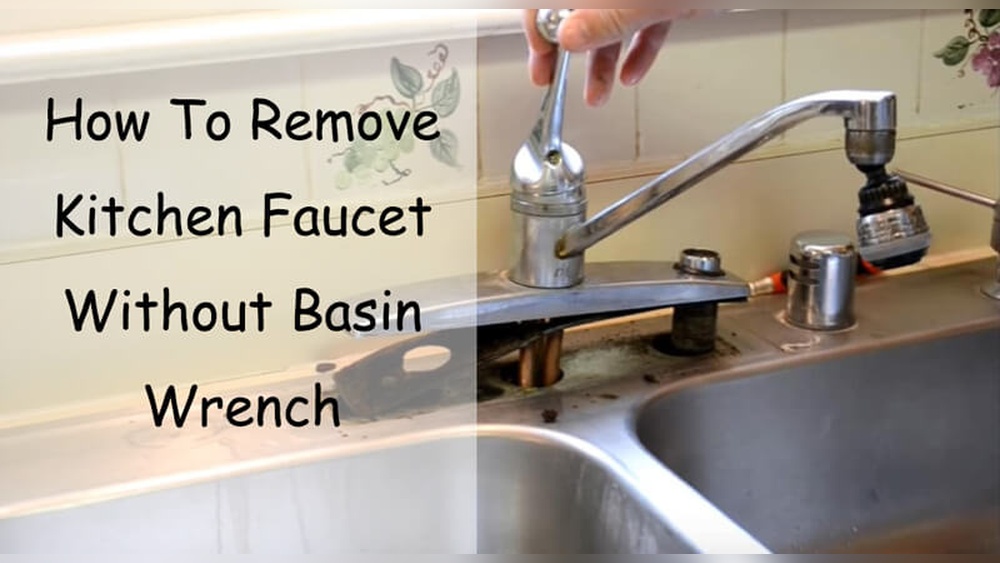
How To Remove A Kitchen Faucet Without A Basin Wrench
Now comes the main task. The following steps are for most standard kitchen faucets. Adjust as needed for your specific sink and faucet.
Step 1: Locate The Mounting Nuts
Shine your flashlight under the sink. You’ll see one or two large nuts holding the faucet base against the sink. These are usually plastic or brass.
If there’s a metal plate or bracket, you may need to remove screws first. Use a screwdriver for this.
Step 2: Loosen The Mounting Nuts
Here’s where you use alternatives to a basin wrench. Try these methods in order:
A. Adjustable Wrench Or Channel-lock Pliers
If there’s enough room, fit your adjustable wrench or channel-lock pliers around the nut. Turn counterclockwise to loosen.
Tip: Wrap the nut with a cloth to protect it from tool marks, especially if you plan to reuse it.
B. Socket Wrench Set
Sometimes, a socket wrench with a long extension can reach nuts in tight spaces. Choose the correct socket size and carefully loosen the nut.
C. Slip-joint Pliers
If the nut is not too tight, slip-joint pliers may do the job. They open wider than regular pliers and can grip large nuts.
D. By Hand
Some plastic mounting nuts can be loosened by hand, especially if not over-tightened. Try this before using force.
Step 3: Deal With Stuck Or Rusted Nuts
Old faucets often have nuts that are corroded or stuck. Here’s what to do:
- Spray penetrating oil on the nut and wait 15-20 minutes.
- Tap gently with the handle of your pliers to help the oil work in.
- Try loosening again with your tools.
If the nut won’t budge, use a mini hacksaw. Carefully cut through one side of the nut, then pry it off with a screwdriver. Be careful not to damage the sink or faucet shank.
Step 4: Remove The Faucet Body
Once the nuts are off, lift the faucet out from above the sink. If it sticks, cut any caulk or sealant around the base with a utility knife.
For faucets with a spray hose, disconnect it from the faucet body before lifting it out.
Step 5: Clean The Area
After removing the faucet, scrape away old plumber’s putty or caulk from the sink surface. A putty knife works well. Wipe the area clean before installing a new faucet.
Comparing Faucet Removal Tools
If you’re deciding which tool to use, here’s a quick comparison:
| Tool | Best For | Pros | Cons |
|---|---|---|---|
| Adjustable Wrench | Accessible nuts | Common, easy to use | Needs space |
| Channel-Lock Pliers | Larger nuts | Strong grip, versatile | Can slip, bulky |
| Socket Wrench | Tight spaces | Reaches deep nuts | Needs correct socket |
| Mini Hacksaw | Stuck nuts | Last resort | Risk of damage |
Tips For A Smooth Faucet Removal
Removing a kitchen faucet can be easy or challenging, depending on your sink and faucet type. Here are some helpful tips:
- Use good lighting. A headlamp keeps your hands free.
- Take your time. Rushing leads to mistakes or broken parts.
- Label parts as you remove them, especially if you plan to reuse supply lines.
- Wear gloves to protect against sharp edges and hot pipes.
- Work with a friend if possible. One person can hold the faucet while the other loosens nuts.
- Check for leaks after disconnecting supply lines. Even a little water can cause damage.
Common Problems And How To Solve Them
Even with the right steps, you might run into issues. Here’s how to handle common problems:
Hard-to-reach Nuts
Some sinks have very little space behind them. If your tools don’t fit, try a socket wrench with a long extension or use pliers at an angle. Removing the sink drain temporarily can create more room.
Rusty Or Frozen Nuts
If penetrating oil doesn’t help, heat the nut gently with a hair dryer. Heat can break rust bonds. If all else fails, cut the nut with a hacksaw.
Stripped Or Rounded Nuts
If the nut’s edges are worn and tools slip, wedge a flathead screwdriver between the nut and sink to create friction, then turn with pliers. Specialized sockets for rounded nuts are also available.
Damaged Supply Lines
If you accidentally twist or break a supply line, replace it. Flexible stainless steel hoses are affordable and easy to install.
When To Call A Plumber
Most kitchen faucet removals are simple DIY jobs. However, call a licensed plumber if:
- The supply shutoff valves won’t close
- You see signs of water damage or mold
- The faucet shank is badly rusted and stuck
- Your home’s plumbing is very old or fragile
Attempting to force old or brittle pipes can cause expensive leaks. A professional will have the right tools for challenging jobs.
Cost Comparison: Diy Vs. Professional Removal
Wondering if doing it yourself is worth it? Here’s a cost breakdown:
| Method | Average Cost | What’s Included |
|---|---|---|
| DIY Removal | $0–$20 | Tools you own, maybe a new wrench or pliers |
| Hire a Plumber | $100–$250 | Labor, tools, possible faucet installation |
DIY saves you money and teaches you a new skill. Most homeowners can remove a faucet in under two hours.
Non-obvious Insights Most Beginners Miss
Many guides don’t mention these important details:
- Photograph the process: Taking pictures at each step makes installing the new faucet much easier. You won’t forget how the parts fit together.
- Check faucet holes and spacing: Before buying a new faucet, measure the distance between holes in your sink. Not all faucets fit all sinks.
- Inspect supply lines for wear: Old or brittle lines can leak after reinstallation. Replacing them when you change the faucet prevents future leaks.
- Test shutoff valves before starting. Stuck valves are a common problem in older homes. If they won’t close, you need to address this before removing the faucet.
Safety Precautions
Plumbing jobs carry risks. Keep yourself and your home safe:
- Always turn off the water supply before starting.
- Use gloves to protect hands from sharp edges.
- Wear safety glasses when using a hacksaw or tools near your face.
- Keep children and pets away from your work area.

Credit: diy.stackexchange.com
What To Do After Removing The Faucet
After the old faucet is out, don’t rush to install the new one. Here’s what to check:
- Clean the sink surface. Remove all old caulk, putty, and debris.
- Inspect for damage. Look for cracks or corrosion around the faucet holes.
- Dry the area. Moisture leads to mold or rot under the sink.
- Check supply lines. Replace them if they’re old or show signs of damage.
If you’re installing a new faucet, follow the manufacturer’s instructions carefully. Modern faucets often use flexible mounting systems that are much easier to install than older models.
Environmental Considerations
Old faucets often waste water. If you’re replacing a leaking or outdated faucet, choose a WaterSense-certified model. These save water and lower your utility bills.
Properly dispose of old faucets, especially if they’re made of metal. Many recycling centers accept brass or stainless steel parts.

Credit: www.youtube.com
Diy Success Stories
Many homeowners have removed their faucets without a basin wrench and saved money. For example, a homeowner in Dallas, Texas, tackled a 20-year-old faucet with only an adjustable wrench and pliers. The nuts were rusted, but after using penetrating oil and patience, the faucet came free in just over an hour.
Another case: a renter in Chicago removed a faucet with a mini hacksaw after other tools failed. The process took time but avoided a costly landlord call-out.
These stories show that with patience, the right tools, and the steps in this guide, you can do the job yourself.
Finding Reliable Help And Information
If you run into trouble, don’t be afraid to ask for help. Plumbing forums, YouTube tutorials, and local hardware store staff are good resources. For official guidance on water-saving fixtures, check the EPA WaterSense page.

Credit: www.homebeautifully.com
Frequently Asked Questions
How Long Does It Take To Remove A Kitchen Faucet Without A Basin Wrench?
Most kitchen faucets can be removed in 60–120 minutes, depending on how tight or corroded the nuts are. If everything is in good condition, the process is much faster.
What Can I Use If I Don’t Have A Basin Wrench?
You can use an adjustable wrench, channel-lock pliers, or a socket wrench. For stubborn nuts, a mini hacksaw may be needed. Each tool has its pros and cons depending on your sink’s space.
Is It Safe To Cut A Stuck Faucet Nut With A Hacksaw?
Yes, but be careful. Wear safety glasses and cut slowly to avoid damaging the sink or nearby pipes. Only use a hacksaw as a last resort when other methods fail.
Can I Reuse Old Supply Lines When Installing A New Faucet?
It’s possible, but not recommended. Old supply lines can leak after being disturbed. Replacing them when you install a new faucet is a smart way to prevent future problems.
What If My Shutoff Valves Don’t Work?
If the valves won’t close, you must shut off the main water supply before starting. Consider replacing faulty valves to avoid leaks and water damage in the future.
Removing a kitchen faucet without a basin wrench is a practical DIY project. With the right tools and careful steps, you can save money and gain confidence in tackling other plumbing tasks. Always work safely, and remember—help is available if you need it.