If you love baking or cooking at home, you’ve probably heard about the KitchenAid Bowl Lift Stand Mixer. This powerful kitchen tool is a favorite in many homes and professional kitchens. It can mix dough, whip cream, shred chicken, and even make pasta with the right attachments. But if you have just bought one, or are thinking about getting it, you might wonder: how do you actually use a KitchenAid Bowl Lift Stand Mixer safely and effectively? This guide will walk you through everything you need to know, from setting up and using the mixer to cleaning and troubleshooting. You’ll also find practical tips, comparisons, and answers to common questions.
What Makes The Kitchenaid Bowl Lift Stand Mixer Special?
KitchenAid makes two main types of stand mixers: tilt-head and bowl lift models. The bowl lift design is famous for its stability and power. Unlike the tilt-head, you don’t tilt the top back to access the bowl. Instead, you use a lever to raise and lower the bowl. This design is better for heavy doughs and bigger batches.
A few key features set the bowl lift mixer apart:
- Sturdy build: The bowl is supported on solid arms, so it stays stable during tough mixing.
- Large capacity: Many bowl lift mixers hold between 5 and 7 quarts, perfect for big families or batch baking.
- Powerful motor: These mixers often have more wattage, handling bread dough or thick batters with ease.
- Attachment hub: You can add tools like pasta rollers, meat grinders, or spiralizers.
If you want to compare a bowl lift to a tilt-head mixer, the table below highlights the core differences.
| Feature | Bowl Lift | Tilt-Head |
|---|---|---|
| Access to Bowl | Lift bowl with lever | Tilt head back |
| Capacity | 5-7+ quarts | 3.5-5 quarts |
| Stability | Very stable | Less stable for heavy loads |
| Best For | Large batches, bread | Small to medium tasks |
Unboxing And Setting Up Your Mixer
When your new KitchenAid Bowl Lift Stand Mixer arrives, it’s tempting to start mixing right away. But take a moment to set up properly for best results.
- Unpack everything: Carefully remove the mixer, bowl, and all attachments. Make sure nothing is missing or damaged.
- Place on a sturdy surface: The mixer is heavy (often 25-30 lbs), so choose a stable counter.
- Wash the bowl and attachments: Clean with warm soapy water to remove factory dust. Dry thoroughly.
- Check the voltage: KitchenAid mixers usually run on standard household voltage (120V in the US), but double-check for your country.
- Attach the bowl: Slide the bowl arms into the slots and press down until you hear a click. The bowl should feel secure.
- Insert an attachment: Raise the bowl using the lever. Insert the beater or hook into the shaft, then twist to lock.
Pro Tip
Before your first use, run the mixer for a minute with nothing inside. This helps clear any leftover factory residue.
Understanding The Controls And Speeds
The KitchenAid Bowl Lift Stand Mixer is simple to use, but understanding each part will help you get better results.
- Speed control lever: Usually numbered 1 to 10. Lower numbers are for slow mixing, higher for whipping or fast mixing.
- Bowl lift lever: Raises and lowers the bowl. Always lower before adding or removing the bowl.
- Attachment hub: Located at the front. Unscrew the cap to connect tools like pasta makers or grinders.
Speed Settings Explained
Each speed is designed for a purpose. Here’s how to use them:
- Stir (1-2): Gentle mixing, folding, or starting dry and wet ingredients together.
- Mix (3-4): Combine batters and cookie doughs.
- Beat (5-6): Creaming butter and sugar, beating eggs.
- Whip (7-10): Whipping cream, egg whites, or light mixtures.
Tip: Always start at a lower speed to avoid splashing, especially with flour or liquids.
Attaching And Using The Mixing Bowl
The bowl is held firmly by two arms. To use it:
- Lower the bowl: Push the lever down. This creates space to add ingredients or change attachments.
- Add ingredients: Measure and pour into the bowl. For dry powders, add slowly to avoid clouds of flour.
- Attach the bowl: Align the bowl handles with the support pins. Press down until it locks.
- Raise the bowl: Pull the lever up. The bowl should be just below the beater.
- Check beater clearance: There should be a small gap (about the thickness of a dime) between the beater and the bowl’s bottom.
Adjusting Beater-to-bowl Clearance
If the beater is too high or low, it won’t mix properly. Use a flathead screwdriver to adjust the small screw under the mixer head. Turn slightly, then test again.
Non-obvious tip: If you notice dry ingredients sticking to the bottom, your beater is too high. If it scrapes the bowl or catches, it’s too low.
Choosing And Using Attachments
Your KitchenAid Bowl Lift Stand Mixer usually comes with three main attachments:
- Flat beater: Best for cakes, cookies, mashed potatoes, and frostings.
- Wire whip: For whipped cream, egg whites, and light batters.
- Dough hook: Kneads bread, pizza, or pasta dough.
Each attachment has a purpose:
- Flat beater: Creaming, mixing, and normal batters.
- Wire whip: Incorporates air quickly.
- Dough hook: Mimics hand-kneading.
For best results:
- Use the right attachment for your recipe.
- Attach before adding ingredients.
- Make sure it’s locked in place.
Specialty Attachments
The mixer’s power hub lets you add tools like:
- Pasta roller
- Meat grinder
- Spiralizer
- Food processor
Just remove the front cap, insert the attachment, and lock. These options make your mixer more than just a baker’s tool.
Making The Most Of The Bowl Lift Feature
The bowl lift isn’t just for looks. It makes working with heavy mixtures safer and easier.
- Stability: The bowl stays steady, even with thick dough.
- Access: Lower the bowl to scrape sides or add ingredients, then lift to mix.
- Capacity: Bowl lift models can handle double or triple batches.
Pro insight: If you bake bread, the bowl lift mixer won’t “walk” or shake on your counter during kneading. This is a common problem with smaller mixers.
Step-by-step: How To Mix With Your Kitchenaid Bowl Lift
Let’s walk through a typical use, such as making cookie dough:
- Prepare ingredients: Measure everything before starting.
- Attach the bowl and flat beater: Make sure they’re secure.
- Add butter and sugar: Lower the bowl, add these first, then lift.
- Start at low speed: Mix until creamy (speed 2-4).
- Add eggs and flavorings: Lower bowl, add, then raise and mix again.
- Add dry ingredients: Lower bowl, add flour, baking powder, etc.
- Mix slowly: Start at speed 1, then increase as needed.
- Scrape the sides: Lower the bowl, use a spatula to scrape, then mix again.
- Add mix-ins: Chocolate chips, nuts, or fruit go in last.
- Finish and remove: Lower bowl, unlock, and scoop dough.
Practical tip: Don’t over-mix. Stop as soon as ingredients are combined for light, fluffy results.
Cleaning And Maintaining Your Mixer
To keep your KitchenAid Bowl Lift Stand Mixer working well for years, clean and maintain it after each use.
Cleaning Steps
- Unplug the mixer: Safety first.
- Remove attachments and bowl: Wash in warm soapy water or dishwasher (most are dishwasher safe).
- Wipe the mixer body: Use a damp cloth. Don’t immerse the mixer in water.
- Clean the power hub: Wipe around the hub and attachment areas.
- Dry everything: Prevent rust and keep parts shiny.
Maintenance Tips
- Check the beater clearance regularly.
- Oil moving parts if you hear squeaking (rare).
- Store attachments in a safe place, not inside the bowl.
- Inspect the cord for damage.
Non-obvious tip: If you use the mixer weekly, it’s smart to check the bowl-to-beater clearance every few months, as vibration can shift the screw over time.

Credit: www.amazon.com
Troubleshooting Common Problems
Even the best mixers can have issues. Here’s how to fix some typical problems.
Mixer Won’t Start
- Check that it’s plugged in.
- Try a different outlet.
- Make sure the speed lever is not between settings.
Beater Hits The Bowl
- Stop immediately.
- Adjust the screw to raise the beater slightly.
Dough Climbs The Hook
- Reduce speed.
- Add flour a little at a time.
- Try oiling the hook lightly.
Mixer “walks” On Counter
- Ensure the feet are clean and flat.
- Work on a non-slip surface.
- If making heavy dough, keep a hand nearby.
Ingredients Aren’t Mixing Well
- Scrape the bowl more often.
- Adjust the beater clearance.
- Use the correct attachment for your recipe.
Practical insight: If your dough hook or beater is chipping, stop using it and replace. Using chipped tools can ruin your recipes and damage the bowl.
Comparing Bowl Lift Models
KitchenAid makes several bowl lift models. Choosing the right one depends on your needs.
| Model | Bowl Size | Motor Power | Best For |
|---|---|---|---|
| Pro 600 | 6 quart | 575 watts | Bread, large batches |
| Commercial | 8 quart | 1.3 HP | Professional, high volume |
| Professional 5 Plus | 5 quart | 450 watts | Home baking, medium batches |
Pro tip: For most home bakers, the 6-quart Pro 600 offers the best balance of size and power. If you bake daily or for events, consider the Commercial model.
Safety Tips For Using Your Mixer
Stand mixers are safe when used properly, but always keep these safety tips in mind:
- Never put fingers near moving parts.
- Unplug before cleaning or changing attachments.
- Don’t overload: Stick to the recommended flour and dough limits in your manual.
- Keep children away during use.
Non-obvious insight: If you use the mixer for long periods, the motor can get warm. This is normal, but let it rest between heavy batches to extend its life.
Recipes Perfect For Bowl Lift Stand Mixers
Having a KitchenAid Bowl Lift Stand Mixer unlocks new recipe possibilities. Some examples:
- Bread dough: Mix and knead up to 8 cups of flour.
- Cookies: Make double or triple batches.
- Whipped cream: Whip up to 2 quarts at a time.
- Shredded chicken: Cooked chicken can be shredded in seconds with the paddle.
Tip: For inspiration, check the recipe book that comes with your mixer or visit KitchenAid’s official site for more ideas.
Common Mistakes And How To Avoid Them
Even experienced users make errors with the bowl lift mixer. Here’s what to watch for:
- Forgetting to lock the bowl: The bowl can rattle or spill if not secured.
- Wrong attachment: Using the dough hook for cake batter can ruin texture.
- Not scraping the sides: Ingredients stay unmixed at the bottom.
- Overfilling the bowl: Leads to messes or motor strain.
- Ignoring beater clearance: Results in poor mixing or bowl damage.
Helpful advice: Keep your manual handy the first few times you use the mixer. It has model-specific tips and troubleshooting.
Accessories And Upgrades
To get even more from your KitchenAid Bowl Lift Stand Mixer, try these accessories:
- Flex edge beater: Scrapes the bowl while mixing, reducing the need to stop.
- Extra bowls: Useful if making multiple recipes at once.
- Pouring shield: Reduces mess when adding flour or liquids.
- Glass or stainless steel bowls: Each has pros and cons. Glass lets you see mixing; steel is lighter.
| Accessory | Benefit | When to Use |
|---|---|---|
| Flex edge beater | Less scraping | Sticky batters, frostings |
| Extra bowl | Save time | Multiple recipes |
| Pouring shield | Less mess | Dry or liquid additions |
Non-obvious insight: Some third-party accessories may not fit perfectly. Always buy from trusted brands or KitchenAid itself.
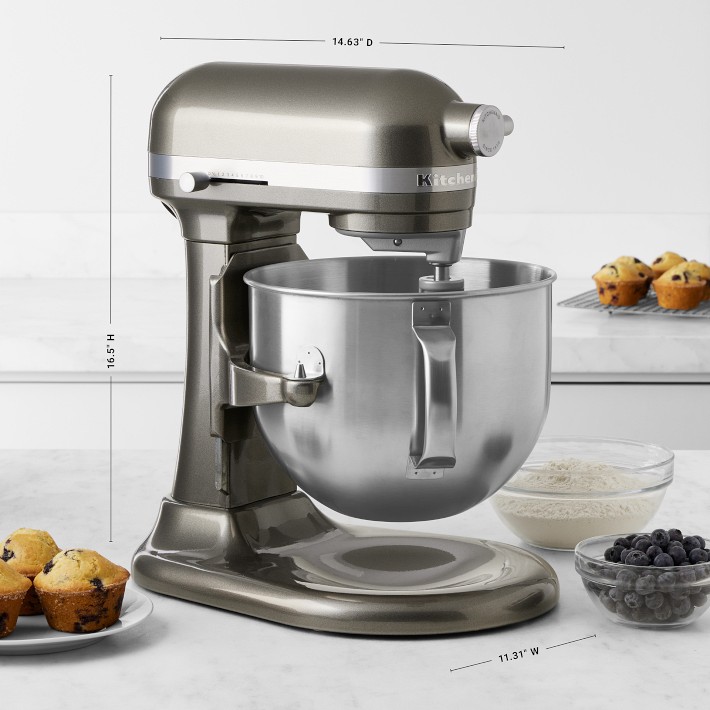
Credit: www.williams-sonoma.com
Kitchenaid Bowl Lift Mixer Vs. Other Brands
You may wonder if KitchenAid is worth the price, especially compared to other brands like Cuisinart, Hamilton Beach, or Bosch.
- Build quality: KitchenAid’s all-metal construction lasts for decades.
- Attachment options: Far more choices than other brands.
- Resale value: KitchenAid mixers hold value well.
- Service and support: Reliable warranty and part availability.
Some other brands offer similar features at a lower price, but often lack the power, durability, or attachment ecosystem.
External resource: For a deeper look at stand mixer comparisons, visit the Consumer Reports kitchen mixer guide.
Storage And Care
Because the bowl lift mixer is heavy, most people leave it on the counter. If you need to store it:
- Use a dust cover to keep it clean.
- Store attachments in a drawer or container.
- Wipe the mixer before and after storage.
Non-obvious tip: If you rarely use your mixer, run it once a month (empty) to keep the motor and gears lubricated.

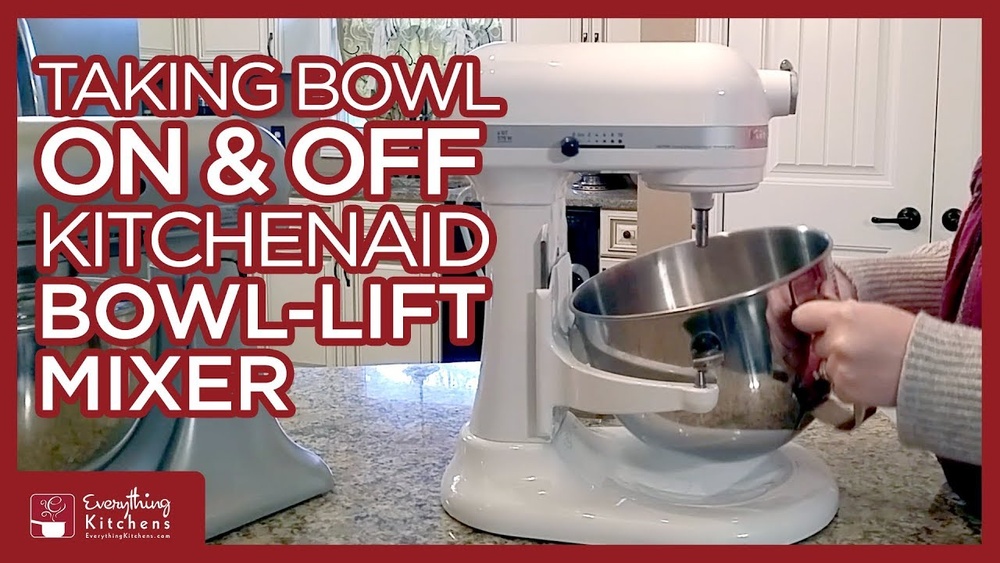
Credit: www.youtube.com
Making The Mixer Work For You
The KitchenAid Bowl Lift Stand Mixer is an investment. With practice, you’ll discover tricks for your style of cooking and baking.
- Try batch cooking: Make cookie dough, bread, or pizza in large batches, then freeze portions.
- Use the mixer for non-baking tasks: Shred cooked meats, mash potatoes, or make homemade butter.
- Explore new attachments: From ice cream makers to grain mills, your mixer can do more than you think.
For more ideas on creative kitchen uses, see our post on clever kitchen hacks.
Frequently Asked Questions
How Do I Know Which Attachment To Use?
Use the flat beater for most batters and cookies, the wire whip for cream and egg whites, and the dough hook for bread or pizza dough. The recipe usually tells you which one works best.
Can I Put The Bowl And Attachments In The Dishwasher?
Most stainless steel bowls and attachments are dishwasher safe, but always check your manual first. Some painted or coated beaters should be washed by hand to prevent chipping.
Why Is My Dough Not Mixing Evenly?
This often happens if the beater clearance is off or you’re using the wrong attachment. Adjust the screw under the mixer head, scrape the sides, and double-check you’re using the right tool for the job.
What Should I Do If The Mixer Starts Making Strange Noises?
Stop the mixer and unplug it. Check for loose attachments or bowl, clean any stuck ingredients, and make sure nothing is hitting the bowl. If noises continue, contact KitchenAid support.
Is It Normal For The Mixer To Get Warm During Use?
Yes, the motor can get warm, especially with heavy doughs or long mixing times. Allow the mixer to cool between batches to extend its life.
The KitchenAid Bowl Lift Stand Mixer is a reliable and versatile tool for any kitchen. With the right setup, care, and tips, you’ll enjoy years of baking, mixing, and exploring new recipes. Whether you’re a beginner or a seasoned baker, this mixer will help you create delicious food with less effort and more fun.