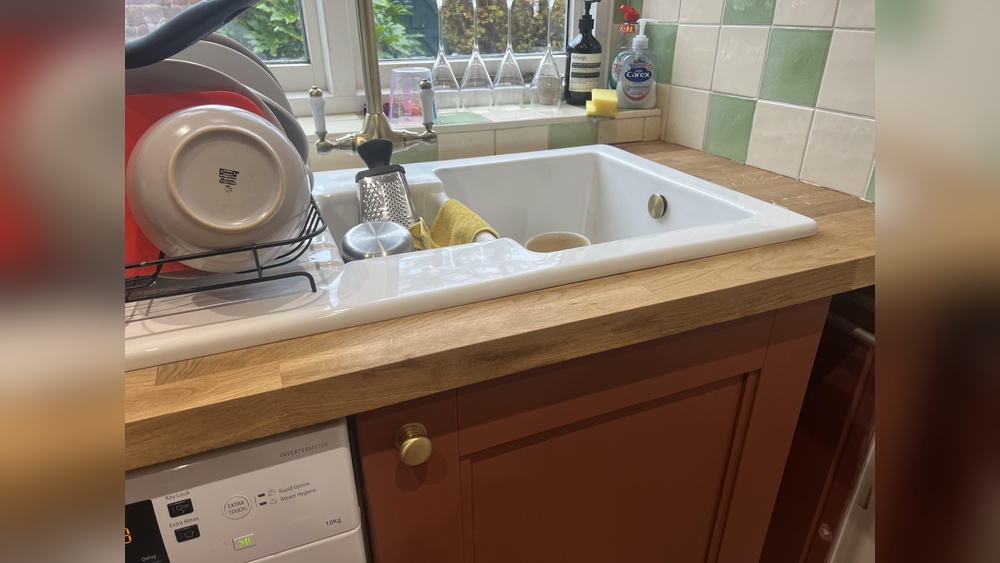
A leaking kitchen sink can cause many problems, from water stains to mold and even damage to your cabinets. Sealing your kitchen sink to the countertop is a simple project that protects your home and keeps your kitchen looking clean.
Many homeowners overlook this important step, but a good seal creates a barrier against water, dirt, and bacteria. Whether you are installing a new sink or fixing an old one, understanding the right way to seal the edges makes a huge difference.
This guide will walk you through every detail of how to seal a kitchen sink to a countertop. You do not need to be a professional plumber to do this job. With the right tools, materials, and techniques, you can get a neat, watertight finish that lasts for years. We will also cover common mistakes people make, expert tips for a better seal, and answers to the most common questions. Let’s dive in and make your kitchen sink both beautiful and functional.
Why Proper Sealing Matters
A kitchen sink is one of the most used areas in any home. Water splashes and spills are common, and even a small gap between the sink and the countertop can lead to big problems. Here are the main reasons why proper sealing is important:
- Prevents Water Damage: If water seeps under the sink rim, it can damage the cabinet, cause wood to rot, and lead to mold growth.
- Stops Mold and Mildew: Sealing keeps moisture out, making it harder for mold and mildew to grow in hidden areas.
- Keeps the Kitchen Clean: Gaps between the sink and countertop can trap food crumbs and bacteria.
- Improves Appearance: A smooth, sealed edge looks professional and neat.
- Protects Your Investment: Quality sealing extends the life of both your sink and countertop.
Types Of Kitchen Sinks And Countertops
Not all sinks and countertops are the same. The sealing process can change depending on the materials used. Understanding your setup helps you choose the best method and sealant.
Common Sink Materials
- Stainless Steel: Lightweight, durable, and popular in many homes.
- Porcelain: Heavy and classic, often used for farmhouse or vintage sinks.
- Composite Granite: Stylish and scratch-resistant, but heavier.
- Cast Iron: Very strong and heavy, often with an enamel coating.
Common Countertop Materials
- Laminate: Affordable and easy to cut but not as waterproof as others.
- Granite: Natural stone that is strong, but needs sealing.
- Quartz: Non-porous, durable, and resists staining.
- Solid Surface: Acrylic-based, seamless look, and easy to clean.
- Wood/Butcher Block: Beautiful but needs good sealing to avoid swelling.
Undermount Vs. Drop-in Sinks
- Drop-in Sinks: The rim sits on top of the countertop. The seal is visible around the edge.
- Undermount Sinks: The sink is attached under the countertop. The seal is hidden below the counter’s edge.
Each type needs its own sealing approach. Knowing your sink and counter helps you prepare better.
Tools And Materials You Will Need
Before you begin, gather all the tools and materials needed for a clean, easy job. Missing items can slow you down or lead to poor results.
Essential Tools
- Caulking gun: For applying sealant smoothly.
- Utility knife or razor blade: To remove old sealant and trim excess.
- Painter’s tape: For masking edges to get a straight line.
- Sponge or rag: For cleaning surfaces.
- Plastic scraper: To remove old residue without scratching.
- Gloves: Protect your hands from chemicals.
Materials
- Sealant: 100% silicone caulk is the best for most sinks and counters. Choose a color that matches your kitchen.
- Rubbing alcohol or mild cleaner: For cleaning surfaces before sealing.
- Paper towels: To wipe away messes.
- Bucket of warm water: For cleaning hands and tools.
Example Of A Tool And Material Table
| Tool/Material | Purpose | Tip |
|---|---|---|
| Caulking gun | Applies sealant evenly | Get a gun with a smooth trigger |
| Silicone caulk | Forms a waterproof seal | Choose kitchen-grade, mold-resistant |
| Painters tape | Makes a neat edge | Remove while caulk is wet |
| Rubbing alcohol | Cleans surfaces | Dries quickly |
Pro Tip: Some beginners forget to check caulk color. Clear caulk works for most countertops, but white or almond can match some sinks better.
Choosing The Right Sealant
Not all caulks are the same. Choosing the right sealant is key for a long-lasting, waterproof finish.
Silicone Vs. Acrylic Caulk
- Silicone caulk: Best for kitchens. It is flexible, waterproof, and resists mold. It can be hard to remove later but offers the best protection.
- Acrylic caulk: Easier to apply and clean but not as strong or waterproof. Not recommended for high-moisture areas like kitchen sinks.
Color And Type
- Choose a color that matches your sink or countertop for a clean look.
- Look for “kitchen and bath” or “mold-resistant” on the label.
Shelf Life
- Caulk can dry out in the tube. Check the date before buying or using.
Example Of Sealant Comparison
| Sealant Type | Waterproof | Mold Resistance | Best Use |
|---|---|---|---|
| Silicone | Yes | High | Kitchen sinks, baths |
| Acrylic | Low | Medium | Walls, low-moisture |
| Polyurethane | Yes | Medium | Outdoor, heavy-duty |
Insider Insight: Some brands offer hybrid sealants that combine silicone flexibility with easier cleanup. These can work, but pure silicone is still the top choice for most sinks.
Preparing The Sink And Countertop
Preparation is one of the most important steps. Rushing this part can lead to leaks and uneven lines.
Step 1: Clean The Area
Wipe the edge of the sink and the countertop with rubbing alcohol or a mild cleaner. Remove grease, food, and old caulk. Even a little dust can stop the sealant from sticking.
Step 2: Remove Old Caulk
If you are resealing, use a utility knife or plastic scraper to cut away old caulk. Be gentle to avoid scratching the countertop or sink.
- For stubborn caulk, a caulk remover gel can help.
- Wipe the area with a damp rag to remove all debris.
Step 3: Dry The Surfaces
Let the area dry completely. Moisture under new caulk can cause it to peel.
Step 4: Mask The Edges
Apply painter’s tape around the edge of the sink and the counter. Leave a thin gap where the caulk will go. This helps you get a straight, professional-looking edge.
Extra Tip: Overlooking cleaning is a common beginner mistake. Even invisible oils can cause caulk to lift after a few weeks.
How To Seal A Kitchen Sink To A Countertop: Step-by-step Guide
Now you are ready for the main event. Follow these steps for a strong, clean seal.
Step 1: Load The Caulk
Cut the tip of the silicone caulk tube at a 45-degree angle. Start with a small hole; you can always cut more if needed. Place the tube in the caulking gun.
- Poke a wire or nail into the nozzle if the tube is sealed inside.
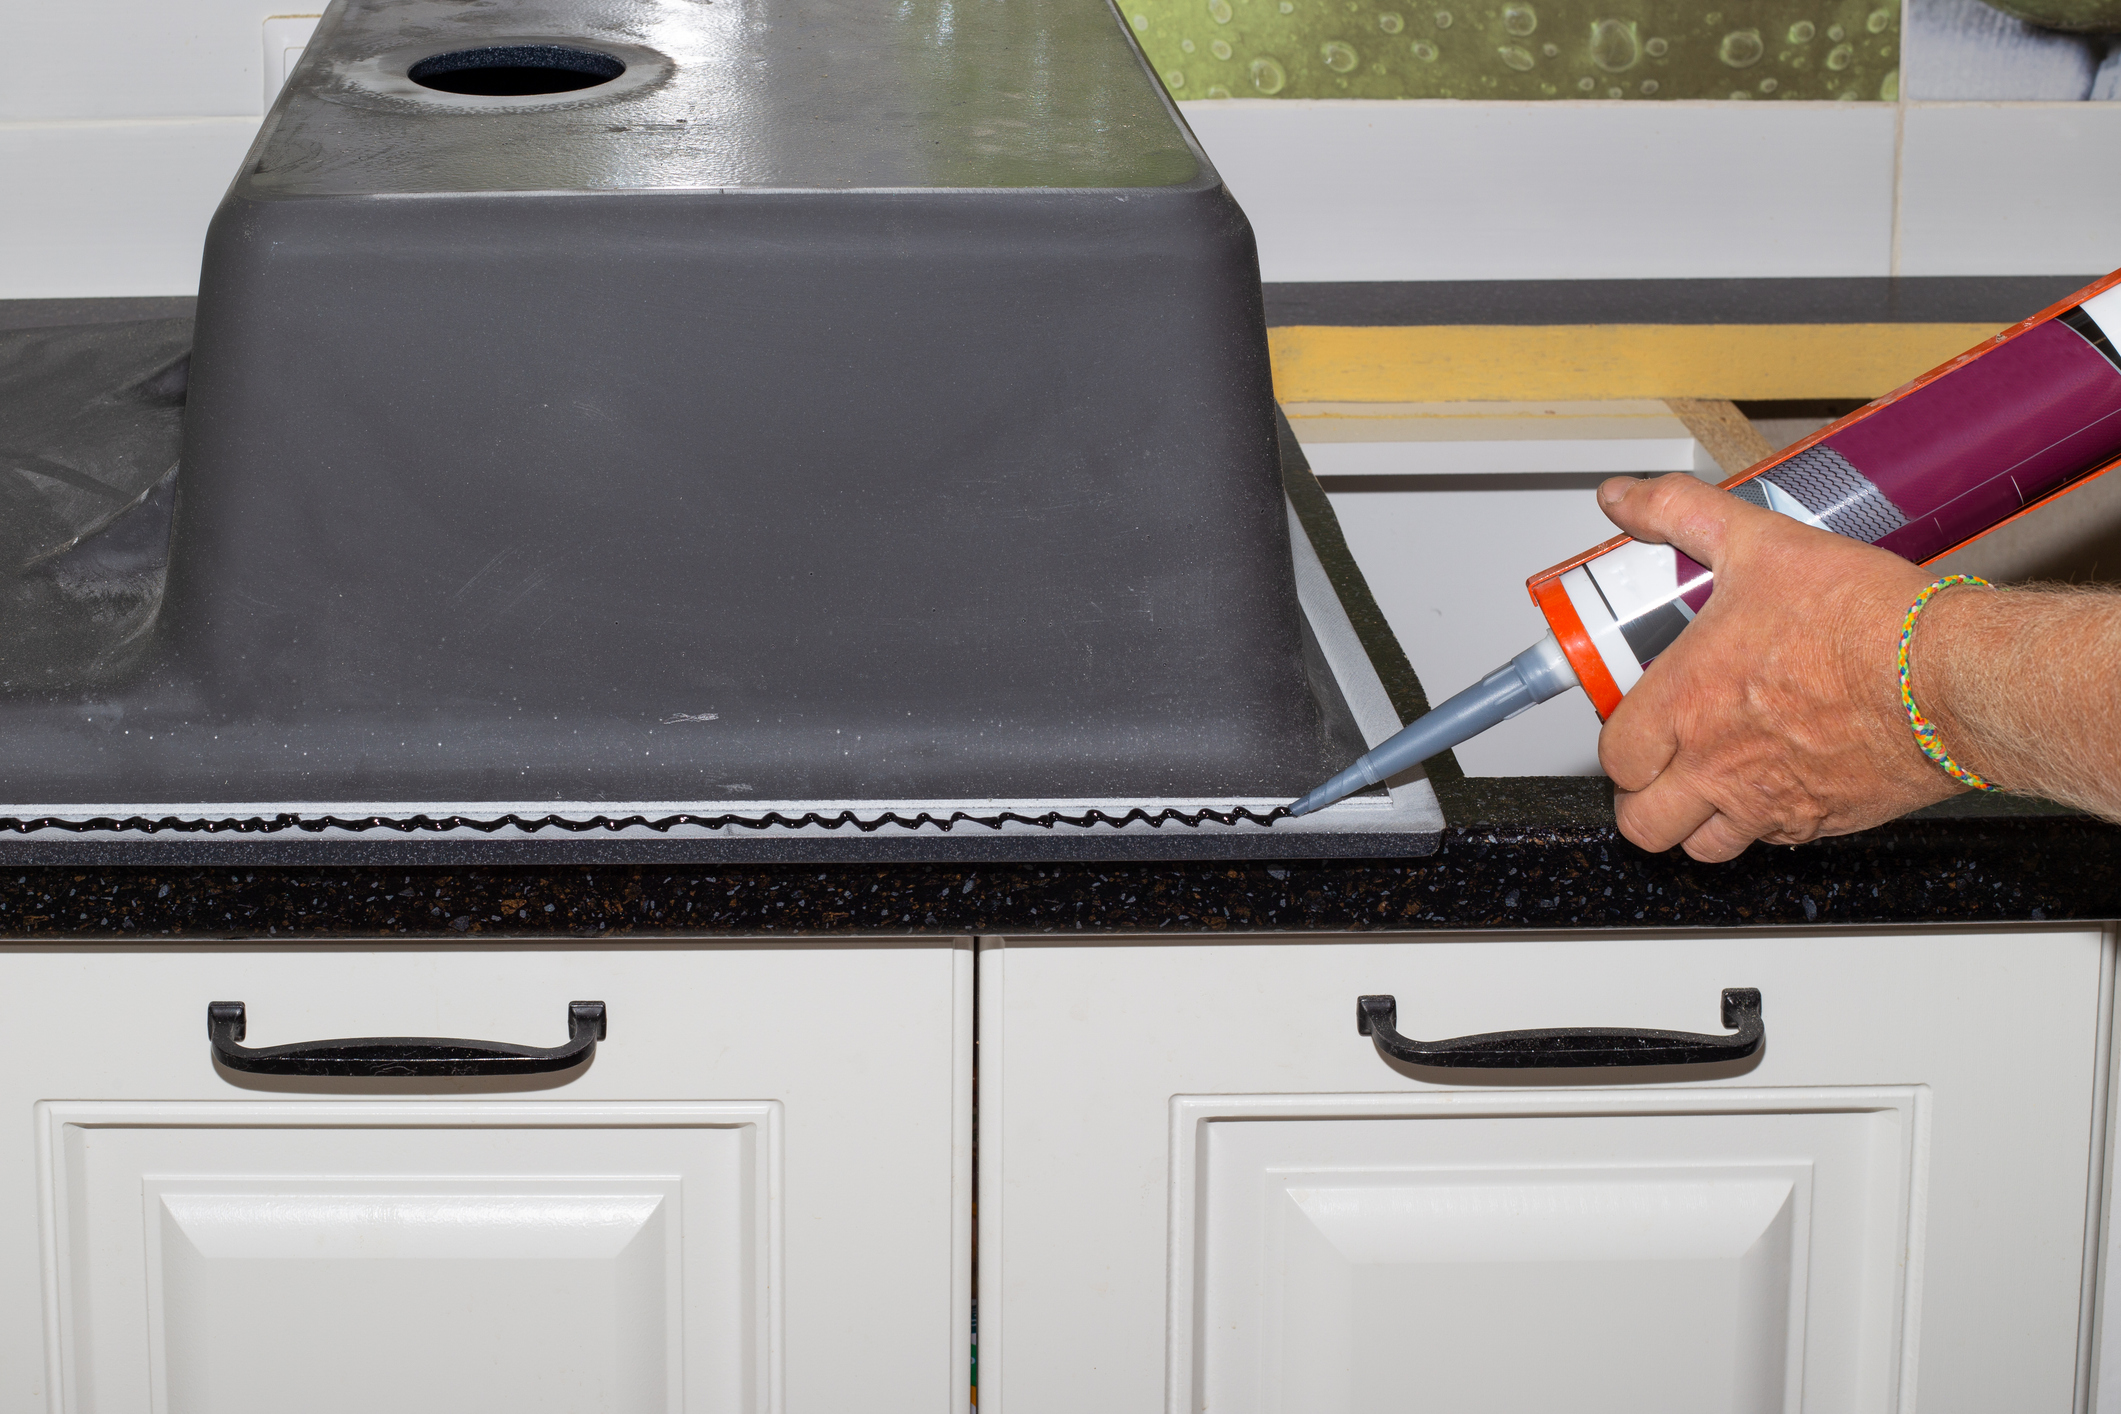
Step 2: Apply The Caulk
Hold the gun at a 45-degree angle. Squeeze the trigger gently and move slowly along the seam between the sink and countertop. Aim for a smooth, even bead.
- For drop-in sinks, apply caulk where the rim meets the counter.
- For undermount sinks, caulk under the edge where the sink meets the stone or solid surface.
Don’t rush. A steady hand makes a better seal.
Step 3: Smooth The Bead
Wet your finger or use a caulk-smoothing tool. Gently run along the bead to press the caulk into the gap and shape it. This step helps seal any small holes and gives a neat finish.
- Wipe away excess with a damp paper towel.
- Remove painter’s tape before the caulk starts to skin over (within 5–10 minutes).
Step 4: Let It Cure
Leave the caulk undisturbed for the time shown on the package (usually 24 hours). Do not use the sink or get it wet during this time.
- Opening windows can help reduce odor and speed drying.
Step 5: Check The Seal
After curing, inspect the seal for gaps or holes. If you see any, add a little more caulk and smooth it again. A continuous bead is important for water resistance.
Extra Insight: Some people make the mistake of applying too much caulk. More is not always better—excess caulk is messy and takes longer to cure.

Credit: www.leftonhome.com
Special Tips For Different Sink Types
Every sink type has its own small differences. Here’s what to watch for:
Drop-in Sinks
- Press the sink down into the fresh caulk bead, then wipe away any caulk that squeezes out.
- Some drop-in sinks have clips underneath—tighten these after the caulk is applied.
Undermount Sinks
- Use supports (like 2x4s) to hold the sink in place while caulk cures.
- Apply caulk to both the rim of the sink and the underside of the countertop for a double seal.
Stainless Steel Sinks
- Stainless steel is light, so it can move. Make sure the caulk bead is continuous, and check for movement before curing.
Heavy Sinks (cast Iron Or Stone)
- You may need help lifting and holding the sink.
- Make sure all edges are level before the caulk cures.
Practical Example: For a granite countertop and undermount sink, use clear silicone. Tape the granite edge carefully to avoid a messy line.
Common Mistakes And How To Avoid Them
Many people make the same errors. Avoiding these will save you time and hassle.
- Not Cleaning Properly: Oils and dust stop caulk from sticking.
- Using the Wrong Caulk: Only use kitchen-grade, waterproof silicone.
- Applying Too Much or Too Little: A thin, even bead works best.
- Waiting Too Long to Smooth: Caulk starts to skin over quickly. Smooth within minutes.
- Not Letting It Cure: Using the sink too soon can ruin your work.
- Missing Spots: Even a tiny gap can let water through.
Unexpected Insight: Some homeowners try to use plumber’s putty instead of silicone. Putty is good for sealing drains but not for the rim of the sink—it can dry out and crack.
Credit: siliconedepot.com
Maintaining The Seal For Years
A good seal lasts many years, but a few simple habits can make it last even longer.
- Wipe spills quickly: Standing water weakens caulk over time.
- Clean gently: Use a soft sponge, not harsh scrubbers, on the caulk line.
- Inspect every few months: Look for cracks, mold, or peeling.
- Fix small problems fast: Add a bit of new caulk if you spot a gap.
Interesting Fact: Most kitchen sink seals last 5–10 years with proper care. Reseal if you see black spots (mold) or gaps.
When To Call A Professional
Most homeowners can seal a kitchen sink themselves. But sometimes, it makes sense to call a pro:
- If you see water damage under the sink.
- If the sink is very heavy or hard to move.
- If the gap is very large or uneven.
- If you have expensive countertops (like marble) and want a perfect finish.
A professional can also help if you are not comfortable using tools or working with chemicals.
Cost And Time Estimates
Sealing a kitchen sink is an affordable project. Here’s what to expect:
Time Needed
- Preparation: 30–45 minutes (includes removing old caulk)
- Application: 15–30 minutes
- Curing: 24 hours (no work, just wait)
Cost Breakdown
| Item | Estimated Cost (USD) | Lifespan |
|---|---|---|
| Silicone caulk (1 tube) | $7–$12 | 5–10 years |
| Caulking gun | $10–$20 | Reusable |
| Painters tape | $3–$6 | One-time |
| Total Project | $20–$40 | – |
Professional installation usually costs $100–$200 for labor, especially for undermount sinks or stone counters.
Sealing A New Sink Vs. Resealing An Old One
The steps are very similar, but here are the main differences:
Sealing A New Sink
- Surfaces are clean and free of old caulk.
- Focus on aligning the sink perfectly before sealing.
- You can choose the best color caulk to match your new setup.
Resealing An Old Sink
- You must remove all old caulk and clean the surfaces well.
- Look for signs of water damage before sealing.
- If you see mold, clean with a bleach solution before resealing.
Extra Tip: Always check under the sink for leaks after sealing and using the sink for a few days.
Eco-friendly And Health Considerations
Some caulks release strong odors or chemicals. Here’s how to keep your kitchen safe:
- Choose low-VOC (volatile organic compound) silicone caulks when possible.
- Open windows and use fans while working.
- Wear gloves to avoid skin irritation.
Some kitchen caulks are labeled “food safe. ” These are good for homes with small children or if you want extra peace of mind.
Troubleshooting: What If Something Goes Wrong?
Sometimes, even after careful work, problems happen. Here’s what to do:
- Sealant won’t stick: Clean the area again and dry it fully. Try a different brand.
- Caulk looks uneven: Scrape off while wet and reapply.
- Mold appears quickly: Use a bleach solution, let dry, and re-caulk with a mold-resistant product.
- Gap is too big: Fill with a backer rod (foam rope) before caulking.
If you notice a persistent leak, double-check both the drain and the rim seal.
Additional Resources And Learning
If you want to see a video or get step-by-step visuals, many home improvement sites and YouTube channels have excellent tutorials. For more technical details, check out the official guidance from Family Handyman.
For those wanting to learn more about kitchen upgrades, check the internal guide on choosing a kitchen faucet for more related information.
Frequently Asked Questions
How Long Does Silicone Caulk Take To Cure?
Most kitchen-grade silicone caulks need about 24 hours to cure completely. Some fast-dry formulas may be ready in 6–12 hours. Always check the label for exact times. Avoid using the sink until the caulk is fully cured.
Can I Use Plumber’s Putty To Seal A Kitchen Sink?
Plumber’s putty is good for sealing sink drains but not for sealing the rim of the sink to the countertop. It can dry out, crack, and does not provide a waterproof, flexible seal like silicone caulk.
How Often Should I Reseal My Kitchen Sink?
Usually, a high-quality silicone seal lasts 5–10 years. You may need to reseal sooner if you see cracks, gaps, or mold. Regular inspection helps you catch problems early.
What Is The Best Way To Remove Old Caulk?
Use a utility knife or a special caulk removal tool to cut and lift old caulk. For stubborn spots, try a caulk remover gel. Clean with rubbing alcohol before applying new caulk.
Is Sealing Different For Undermount And Drop-in Sinks?
Yes, the main difference is where you apply the sealant. For drop-in sinks, seal along the top rim; for undermount sinks, seal under the countertop edge. The technique and materials are mostly the same, but the application area changes.
Sealing your kitchen sink to the countertop is an easy project that pays off with years of protection. With the right tools, materials, and a little patience, you’ll enjoy a cleaner, safer, and better-looking kitchen.

Credit: www.youtube.com