A kitchen sink that won’t drain is more than an inconvenience—it can disrupt your whole day. Water pooling in the basin, foul smells, and dishes piling up can make any kitchen feel out of control. But draining a kitchen sink effectively is not just about unclogging.
It’s about understanding the causes, using the right tools, and applying proven techniques to keep your plumbing healthy. Whether you’re dealing with a slow drain or a complete blockage, you can tackle the issue with confidence and prevent it from happening again.
This guide will walk you through everything you need to know, from simple fixes to expert advice, so you can enjoy a clean, free-flowing sink every day.
Why Draining Your Kitchen Sink Matters
A well-drained sink is more than just clean—it’s essential for hygiene, convenience, and even the health of your home. When water stands in the sink, bacteria and odors can quickly develop. Over time, blocked pipes may cause leaks, mold, or even structural damage. According to the Environmental Protection Agency (EPA), about 10% of American homes have leaks that waste 90 gallons or more per day, often made worse by poor drainage. Taking control of your sink drainage now can help you avoid costly repairs and keep your kitchen inviting.
Common Causes Of Kitchen Sink Drain Problems
Understanding why kitchen sinks get blocked helps you fix them faster and prevent future issues. Here are the main culprits:
- Food waste: Leftover rice, pasta, coffee grounds, and eggshells can easily clog pipes.
- Grease and fat: Pouring oil or fat down the drain hardens inside pipes, causing stubborn blockages.
- Soap scum: Soap, especially bar soap, can combine with minerals to form a sticky residue.
- Foreign objects: Small items like utensils, bottle caps, or even kids’ toys may slip down the drain unnoticed.
- Mineral buildup: Hard water leaves mineral deposits, narrowing pipes over time.
- Improper installation: Poorly fitted pipes or old plumbing can lead to regular drainage problems.
Knowing the root cause saves time and helps you choose the right solution.
Essential Tools For Draining A Kitchen Sink
Before you start, gather the right tools. Having them on hand makes the job quicker and safer.
- Plunger: The classic sink plunger creates suction to dislodge clogs.
- Plumbing snake (drain auger): Reaches deep clogs that plungers can’t move.
- Bucket: Catches water when you open pipes.
- Adjustable wrench: Opens pipe joints under the sink.
- Flashlight: Helps you see inside cabinets or pipes.
- Rubber gloves: Protect your hands from dirty water and sharp objects.
- Baking soda and vinegar: Natural cleaners to clear minor clogs.
If you have a garbage disposal, keep the manufacturer’s manual nearby for safe troubleshooting.
Step-by-step Methods To Drain Your Kitchen Sink
Let’s break down the most effective ways to drain a kitchen sink, from the simplest to the most advanced. Start with the easiest method and work your way up until the water flows freely.
1. Remove Standing Water
Before working, clear out as much water as possible. Use a cup, bowl, or small container to scoop water into a bucket. This keeps your workspace tidy and prevents spills.
2. Check And Clear The Drain Stopper
Often, a clogged or misaligned stopper blocks water. Remove the stopper and clean off any debris or food particles. Rinse it well before replacing. If the water starts draining, you’ve solved the problem.
3. Use Boiling Water
Boiling water is a simple but powerful solution. Pour a full kettle of hot water directly into the drain. This melts greasy buildup and dislodges minor clogs. Wait a few minutes and repeat if needed. Be careful not to use boiling water with PVC pipes, as extreme heat can damage them.
4. Plunge The Sink
If boiling water doesn’t work, try a plunger:
- Fill the sink with a few inches of warm water (enough to cover the plunger cup).
- Place the plunger over the drain, making sure it seals tightly.
- Push down and pull up rapidly 10–15 times.
- Remove the plunger and check if the water drains.
If you have a double sink, block the other drain with a wet cloth to focus suction.
5. Use Baking Soda And Vinegar
This natural method is great for mild blockages:
- Pour 1/2 cup of baking soda into the drain.
- Add 1 cup of white vinegar.
- Cover the drain with a plug and wait 10–15 minutes.
- Pour hot water to flush the mixture and any loosened debris.
This method also helps to reduce odors.
6. Try A Drain Snake Or Auger
For tougher clogs, a drain snake is very effective:
- Insert the tip of the snake into the drain and push until you feel resistance.
- Turn the handle to break up or hook the blockage.
- Pull out the snake, removing debris with it.
- Run water to check if the blockage is gone.
Drain snakes can reach deep into pipes where other methods fail.
7. Clean The P-trap
If the sink still doesn’t drain, the clog may be in the P-trap (the curved pipe under the sink):
- Place a bucket under the P-trap to catch water.
- Use a wrench to loosen the slip nuts holding the trap.
- Remove the P-trap and clear out debris by hand or with a brush.
- Rinse the trap with water before reattaching.
Always check for leaks after reassembling.
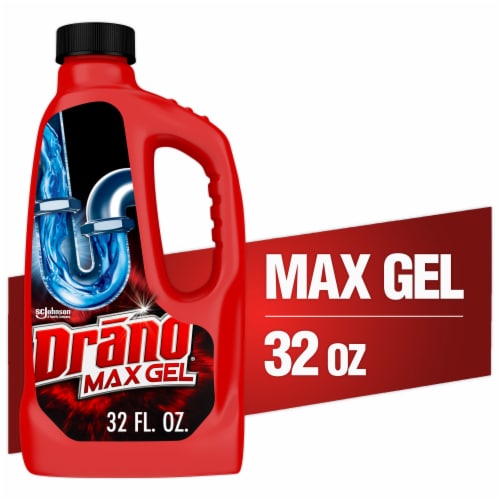
8. Use Chemical Drain Cleaners (with Caution)
Chemical cleaners can clear stubborn blockages, but they can also damage pipes and harm the environment. Use only as a last resort, and follow instructions carefully. Never mix different chemicals, and ventilate the area.
9. Check The Garbage Disposal
If your sink has a garbage disposal, the problem may be there:
- Turn off the power at the breaker.
- Look inside the disposal for blockages and remove them with tongs or pliers.
- Press the reset button on the bottom of the unit.
- Restore power and test the sink.
Avoid using your hands inside the disposal.
10. Inspect The Main Drain Line
If none of the above works, the issue might be in your main drain line. This is more common in older homes or after heavy use. You may need to use a longer auger or call a professional plumber.
Comparing Kitchen Sink Drainage Methods
To help you choose the right solution, here’s a comparison of the most common drainage methods:
| Method | Best For | Time Needed | Cost | Effectiveness |
|---|---|---|---|---|
| Boiling Water | Grease, minor clogs | 5–10 minutes | Low | Moderate |
| Plunger | Food debris, shallow clogs | 10–15 minutes | Low | High |
| Baking Soda & Vinegar | Odor, light buildup | 20–30 minutes | Low | Moderate |
| Drain Snake | Deep or stubborn clogs | 15–30 minutes | Medium | High |
| Chemical Cleaner | Severe clogs | 30–60 minutes | Medium–High | Very High (with risk) |
Non-obvious insight: Many people skip checking the P-trap, but more than 60% of kitchen clogs happen there. Cleaning it is usually faster and cheaper than using chemicals or calling a plumber.
Preventing Future Drain Blockages
Prevention is always easier than fixing a clog. Here’s how to keep your kitchen sink draining smoothly:
- Dispose of food waste properly: Scrape plates into the trash before rinsing.
- Don’t pour grease down the drain: Let it cool and throw it in the trash.
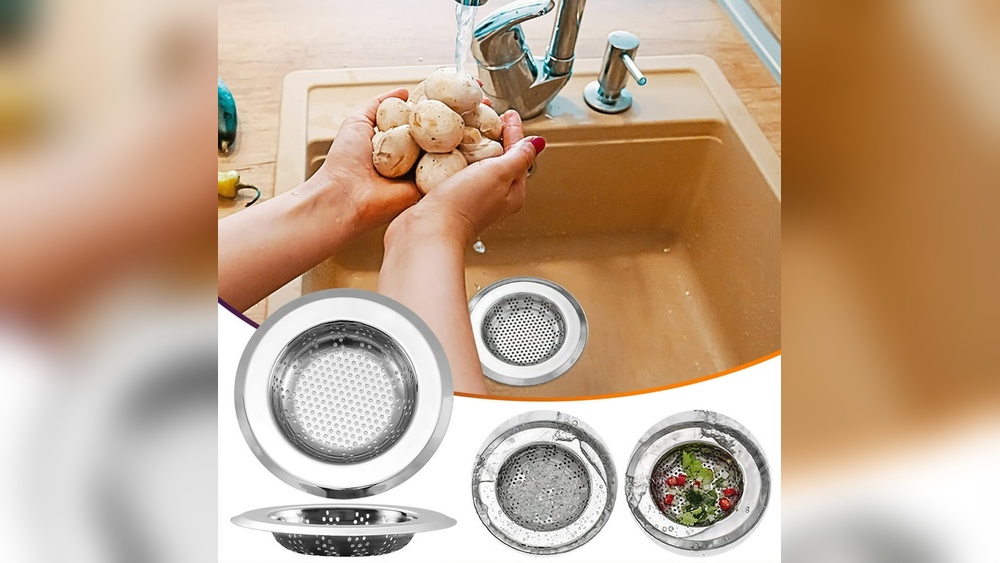
- Use a drain strainer: Catch food scraps and debris before they enter the pipes.
- Run hot water after use: Helps flush away minor buildup.
- Clean the P-trap regularly: Every few months, take it apart and rinse it out.
- Limit use of the garbage disposal: Avoid fibrous foods (like celery) and bones.
- Flush with baking soda and vinegar monthly: Prevents odor and buildup.
A little attention now can save hours of frustration later.
When To Call A Professional Plumber
Some situations are best left to experts. Call a plumber if:
- The clog is deep or keeps coming back.
- Water backs up into other sinks or drains.
- There’s a bad smell you can’t remove.
- Pipes are leaking or you see water damage.
- You hear gurgling sounds from the drain (a sign of venting problems).
Non-obvious insight: Ignoring repeated clogs may signal a bigger problem, like tree roots in the main sewer line. Early action prevents expensive repairs.
Safety Tips For Draining Your Kitchen Sink
Working with plumbing can be messy and sometimes risky. Follow these safety guidelines:
- Wear rubber gloves to protect against germs and chemicals.
- Never mix chemical cleaners—they can produce dangerous fumes.
- Use a flashlight to check for sharp objects before reaching in.
- Always disconnect power before working on garbage disposals.
- Keep small children and pets away from the work area.
If you’re unsure at any step, it’s safer to pause and ask for help.
Troubleshooting Persistent Drainage Problems
If your kitchen sink still won’t drain after trying every method, take a closer look at these possibilities:
- Ventilation issues: Kitchen sinks need proper venting to avoid airlocks. Blocked or broken vents can stop water from draining.
- Old or corroded pipes: Pipes over 30 years old may be too narrow or rough inside, catching debris more easily.
- Sewer line blockages: If other drains in your home are also slow, the main sewer line could be clogged.
Here’s a quick comparison of trouble signs and what they might mean:
| Symptom | Possible Cause | DIY Fix? | Call a Plumber? |
|---|---|---|---|
| One sink slow | Local blockage (P-trap or drain) | Yes | No |
| Multiple drains slow | Main line clog | No | Yes |
| Bad odor, water not moving | Deep clog or vent problem | Sometimes | Usually |
| Gurgling sounds | Ventilation problem | No | Yes |
Eco-friendly Tips For Sink Drainage
Protecting the environment while keeping your sink clear is possible:
- Choose enzyme-based drain cleaners instead of harsh chemicals. These use natural bacteria to break down clogs.
- Compost food scraps instead of washing them down the sink.
- Use minimal water when rinsing dishes.
- Install a water-efficient faucet to reduce overall water usage.
For more on eco-friendly home solutions, check out the official site of the EPA WaterSense program.

Credit: www.amazon.com
Kitchen Sink Drainage For Different Sink Types
Not all kitchen sinks are the same. Here’s how drainage may differ based on the type:
Stainless Steel Sinks
Most common in modern kitchens, they’re durable and easy to clean. However, avoid using harsh chemicals, which can stain or corrode the finish.
Porcelain Sinks
These are more delicate. Avoid boiling water or chemical cleaners, as they can crack or discolor the surface.
Farmhouse (apron) Sinks
These often have larger, deeper basins. Use a larger plunger or longer drain snake if needed.
Double Sinks
Always plug one side when plunging the other. Double sinks often share a P-trap, so a clog can affect both sides.
Sinks With Garbage Disposals
Always disconnect power before any maintenance. Use only cold water when running the disposal to keep grease solid and easier to flush away.
Mistakes To Avoid When Draining Your Kitchen Sink
Even experienced homeowners make these common mistakes:
- Pouring boiling water down plastic pipes (risk of melting).
- Using too much force with a plunger (can damage seals).
- Overusing chemical cleaners (can harm pipes and septic systems).
- Forgetting to check the garbage disposal before using other methods.
- Ignoring small leaks after reassembling the P-trap.
Always read your plumbing’s manual and take your time.

Credit: www.youtube.com
Real-life Example: Fixing A Stubborn Kitchen Sink Clog
Maria, a homeowner in Texas, faced a blocked kitchen sink. First, she tried boiling water, but nothing happened. Next, she plunged the sink, but the water stayed. Maria then used baking soda and vinegar, which fizzed but didn’t clear the clog.
Frustrated, she finally removed the P-trap and found it packed with food scraps. After cleaning it and reattaching the pipe, her sink drained instantly. Her story shows that sometimes, the simplest mechanical fix is the most effective.
How To Keep Your Kitchen Sink Draining Smoothly All Year
Consistency is key. Every month, do a simple checkup:
- Run hot water after every meal cleanup.
- Use baking soda and vinegar as a preventive measure.
- Inspect under the sink for leaks or drips.
- Clean the drain strainer and stopper weekly.
If you notice slow drainage, act quickly—don’t wait for a full blockage.
Internal Resource For Further Reading
Looking for more home maintenance tips? See our guide on kitchen cleaning essentials for practical strategies that keep your entire kitchen spotless.
Frequently Asked Questions
How Often Should I Clean The P-trap Under My Kitchen Sink?
For most homes, cleaning the P-trap every three to six months is enough. If you cook often or notice slow drainage, check it more frequently to prevent buildup.
Is It Safe To Use Chemical Drain Cleaners?
Chemical cleaners can work, but they may harm older pipes and the environment. Try natural solutions first, like baking soda and vinegar. If you use chemicals, follow the instructions and never mix different brands.
What Should I Do If Water Backs Up Into Other Drains?
If water from your kitchen sink shows up in the bathroom or laundry room, you may have a main line blockage. This is a job for a professional plumber, as it can affect your whole home’s plumbing.
Can I Use A Plunger On A Double Sink?
Yes, but you should plug one drain tightly while plunging the other. This keeps the pressure focused and improves your chances of clearing the clog.
What Foods Should I Avoid Putting Down The Drain?
Avoid washing down grease, coffee grounds, pasta, rice, eggshells, and fibrous vegetables like celery. These are common causes of kitchen clogs and can build up quickly.
Draining your kitchen sink effectively is about more than just clearing a blockage—it’s about prevention, smart techniques, and knowing when to call for help. With the right approach, you’ll keep your kitchen running smoothly and avoid costly repairs. Start with simple solutions, use the right tools, and make regular maintenance a habit.
Your sink (and your sanity) will thank you.
Credit: www.fredmeyer.com