If you own a KitchenAid mixer, you probably use it often for baking, cooking, or even making homemade pasta. But sometimes, a simple task like removing the bowl from your mixer can become confusing or frustrating—especially if it feels stuck or if you’re new to using stand mixers. Understanding the right way to detach the bowl is important not just for convenience, but also to avoid damaging your mixer or its accessories.
This guide explains, in simple and clear steps, how to remove the bowl from different KitchenAid mixer models. You’ll also learn why bowls can get stuck, how to safely clean and maintain them, and what to do if things go wrong.
Whether you have a tilt-head or bowl-lift model, you’ll find all the tips you need here. Plus, we share important maintenance advice, hidden insights most beginners miss, and real-world examples to make things easy. By the end, you’ll handle your KitchenAid mixer confidently, every time.
Understanding Kitchenaid Mixer Types
Before you remove the bowl, it’s important to know which type of mixer you have. KitchenAid mixers mainly come in two designs: tilt-head and bowl-lift. Each model uses a different way to attach and remove the bowl.
Tilt-head Mixers
Tilt-head mixers are popular for home kitchens. The top of the mixer tilts back, letting you access the bowl and attachments easily. The bowl sits on a round base and locks with a simple twist.
Key features:
- The head tilts back for access
- The bowl locks on the base with a twist
- Usually 4.5 to 5-quart sizes
Bowl-lift Mixers
Bowl-lift mixers are larger and stronger, made for heavy-duty mixing. The bowl sits between two arms and lifts up with a lever.
Key features:
- The head does not move
- The bowl attaches to side arms with two pins
- A lever moves the bowl up and down
- Bowls are usually 5 to 7 quarts or more
Why Model Type Matters
The removal method is different for each type. If you try to pull a bowl out the wrong way, you may damage the mixer or hurt yourself. Always check your mixer’s manual or look for the model number (usually under the base or on the side).
How To Remove The Bowl From A Tilt-head Kitchenaid Mixer
If you have a tilt-head model, removing the bowl is usually simple. But if it’s your first time, or if the bowl is stuck, these steps will help.
Step-by-step Guide
- Unplug the Mixer
- Always unplug the mixer before removing the bowl. This prevents accidental starts and keeps you safe.
- Remove Any Attachments
- If you have a beater, whisk, or dough hook attached, remove it first. Hold the attachment, push up slightly, and turn it counterclockwise to unlock and pull it off.
- Tilt the Head Back
- Find the tilt lever (usually on the left side). Push it to unlock and lift the mixer head back. This gives you space to reach the bowl.
- Unlock the Bowl
- Hold the bowl with both hands. Turn the bowl counterclockwise (to the left) to unlock it from the base. You may feel it loosen suddenly.
- Lift the Bowl Out
- Once the bowl is unlocked, lift it straight up and out of the base.
Pro Tip: Sometimes, dried dough or batter can make the bowl stick. Wiggle the bowl gently side to side as you twist. Don’t force it—if it won’t move, see the stuck bowl section below.
Common Beginner Mistakes
- Forgetting to remove the attachment first can block the bowl from coming out.
- Trying to lift the bowl without twisting can damage the locking tabs.
- Forcing the bowl if it feels stuck (see below for solutions).
How To Remove The Bowl From A Bowl-lift Kitchenaid Mixer
Bowl-lift mixers are built to handle larger batches and heavy doughs, but their bowl system is a bit different.
Step-by-step Guide
- Unplug the Mixer
- Safety first: Unplug the mixer before handling the bowl.
- Lower the Bowl
- Find the lever on the side of the mixer. Move it down to lower the bowl to its lowest position.
- Remove Any Attachments
- Take off the beater, whisk, or hook. Push up slightly and turn to unlock, then pull off.
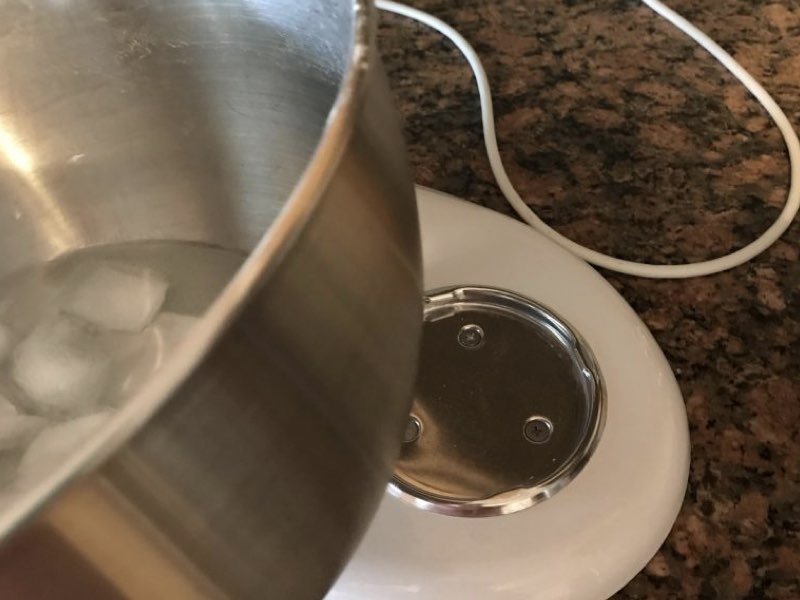
- Detach the Bowl from the Pins
- Hold the bowl handles. Push the bowl down slightly to free the bowl from the pins on each side.
- Pull the bowl slightly outward (toward you) until it clears the side arms.
- Lift the Bowl Away
- Once the bowl is free from the pins, lift it up and away from the mixer.
Tip: If the bowl feels stuck on one side, check that both pins are clear. Sometimes batter or dough gets into the grooves, making it harder to remove.
What To Avoid
- Don’t force the bowl if it feels stuck; check for dried food or debris.
- Never try to remove the bowl with the lift lever in the “up” position.
How To Remove A Stuck Kitchenaid Mixer Bowl
A stuck bowl can be frustrating. This problem is more common than you might think, especially if dough has dried around the base or the bowl hasn’t been removed in a long time.
Reasons Your Bowl Might Stick
- Dried batter or dough: This acts like glue, especially if not cleaned right away.
- Over-tightening: Locking the bowl too firmly can make removal harder.
- Misalignment: The bowl wasn’t properly seated before, causing it to jam.
- Corrosion: Moisture under the bowl can cause rust, especially with metal bases.
Easy Solutions For A Stuck Bowl
- Add Warm Water
- Pour a small amount of warm water around the bowl’s base. Wait a few minutes for dried batter to soften.
- Use a Soft Cloth
- Place a damp, warm cloth around the base. The heat can help loosen stuck-on food.
- Gently Wiggle
- Hold the bowl firmly and gently wiggle side to side while twisting counterclockwise (for tilt-head) or pulling down/outward (for bowl-lift).
- Apply Light Cooking Oil
- If you suspect rust, a drop of cooking oil around the base pins may help. Don’t use too much.
- Avoid Tools
- Never use metal tools or hammers; this can damage the mixer or bowl.
Advanced Tip: For severe cases (especially with older mixers), let the bowl soak in warm, soapy water overnight (if possible). If it still won’t budge, contact KitchenAid support for advice.
What Beginners Miss
Many people think a stuck bowl means the mixer is broken, but usually, it just needs cleaning or a gentle touch. Also, if you always lock the bowl too tightly, it’s more likely to get stuck next time.
Cleaning And Maintaining Your Kitchenaid Mixer Bowl
Proper cleaning and care keep your bowl easy to remove and help your mixer last longer. A well-maintained bowl is less likely to get stuck or develop odors.
Best Practices For Cleaning
- Wash after every use: Don’t let batter or dough dry on the bowl.
- Use warm, soapy water: Most KitchenAid bowls are stainless steel or glass. They can be cleaned with dish soap and a soft sponge.
- Dry thoroughly: Wipe the bowl dry to prevent rust or water spots.
- Check the base and pins: Clean the area where the bowl attaches. Food can hide in small crevices.
Are Kitchenaid Bowls Dishwasher Safe?
Most metal and glass bowls are dishwasher safe, but check your manual. Some special finishes (like ceramic) may need hand washing.
Removing Stubborn Stains Or Odors
If your bowl has sticky spots or odors:
- Soak with baking soda and water for 15–30 minutes.
- Scrub with a soft brush; avoid steel wool.
- Rinse thoroughly.
Pro Tip: For glass bowls, never use sharp objects to scrape off dried batter—this can scratch the glass.
Comparing Bowl Types: Which Is Easier To Remove?
Many users wonder if one model is easier than another when it comes to removing the bowl. Here’s a quick comparison of common KitchenAid bowl types:
| Bowl Type | Ease of Removal | Common Problems |
|---|---|---|
| Tilt-Head (Metal) | Easy (twist & lift) | Can stick with dried batter |
| Tilt-Head (Glass) | Moderate (heavier, fragile) | Can chip if dropped |
| Bowl-Lift (Metal) | Moderate (must align pins) | Sticks if pins dirty |
| Bowl-Lift (Glass) | Harder (heavy & fragile) | More risk of breakage |
Key Insight: Glass bowls are beautiful but heavier and more fragile. Always use two hands and never force them.
Safety Tips When Handling Kitchenaid Mixer Bowls
Removing and cleaning the bowl seems simple, but it’s easy to overlook safety, especially if you’re in a hurry.
Essential Safety Steps
- Always unplug: Even if you’re just removing the bowl.
- Remove attachments first: Prevents injuries and makes the bowl easier to handle.
- Use two hands: Especially with glass bowls or when the bowl is full.
- Don’t use sharp tools: To pry a stuck bowl—this can cause serious injury.
When To Call For Help
If you can’t remove the bowl after trying all the steps above, or if you see damage (cracks, bent pins, broken base), stop and contact KitchenAid support or a qualified repair center.
Real-world Examples: Removing The Bowl In Different Scenarios
Sometimes, you might be dealing with special situations—like removing the bowl while dough is still inside, or when the mixer is covered in flour. Let’s look at some examples.
Example 1: Removing The Bowl With Dough Inside
If you need to take out the bowl but the dough is sticky and heavy, it’s best to:
- Lower or tilt the head (depending on model)
- Use a silicone spatula to scrape dough from the sides
- Remove the attachment first
- Lift the bowl slowly, supporting the weight
Example 2: Removing The Bowl When Covered In Flour
Dry ingredients can make surfaces slippery. Wipe your hands first to get a better grip. If flour gets under the base, clean it out to prevent sticking next time.
Example 3: Removing The Bowl After A Long Time
If you haven’t used your mixer for months, check for rust or dried food before trying to remove the bowl. Apply a little oil if needed, and clean thoroughly after removal.
Hidden Insight: Many beginners forget that even a little moisture under the bowl can cause rust over time. Always dry the base after washing.
Credit: jacksonsjob.com
Troubleshooting Bowl Removal: Advanced Tips
If the usual methods don’t work, there are some advanced steps you can try before calling for help.
Advanced Troubleshooting Steps
- Tap Gently with a Rubber Mallet: If the bowl is metal and really stuck, a gentle tap (not a hit) with a rubber mallet on the side (near the base) can help loosen it.
- Use a Hair Dryer: Apply gentle heat to the area where the bowl meets the base. Heat can expand the metal slightly and help release the bowl.
- Check for Warping: Sometimes, repeated heavy use can warp the bowl or base. If you notice uneven gaps or the bowl never sits flat, it may be time for a replacement.
When All Else Fails
If you’ve tried everything, do not force the bowl. Forcing can break the bowl or the mixer’s base, leading to costly repairs. Contact KitchenAid customer service for personalized help.
Preventing Bowl Sticking: Maintenance Tips
A little prevention goes a long way. Most bowl problems can be avoided with regular care.
Best Maintenance Practices
- Clean after every use: Wipe the base and bowl pins before storing.
- Avoid over-tightening: Lock the bowl in place, but don’t use too much force.
- Store with bowl removed: If you don’t use the mixer often, store the bowl separately to prevent sticking.
- Lubricate pins occasionally: For bowl-lift models, a tiny drop of food-safe oil on the pins every few months can prevent rust and sticking.
Storage Tips
- Store the bowl upside down to keep dust out.
- If you stack bowls, place a soft cloth between them to avoid scratches.
Comparing Kitchenaid Mixer Bowl Sizes And Weights
Knowing the size and weight of your bowl helps you handle it more safely and makes removal easier, especially for larger models.
| Bowl Size | Material | Weight (Approx.) | Model Type |
|---|---|---|---|
| 4.5 Quart | Stainless Steel | 1.2 kg | Tilt-Head |
| 5 Quart | Glass | 2.1 kg | Tilt-Head |
| 6 Quart | Stainless Steel | 1.6 kg | Bowl-Lift |
| 7 Quart | Stainless Steel | 1.8 kg | Bowl-Lift |
Pro Tip: If you struggle to lift heavy bowls, consider switching to a smaller size or a lighter material.
How To Know If You’re Removing The Bowl Correctly
Sometimes it’s not clear if you’re doing things right, especially if the bowl feels hard to turn or lift.
Signs Of Correct Removal
- The bowl turns or moves easily with little force.
- No metal grinding sounds when unlocking.
- The bowl sits flat and steady when placed back.
Signs Of A Problem
- The bowl is difficult to twist or lift, even after cleaning.
- The bowl wobbles when attached.
- There is visible damage to the locking tabs or pins.
If you notice any of these, review the removal steps above or contact support.

Credit: www.youtube.com
Extra Tips For First-time Kitchenaid Mixer Owners
If you’re new to KitchenAid mixers, here are a few practical things that often go unsaid:
- Read the manual: Each model is a little different. The manual has diagrams and specific instructions.
- Practice with an empty bowl: Try removing and attaching the bowl a few times before using the mixer for baking.
- Keep the area clean: Flour, sugar, and dough can get everywhere. Keeping the base and bowl clean prevents sticking and makes baking more fun.
- Register your mixer: If you run into problems, registered products get faster service and support.
Insider Fact: Many people are surprised that replacement bowls are available for most KitchenAid models. If your bowl is damaged or always gets stuck, it might be time for a new one.
When Should You Replace Your Kitchenaid Mixer Bowl?
Even with the best care, bowls can wear out or get damaged. Here’s how to know when it’s time for a replacement:
- Cracks or chips: Especially in glass or ceramic bowls.
- Bent or broken locking tabs: If the bowl no longer locks securely.
- Rust or pitting: Deep rust that doesn’t clean off can affect food safety.
- Persistent sticking: If cleaning and oiling don’t fix the problem.
Replacement bowls can be bought directly from KitchenAid or reputable kitchen suppliers. Check your model number to get the right fit.
Kitchenaid Mixer Bowl Removal Myths
There are some common myths about removing and caring for mixer bowls. Let’s clarify a few:
- Myth: You need to use force to remove a stuck bowl.
- Truth: Gentle wiggling and cleaning are much safer and more effective.
- Myth: All bowls fit all mixers.
- Truth: Each model uses different bowl designs. Always check compatibility.
- Myth: It’s okay to use metal tools to pry off a stuck bowl.
- Truth: This can damage your mixer and void the warranty.
Useful Resources For Kitchenaid Mixer Owners
For more information, visit the official KitchenAid website for manuals, support, and replacement parts. If you want to explore more about cleaning kitchen appliances, check out our post on how to clean your food processor.

Credit: www.reddit.com
Frequently Asked Questions
How Do I Remove The Bowl From My Kitchenaid Mixer If It’s Full Of Dough?
Lower the bowl or tilt the head, remove the attachment, and use a spatula to scrape the dough from the sides. Support the bowl with both hands and lift it gently. If the dough is very sticky, clean the rim before removing the bowl.
Can I Remove The Bowl While The Mixer Is Still Plugged In?
No, always unplug the mixer before removing the bowl. This prevents accidental starts and keeps you safe.
Why Does My Kitchenaid Mixer Bowl Get Stuck So Often?
Common reasons include dried batter, over-tightening, or rust on the base or pins. Clean your bowl and the attachment area after each use to prevent sticking.
Are All Kitchenaid Mixer Bowls Dishwasher Safe?
Most stainless steel and glass bowls are dishwasher safe, but always check your model’s manual. Some ceramic and specialty bowls may need hand washing.
What Should I Do If My Bowl Is Damaged Or Won’t Lock Properly?
Stop using the bowl right away. Order a replacement bowl that matches your mixer model. Using a damaged bowl can cause spills or damage the mixer.
With these tips and step-by-step instructions, removing the bowl from your KitchenAid mixer becomes a simple, safe, and stress-free task. Whether you’re a first-time user or a seasoned baker, proper care and handling will help your mixer serve you for years to come.