A stainless steel kitchen sink is the heart of any modern kitchen. It’s where you clean, prep, and often spend more time than you realize. Over time, even the best sinks can start to look dull, scratched, or water-stained. But what if you could make your sink shine like new—without expensive products or calling a professional?
With the right approach, you can polish a stainless steel kitchen sink to perfection and keep it gleaming for years. This guide will show you every step, from the first rinse to the final shine, including pro tips and common mistakes to avoid. Whether you want to remove stubborn stains or simply maintain your sink’s beauty, you’ll learn how to do it all—clearly and simply.
Why Stainless Steel Sinks Lose Their Shine
Stainless steel is known for its strength and shine, but it’s not immune to wear. Over time, sinks face:
- Water spots from minerals in tap water
- Scratches from pots, pans, and utensils
- Soap scum and residue
- Rust marks from steel wool or old tools
- Stains from food or cleaners
The daily use of your sink exposes it to many things that reduce its shine. For example, when you wash vegetables, soap residue and tiny bits of food can stick to the sides. Even small things, like leaving a wet sponge on the edge, can cause marks.
Many people don’t realize that hard water (water with lots of minerals) is a main reason for cloudy sinks. Also, using the wrong cleaner, such as bleach or harsh powder, can make things worse.
Most beginners miss this: The direction you clean matters. Stainless steel has a grain, like wood. Cleaning with the grain (not against it) prevents new scratches and brings out the natural shine. If you wipe in circles or against the grain, you can make scratches more visible and lose the mirror finish you want.
Another subtle reason sinks lose their shine is the slow buildup of limescale from water. This can make the surface feel rough and look uneven. Even if you clean every day, using the wrong cloth or letting water sit can cause problems.
What You’ll Need For Perfect Polishing
Before you start, gather everything you need. Having the right tools and products makes polishing safer, faster, and more effective.
Here’s a handy comparison of common cleaning items and their best uses:
| Item | Use | Notes |
|---|---|---|
| Soft sponge or microfiber cloth | Gentle cleaning and drying | Never use rough pads; a soft cloth protects the finish |
| Baking soda | Light scrubbing and stain removal | Safe and non-abrasive; also deodorizes |
| White vinegar | Dissolving water spots and limescale | Use diluted for best results; avoids strong smell |
| Olive oil or baby oil | Final shine and polishing | Just a drop is enough; prevents streaks |
| Soft-bristle toothbrush | Cleaning corners and around the drain | Old toothbrush works well; good for hard-to-reach spots |
| Dish soap | Basic cleaning | Removes grease and food bits; choose mild formula |
| Bar Keepers Friend | Deep cleaning and removing tough stains | Use sparingly; rinse well to avoid residue |
Tip: Never use steel wool, wire brushes, or harsh scouring powders. They can scratch and damage the finish. Stick to soft, non-abrasive materials for every stage of cleaning. If you want to use a new product, always test it on a small area first.
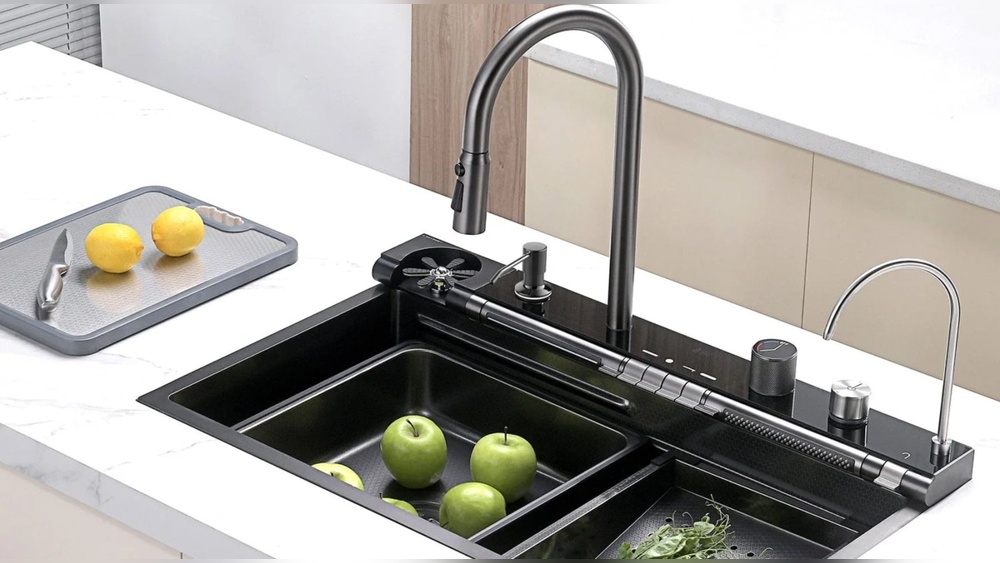
Credit: www.kbauthority.com
Step-by-step: How To Polish A Stainless Steel Kitchen Sink
Let’s break down the process into clear, easy steps. Each stage builds on the last for a truly polished finish.
1. Empty And Rinse The Sink
Start by taking out all dishes, racks, and anything else from the sink. Rinse with warm water to remove loose dirt and food. This first rinse helps you see where the real problem areas are.
Non-obvious insight: Warm water softens dried food and mineral spots, making them easier to clean later. If you skip this, scrubbing hard dirt can scratch your sink.
Take time to check under the edges and around the drain. These spots often collect small bits of food or debris, which can be missed if you rush.
2. Clean With Dish Soap
Add a few drops of mild dish soap to a soft sponge or cloth. Wipe the whole sink, including the sides and corners. Use small, gentle circles and clean with the grain (look closely to see if it goes horizontally or vertically).
When cleaning, focus on the areas around the faucet and the drain. These spots often hide soap scum and grease. You can use a toothbrush to scrub gently in tight spaces.
Rinse away all the soap with warm water. Dry with a clean microfiber towel.
Don’t skip drying. Leaving water on the surface can cause new spots right away. Some people use paper towels, but microfiber towels work better because they absorb water faster and leave no lint.
3. Remove Stains And Spots
If you see hard water stains or cloudy patches, use white vinegar. Pour some vinegar onto a cloth and wipe the spots. For tough stains, soak a paper towel with vinegar and lay it over the area for 10 minutes, then wipe away.
Pro tip: If you live in a hard water area, doing this step once a week keeps your sink looking great. You can also use diluted vinegar in a spray bottle for easy daily touch-ups.
For extra stubborn spots, try rubbing gently with your finger wrapped in the cloth. This lets you focus on small areas without spreading the stain.
4. Scrub With Baking Soda
Sprinkle baking soda all over the wet sink. It will fizz a bit with vinegar, helping to lift away grime. Use a damp sponge or soft brush to scrub gently, always following the grain.
Baking soda is a gentle abrasive that removes stains without scratching. Pay extra attention to the drain and edges. The corners often collect a mix of grease and mineral deposits. Scrubbing them with a toothbrush dipped in baking soda can make a big difference.
Rinse thoroughly with water to remove all the baking soda. If you see any white powder left behind, wipe again with a wet cloth.
5. Deep Clean Problem Areas
For any dark spots, rust marks, or stubborn stains, use a bit of Bar Keepers Friend or another stainless steel cleaner. Apply it to a damp sponge, rub gently, and rinse well.
Important: Never let cleaner dry on the sink. Rinse right away to prevent streaks. If you need to clean a spot again, use a fresh sponge to avoid spreading dirt.
If you find stains that don’t budge, try repeating the process with less pressure. Sometimes, slow and steady is better than scrubbing hard.
6. Clean Faucets And Hardware
Don’t forget the faucet and handles. Wipe them with dish soap, then use vinegar for water spots. Polish with a dry cloth to avoid new marks. A toothbrush helps reach tight spots.
Common mistake: Many people polish the sink but skip the faucet, making the whole area look uneven. Even if your sink shines, a dull faucet stands out. For extra shine, use a tiny drop of oil on the faucet after cleaning.
If your faucet has hard water buildup, wrap it with a vinegar-soaked cloth for 10-15 minutes, then scrub gently.
7. Dry Completely
Use a fresh microfiber towel to dry every part of the sink. Drying stops new water spots and prepares the surface for polishing.
Don’t just dry the basin—wipe around the faucet, handles, and edges. If you leave water in the grooves, it can cause streaks and dull areas.
8. Polish For Shine
Put a small amount of olive oil or baby oil on a clean, dry cloth. Rub the oil into the sink, going with the grain. Buff with another clean towel until the sink shines.
You only need a little oil. Too much can leave a sticky surface that attracts dust. Start with a drop, then add more if needed.
This final touch makes the sink look brand new and helps repel water. If your sink has a brushed finish, polish gently to avoid making the surface too glossy.
9. Maintain The Shine
To keep your sink looking perfect, repeat these steps regularly. Wipe up water after each use, and do a full polish every week or two.
Here’s a quick maintenance schedule you can follow:
| Task | Frequency | Purpose |
|---|---|---|
| Rinse and dry sink | After every use | Prevents water spots |
| Clean with dish soap | Daily | Removes grease and residue |
| Baking soda scrub | Weekly | Keeps stains away |
| Polish with oil | Every 1-2 weeks | Restores shine |
| Deep clean (Bar Keepers Friend) | Monthly or as needed | Handles tough stains |
Non-obvious insight: If your sink gets a lot of use, add a quick wipe-down before bed. This prevents overnight buildup and keeps the surface looking fresh every morning.
Key Tips For A Flawless Finish
Getting a perfect shine is about more than just elbow grease. Here are expert tips to take your sink from clean to stunning:
- Always go with the grain. Look closely at your sink—the lines run in one direction. Cleaning with the grain reduces scratches.
- Use two cloths: One for cleaning, one for drying/polishing. This avoids spreading water marks.
- Don’t let water stand. Pooled water leaves dull spots fast.
- Avoid bleach and chlorine. These chemicals damage stainless steel and cause rust.
- Rinse away all cleaners. Even gentle products can leave marks if left to dry.
- Use a sink grid or mat. This protects the bottom from scratches caused by heavy pots and pans.
- Don’t use rough pads. Even “non-scratch” pads can leave micro-scratches over time.
- Wipe up acids quickly. Lemon juice, vinegar, or tomato sauce can etch the surface if left too long.
- Buff after oiling. Always buff the oil until the surface is smooth, not sticky.
- Polish regularly, not just for guests. Consistent care prevents buildup and makes each cleaning faster.
Insider tip: If you notice small scratches, rubbing gently with a non-abrasive pad and a bit of baking soda can blend them in with the rest of the grain.
Another overlooked tip: Use filtered water for the final rinse if you have hard water. This prevents new mineral spots from forming and keeps your sink shining longer.

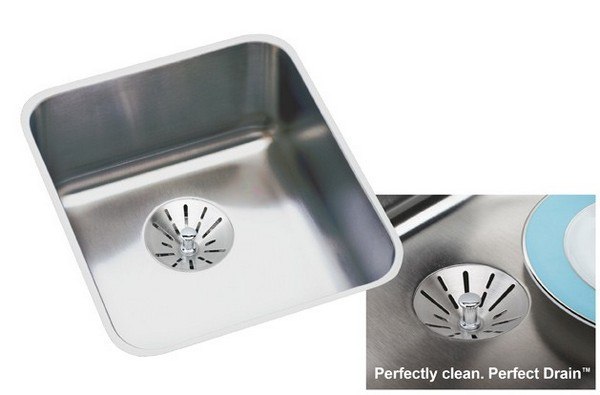
Credit: www.amazon.com
Mistakes To Avoid When Polishing A Stainless Steel Sink
Even with the right tools, some habits can do more harm than good. Here’s what to watch out for:
- Scrubbing against the grain: This makes scratches stand out and dulls the finish.
- Using steel wool: It can leave behind steel bits that rust and damage the sink.
- Letting cleaners dry on the sink: Streaks and residue are hard to remove later.
- Too much oil: Leaves a greasy film instead of a clean shine.
- Skipping the rinse: Any leftover cleaner can cause stains or corrosion.
- Using colored sponges: Dyes can sometimes transfer to the metal.
Many beginners miss that using “miracle” stainless steel sprays can sometimes leave a sticky residue if not buffed well. Always read the label and test in a small area first.
Another mistake is cleaning the sink only when it looks dirty. Regular gentle care stops problems before they become tough stains.
How To Handle Deep Scratches And Rust Spots
Sometimes, normal cleaning isn’t enough. If your sink has deep scratches or rust spots, try these steps:
Deep Scratches
- Use a non-abrasive pad with a bit of baking soda or stainless steel polish.
- Rub gently, following the grain. Avoid circular motions.
- Repeat as needed, but don’t overdo it. Too much scrubbing can make the scratch worse.
- Finish with oil polish to blend the area.
If the scratch is very deep, you can use a stainless steel repair kit, which includes fine sandpaper and polish. Always follow the instructions and test in a hidden area first.
Rust Spots
- Mix baking soda with a bit of water to make a paste.
- Apply to the rust spot and let sit for 10 minutes.
- Gently scrub with a soft brush or sponge.
- Rinse and dry completely.
If rust returns, check for metal objects left in the sink. Even small steel particles can cause repeat spots.
Non-obvious insight: Rust often starts from tiny metal shavings left after using steel wool or cleaning tools. Always check for these after cleaning and rinse well.
Choosing The Right Polish And Cleaner
Not all polishes and cleaners are created equal. Some are made for heavy-duty jobs, while others are designed for daily maintenance.
Here’s a comparison of popular sink cleaners:
| Product | Type | Best for | Notes |
|---|---|---|---|
| Baking soda | Powder | Daily cleaning, light stains | Safe, natural |
| Bar Keepers Friend | Powder/Cream | Tough stains, rust | Use sparingly |
| Dedicated stainless steel polish | Spray/Cream | Final shine, water resistance | Buff well |
| White vinegar | Liquid | Water spots, limescale | Rinse after use |
| Olive oil/baby oil | Oil | Final polish | Use sparingly |
Non-obvious insight: Many “all-purpose” cleaners contain bleach or harsh chemicals. Always check the label before using anything new on your sink.
If you want a professional finish, look for polishes that leave a protective coating. This helps water bead off and slows down future stains.
Advanced: Removing Hard Water Buildup
If you have a white, chalky layer that doesn’t come off with normal cleaning, it’s likely hard water buildup. Here’s how to tackle it safely:
- Soak a cloth in white vinegar and lay it over the affected area for 30 minutes.
- Wipe away the loosened buildup with a non-scratch sponge.
- Rinse and dry.
- Repeat if needed. Stubborn spots may need a second round.
To prevent hard water buildup, try drying your sink after every use. If your water is very hard, consider installing a small filter on your tap.
Avoid using lime removers or CLR unless the label says it’s safe for stainless steel. Some strong cleaners can dull or discolor the finish.

Credit: www.leftonhome.com
Keeping Your Sink Looking New: Daily Habits
The best way to polish a stainless steel kitchen sink to perfection is to prevent problems before they start. Add these daily habits to your routine:
- Wipe the sink dry after every use.
- Rinse away food and soap residue right away.
- Don’t leave wet sponges, cloths, or metal items in the sink.
- Use a sink grid to protect the surface from heavy pots.
- Give the sink a quick polish once a week.
Even small changes, like using a separate cloth for drying, can make a big difference. If you often cook with acidic foods, rinse your sink right after to prevent etching.
Tip: A minute spent wiping down your sink saves hours of deep cleaning later. These habits also keep your kitchen smelling fresh and prevent bacteria buildup.
For more in-depth information on stainless steel care, you can read this helpful guide from the Wikipedia: Stainless Steel.
Frequently Asked Questions
What Is The Best Thing To Polish A Stainless Steel Sink?
The best way to polish a stainless steel sink is to first clean it with dish soap, remove stains with vinegar and baking soda, and finish with a small amount of olive oil or a dedicated stainless steel polish. Always polish with the grain for the best shine.
For extra shine, buff with a dry microfiber cloth.
Can You Use Vinegar On Stainless Steel Sinks?
Yes, vinegar is safe and very effective for removing water spots and limescale. Always rinse the sink well after using vinegar, and never let it sit for hours to avoid dulling the finish. Diluting vinegar with water makes it less harsh and easier to use daily.
How Do You Remove Scratches From A Stainless Steel Sink?
Small scratches can be blended by gently rubbing with baking soda or a stainless steel cleaner and a non-abrasive pad, always following the grain. Deep scratches may need a professional refinishing kit for the best results. Regular polishing helps hide light scratches over time.
How Often Should You Polish Your Sink?
For the best results, polish your stainless steel sink every 1-2 weeks. Wipe it dry after each use and do a full cleaning and polish at least once a week to keep it looking perfect. If your sink gets heavy use, polish more often.
What Should You Never Use On A Stainless Steel Sink?
Never use steel wool, harsh scouring powders, bleach, or chlorine-based cleaners. These can scratch, stain, or even rust your sink. Stick to gentle, non-abrasive cleaners and soft cloths. Always check cleaning product labels for safety.
—
A polished stainless steel kitchen sink not only looks stunning but also makes your whole kitchen feel cleaner and more welcoming. By following these steps and tips, you can keep your sink shining for years—without stress or expensive treatments. Remember, the key is gentle, regular care and using the right products. For more home improvement ideas, check out our guide on how to choose the best kitchen faucet for your sink. With a little attention, your kitchen will always be ready to impress.