Removing the bowl from a KitchenAid mixer seems simple—until you actually try it for the first time. Many home bakers and even experienced cooks run into trouble. The bowl can get stuck, feel heavy, or just seem impossible to twist off. If you’re struggling, you’re not alone. Understanding the right way to remove the bowl not only makes baking easier but also helps protect your mixer from damage. This guide covers every detail you need to confidently and safely remove a bowl from any KitchenAid stand mixer.
Understanding Your Kitchenaid Mixer Bowl Types
KitchenAid mixers come in different designs, and the bowl attachment method is one of the biggest differences. Knowing which type you have is key for safe removal.
Tilt-head Mixers
These are the most popular for home kitchens. The tilt-head mixer lets you lift the head up and down. The bowl sits on a flat base and locks with a simple twist.
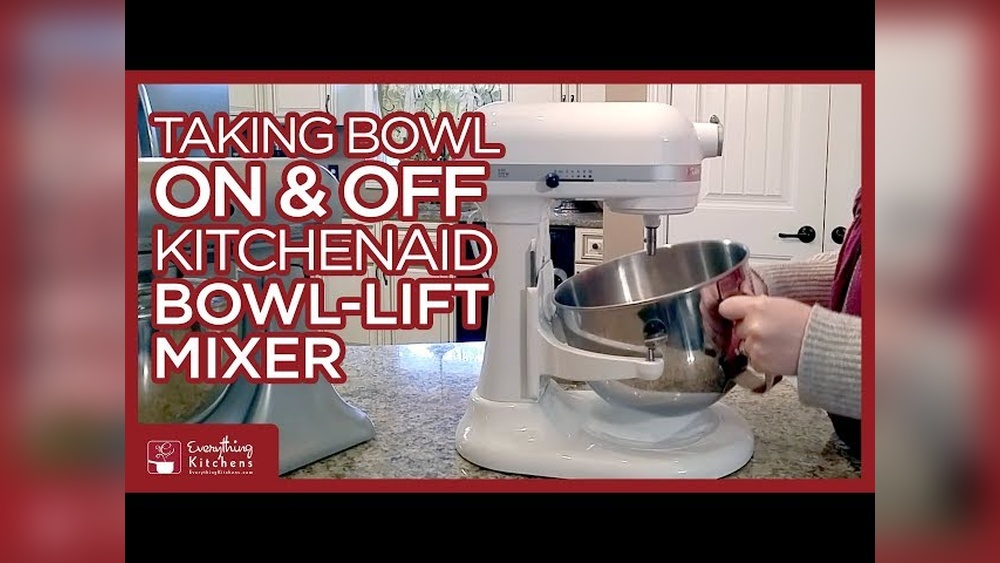
Bowl-lift Mixers
These are more common in professional settings or for heavy-duty baking. Bowl-lift mixers have arms that raise and lower the bowl using a lever. The bowl attaches at two side pins and a rear tab.
Glass And Stainless Steel Bowls
KitchenAid offers both glass and stainless steel bowls. Glass bowls are heavier and often have a handle, while stainless steel bowls are lighter but may lack a handle. Each style feels different when attaching and removing.
Why Does Bowl Type Matter?
The removal method is different for each style. For example, bowl-lift mixers require a specific sequence and more care. Forcing the wrong method can scratch or even break your bowl.
Why The Bowl Gets Stuck
Many people ask: “Why is my KitchenAid bowl stuck?” The answer is usually simple, but not always obvious.
- Dried Ingredients: Flour, sugar, or dough can harden between the bowl and base.
- Wrong Removal Technique: Turning or pulling the wrong way can jam the bowl.
- Temperature Changes: Cold bowls can contract, making them harder to remove.
- Overfilling: Heavy batter or dough can create extra pressure.
- Misalignment: If you don’t seat the bowl fully when attaching, it can twist off-track.
Knowing these reasons helps you avoid mistakes and plan the right fix.
Step-by-step Guide: Removing A Bowl From A Kitchenaid Mixer
Let’s break down the process for both main types: tilt-head and bowl-lift. Read your mixer’s manual for model-specific notes, but these steps work for most KitchenAid mixers.
For Tilt-head Kitchenaid Mixers
- Turn Off and Unplug: Always start with safety. Unplug the mixer.
- Raise the Mixer Head: Push the unlock lever or button. Lift the head fully so you have access to the bowl.
- Remove Attachment: Take off the beater, whisk, or dough hook by pushing it up slightly and twisting it counterclockwise.
- Twist the Bowl: Hold the bowl handle. Turn the bowl counterclockwise (to the left). You may need to use both hands if it’s tight.
- Lift the Bowl: Once unlocked, lift the bowl straight up. If it feels stuck, wiggle gently side-to-side.
Pro Tip: If the bowl won’t budge, check for dried ingredients around the base. Use a damp cloth to clean before twisting again.
For Bowl-lift Kitchenaid Mixers
- Turn Off and Unplug: Safety first—always unplug.
- Lower the Bowl: Move the lever down to the lowest position. This releases tension.
- Remove Attachment: Take off the mixing tool as above.
- Release Side Pins: Hold the bowl handle, then gently pull the bowl’s sides away from the pins.
- Release Rear Tab: Tilt the bowl slightly forward so the back tab comes out of its slot.
- Lift the Bowl: When all points are free, lift the bowl up and out.
Caution: Do not force the bowl. If it doesn’t come out, double-check that all pins and tabs are clear. Forcing can bend the arms.
Removing A Glass Bowl
Glass bowls are heavier. Always support the bottom as you lift. Never use the handle alone, as this can crack the glass.
Removing A Bowl With Dough Or Batter Inside
Heavy dough may make the bowl harder to twist. Try using a rubber spatula to loosen the dough from the sides before removal.
What To Do If The Bowl Is Stuck
Sometimes, the bowl just won’t move. Here’s how to handle the situation:
- Don’t Panic: Forcing the bowl can break it or damage the mixer.
- Check for Debris: Look for flour, sugar, or dough caked around the base.
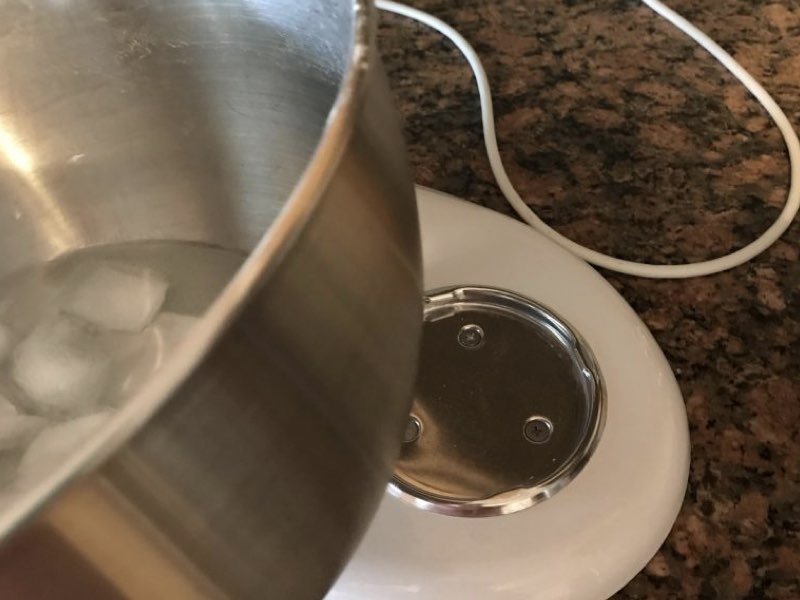
- Warm the Bowl: If the bowl is cold, try wrapping a warm, damp towel around the base for a few minutes. Metal expands with heat, which can help loosen it.
- Use Gentle Pressure: Place one hand on the mixer base, and gently twist the bowl with the other. Avoid sudden jerks.
- Apply Food-Safe Lubricant: If nothing works, a drop of food-safe mineral oil around the base can help.
Never use metal tools to pry the bowl—this causes scratches and may void the warranty.
Cleaning The Bowl And Mixer Base
A clean mixer is less likely to have stuck bowls. Here’s how to keep it in top shape:
- Wipe After Every Use: After removing the bowl, wipe the base with a damp cloth.
- Deep Clean Monthly: Remove attachments and bowl. Use mild soap and water for the bowl. For the base, use a soft brush to clean crumbs or dried ingredients.
- Dry Thoroughly: Moisture between the bowl and base can cause sticking.
Bonus Tip: If you use the mixer often, sprinkle a little cornstarch on the base before attaching the bowl. This prevents dough buildup.
How Bowl Removal Differs By Kitchenaid Model
KitchenAid has made many mixer models over the years. While the basic process is similar, small differences can trip you up.
Classic Series Vs. Artisan Series
- Classic Series: Usually tilt-head. The locking mechanism can be stiff on new mixers.
- Artisan Series: Also tilt-head but with a smoother twist-lock. The handle is more ergonomic.
Professional Series
- Pro 600 and Pro Line: These use the bowl-lift style. The bowls are larger and heavier, often requiring two hands to remove.
Mini And Heavy Duty Models
- Mini Mixers: Lighter bowls, often easier to remove.
- Heavy Duty: Sometimes have an extra-strong locking mechanism.
Glass Vs. Stainless Steel Attachments
- Glass Bowls: Heavier and more likely to stick if not cleaned well.
- Stainless Steel: More forgiving, but can still get stuck if batter dries.
Comparison Of Bowl Types And Removal Difficulty
| Model Type | Bowl Material | Attachment Style | Removal Difficulty |
|---|---|---|---|
| Tilt-Head | Stainless Steel | Twist-Lock | Easy |
| Tilt-Head | Glass | Twist-Lock | Medium |
| Bowl-Lift | Stainless Steel | Pin-and-Tab | Medium |
| Bowl-Lift | Glass | Pin-and-Tab | Hard |

Credit: www.reddit.com
Common Mistakes To Avoid
Removing a KitchenAid bowl should be simple, but these common errors make it harder:
- Forcing the Bowl: Applying too much pressure risks breaking the bowl or bending the base.
- Not Removing Attachments First: The beater or whisk can block removal. Always detach first.
- Holding Only the Handle: Especially with glass bowls, always support the base.
- Not Lowering the Bowl Fully (Bowl-Lift Models): The bowl must be at its lowest point before removal.
- Ignoring Stuck Debris: Even a little dried dough can block the bowl from twisting out.
- Using Tools to Pry: Avoid screwdrivers or knives—they scratch and can break the bowl.
Non-obvious Insight: If your bowl is stuck often, check that you’re not over-tightening when attaching. Just a gentle twist to lock is enough.
Tips For Easier Bowl Removal Every Time
Preventing a stuck bowl is easier than fixing one. These expert tips make removal smooth:
- Attach Bowl Gently: Over-tightening during attachment can make removal hard. Stop as soon as the bowl is secure.
- Clean Immediately: Wipe away spills and crumbs after every use.
- Avoid Extreme Temperature Changes: Don’t put a hot bowl directly in the freezer or vice versa.
- Lubricate Occasionally: Once every few months, rub a drop of food-safe oil on the base.
- Use Both Hands for Heavy Bowls: Especially important for glass or large models.
- Inspect the Base Regularly: Look for dents or bends that can cause sticking.
Example: After making bread dough, remove the bowl and clean the base before the dough dries. This simple habit prevents most stuck bowls.
When To Seek Professional Help
Most bowl removal problems can be solved at home. But sometimes, you need help:
- Bowl is Jammed and Won’t Budge: If you’ve tried all safe methods, call KitchenAid support.
- Bowl or Base Is Damaged: Cracked bowls or bent mixer bases need professional repair.
- Attachment Won’t Detach: If the beater is stuck, forcing it can damage gears.
Attempting to fix a seriously jammed bowl yourself may void your warranty. When in doubt, contact customer service.
Comparison: Kitchenaid Mixer Bowl Removal Vs. Other Brands
How does KitchenAid compare to other stand mixers? Here’s a look:
| Brand | Attachment Method | Ease of Removal | Common Issues |
|---|---|---|---|
| KitchenAid | Twist-Lock/Pin-and-Tab | Medium | Stuck with batter, over-tightening |
| Kenwood | Slide-In | Easy | Bowl misalignment |
| Cuisinart | Lift-and-Twist | Medium | Bowl wobbles |
| Hamilton Beach | Twist-Lock | Easy | Plastic bowl warping |
KitchenAid’s system is reliable but can be tricky if you don’t know the exact steps, especially with sticky doughs or batter.
Maintaining Your Kitchenaid Mixer Bowl For Longevity
Taking care of your bowl helps it last longer and makes removal easier.
Storage Tips
- Store Bowl Separately: Don’t leave the bowl locked on the mixer for long periods.
- Avoid Heavy Items: Don’t store heavy objects in the bowl, which can cause warping or cracks.
Cleaning Advice
- Use Non-Abrasive Cleaners: Avoid harsh scrubs that can scratch.
- Dishwasher Safe? : Most KitchenAid stainless bowls are dishwasher safe, but glass bowls should be hand washed for safety.
Checking For Damage
- Inspect Regularly: Look for cracks, chips, or bends.
- Replace When Needed: A damaged bowl can be dangerous to use.
Non-obvious Insight: If you bake often, consider keeping a spare bowl. This prevents delays if one bowl needs extra cleaning or repair.
Troubleshooting Unusual Problems
Even with the best care, unusual problems can happen.
Bowl Wobbles When Mixing
Check if the bowl is seated properly. If not, remove and reattach, making sure it’s secure. If wobbling continues, the base or bowl may be bent.
Unusual Noises When Removing
A scraping noise usually means dried ingredients between the bowl and base. Stop, clean, and try again.
Bowl Locks Up After Freezing
Cold can shrink the metal slightly. Let the bowl warm to room temperature before removing.
Mixer Head Won’t Lift (tilt-head Models)
If the head is stuck, do not force it. Check for batter or dough blocking the hinge.

Credit: www.youtube.com
Upgrading Or Replacing Your Kitchenaid Bowl
Sometimes, the best solution is to upgrade or replace your bowl. Here’s what to consider:
Size
- Standard: 4.5–5 quarts for most home bakers
- Large: 6 quarts or more for frequent, heavy baking
Material
- Stainless Steel: Durable and dishwasher safe
- Glass: Heavy, stylish, but more fragile
- Ceramic: Stylish, but not for heavy-duty use
Extra Features
- Handles: Make removal easier, especially with heavy doughs
- Pour Spout: Less mess when pouring batter
Where To Buy
Always buy genuine KitchenAid bowls from trusted sellers. Counterfeit or off-brand bowls may not fit or could damage your mixer. For a reliable overview of mixer accessories, check Serious Eats.
Safety Precautions When Removing The Bowl
Never ignore safety when handling your mixer:
- Unplug First: Prevents accidental start.
- Wait for Moving Parts to Stop: Don’t remove the bowl while the beater is spinning.
- Support Heavy Bowls: Use both hands, especially for glass or large bowls.
- Keep Fingers Clear: Watch out for sharp attachments or the locking mechanism.
Following these steps avoids injuries and damage.
Kitchenaid Bowl Removal: Real-life User Experiences
Many home bakers have shared their struggles and solutions online. Here’s what’s common:
- Sticky Dough: “After making pizza dough, my bowl always stuck. Warming the base fixed it.”
- First-Time Frustration: “I twisted and twisted, but didn’t realize I had to lift the tilt-head first.”
- Bowl-Lift Confusion: “I tried pulling straight out, but the rear tab was still locked.”
Learning from others’ experiences can help you avoid similar problems.
Internal Resources For Further Reading
If you’re interested in more KitchenAid tips or troubleshooting, you might also enjoy our post on [how to clean a KitchenAid mixer](https://yourwebsite.com/how-to-clean-kitchenaid-mixer) for more maintenance strategies.
Credit: jacksonsjob.com
Frequently Asked Questions
How Do I Remove A Stuck Kitchenaid Bowl Without Damaging It?
Start by unplugging the mixer. Check for dried dough or debris around the base. Use a warm, damp towel to heat the base gently—this can loosen the bowl. Never use metal tools. If it’s still stuck, apply a drop of food-safe oil and wait a few minutes before trying again.
Is There A Difference Between Removing Glass And Stainless Steel Bowls?
Yes. Glass bowls are heavier and more likely to get stuck if not cleaned well. Always support the bowl from the bottom, not just the handle. Stainless steel bowls are lighter and more forgiving but can still get stuck if batter dries around the base.
Can I Remove The Bowl While The Beater Is Attached?
It’s not recommended. Remove the beater or attachment first to avoid damaging the bowl, attachment, or mixer. Leaving the beater on can block the bowl from twisting off properly.
Why Does My Bowl Keep Getting Stuck Every Time?
This usually happens due to dried ingredients at the base, over-tightening when attaching, or temperature changes. Clean the base after every use, attach gently, and avoid putting a hot bowl on a cold base (or vice versa).
What Should I Do If The Bowl Or Base Is Damaged?
Stop using the mixer. A cracked or bent bowl can be dangerous. Contact KitchenAid support or buy a genuine replacement bowl. Attempting to repair it yourself may void your warranty.
Removing a bowl from a KitchenAid mixer should be quick and simple. With the right technique and a bit of regular cleaning, you’ll save time and avoid frustration in your kitchen. Whether you’re baking bread, mixing cake batter, or just cleaning up, these steps ensure your mixer stays in top shape for years to come.