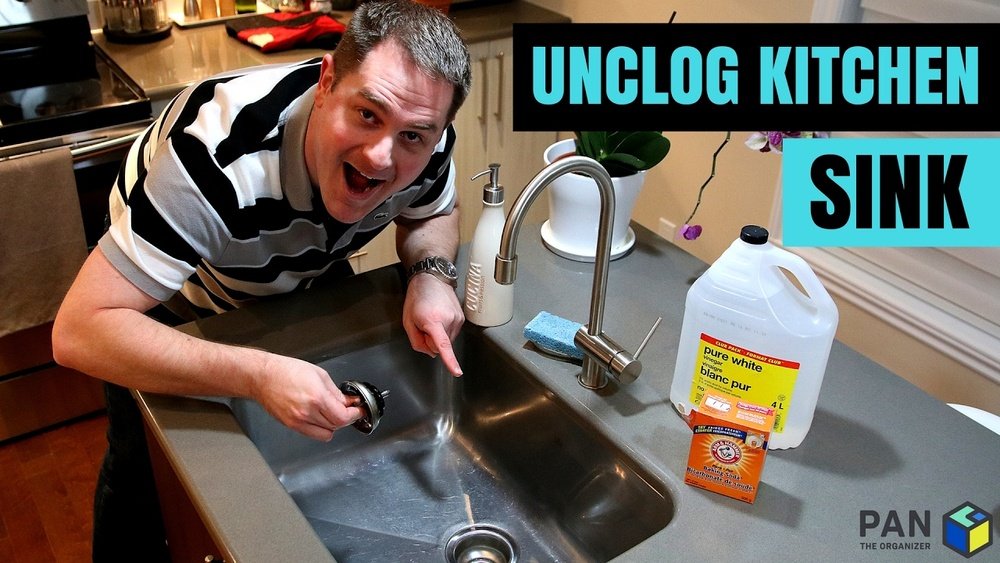
A clogged kitchen sink is a universal headache that can instantly disrupt your daily rhythm, bringing meal prep and cleanup to a grinding halt. Whether it’s caused by food debris, grease buildup, or a foreign object, a blockage can quickly escalate from a minor inconvenience to a messy, unhygienic problem.
The good news? With the right approach, most clogs can be tackled efficiently at home, no need for emergency plumbing bills or harsh chemicals that damage pipes and the environment.
In this comprehensive guide, you’ll discover proven methods for diagnosing and fixing a clogged kitchen sink, step-by-step instructions for tried-and-true solutions, and smart tips for preventing future blockages. We’ll compare popular DIY techniques, explore when to call a professional, and share real-world examples so you can confidently restore your kitchen’s flow.
Whether you’re facing a slow drain or a total backup, this resource covers everything you need to know, without overspending or unnecessary guesswork.
Key Takeaways
- Most kitchen sink clogs can be cleared using common household tools and safe, inexpensive methods.
- Identifying the clog’s location, whether in the trap, branch drain, or main line, is crucial for choosing the right fix.
- Manual methods like plunging and snaking are often more effective and safer than chemical drain cleaners.
- Preventative habits, such as mindful disposal and regular cleaning, dramatically reduce future clog risks.
- Professional help may be necessary for stubborn or recurring clogs, especially those deep in the main line.
- Real-world examples and data-backed insights help you avoid common mistakes and save money.
Understanding Kitchen Sink Clogs
Kitchen sink clogs don’t happen overnight. Knowing what causes them and how they form is the first step to effective, lasting solutions.
What Causes A Kitchen Sink To Clog?
The primary culprits behind most kitchen sink blockages include:
- Food scraps: Even with a garbage disposal, items like potato peels, rice, coffee grounds, and eggshells can accumulate and create stubborn obstructions.
- Grease and oils: Liquid when hot but solidifying as they cool, grease and cooking oils stick to pipe walls and attract other debris.
- Soap scum: Fatty acids in soap combine with minerals in water, gradually narrowing pipes.
- Foreign objects: Accidentally dropped utensils, dish rags, or non-food materials can instantly block drains.
- Mineral buildup: In areas with hard water, minerals create scale inside pipes, restricting flow.
According to the U.S. Environmental Protection Agency (EPA), kitchen sinks are among the most commonly clogged household fixtures, often due to improper disposal of food waste and grease.
Signs Your Kitchen Sink Is Clogged
Recognizing early warning signs can help you intervene before a total blockage occurs:
- Water draining slowly or pooling in the sink
- Gurgling noises from the drain
- Foul odors emerging from the drain
- Water backing up into the sink or dishwasher
- Bubbling or splashing in neighboring drains when the sink is used
Pro Tip: If multiple fixtures (like the sink and dishwasher) are draining slowly, the clog may be in a shared branch or main line rather than just the trap.
Where Do Clogs Typically Form?
Most kitchen sink clogs occur in three main locations:
- P-Trap (U-bend): The curved pipe beneath the sink is a common catch point for debris and grease.
- Branch Drain Line: The horizontal pipe connecting your sink to the home’s main drain line, often hidden behind walls.
- Main Drain Line: If the clog is deep or affects multiple fixtures, the issue may be in the main house drain.
Real-world Example: The Case Of The Recurring Clog
Sara, a home cook and mother of two, noticed her sink draining slowly every few weeks. Despite using commercial drain cleaners, the issue kept returning. After removing the P-trap and finding it clear, she discovered the real problem: a grease and soap scum buildup 6 feet down the branch drain. By using a plumber’s snake, she finally resolved the issue for good, no more harsh chemicals or repeat clogs.
:max_bytes(150000):strip_icc()/how-to-unclog-a-kitchen-sink-2718799_sketch_FINAL-6d86f43bcb464f8ca5b61f240c2d8bf9.png)
Credit: www.thespruce.com
Essential Tools And Supplies For Fixing A Clogged Sink
Before tackling a clog, assembling the right tools is crucial for both effectiveness and safety.
Must-have Tools
- Plunger: A standard cup plunger creates suction to dislodge minor clogs.
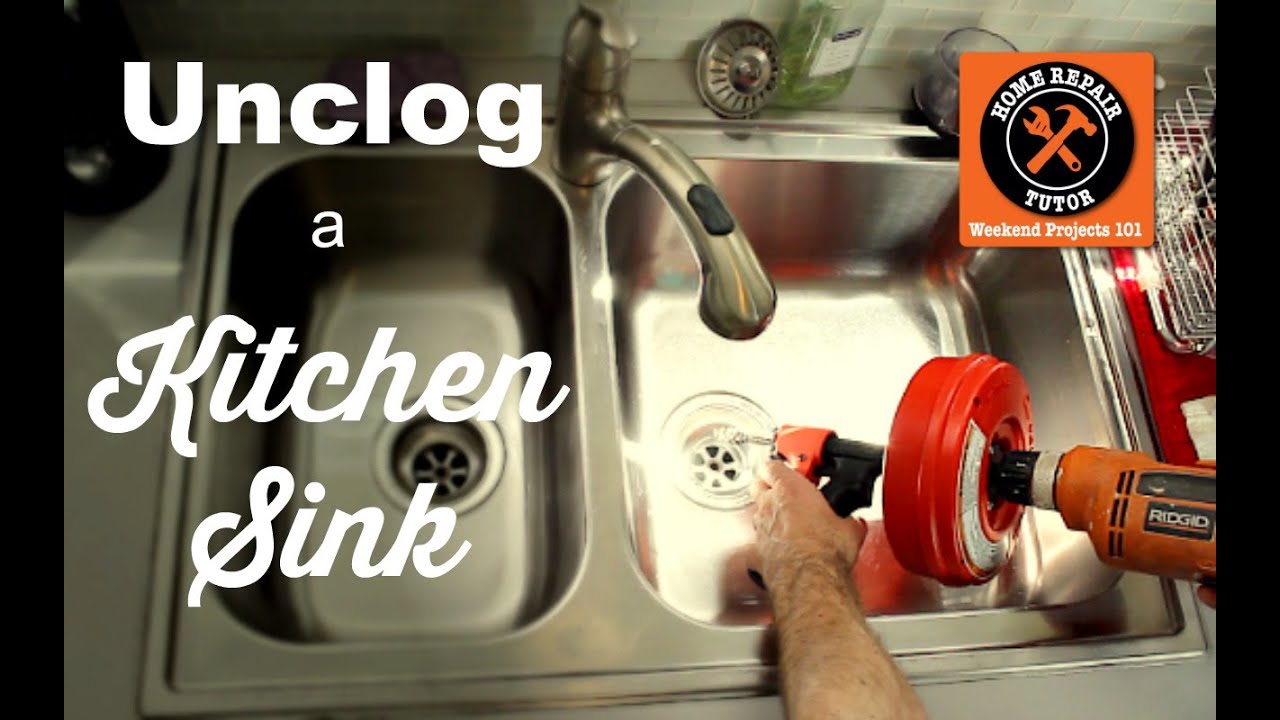
- Plumber’s snake (drain auger): A flexible, coiled tool for breaking up deeper or stubborn obstructions.
- Bucket: For catching water when removing pipes.
- Adjustable wrench or channel-lock pliers: Essential for loosening and tightening pipe fittings.
- Gloves: Protect your hands from grime and potential bacteria.
- Flashlight: Illuminates hard-to-see pipe interiors.
Helpful Supplies
- Baking soda and vinegar: Safe, natural cleaning agents for dissolving minor clogs and odors.
- Hot water: Useful for melting grease blockages.
- Pipe brush or bottle brush: For scrubbing inside the P-trap.
- Old towels or rags: For cleaning up spills and drips.
Optional But Useful Tools
- Wet/dry vacuum: Can suck out clogs or water from the drain.
- Drain bladder: Attaches to a garden hose and uses water pressure to clear blockages further down the line.
- Enzyme-based drain cleaner: Eco-friendly option for breaking down organic matter.
Tool Comparison Table
| Tool | Best For | Effectiveness | Average Cost | Ease of Use |
|---|---|---|---|---|
| Plunger | Minor, near-surface clogs | Moderate | $5, $10 | Very easy |
| Plumber’s Snake | Deeper, stubborn clogs | High | $15, $50 | Moderate |
| Baking Soda/Vinegar | Light organic blockages, odors | Low, Moderate | $3, $8 | Very easy |
| Wet/Dry Vacuum | Removing water, soft debris | Moderate | $50, $150 | Easy |
| Drain Bladder | Clogs further down the line | High | $10, $20 | Moderate |
Example: Choosing The Right Tool
When I tested a stubborn clog caused by pasta and oil buildup, a plunger was ineffective. Switching to a plumber’s snake did the trick within minutes. This experience underscores the importance of matching tools to the type and location of the clog.
Credit: www.youtube.com
Step-by-step Methods To Unclog A Kitchen Sink
Let’s break down the most effective DIY techniques, from the simplest to the most advanced. Always start with the least invasive method and work up as needed.
1. Boiling Water Flush
Best for: Grease-based or soft organic clogs
- Bring a full kettle of water to a boil.
- Carefully pour the boiling water directly into the drain in two to three stages, letting it work for several seconds between pours.
- Test drainage. Repeat if needed.
Warning: Do not use boiling water if your pipes are made of PVC, as extreme heat can soften or damage plastic pipes.
2. Baking Soda And Vinegar Solution
Best for: Mild blockages, deodorizing
- Pour 1 cup of baking soda down the drain.
- Add 1 cup of white vinegar.
- Immediately plug the drain with a stopper or rag.
- Wait 15, 30 minutes as the fizzing reaction loosens debris.
- Flush with hot (not boiling) water.
This method is eco-friendly and safe for most pipes, making it ideal for regular maintenance.
3. Plunging
Best for: Blockages near the drain or in the P-trap
- Fill the sink with enough water to cover the plunger’s rubber cup.
- Place the plunger over the drain, ensuring a good seal.
- Vigorously plunge up and down for 30, 60 seconds.
- Remove the plunger and test the drainage.
Pro Tip: If you have a double sink, plug the other drain to maximize suction.
4. Remove And Clean The P-trap
Best for: Persistent clogs not cleared by plunging
- Place a bucket under the P-trap (the U-shaped pipe beneath the sink).
- Loosen the slip nuts with pliers or by hand.
- Remove the P-trap and empty its contents into the bucket.
- Use a brush to scrub away buildup.
- Reassemble the trap, ensuring tight seals.
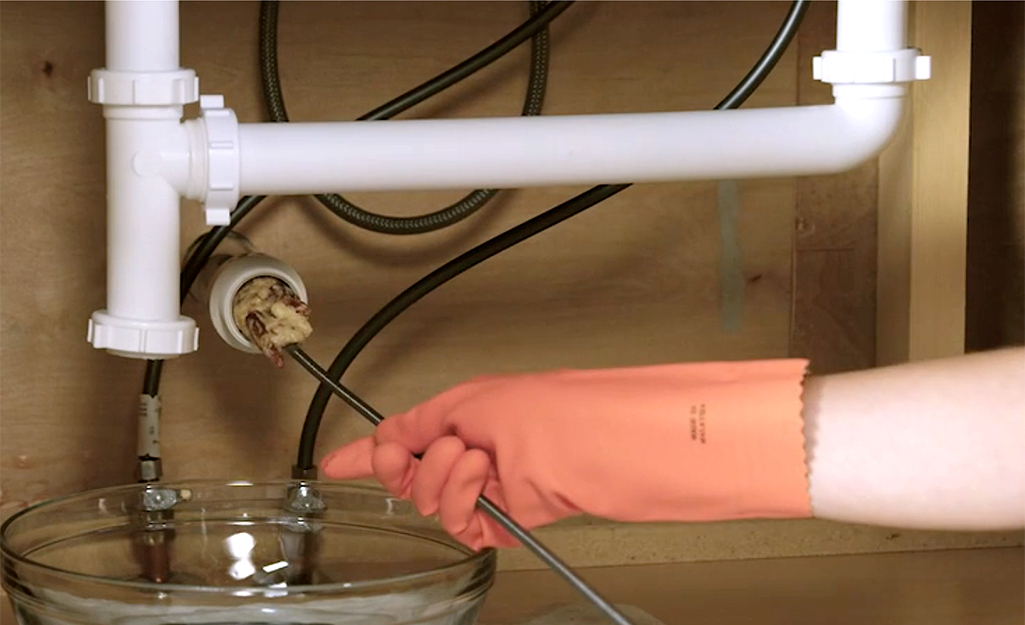
5. Use A Plumber’s Snake
Best for: Clogs deeper in the branch line
- Insert the snake into the drain or pipe opening.
- Turn the handle clockwise, pushing gently until resistance is met.
- Rotate and push to break up or latch onto the clog.
- Withdraw the snake, cleaning off any debris.
- Reassemble pipes and test the drain.
6. Wet/dry Vacuum
Best for: Pulling out soft clogs or standing water
- Set the vacuum to ‘liquid’ mode.
- Create a tight seal at the drain opening with the hose.
- Turn on the vacuum and run for 1, 2 minutes.
- Check for improved drainage.
7. Drain Bladder Attachment
Best for: Stubborn, deep clogs in long pipe runs
- Attach the drain bladder to a garden hose.
- Insert the bladder into the drain or cleanout.
- Turn on the water slowly; the bladder expands and forces water through the clog.
- Run for 1, 2 minutes, then remove and test drainage.
Warning: Use caution, excessive pressure can damage older pipes.
8. Enzyme-based Drain Cleaner
Best for: Organic clogs, safe for pipes and septic systems
- Pour the recommended amount into the drain per manufacturer’s instructions.
- Let sit (often overnight).
- Flush with hot water.
Unlike caustic chemical cleaners, enzyme solutions use natural bacteria to break down organic material.
Method Effectiveness Table
| Method | Clog Type | Time Required | Pipe Safety | DIY Friendly |
|---|---|---|---|---|
| Boiling Water | Grease, soft food | 5, 10 min | High (unless PVC) | Very easy |
| Baking Soda & Vinegar | Light organic, odors | 30, 40 min | Very high | Very easy |
| Plunger | General, near drain | 10, 15 min | Very high | Easy |
| P-Trap Removal | Trap blockages | 20, 30 min | Very high | Moderate |
| Snake | Deeper, stubborn | 20, 40 min | High | Moderate |
| Wet/Dry Vacuum | Soft, loose clogs | 10, 20 min | High | Easy |
| Drain Bladder | Deep, solid clogs | 20, 30 min | Moderate | Moderate |
| Enzyme Cleaner | Organic | 8, 12 hrs | Very high | Very easy |
Example: Clearing A Grease Clog
Mark, a frequent home chef, noticed his sink draining slower after cooking fried foods. Rather than reaching for chemicals, he poured boiling water down the drain, followed by a baking soda and vinegar flush. Within 30 minutes, the clog cleared and the foul odor disappeared.
Credit: www.homedepot.com
Chemical Drain Cleaners: Should You Use Them?
Chemical drain cleaners are widely advertised as quick-fix solutions, but they come with significant downsides.
Types Of Chemical Cleaners
- Caustic (lye-based): Dissolve grease and hair by generating heat.
- Oxidizing (bleach-based): Break down organic matter through chemical reactions.
- Acidic (sulfuric/muriatic acid): Highly corrosive, often used by professionals only.
Risks And Drawbacks
- Pipe Damage: Prolonged or repeated use can corrode metal and soften plastic pipes.
- Health Hazards: Fumes can irritate skin, eyes, and lungs. Accidental splashes may cause burns.
- Environmental Impact: Chemicals can contaminate groundwater and harm aquatic ecosystems.
- Limited Effectiveness: Often ineffective on solid obstructions or deep clogs.
According to the Wikipedia entry on drain cleaners, many plumbers advise against routine use of chemical drain openers, reserving them for rare, last-resort situations.
Safer Alternatives
- Mechanical methods (plunging, snaking)
- Enzyme-based cleaners
- Regular maintenance with baking soda and vinegar
Pro Tip: If you’ve already used chemical cleaners, do not attempt to plunge or snake the drain immediately, as splashing could expose you to hazardous chemicals.
Example: When Chemicals Made Things Worse
A homeowner poured a caustic cleaner down a fully blocked sink. The chemical pooled, emitting noxious fumes and softening the PVC trap. The repair cost for pipe replacement far exceeded a professional drain cleaning.
Preventing Future Kitchen Sink Clogs
After you’ve cleared a clog, proactive habits and routine maintenance will keep your kitchen sink running smoothly.
Smart Disposal Habits
- Scrape plates into the trash or compost before rinsing.
- Never pour grease or oil down the drain, collect it in a container and dispose of it with solid waste.
- Use a drain strainer to catch food particles and debris.
- Avoid rinsing coffee grounds, eggshells, and starchy foods (like rice or pasta) into the sink.
Regular Cleaning Routines
- Weekly: Pour hot water down the drain to clear minor buildup.
- Monthly: Flush with baking soda and vinegar to dissolve organic residue.
- After heavy use: Clean the strainer and wipe away grease around the drain opening.
Routine Maintenance Checklist
- Inspect and clean the P-trap every 6, 12 months.
- Tighten any loose pipe fittings.
- Check for slow drainage and address early.
Installing Upgrades
- Garbage disposal: If installed, always run cold water and avoid overloading.
- High-quality drain strainer: A fine mesh model catches more debris.
- Grease traps: In high-use kitchens, a small under-sink grease trap captures oil before it enters the pipes.
Prevention Comparison Table
| Prevention Method | Ease | Cost | Effectiveness | Recommended Frequency |
|---|---|---|---|---|
| Drain Strainer | Very easy | $3, $10 | High | Continuous |
| Hot Water Flush | Very easy | Negligible | Moderate | Weekly |
| Baking Soda & Vinegar | Very easy | $3, $8 | High | Monthly |
| Grease Disposal | Easy | Negligible | High | Every use |
| P-Trap Cleaning | Moderate | None | High | 6, 12 months |
Example: Preventative Habits Save Money
After a costly plumbing bill, one family started using a drain strainer and monthly baking soda flushes. Over two years, they experienced no further clogs, saving both money and frustration.
Pro Tip:
If you often cook meals with heavy oils or sauces, consider cleaning your sink drain more frequently to prevent buildup.
When To Call A Professional Plumber
While most clogs can be handled with DIY methods, certain situations require expert intervention.
Signs You Need A Pro
- Multiple fixtures are clogged (sink, dishwasher, and tub).
- Sewage odors or water backing up from other drains.
- Clog persists after multiple DIY attempts.
- You suspect a deep main line blockage.
What Plumbers Do Differently
- Professional-grade augers (drain snakes) reach up to 100 feet and can clear major blockages.
- Video camera inspections identify the precise location and cause of the clog.
- Hydro-jetting uses high-pressure water to scour pipes clean.
Cost Comparison Table
| Service | Average Cost (US) | Effectiveness | DIY Alternative? |
|---|---|---|---|
| Basic Drain Snaking | $100, $250 | High | Yes (shorter snakes) |
| Hydro-Jetting | $300, $600 | Very high | No |
| Camera Inspection | $150, $400 | Very high | No |
| Pipe Replacement | $500, $2,000+ | Highest | No |
How To Choose A Plumber
- Check reviews and references before hiring.
- Confirm licensing and insurance in your state.
- Request a written estimate and compare rates.
- Ask about warranties on work performed.
Example: Hidden Main Line Clog
A homeowner tried all the classic DIY methods but still had water backing up into the kitchen and bathroom sinks. A plumber’s camera revealed a tree root intrusion in the main sewer line, something no home solution could have fixed.
The prompt professional repair prevented costly water damage.
Pro Tip: If you’re not comfortable disassembling pipes or dealing with sewage, don’t hesitate to call a professional. Safety and health always come first.
Eco-friendly Solutions And Safety Tips
Protecting your pipes and the environment is just as important as clearing a clog.
Green Drain Maintenance
- Enzyme-based cleaners: Use natural bacteria to break down organic material without harming plumbing or groundwater.
- Manual removal: Plunging, snaking, and P-trap cleaning don’t introduce toxins into your home or the environment.
- Composting food waste: Keeps bulky scraps out of pipes and reduces landfill use.
Safety Precautions
- Wear gloves and eye protection when handling dirty water or pipes.
- Never mix chemical cleaners, toxic fumes or dangerous reactions can occur.
- Vent